13 Laundry Room Shelf Ideas for a More Useful Laundry Space
The shelf in your laundry room works harder than almost any other surface in the house, and it usually gets…
The shelf in your laundry room works harder than almost any other surface in the house, and it usually gets the least thought. A good shelf setup turns the laundry room from a pass-through chore zone into a place where everything has a home: detergent within reach, pocket finds collected in one jar, folded clothes with a real landing spot. These 13 laundry room shelf ideas all work in a normal house, and the few that need mounting use normal tools. Each one names real materials, honest effort levels, and a lower-cost way to get a similar result, so you can pick the ones that fit your space and skip the rest.
In This Guide
- A Small Jar For Loose Pocket Items
- A Closed Container For Detergent
- A Shelf Above A Reachable Work Zone
- A Vertical Organizer On An Unused Wall
- A Slim Basket For Clean Cloths
- A Small Framed Print Away From Moisture
- A Neutral Palette With One Accent Color
- A Labeled Repair Or Stain-Treatment Bin
- A Compact Ironing-Tool Storage Spot
- A Basket For Ready-To-Return Laundry
- An Open Landing Space For Folded Items
- A Shallow Shelf For Daily Supplies
- A Labeled Basket For Each Sorting Category
Laundry Room Shelf Rules Before You Start
A few ground rules make every idea below work better. First, measure before you mount anything: open your washer and dryer doors fully and swing your folding space clear, then measure what is left. Most front-loader doors need 18 to 22 inches of clear swing space, and a top-loading washer lid needs the full vertical clearance above the machine. Nothing should force you to squeeze past an open door.
Second, keep the daily-use zone between about 36 and 60 inches off the floor. That is the comfortable reach range where you will actually grab detergent, dryer sheets, and the stain stick without a step stool. Reserve higher shelves for refills and seasonal items.
Third, store laundry chemicals smartly. Detergent, bleach, and stain removers belong in closed containers, up and out of reach if you have kids or pets in the house. Keep flammables (some stain treatments and spray starches) away from the dryer’s heat exhaust, and never stack boxes on top of the dryer where they can fall behind it.
Fourth, anchor wall-mounted shelves into studs or use proper hollow-wall anchors rated for the load. Laundry supplies get heavy fast: a full bottle of detergent can weigh 10 pounds or more. And if your laundry room shares space with a furnace or water heater, leave the clearances those appliances require untouched. A shelf is never worth a code violation.
If you enjoy this kind of practical organizing, the same grouped-and-labeled logic shows up in our small pantry organization guide, where every container earns its place.
1. A Small Jar For Loose Pocket Items
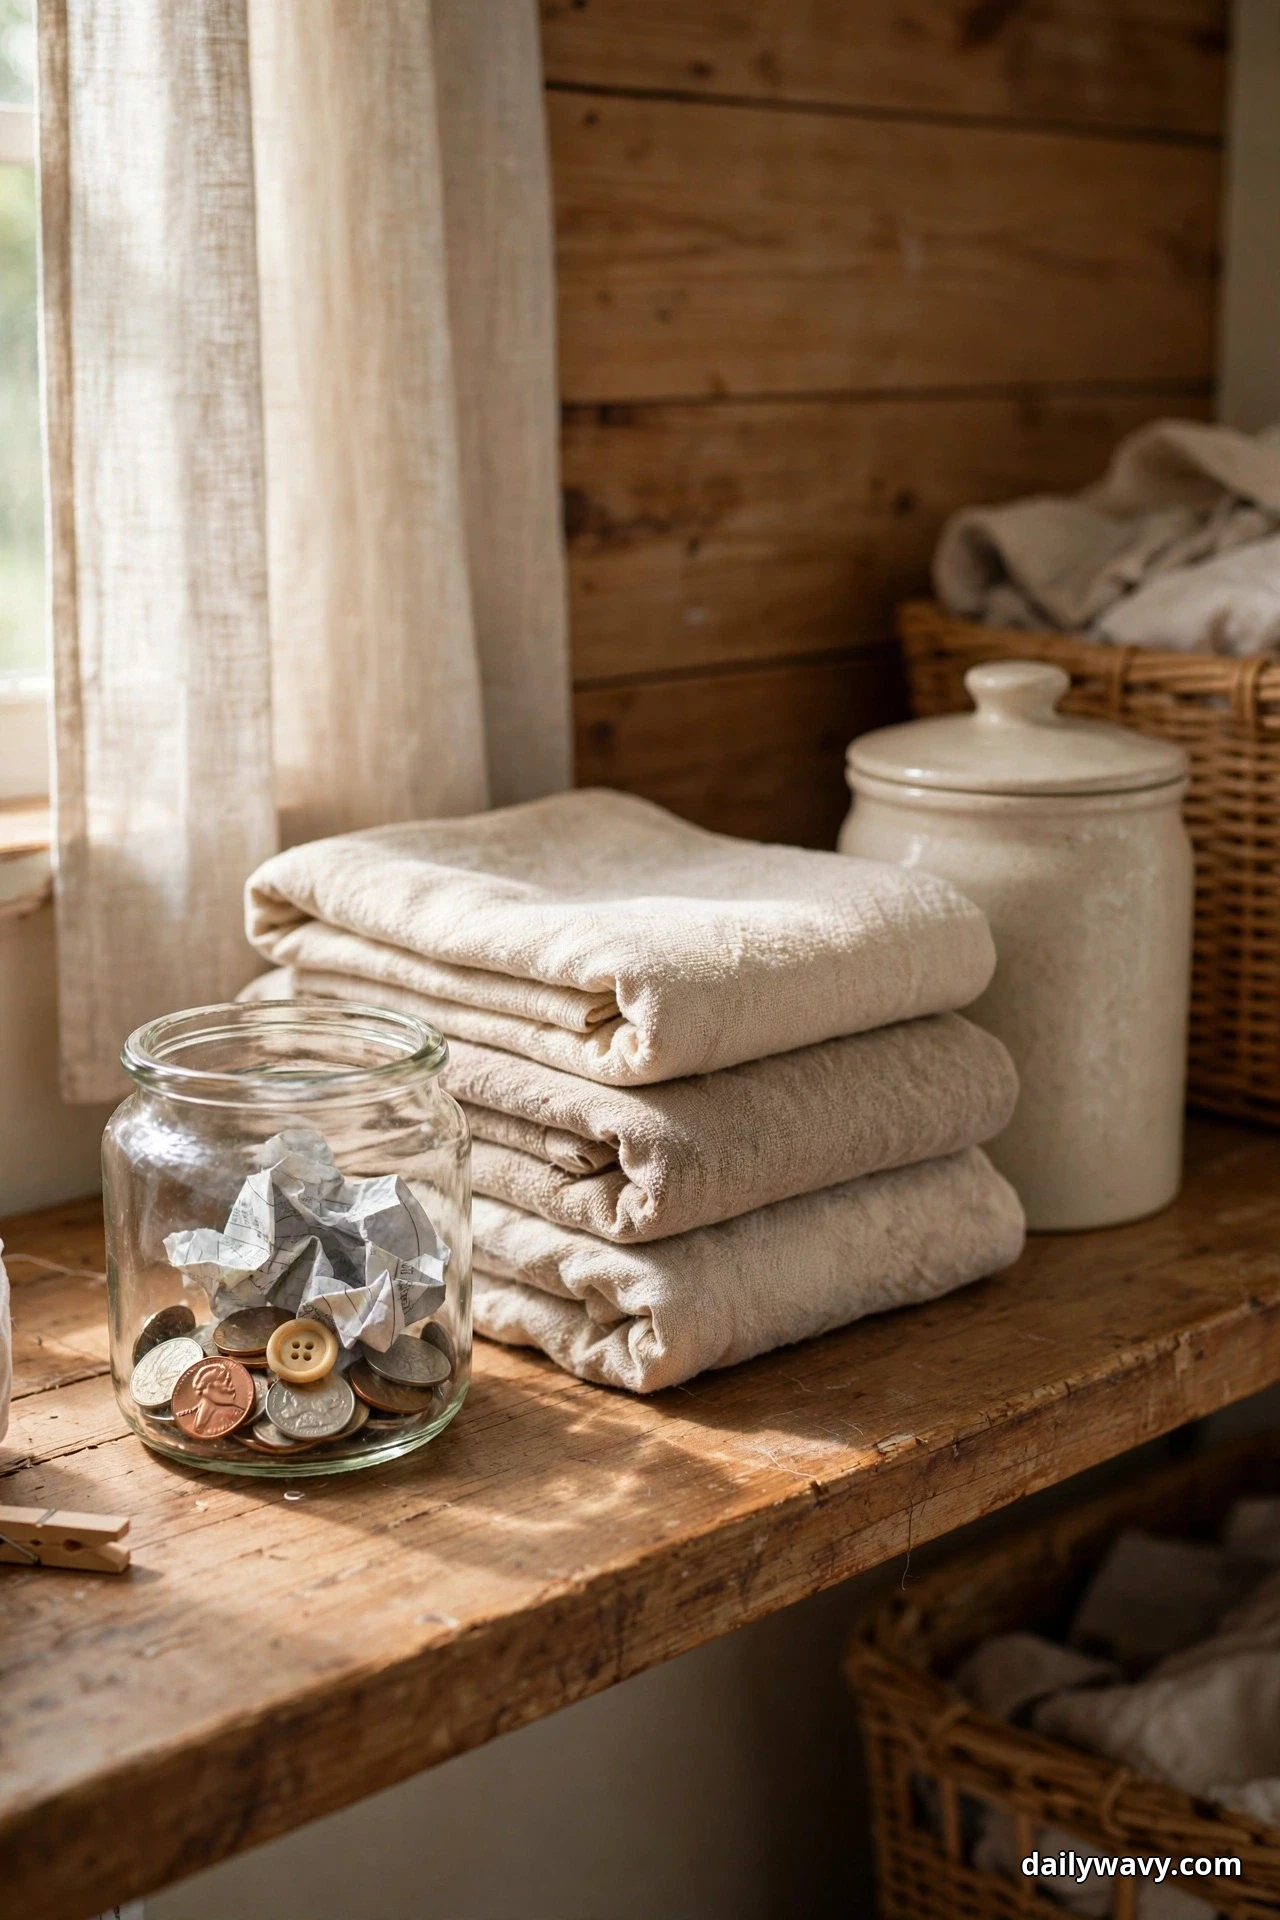
Every load of laundry produces the same surprise: coins, receipts, a stray button, a hair tie, maybe a folded-up five-dollar bill. A small jar on the shelf gives all of it a home so it stops disappearing into the lint trap or the bottom of the machine.
What to measure. The jar needs about 6 inches of shelf depth and 8 inches of height clearance. Place it at shoulder height near the washer loading door, where your hand goes first when you empty pockets.
Materials. A 10 to 16 ounce glass jar with a wide mouth works best, something you can drop coins into one-handed. Small crocks, ramekins, or a short metal tin all work too. Keep the opening at least 2 inches wide so folded bills fit.
Placement and effort. Set the jar on the shelf closest to the washer. Empty it once a week into your wallet or a pocket tray. Effort is minimal: this is a five-minute setup that pays off immediately.
Lower-cost alternative. Any clean jam jar with the label soaked off works just as well as a purpose-bought canister.
Practical tip. If you find a lot of receipts, tuck a small recycling bag next to the jar so the good stuff and the trash separate themselves.
2. A Closed Container For Detergent

Detergent in its original bag or a torn box looks messy and invites spills. A closed container keeps pods dry, powder clumped-free, and the shelf looking intentional instead of chaotic.
What to measure. The container needs a shelf at least 8 inches deep and 10 to 12 inches of vertical clearance. If you use liquid detergent in a large bottle, measure the bottle with the pump or cap on before you shop.
Materials. A glass or ceramic canister with a tight-fitting lid is ideal for pods or powder: airtight, easy to wipe, and you can see when refills are due. For liquid detergent, a dispenser bottle with a pour spout works well. Choose containers with smooth interiors so powder does not pack into corners.
Placement and effort. Keep the detergent container on the shelf closest to the washer at comfortable reach height (36 to 48 inches). Decant a full bag once, then refill from the economy-size bag stored elsewhere. Effort is low: a one-time setup plus a two-minute refill every few weeks.
Lower-cost alternative. A large mason jar or repurposed cookie jar with a screw-on lid does the same job for next to nothing.
Practical tip. Toss the included scoop or measuring cup inside the container so it never wanders off into the back of the shelf.
3. A Shelf Above A Reachable Work Zone

The most useful shelf in a laundry room is the one hovering right over your work zone: the folding counter, the top of a front-loader pair, or the sorting table. It keeps the things you touch every load at fingertip height.
What to measure. Mount the shelf 16 to 20 inches above the work surface, and keep the shelf itself at or below 60 inches off the floor so everything stays in easy reach. Leave at least 2 inches of clearance beyond the washer lid swing if you have a top loader.
Materials. A 10 to 12 inch deep pine or painted board on sturdy brackets is the classic build. Two brackets per 4-foot span is the minimum; add a third for longer shelves. Wood screws into studs beat drywall anchors every time for a shelf you will lean on.
Placement and effort. Center the shelf over the work zone, not over the machines, so you reach for stain sticks and clothespins while you fold. Effort is moderate: locating studs, leveling, and mounting takes about an hour with basic tools.
Lower-cost alternative. A single unfinished pine board from the hardware store plus two metal brackets costs very little and takes paint or stain well.
Practical tip. Add a thin lip or a 1-inch tall front edge strip to keep bottles from sliding off when the washer vibrates on spin cycle.
4. A Vertical Organizer On An Unused Wall
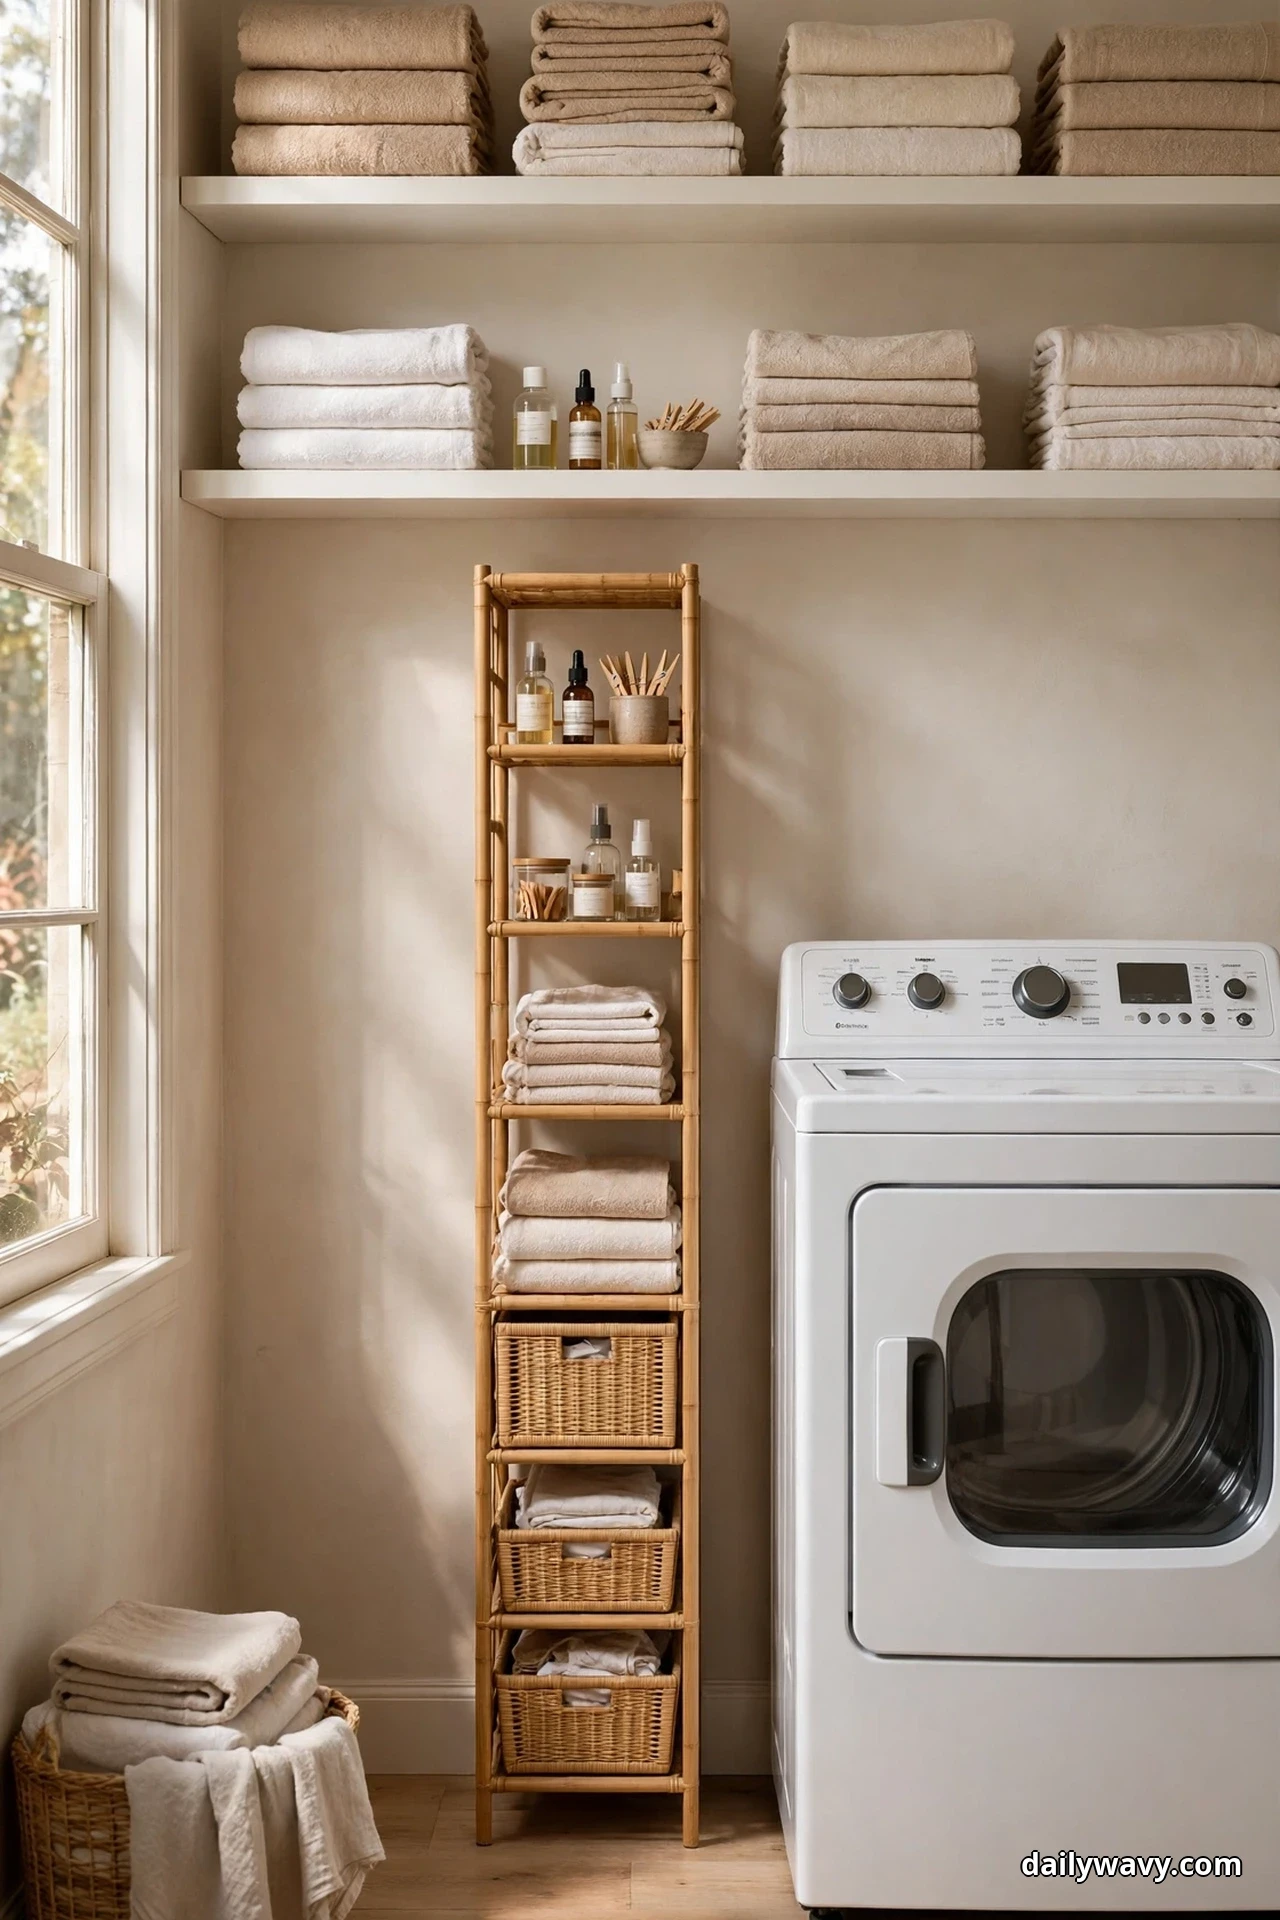
Every laundry room has a dead wall: the sliver beside the dryer, the space behind the door, the gap between the machines and the wall. A vertical organizer turns that strip into working storage without taking any floor space.
What to measure. Most unused wall strips are 6 to 12 inches wide and 60 to 84 inches tall. Measure the width at the narrowest point (baseboards and trim eat inches) and confirm nothing swings into it: doors, lids, and your own elbows.
Materials. Slim tower shelves, narrow ladder shelves, or a set of stacked wall bins all work. For a DIY version, three small floating shelves spaced 12 to 16 inches apart in the gap do the trick. Choose moisture-resistant finishes since laundry rooms run humid.
Placement and effort. Mount or stand the organizer flush against the unused wall, anchored to a stud so it cannot tip. Effort is moderate for wall-mounted versions, minimal for a freestanding tower you simply set in place.
Lower-cost alternative. A repurposed narrow bookcase or CD tower from a thrift store fits these gaps surprisingly well after a coat of paint.
Practical tip. Put the items you reach for least (refill jugs, seasonal products) on the highest tiers and keep the middle shelves for weekly-use supplies.
5. A Slim Basket For Clean Cloths

Clean microfiber cloths, drying cloths, and dusting rags migrate everywhere in a laundry room. A slim basket corrals them into one grab-and-go spot instead of a tangled pile.
What to measure. Slim means 4 to 6 inches wide so the basket slips onto a shallow shelf or beside taller containers. Measure your shelf depth and leave an inch in front for the basket to slide out easily.
Materials. Felt, seagrass, or woven cotton baskets are soft on shelves and easy to pull out. Wire baskets work too but line them with a cloth liner so small rags do not poke through. Roll cloths instead of folding them to fit more and see everything at a glance.
Placement and effort. Park the basket on a mid-level shelf near the folding area, where you actually use cloths. Effort is near zero: buy or repurpose a basket and load it up.
Lower-cost alternative. A shoebox wrapped in kraft paper or fabric makes a perfectly good slim cloth basket for free.
Practical tip. Keep a second small basket beside it for cloths that need washing, so clean and used never mix.
6. A Small Framed Print Away From Moisture

Laundry rooms earn a little beauty too, and a small framed print on the shelf makes the space feel finished rather than purely functional. The trick is placement: moisture is the enemy of paper art, so position matters more than the frame itself.
What to measure. Hang or lean the print at least 3 feet horizontally from the washer and dryer, and above 48 inches off the floor where splashes cannot reach. Check that no steam vent points at it.
Materials. A 5×7 or 8×10 print in a simple frame with a moisture-resistant back (foam board behind the art works). Glass-front frames handle humidity better than open ones. Botanical prints, vintage laundry ads, or simple line art all suit the room.
Placement and effort. Lean it on a high shelf against the wall or hang it on the driest wall in the room. Effort is minimal: one nail or a lean, done in minutes.
Lower-cost alternative. Frame a page from a calendar, a postcard, or your own photo print instead of buying art.
Practical tip. In very humid laundry rooms, choose canvas prints or metal photo prints, which shrug off moisture that would curl paper.
7. A Neutral Palette With One Accent Color

Laundry rooms collect visual noise: bright detergent packaging, mismatched bottles, random colored plastics. A neutral palette with one accent color calms all of it down, and the shelf is the easiest place to start.
What to measure. No measurements needed, just a quick inventory. Count how many visible colors sit on your shelves right now; the goal is to corral them into whites, creams, and warm grays, with one accent like sage green, terracotta, or dusty blue.
Materials. Neutral baskets, canisters, and bins do the heavy lifting: cream seagrass baskets, white ceramic containers, natural wood boxes. The accent color appears in small doses: one set of labels, a colored basket, a small plant pot. Decanting bright products into neutral containers is the fastest transformation.
Placement and effort. Group neutrals together and let the accent repeat in two or three spots so it feels deliberate. Effort is low to moderate depending on how many containers you decant or replace.
Lower-cost alternative. Spray paint mismatched plastic bins in one neutral color for a unified look at almost no cost.
Practical tip. If you hate decanting, opaque neutral bins hide packaging clutter just as well as clear containers display it; pick the style you will actually maintain.
8. A Labeled Repair Or Stain-Treatment Bin

Stains do not wait, and neither do loose hems. A small labeled bin holding your stain-treatment kit and basic mending supplies means you can deal with problems the moment clothes come out of the washer instead of the next time you remember.
What to measure. A bin about 8 inches wide, 6 inches tall, and 6 inches deep fits on most shelves and holds a surprising amount. Label the front so anyone in the household knows what lives inside.
Materials. A sturdy lidded bin or open-front container: stain remover stick or spray, a travel sewing kit, spare buttons in a tiny envelope, a seam ripper, and a few safety pins. A label maker, chalkboard tag, or adhesive label gives it the finished look.
Placement and effort. Keep the bin on the folding-counter shelf where stains get spotted. Effort is low: assemble the supplies you already own into one labeled container in about fifteen minutes.
Lower-cost alternative. A quart-size zip bag labeled with a marker works as a starter version inside any box or basket.
Practical tip. Restock the stain stick when it runs low, not when you discover a stain. A quick glance every month keeps the kit ready.
9. A Compact Ironing-Tool Storage Spot
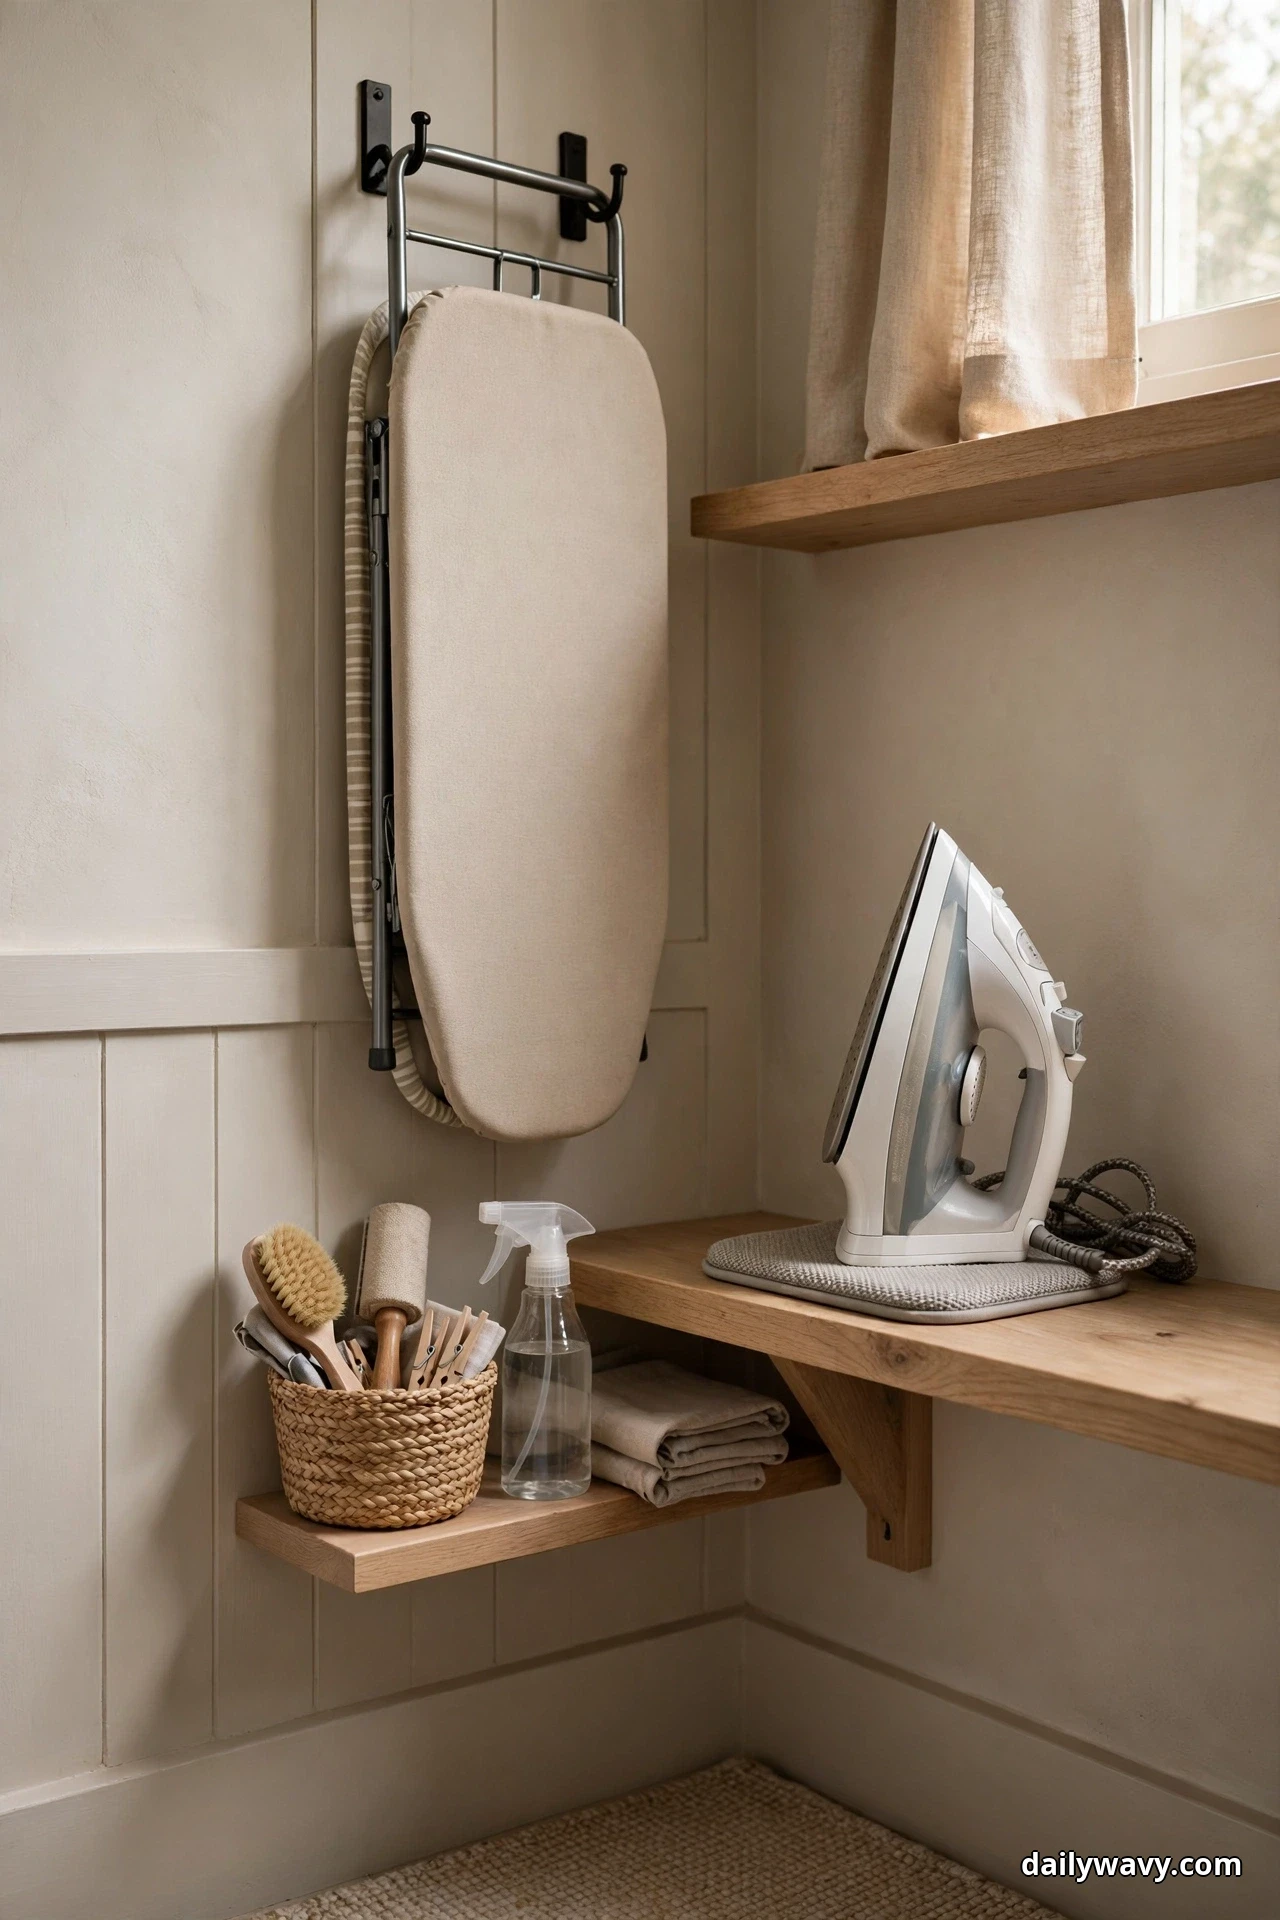
Irons, steamers, and ironing boards are the classic laundry-room clutter: too big to hide, too awkward to stack. A compact dedicated spot keeps them upright, safe, and out of the way.
What to measure. An iron needs about 6 inches of shelf depth and 10 inches of height when stored upright on its heel. A folded ironing board needs roughly 5 inches of wall width and the full height from floor to shelf. Measure your board folded before committing to a spot.
Materials. Two sturdy wall hooks or a purpose-made ironing-board holder for the board, and a heat-resistant silicone pad or small trivet on the shelf for the iron. A cord wrap or Velcro strap keeps the iron cord tidy. Never store a hot iron; let it cool fully on the pad first.
Placement and effort. Mount the board holder on the wall beside the shelf, and reserve the shelf end nearest it for the iron and spray starch. Effort is moderate: mounting holders into studs takes about thirty minutes.
Lower-cost alternative. Two large utility hooks from the hardware store hold an ironing board securely for a few dollars.
Practical tip. Hang the board with the padded side facing the wall so the metal frame does not scuff paint or drywall.
10. A Basket For Ready-To-Return Laundry

Laundry is not done when it is folded; it is done when it is put away. An outgoing basket on or under the shelf collects folded items that belong elsewhere, so they leave the laundry room in one trip instead of accumulating.
What to measure. A standard laundry basket is about 18 inches wide and 24 inches tall; measure the floor space under your shelf or the shelf slot where it will live. If space is tight, a collapsible basket or a large tote bag works.
Materials. One sturdy basket or tote with handles, ideally different in color from your sorting baskets so nobody mixes them up. Some households run one basket per floor of the house; others manage fine with a single returns basket that gets carried around weekly.
Placement and effort. Set the basket on the floor beneath the shelf or on a low shelf where folded stacks land directly into it. Effort is zero beyond choosing the basket: the system maintains itself if you carry the basket on a regular day.
Lower-cost alternative. Any tote bag with sturdy handles already in your house does this job perfectly.
Practical tip. Make “basket rounds” a fixed routine, like Sunday evening, so the returns basket never becomes a second dirty pile. The same landing-zone idea works at the front door, as in our small entryway decor guide.
11. An Open Landing Space For Folded Items

The hardest shelf idea on this list is also the simplest: leave part of the shelf empty on purpose. A clear landing space is where folded shirts, matched socks, and half-sorted piles go while you work, and it disappears the moment you fill it with storage.
What to measure. Reserve at least 24 inches of shelf width and 12 inches of depth as the landing zone. If your shelf is shorter than that, the folding counter or the top of a front-loader pair can serve instead.
Materials. None, and that is the point. A bare stretch of shelf, wiped clean, is the whole idea. If the bare shelf bothers you visually, a single low tray or runner marks the zone without filling it.
Placement and effort. Put the landing space on the shelf closest to the folding surface, at counter height if possible. Effort is discipline: the space only works if the household agrees it stays clear.
Lower-cost alternative. Free. This idea costs nothing and saves the most frustration of any idea here.
Practical tip. If the landing space keeps filling up, it is a sign you need more closed storage elsewhere on the shelf, not a bigger landing zone.
12. A Shallow Shelf For Daily Supplies

Some supplies get used every single load: dryer sheets, scent beads, the lint roller, a fabric shaver. A shallow shelf keeps them in a single visible row instead of a deep pile where small items vanish.
What to measure. Four to six inches of depth is the sweet spot: deep enough for bottles, shallow enough that nothing hides behind anything else. Mount it at eye level or just below for the fastest grab.
Materials. A narrow picture-ledge style shelf works beautifully here, with its built-in lip keeping items from tipping off. Small bins or a divided organizer on a regular shallow shelf do the same job. Keep each category to one row so everything stays visible.
Placement and effort. Mount the shallow shelf right above the washer or beside the detergent station, wherever your hands go first in the laundry routine. Effort is moderate for mounting, minimal if you use a freestanding tiered organizer instead.
Lower-cost alternative. A narrow spice rack repurposed as a laundry shelf holds small bottles perfectly and costs very little.
Practical tip. Decant dryer sheets into a small open box so you can grab one with one hand while holding laundry with the other.
13. A Labeled Basket For Each Sorting Category

Sorting laundry before wash day is the single biggest time-saver in the whole room, and labeled baskets on the shelf make it automatic. Dirty clothes go straight into the right basket the moment they arrive, and wash day becomes grab-and-load.
What to measure. Allow one basket per category: whites, darks, and colors are the classic three, or one per person for larger households. Each basket needs roughly 12 inches of shelf width; measure your shelf and pick the number of categories that fit.
Materials. Matching baskets in one neutral color with clear labels keep it tidy and readable. Woven baskets breathe well for dirty laundry, which matters in a humid room. Labels can be chalkboard tags, printed labels, or simple adhesive strips.
Placement and effort. Line the baskets along one shelf where the whole household can reach them, ideally near the room entrance so clothes get sorted on arrival. Effort is low: buy matching baskets, label them, and start tossing.
Lower-cost alternative. Identical tote bags or boxes you already own, labeled with tape and marker, work just as well until you upgrade.
Practical tip. Add a fourth small basket labeled “stain check” for items that need treatment before washing, so nothing stained slips through into the machine.
Laundry Room Shelf FAQs
How high should a laundry room shelf be?
Daily-use items belong between 36 and 60 inches off the floor, which is the comfortable reach range for most adults. Mount the main shelf 16 to 20 inches above your folding surface or the top of front-loading machines. Keep refills and seasonal items on higher shelves, and avoid storing heavy bottles above shoulder height.
How much weight can a laundry shelf hold?
It depends entirely on the mounting. A shelf screwed into wall studs with sturdy brackets can hold 50 pounds or more per 4-foot span, while drywall anchors alone are rated for much less. Laundry supplies are heavy: a full detergent bottle can weigh 10 pounds. When in doubt, add brackets and anchor into studs.
What is the best shelf material for a laundry room?
Sealed wood, metal, or melamine all work well. Laundry rooms run humid, so avoid raw MDF or particle board that can swell with moisture. Painted pine with a clear sealer is the budget classic, and powder-coated metal shelving handles heavy detergent jugs without sagging.
How do I keep laundry shelves from looking cluttered?
Three moves fix most clutter: decant bright products into neutral containers, corral small items into baskets, and leave one landing space deliberately empty. Matching containers matter more than expensive ones. For small-room logic that applies beyond the laundry room, our small bathroom storage guide uses the same principles.
Can I put shelves above a stacked washer and dryer?
Yes, with care. Keep shelves high enough to clear the dryer door swing and leave the dryer’s ventilation and service access untouched. Store only light items up there, since reaching over stacked machines is awkward, and never block the exhaust duct.
How do I store detergent safely on a shelf?
Keep detergent in closed containers, stored up and out of reach of children and pets. Follow the product label: pods and powder stay dry, liquids stay upright and tightly closed. Never transfer chemicals into food containers, and keep flammables like some spray starches away from the dryer’s heat exhaust.
A Shelf That Earns Its Keep
A useful laundry room shelf is not about buying more containers; it is about giving every job a place. Start with the daily-use trio (detergent, pocket-items jar, and daily supplies), add sorting baskets if wash day eats your weekend, and finish with the pretty touches like the framed print once the system works. The room will never be glamorous, but it can be calm, and calm is what makes laundry feel like less of a chore.
For more ideas in the same organized spirit, browse our Home & Decor collection, where every guide follows the same rule: real materials, honest effort, no clutter.