15 Long Living Room With Dining Area Ideas with Practical Furniture Placement
A long living room with a dining area is really two rooms sharing one rectangle. The living end needs soft…
A long living room with a dining area is really two rooms sharing one rectangle. The living end needs soft seating and a clear path, while the dining end needs a table with chair pull-out space. Get the walking route right and both zones work. Get it wrong and the room feels like a hallway with furniture in the way. These fifteen ideas focus on practical furniture placement: what to measure, where each piece sits, and how daily life fits around them. If your room is also tight across its width, our narrow living room layout guide tackles that exact challenge. Measure your own walls first, then pick the ideas that fit your doors, windows, and radiators.
Jump to an idea
- Nesting tables that tuck under each other
- A storage ottoman as the central surface
- A slim console defining the walking route
- An armless chair at the open end
- A rug defining the seating zone
- A wall-mounted lamp saving floor space
- A bench that slides under a window
- A fold-away occasional table
- A shallow bookcase at a room boundary
- A light curtain separating two zones
- A narrow storage unit beside seating
- A compact loveseat with an ottoman
- A pair of small stools for guests
- A translucent side table beside seating
- A low cabinet beneath artwork

1. Nesting tables that tuck under each other
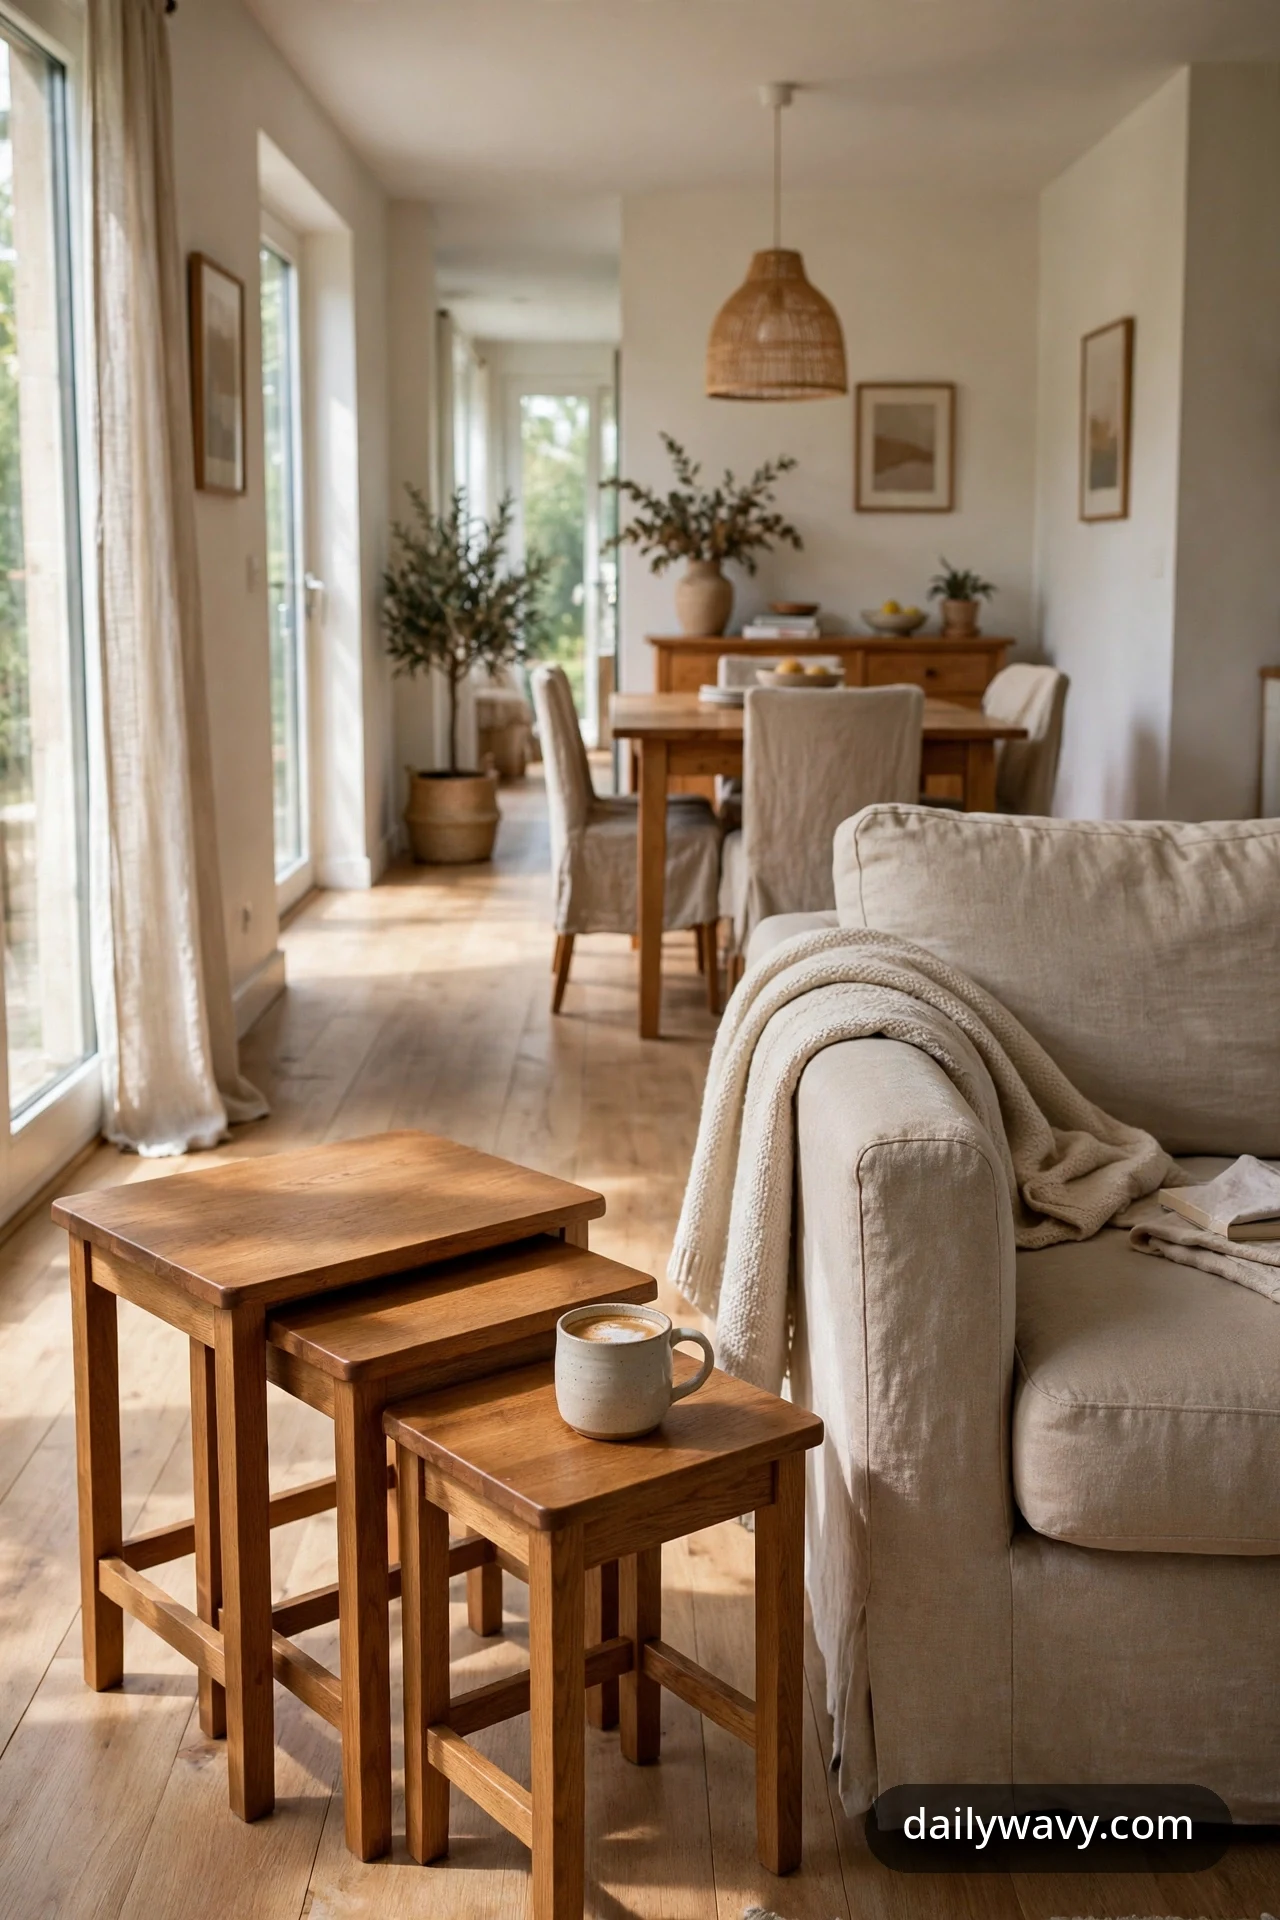
A set of nesting tables is a hard-working small surface for the living end of a long room. When they are stacked, the footprint is a single 18 to 20 inch square. When guests arrive or dinner stretches into the evening, you pull out the smaller tables and suddenly there is a landing spot for every drink. Few pieces give you this much surface for so little permanent floor space.
Measure the end of your sofa or loveseat first. The largest table should sit about 2 inches below the arm height, and you need at least 24 inches of clear pull-out space in front of it so the smaller tables can slide out without hitting the rug edge or a chair leg. In a typical long room of 20 feet, place the nested set at the end of the seating closest to the dining zone, so it can serve both a reader on the sofa and someone waiting for dinner to be served.
Choose oak, ash, or walnut veneer tops with simple metal or solid wood legs. The tables need to survive being pulled out daily, so check that the smaller ones glide without wobbling. Round or soft-square tops are kinder to shins in a room where the walking route passes close by. Keep the styling light: one small lamp or a stack of two books is plenty, because a cluttered nesting set defeats the purpose.
This is an afternoon project with a drill and a screwdriver. A three-piece set typically costs between $80 and $180. A realistic lower-cost alternative is a single C-shaped side table that slides over the sofa arm and can be carried to the dining end when needed. Either way, keep the main walking route at 30 to 36 inches wide so the tables never become an obstacle course.
2. A storage ottoman as the central surface

Swap the coffee table for a storage ottoman and the center of the living zone does three jobs at once. It holds drinks and books like a table, hides throws and board games inside, and becomes an extra seat when the dining table fills up. In a long room where every piece must justify its floor space, that triple duty matters.
Size it like a coffee table, not a footstool. A 30 to 36 inch square or a 40 inch round works with most loveseats and two-seaters. Keep it 14 to 18 inches from the front of the seating so legs reach it comfortably but feet can still pass around the ends. The top should sit within 2 inches of the seat height, which keeps it useful as both table and seat. Place a flat tray on top for drinks so glasses never sit directly on upholstery, and the tray comes off in seconds when someone needs the seat.
Measure the route from the ottoman to the dining table before you buy. On busy evenings it will get carried or dragged across the room as a sixth or seventh dining seat, so it needs to clear the walking route and fit under or beside the dining table without blocking chair pull-out space. Look for linen, performance fabric, or top-grain leather that wipes clean. A hinged lid that stays open on its own is worth paying for, because a lid that slams is a lid nobody opens.
Setting this up takes minutes. Upholstered storage ottomans run $120 to $300. A realistic lower-cost alternative is a lidded wicker trunk from a thrift store, which gives the same hidden storage and a sturdier top for roughly a third of the price. Add stick-on felt pads underneath so it slides across the floor without marking it.
3. A slim console defining the walking route

A slim console along the long wall does something few other pieces do: it draws the walking route without blocking it. At 10 to 14 inches deep, it hugs the wall and turns a vague stretch of floor into a deliberate lane from the living end to the dining end. The room reads as two intentional zones instead of one long corridor.
Measure the wall run and leave at least 6 inches of clearance at each end so the console never crowds a doorway or a window frame. The walking lane in front of it should stay 30 to 36 inches wide. Any narrower and people will start cutting across the seating zone. If the console sits between the living and dining ends, style it as a serving surface: a stack of placemats, a carafe, and two candlesticks. It becomes a staging spot for dinner and a visual bridge between the zones.
Check door swings before you position it. A door that opens inward needs a full clear arc, and the console must sit outside that arc. The same goes for radiators: keep the console 3 to 4 inches off a radiator so heat circulates freely. Solid wood or painted consoles with a lower shelf add storage for dining linens without any extra footprint. Secure it to the wall with an anti-tip strap if the household includes children, because a shallow piece tips more easily than a deep one.
Installation is a one-person afternoon job. Expect $100 to $250 for a solid piece. A realistic lower-cost alternative is a pair of narrow wall-mounted shelf brackets with a stained pine board across them, which gives the same line along the wall for under $60 and zero floor footprint. Keep the top surface uncluttered so the lane reads clearly from one end of the room to the other.
4. An armless chair at the open end

Every long living room has an open end: the side of the seating arrangement that faces the rest of the room rather than a wall. Put an armed chair there and it closes the space like a gate. Put an armless chair there and the zone stays visually open while still gaining a seat. The difference in width is real, usually 24 to 26 inches for an armless slipper chair versus 32 to 36 for an armed one, and in a narrow stretch of room those inches are the walking route.
Angle the chair slightly toward the center of the seating, not square to the wall. That small rotation invites conversation and keeps the chair from looking like it was parked there by accident. Leave 30 inches of passage behind it so the route from the front door to the dining end never pinches. If the chair sits at the boundary between living and dining, a swivel base earns its keep: it turns toward the sofa for conversation and toward the table when dinner is ready.
Measure the seat height against your dining chairs. If the two match within an inch, the armless chair can slide up to the dining table as an extra seat on busy nights, which is exactly the kind of double duty a long room needs. Look for a sturdy wood or metal frame with a firm cushion. Slipcovered styles work well because the cover comes off for washing after it doubles as a dining seat.
This takes an hour to place and style. Slipper and armless chairs run $150 to $400. A realistic lower-cost alternative is pulling a spare dining chair into the living end, which costs nothing and teaches you whether the spot actually gets used before you spend anything. Add a small lumbar pillow so the armless seat stays comfortable for a full evening.
5. A rug defining the seating zone

In a long room with no wall between living and dining, a rug is the wall. It tells the eye where the seating zone starts and ends, and it keeps the furniture from drifting into the walking route over time. Without one, chairs and tables migrate toward the center of the room until the lane narrows to a shuffle.
Size the rug to the seating, not the room. An 8 by 10 foot rug suits most loveseat-and-two-chair arrangements, with the front legs of every seat on the rug and the back legs off. Leave 18 to 24 inches of bare floor between the rug edge and the wall so the room breathes. The rug should stop well short of the dining zone: the dining table gets its own rug or none at all, and a clear strip of floor between the two rugs marks the boundary.
Measure door clearance before you buy. An interior door needs to swing over the rug without catching, which usually means low pile under 0.5 inches thick. Natural fibers like wool or jute handle traffic well and feel right underfoot. In the dining zone, skip the rug under the table if the room is tight, because chair legs catching on a rug edge is a daily annoyance and a rug under a dining table needs to extend 24 inches past the table on every side where chairs sit to work.
Laying a rug takes minutes but measuring takes longer. Expect $150 to $400 for a good 8 by 10. A realistic lower-cost alternative is a flatweave cotton rug, which costs roughly half, washes easily, and lies flat enough for any door. Tape the corners down with rug tape on hard floors so the edge never becomes a trip point on the walking route.
6. A wall-mounted lamp saving floor space

A floor lamp eats 12 to 16 inches of floor in every direction once you count the base, the shade, and the space people leave around it. In a long room where the walking route runs past the seating, that footprint is expensive. A wall-mounted lamp gives the same reading light from zero floor inches. The wall does the holding, the floor stays clear, and the lane past the sofa keeps its full width.
Mount a swing-arm or plug-in sconce beside the main seat at 42 to 48 inches above the seat cushion, which puts the shade at a comfortable reading height without shining in anyone’s eyes. A swing arm lets the reader pull light toward the book and push it back when conversation starts. Place it on the wall side of the seating, not the room side, so nobody brushes past it on the way to the dining table. If the living end has no free wall, mount it on the side of a tall bookcase or on the window frame trim, anywhere solid that keeps it out of the walking path.
Measure twice before drilling. Studs hold the weight; drywall anchors handle lighter plug-in styles. Run the cord down the wall in a paintable cord cover to the nearest outlet, tucked behind furniture. Hardwired sconces look cleaner but need an electrician and a free circuit, so most renters and quick makeovers use plug-in models. Keep the dining zone’s lighting separate, a pendant or chandelier over the table, so each zone reads as its own space after dark.
Installation takes an hour for a plug-in model. Expect $60 to $200. A realistic lower-cost alternative is a clamp or clip-on shelf lamp attached to an existing bookcase or console, which gives adjustable reading light for under $30 and moves with you. Either way, put both lamps on separate switches or smart plugs so the two zones can be lit independently.
7. A bench that slides under a window

Long rooms usually have their windows along one of the long walls, and the space beneath those windows is dead floor. A low bench turns it into seating, storage, and a visual anchor all at once. When dinner needs two more seats, the bench slides out from the wall and joins the dining table. The rest of the week it holds cushions, throws, or the board games nobody can find.
Measure the window first. The bench top should sit 2 to 3 inches below the sill so the window still opens and the trim stays visible. Depth of 14 to 18 inches keeps the bench from jutting into the walking route. If there is a radiator under the window, this idea needs care: never block heat. Either choose a bench with an open slatted base that lets warm air rise, or leave a 3 to 4 inch gap between the bench back and the radiator. Blocking a radiator wastes heat and can be a fire risk with some heater types, so when in doubt, place the bench under a different window.
A bench with a lift-up or drawer base adds hidden storage for dining linens and placemats, which is gold in a room with no sideboard. Style it with two or three cushions in the room’s palette and keep the surface mostly clear so it reads as seating, not as a shelf. The bench marks a soft boundary between zones when it sits between the living and dining ends, giving the eye a place to rest.
This is a weekend project if you build, an afternoon if you buy. Storage benches run $120 to $300. A realistic lower-cost alternative is two sturdy cube stools that tuck under the window and separate when guests arrive, usually under $80 for the pair. Add felt pads so the bench slides without scratching the floor when it moves to the dining table.
8. A fold-away occasional table

Some evenings need a side table, and most evenings do not. A fold-away occasional table handles both. Gateleg, drop-leaf, and folding tray styles all collapse to a slim profile of 6 to 8 inches that parks against a wall or behind a door, then open to a full 20 to 30 inch surface when the room fills with people. In a long room with a dining area, it lives quietly against the wall between the zones and earns its keep at every gathering.
Measure the parked spot and the open spot. The parked footprint should be outside the 30 to 36 inch walking route, tucked against the long wall where the slim console idea also works. The open footprint needs 24 inches of clearance on the working sides so chairs can pull up to it. A drop-leaf round table is a forgiving choice: with both leaves down it is a narrow console, with one leaf up it seats two for a game, with both up it becomes a small dining surface for four.
Check stability before you commit. Open the table in the store and press down on the edge. A table that rocks on a showroom floor will rock worse on your rug. Look for a locking mechanism on the leaves and legs, and a top that sits level when open. Wood tops handle hot dishes better than laminate, which matters when the table serves as a dining overflow surface.
This takes minutes to set up. Quality folding tables run $90 to $220. A realistic lower-cost alternative is a simple folding tray table, which stores flat in a closet and costs under $40. Keep a tablecloth or runner nearby so the fold-away can dress up for dinner duty in seconds.
9. A shallow bookcase at a room boundary

A shallow bookcase set at a right angle to the long wall is a firm zone divider that still lets light and air through. At 8 to 10 inches deep it takes barely more floor than a console, but its height, usually 60 to 72 inches, draws a clear line between the living end and the dining end. Each zone gets its own backdrop, and the room stops feeling like one long tunnel.
Position it where the living zone naturally ends, typically just past the seating arrangement. Measure the remaining passage with care: you need a full 36 inches of clear walking route past the bookcase, door to dining table, with no squeezing. Anchor it to the wall or floor with an anti-tip kit, because a tall shallow piece is among the easiest pieces to tip, and children will climb it. Face the shelves toward the living zone and style them with books and small objects. The back of the unit faces the dining zone, where it can hold serving pieces, a small bar setup, or a row of cookbooks within reach of the table.
Check what is behind the placement before you move it. Do not block a window, a radiator, or a doorway, and keep it clear of the dining chairs’ pull-out zone, which needs 36 inches from the table edge to the wall. An open-back bookcase lets light filter through and keeps both zones feeling connected. A closed-back unit gives a stronger visual stop but can darken the far end, so choose based on how much natural light the dining end gets.
Assembly takes one to two hours. Shallow bookcases run $80 to $250. A realistic lower-cost alternative is a stack of two open cube shelves laid on their sides, which gives the same divider effect for under $100 and can be separated later if the layout changes. Style the shelves loosely, with breathing room between groups of books, so the divider reads as furniture rather than storage.
10. A light curtain separating two zones

When you want the zones to feel separate but the room to stay bright, a light curtain does what most furniture cannot. A sheer or linen panel on a ceiling track divides the long room into a living end and a dining end without stealing a single inch of floor. Pulled closed, it softens noise and sightlines for a cozy dinner. Pulled open, the room flows as one space again.
Mount a ceiling track, not a tension rod, for a span wider than a doorway. A track screwed into ceiling joists holds a full-width panel securely and lets it glide with one hand. Measure the ceiling height and order panels that end half an inch above the floor, long enough to look deliberate but short enough to never drag. The panel width should be about 1.5 times the span it covers so the fabric gathers softly instead of stretching flat. Choose a sheer or lightweight linen that filters light rather than blocking it. The dining end usually has less natural light, so a heavy curtain would darken it further.
Keep the curtain clear of heat sources. Do not let fabric hang against a radiator, and keep it 12 inches from any wall-mounted heater. If the only placement crosses a radiator, use a shorter cafe-length panel or switch to a different divider idea. For renters, an adhesive ceiling track or a tension-mounted room divider pole achieves the same effect without drilling, though both hold less weight, so keep the fabric light.
Installation takes two to three hours including measuring. Expect $60 to $180 for track, hardware, and panels. A realistic lower-cost alternative is a freestanding folding screen, which needs no mounting at all, costs $70 to $150, and folds flat when the zones should merge. Either option gives the long room something it rarely has: a door you can open and close between its two lives.
11. A narrow storage unit beside seating

The gap beside a sofa or loveseat, between the seating and the dining zone, is usually wasted. A narrow storage unit turns it into the room’s quiet workhorse. At 12 to 16 inches deep it slides into that gap without narrowing the walking route, and inside it holds everything the long room tends to scatter: dining linens, placemats, chargers, the candles, and the games that migrate from the living end.
Measure the gap before shopping. The unit must sit fully clear of the dining chairs’ pull-out zone and leave the 30 to 36 inch walking lane untouched. Height matters too: 28 to 34 inches keeps the top at a comfortable landing-spot height and low enough that the sightline stays clean, and the top becomes a landing spot for a lamp or a drink. Closed doors or drawers are better than open shelves here, because a storage piece in the middle of the room’s sightline needs to look calm. Inside, use small bins or dividers so linens and candles do not become a jumble.
Position it on the dining side of the seating rather than the wall side. That way it serves dinner directly: placemats and candles are one step from the table, and after the meal everything goes back in one motion. Keep it 3 to 4 inches off any radiator and clear of door swings. If the unit sits under a window, keep the top below the sill so the window still opens fully.
Assembly takes an hour. Narrow cabinets run $100 to $260. A realistic lower-cost alternative is a lidded storage bench or a stack of two lidded baskets, which holds nearly as much for under $80 and can be moved when the layout changes. Fitting real storage into tight rooms is a recurring puzzle, and the same measure-first thinking shapes our small bedroom with a queen bed guide.
12. A compact loveseat with an ottoman

In a long room with a dining area, a full-size sofa is often the piece that breaks the layout. A compact loveseat of 52 to 58 inches wide seats two comfortably and frees 20 or more inches of floor compared to a standard 84 inch sofa. Pair it with a matching ottoman and you recover the stretch-out comfort: the ottoman extends the seat for lounging, becomes a coffee table with a tray on top, and slides to the dining table as an extra seat.
Measure the living zone as its own room. Mark the zone’s boundaries with painter’s tape on the floor: the loveseat against one long wall or floated slightly off it, the ottoman 14 to 18 inches in front, and the walking route of 30 to 36 inches preserved on the open side. The dining table gets the remaining length, with 36 inches of chair pull-out space on the working sides. If the numbers do not fit, shrink the dining table before you shrink the walking route, because a pinched lane ruins both zones.
Choose apartment-scale pieces with slim arms or armless designs. Raised legs let light pass underneath, which makes the zone feel larger than it is. Performance fabric handles the double duty of daily lounging and occasional dining overflow. The ottoman should be firm enough to sit on, not a soft pouf that collapses, and light enough for one person to carry to the table.
Arranging takes an afternoon. A compact loveseat runs $400 to $900, with ottomans $100 to $250. A realistic lower-cost alternative is two matching armchairs instead of the loveseat, which often costs less secondhand, moves more easily, and lets you angle the seats toward each other for conversation. Keep the palette restrained so the smaller pieces read as intentional rather than cramped.
13. A pair of small stools for guests

A long room with a dining area hosts more people than its furniture suggests, because guests often outnumber seats. A pair of small stools is the answer. They tuck under a console, beside the loveseat, or under the dining table’s far end, invisible on ordinary days. When the table fills, they become dining seats five and six, or extra perches around the coffee conversation.
Measure stool height against the dining table. The seat should sit 10 to 12 inches below the tabletop, which for a standard 30 inch table means a stool height of 18 to 20 inches. Diameter of 14 to 16 inches fits an adult comfortably without hogging floor. Round stools slide under tables and consoles more easily than square ones. Choose solid wood or metal frames that handle adult weight, and check the weight rating before buying, because a stool that flexes is a stool nobody trusts.
Store them where they disappear. Under the slim console from idea 3 is ideal, or flanking the low cabinet in the living zone. The key measurement is the clear height of the storage spot: the stool must slide fully underneath with an inch to spare. Keep the walking route in mind here too. Stools left out in the lane become trip hazards, so build the habit of tucking them away after every gathering.
This takes minutes to place. Pairs run $60 to $160. A realistic lower-cost alternative is a pair of folding stools, which collapse flat and hang on a hook inside a closet for under $50. Add felt pads to the feet so they move quietly across hard floors when dinner calls.
14. A translucent side table beside seating

Small zones need surfaces, but solid furniture makes small zones feel smaller. A translucent side table solves the contradiction. Acrylic or glass lets light and sightlines pass straight through, so the table reads as almost nothing while still holding a lamp, a book, and a drink. In the living end of a long room, where the seating sits close to the walking route, that visual lightness keeps the space feeling open.
Choose a C-shaped design that slides over the sofa arm or the ottoman edge, or a simple round top on a clear pedestal. A 15 to 18 inch top is plenty for a lamp base or a coffee cup. Measure the weight it needs to hold: acrylic tables typically support 10 to 20 pounds, which is fine for daily use but not for a heavy stack of books. Place it at the end of the seating nearest the dining zone so it can serve both areas, and keep it 2 inches below the arm height for comfortable reach.
Glass and acrylic show every fingerprint, so this is a piece for households that can wipe it down weekly. A microfiber cloth and a spritz of glass cleaner take two minutes. Check the edges for a polished, rounded finish, because sharp acrylic edges chip and sharp glass edges are a hazard in a room where the walking route passes close by. Tempered glass is the safer choice if the household includes children or pets.
Placement takes minutes. Acrylic C-tables run $70 to $180, glass side tables $50 to $150. A realistic lower-cost alternative is a light wood round table in a pale finish, which does not disappear but stays visually quiet for under $60. Keep the styling minimal: one object on top, nothing more, so the transparency does its work.
15. A low cabinet beneath artwork

A long wall with a single large artwork above a low cabinet is a strong anchor for the living zone. The cabinet, 28 to 32 inches high, grounds the composition. The art draws the eye up and gives the long wall a destination. Together they tell the room that this end is the living end, finished and intentional, while the dining end gets its own moment at the far side.
Measure the wall and center the composition on the seating, not on the room. The cabinet should span roughly two-thirds of the seating width it sits behind or beside. Hang the art 6 to 8 inches above the cabinet top, which is lower than most people expect but keeps the two pieces reading as one unit. Leave the walking route untouched: the cabinet depth of 14 to 18 inches plus the lane of 30 to 36 inches must both fit between the seating and the opposite wall. If they do not, choose a shallower cabinet before you narrow the lane.
Use the inside for dining service. Tablecloths, placemats, and the good napkins live here, one step from the dining table, and the top holds a lamp on the living side and a serving tray on the dining side. That split personality is exactly right for the boundary piece between zones. Run any lamp cords through a cord cover to the nearest outlet, and keep the cabinet 3 to 4 inches off radiators.
Hanging the art takes an afternoon with a level and a stud finder. Low cabinets run $150 to $400. A realistic lower-cost alternative is two matching secondhand nightstands pushed together, which gives the same low line and closed storage for under $100. Choose art large enough to matter: one generous piece beats a scattered gallery on a long wall.
Frequently asked questions
How wide should the walking route through the room be?
Aim for 30 to 36 inches of clear, unobstructed floor from one end of the room to the other. That width lets one person pass comfortably and carry a serving dish. Measure it with the dining chairs pushed in, not pulled out, since daily life happens with chairs tucked. If the lane pinches below 28 inches anywhere, move furniture before you buy anything new.
Where should the dining table go in a long room?
The far end from the main door usually works best, because it keeps cooking traffic from crossing the seating zone. Leave 36 inches between the table edge and the wall on the sides where chairs pull out, and 24 inches on sides used only for serving. A table against the far short wall with chairs on three sides fits rooms as narrow as 10 feet wide.
How do I stop the room from looking like a hallway?
Give each zone its own identity. A rug under the seating, a different light source over the dining table, and one clear boundary piece like a bookcase or curtain break the tunnel effect. Vary the furniture heights too: tall pieces at the ends and low pieces in the middle keep the eye moving instead of racing down the length.
What if the front door opens into the middle of the room?
Treat the door swing as a third zone. Keep a clear 36 inch arc in front of the door and place a slim console or a row of hooks on the nearest wall so coats and bags have a home. Our small entryway decor guide covers exactly this kind of tight arrival space.
Can I put furniture in front of a radiator?
Keep heat sources clear. Leave at least 3 to 4 inches of air space above and in front of radiators, and never drape fabric directly against one. Open-based benches and slatted pieces work near radiators; solid cabinets and upholstered pieces belong elsewhere. When in doubt, choose a different wall.
What size rug works under a dining table in a long room?
The rug should extend at least 24 inches beyond the table on every side where chairs sit, so chair legs stay on the rug when pulled out. For a 36 by 60 inch table, that means a rug around 8 by 10 feet. If the room cannot fit that, skip the dining rug entirely and put the rug money into the living zone instead.
These fifteen ideas all share one principle: measure first, then place. A long living room with a dining area rewards careful furniture placement more than any single beautiful piece. Walk your own route, tape the zones on the floor, and let the measurements tell you which ideas fit. For more small-space thinking across the home, browse our Home & Decor collection.