14 Small Wardrobe Organization Ideas to Keep Everyday Items Easy to Find
A small wardrobe works best when everything inside it has a job and a home. You do not need a…
A small wardrobe works best when everything inside it has a job and a home. You do not need a bigger closet to stop the morning pileup. You need small, deliberate fixes that make your everyday things visible, reachable and easy to return. The ideas below cost little, fit rental rules and hold up to real daily use.
This guide walks through 14 practical upgrades for a small wardrobe, from the top shelf down to the floor. Each one includes what to measure, what to buy, where it goes, how much effort it takes and a budget-friendly alternative. Pick three to start, and your wardrobe will feel noticeably roomier.
Jump to an idea
- A Top Shelf For Light Seasonal Items
- A Fabric Pouch For Small Accessories
- A Slim Pull-Out Storage Solution
- A Repeated Spacing System Between Groups
- A Shelf Riser Making Two Usable Levels
- A Designated Return-To-Place Zone
- A Hanging Organizer Where Suitable
- A Breathable Bag For Delicate Items
- A Small Inventory Card At The Front
- A Basket For Items Awaiting Repair
- An Adjustable Divider In A Wide Section
- A Dedicated Travel-Packing Bin
- A Grouped Arrangement By Use Frequency
- A Clear Gap Preventing Overstuffing
Small wardrobe rules before you start
Before buying a single bin, measure your wardrobe. Record the interior width, depth and the height of each shelf and the hanging rod. Most small wardrobes are 24 to 36 inches wide and about 24 inches deep, and those two numbers decide everything. Bring them on your phone when you shop so containers actually fit.
Sort before you store. Pull everything out, group by type and be honest about what you wear. Items you have not touched in a year go to donation. This single step frees more space than any organizer.
Give everyday items the prime real estate: rod space and shelves between knee and eye level. Occasion wear and out-of-season clothes move up high or to the back. Nothing heavy should hang from a lightweight over-the-door organizer or a tension rod that was not built for the load. And never put away clothing that is even slightly damp. It invites mildew in a closed wardrobe fast.
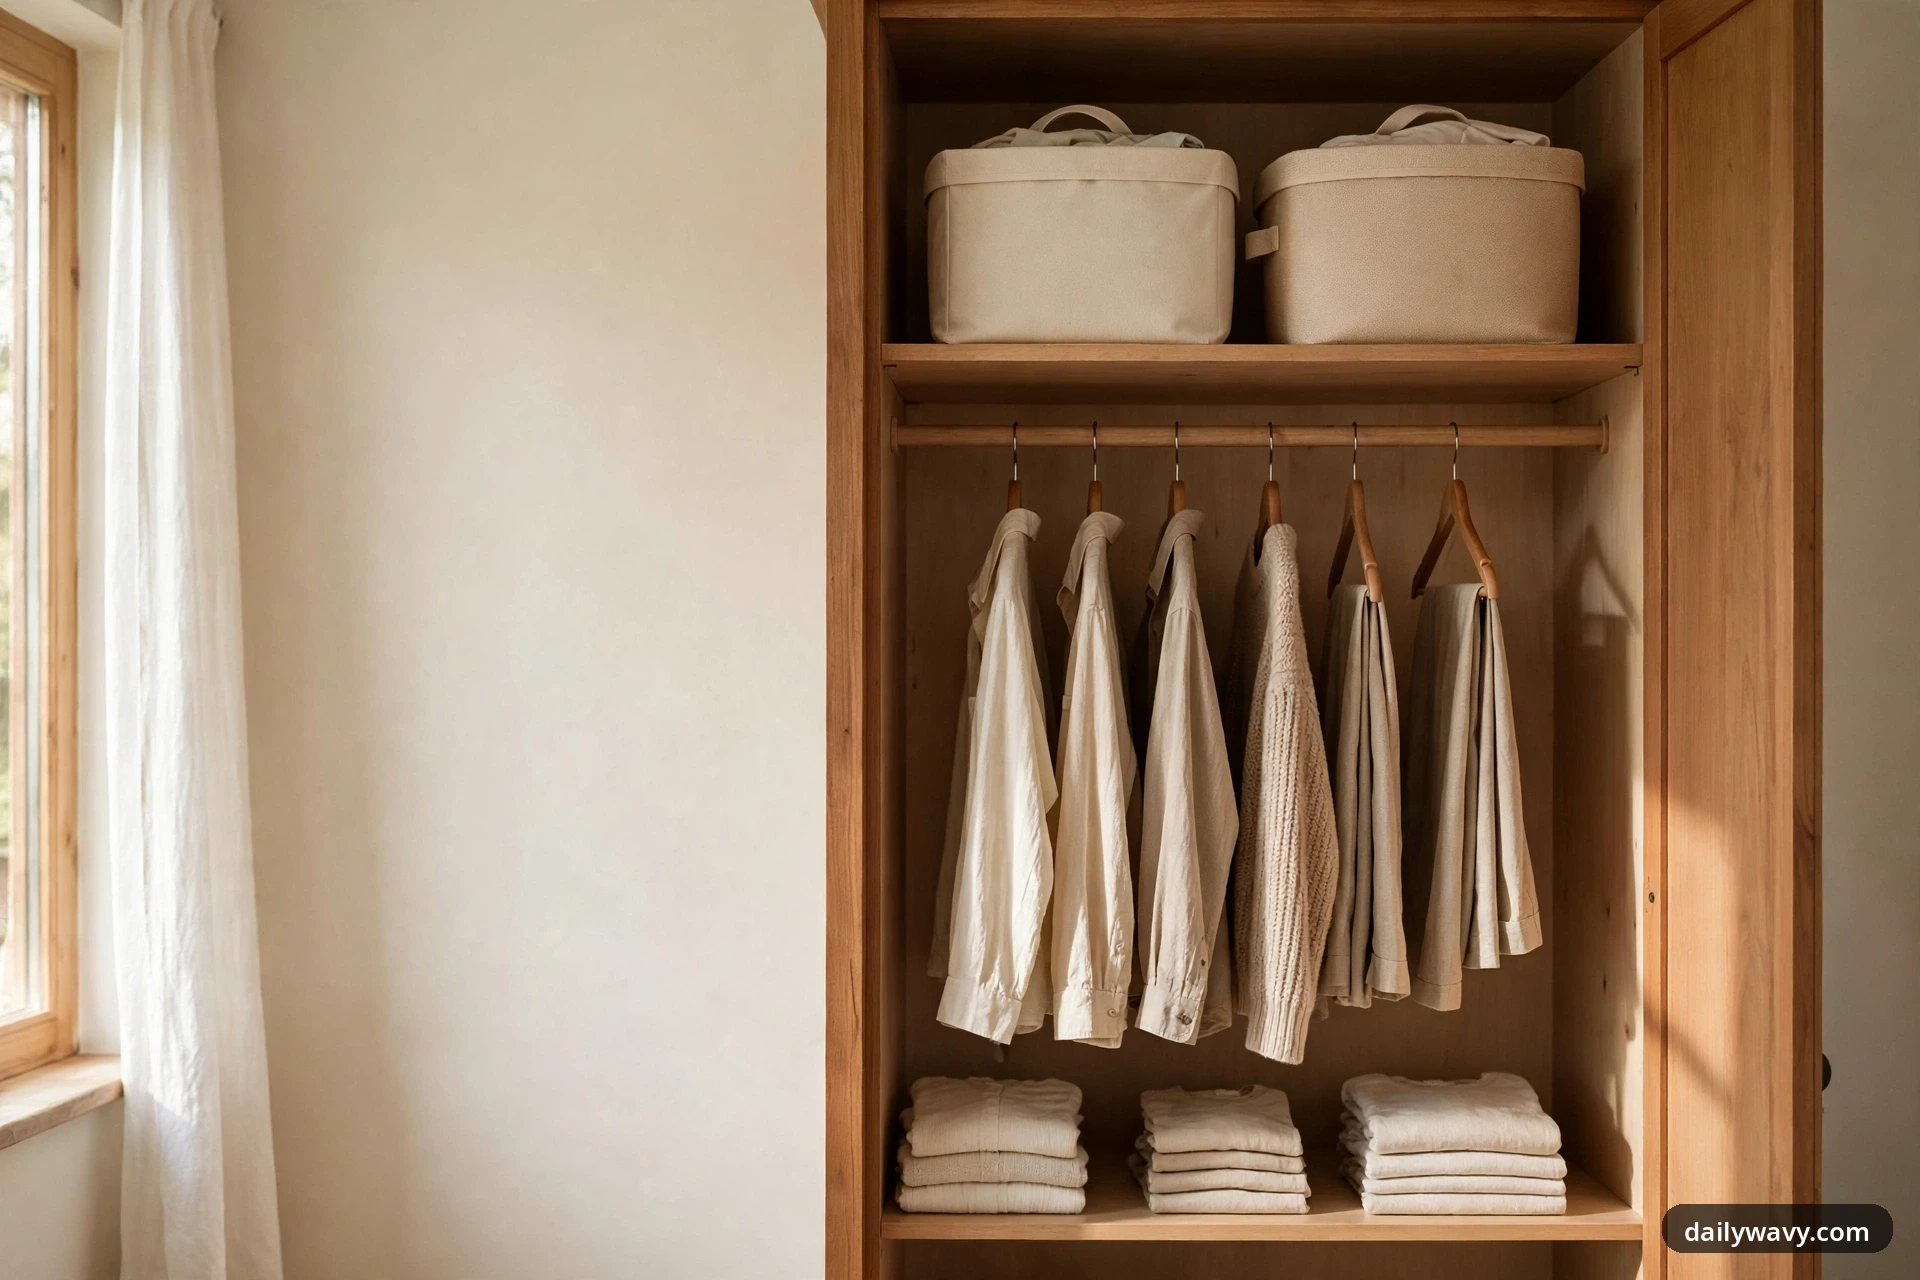
1. A Top Shelf For Light Seasonal Items

That top shelf you can barely reach is not wasted space. It is perfect for lightweight seasonal items you only need twice a year: beach hats, a light packable jacket, the gloves and scarves you will not touch until November. Keep it featherweight so nothing heavy comes down on your head.
What to measure: Shelf depth and the clearance from shelf to ceiling. Most top shelves hold 12 to 15 inches of height. Choose bins no taller than that clearance minus one inch.
Materials: Two or three matching lightweight fabric bins with lids, about 12 by 12 inches. A small step stool, foldable, that tucks beside the wardrobe.
Placement: Seasonal items go in the bins, lids on, pushed to the back half so the front stays grab-able for a travel bag. Label the front of each bin with a simple tag: “Summer” or “Winter.”
Approximate effort: One hour, mostly sorting. Lower-cost alternative: Cardboard boxes covered with wrapping paper, with the contents written on a sticky note.
2. A Fabric Pouch For Small Accessories
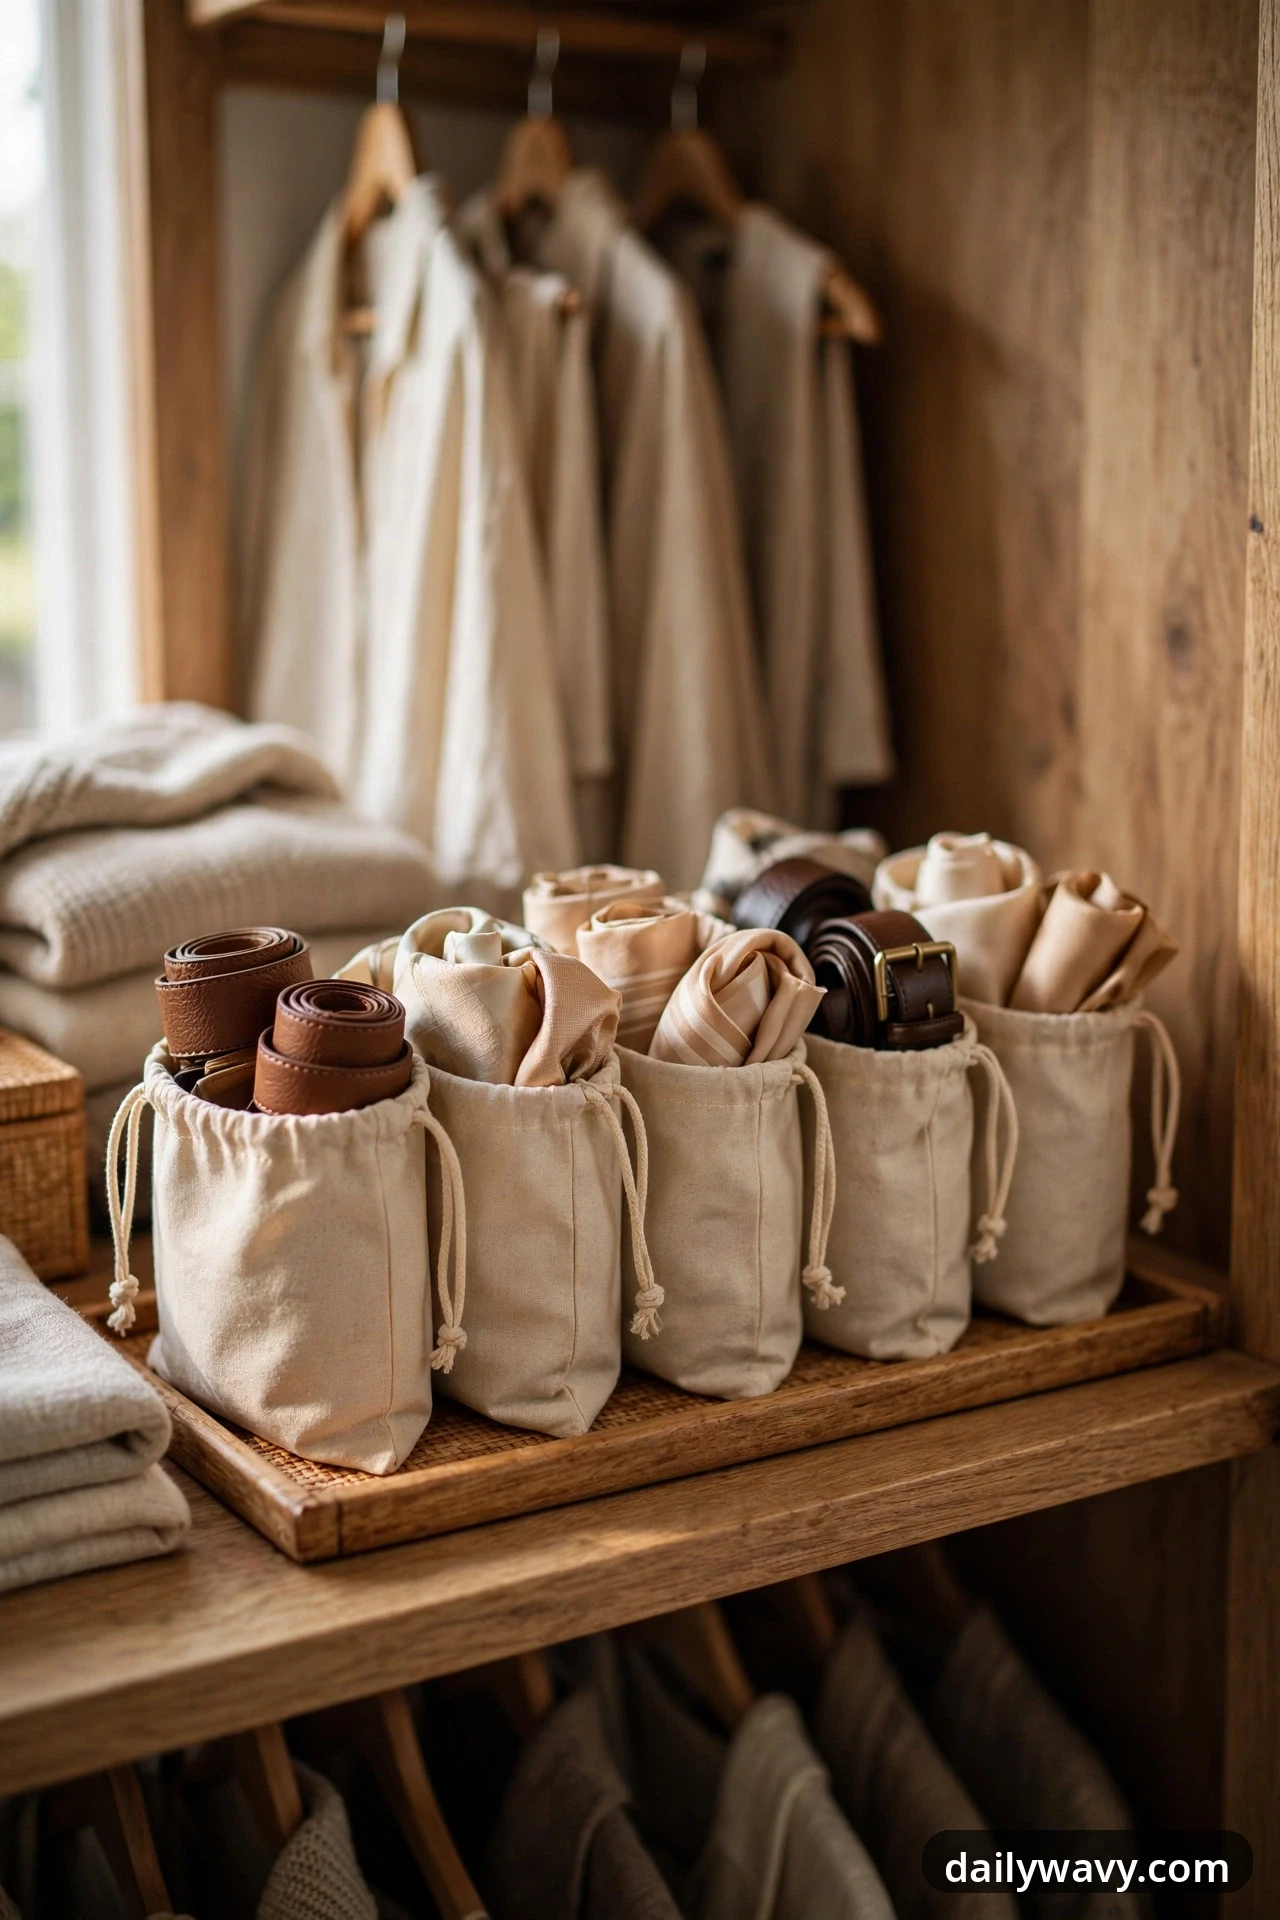
Belts, ties, silk scarves and hair accessories vanish in a small wardrobe because they have no container of their own. A few small fabric pouches give each accessory family a pocket, and the whole collection suddenly stays together.
What to measure: The depth of your shelf or drawer. Pouches around 6 by 8 inches fit most shelves without dangling.
Materials: Canvas or cotton drawstring pouches, four to six of them. A label maker or fabric-safe pen for marking: “Belts,” “Scarves,” “Ties.”
Placement: Line the pouches upright in a shallow tray on a mid-level shelf, like books on a shelf. Drawstrings face up so you can see the contents when you loosen one.
Approximate effort: Thirty minutes including labeling. Lower-cost alternative: Cotton makeup bags from a dollar store, grouped by color.
3. A Slim Pull-Out Storage Solution
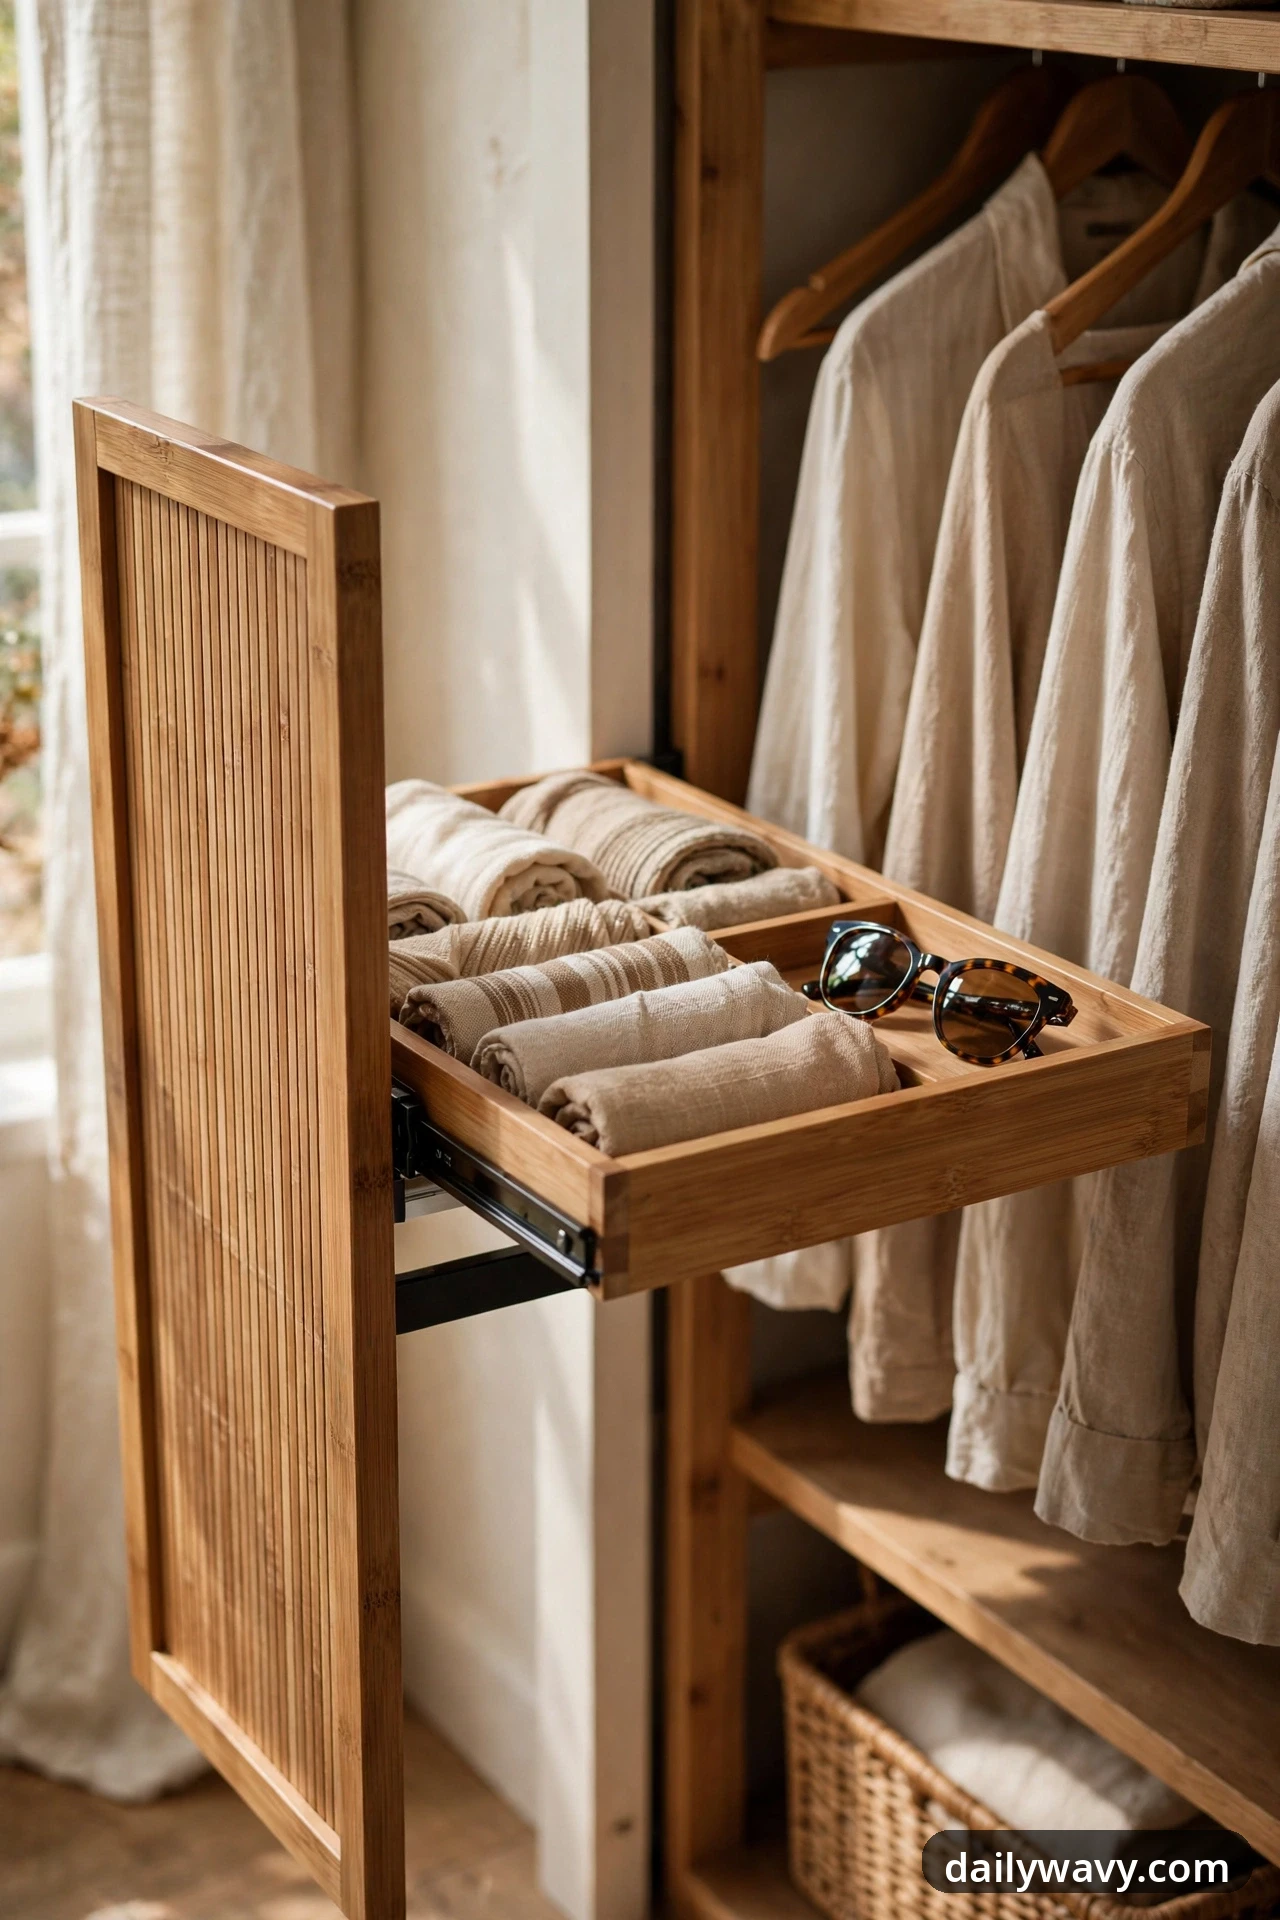
The narrow dead strip beside hanging clothes is often the best spot for a slim pull-out. These rolling carts or vertical drawer units are 6 to 8 inches wide and hold belts, rolled scarves, sunglasses and other slim items in a footprint that would otherwise be wasted.
What to measure: The exact width of the gap between the wardrobe frame and your hanging clothes. Leave at least an inch of clearance so fabric does not snag.
Materials: One slim rolling cart or a narrow stackable drawer unit, plus a set of small dividers for the top tray.
Placement: Roll it into the gap with the open top at a comfortable grabbing height. Heaviest items go on the bottom shelf so it cannot tip.
Approximate effort: Forty-five minutes with assembly. Lower-cost alternative: A repurposed magazine holder box slid into the gap for rolled items.
4. A Repeated Spacing System Between Groups
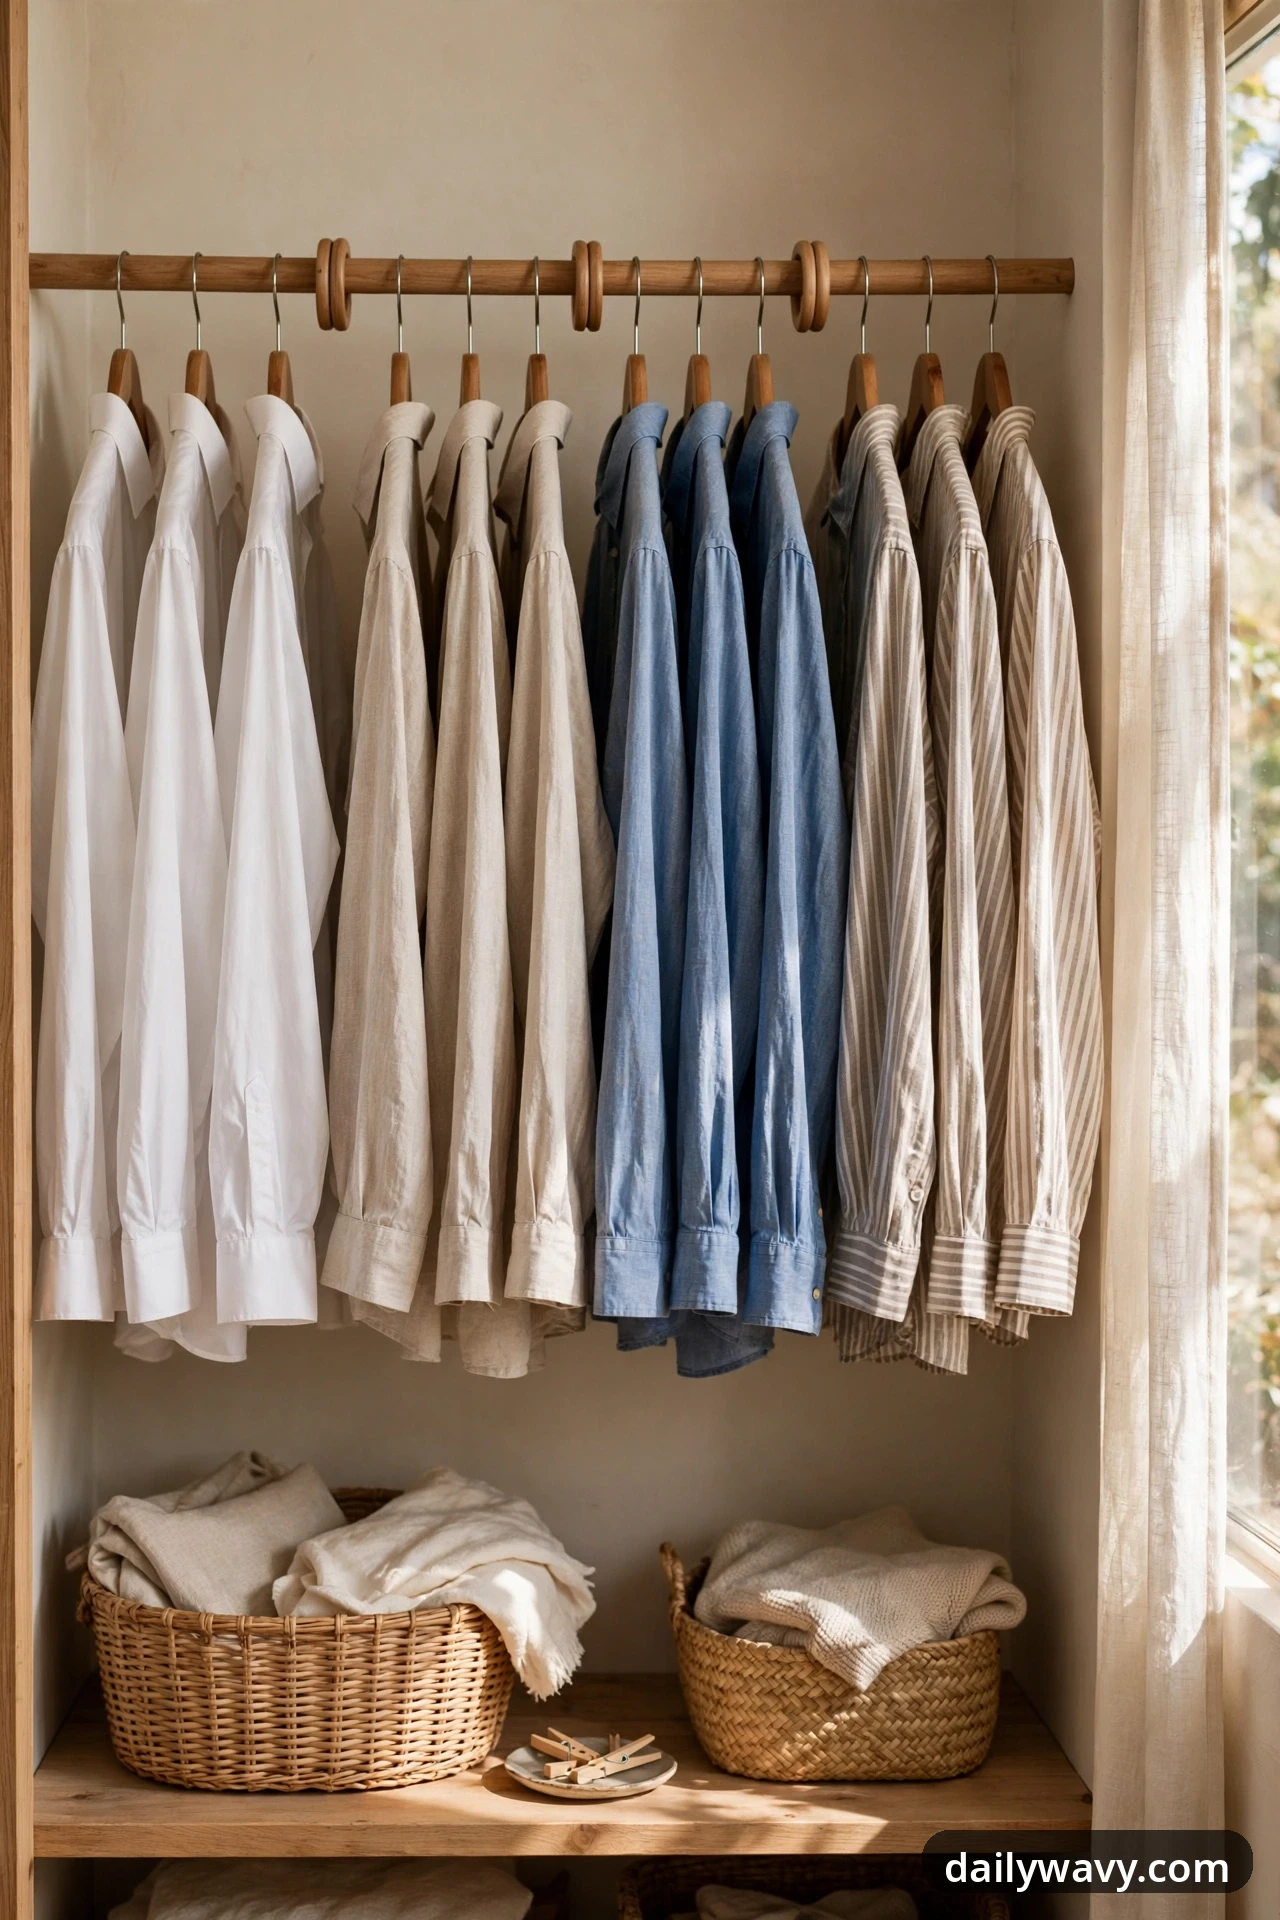
A rail of shirts looks chaotic when hangers crowd together at random. Switching to matching slim hangers and leaving a finger-width of space between clothing groups makes every section readable at a glance. You stop pulling five shirts down to find one.
What to measure: Rod length. Count how many slim hangers fit: roughly 1 inch per hanger, so a 30-inch rod holds about 28 garments.
Materials: A set of matching slim velvet or plastic hangers. Small wooden or plastic divider rings to mark group boundaries.
Placement: Group by type, then color: work shirts, then casual shirts, then outer layers. A divider ring between groups keeps the system intact after laundry day.
Approximate effort: One to two hours for a full hanger swap and regroup. Lower-cost alternative: Keep your current hangers and just regroup by type, leaving a 2-inch breathing gap between groups.
5. A Shelf Riser Making Two Usable Levels
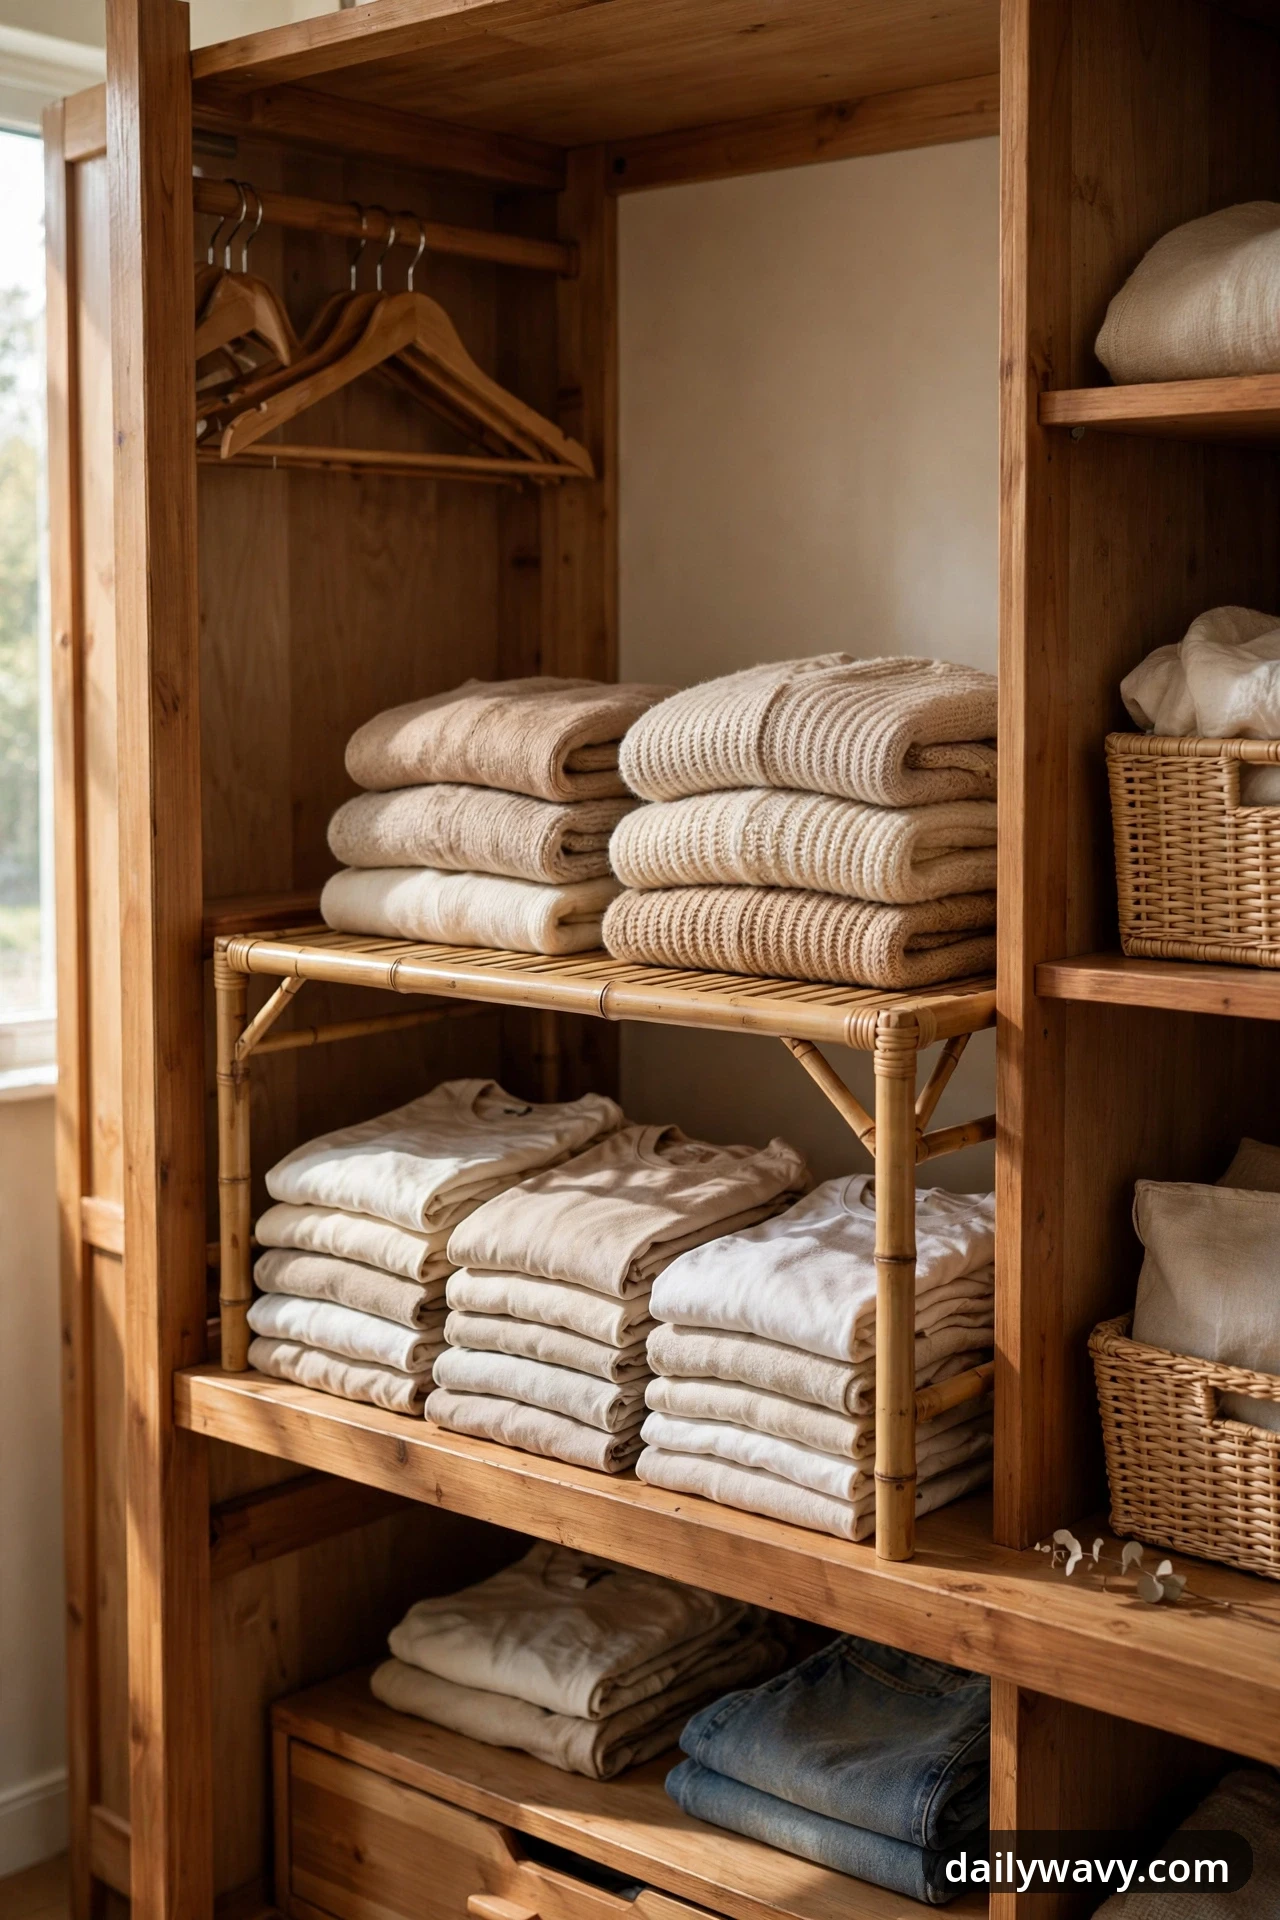
A single tall shelf wastes its upper half. A freestanding shelf riser, essentially a small open table, splits that height into two usable levels: folded tees below, sweaters or jeans above. You gain a whole extra shelf without drilling a hole.
What to measure: Shelf depth and the height above it. Risers come in 9 to 12 inch heights; pick one that leaves a 2-inch gap above the folded stack.
Materials: One bamboo or metal shelf riser sized to your shelf depth. Non-slip shelf liner for the top surface.
Placement: Center the riser on the shelf. Put the items you grab least often on top and the everyday folds underneath where your hands naturally go.
Approximate effort: Twenty minutes. Lower-cost alternative: Two sturdy shoeboxes side by side with a cutting board across the top.
6. A Designated Return-To-Place Zone

Much wardrobe mess does not come from laundry. It comes from clothes that are too clean for the hamper and too worn to hang back up: the jeans you will wear again, the cardigan from yesterday. A designated zone for these “in-between” clothes stops the chair pile from forming.
What to measure: Find a 12-inch stretch of shelf or a door hook area that stays visible when you open the wardrobe.
Materials: A shallow open tray, a single wall hook or one labeled basket. A small tag that reads “Wear again.”
Placement: Put it right at the front of the wardrobe at waist height, never buried at the back. The rule is simple: worn-once clothes go here, and they get re-worn or washed within two days.
Approximate effort: Fifteen minutes to set up and explain to the household. Lower-cost alternative: A tote bag hung on the wardrobe door handle.
7. A Hanging Organizer Where Suitable

Hanging fabric organizers add instant cubbies to a wardrobe with no tools. The key word is “suitable”: they work for light items like folded tees, scarves and pajamas, but they are not shelves. Keep each cubby to a few light items so the organizer hangs straight and the rod never strains.
What to measure: The free rod length beside your hanging clothes, usually 10 to 12 inches for a six-cubby organizer. Check your rod’s load rating if it is a tension rod.
Materials: One six- or seven-cubby hanging organizer in canvas. Only light items: tees, tanks, scarves, socks.
Placement: Hang it at one end of the rod. Heavy shoes, bags and denim never go in hanging cubbies. They belong on a solid shelf or the floor.
Approximate effort: Ten minutes to hang and fill. Lower-cost alternative: Sew or clip canvas tote bags to a spare hanger for two large cubbies.
8. A Breathable Bag For Delicate Items

Suit jackets, blazers and silk dresses pick up dust and snags in a busy small wardrobe. A breathable cotton garment bag protects them while letting air circulate, which plastic bags do not. The delicate item stays clean and ready without a full dry-cleaning bag routine.
What to measure: Garment length. A 40-inch bag covers shirts and jackets; a 50-inch bag covers dresses and coats.
Materials: Two to three cotton or canvas garment bags with a full-length zipper. Never plastic: it traps moisture.
Placement: Hang bags at the end of the rod where they are easy to pull out. Leave the bottom of each bag open slightly for air if your climate is humid.
Approximate effort: Fifteen minutes. Lower-cost alternative: A clean cotton pillowcase with a small slit cut for the hanger hook.
9. A Small Inventory Card At The Front
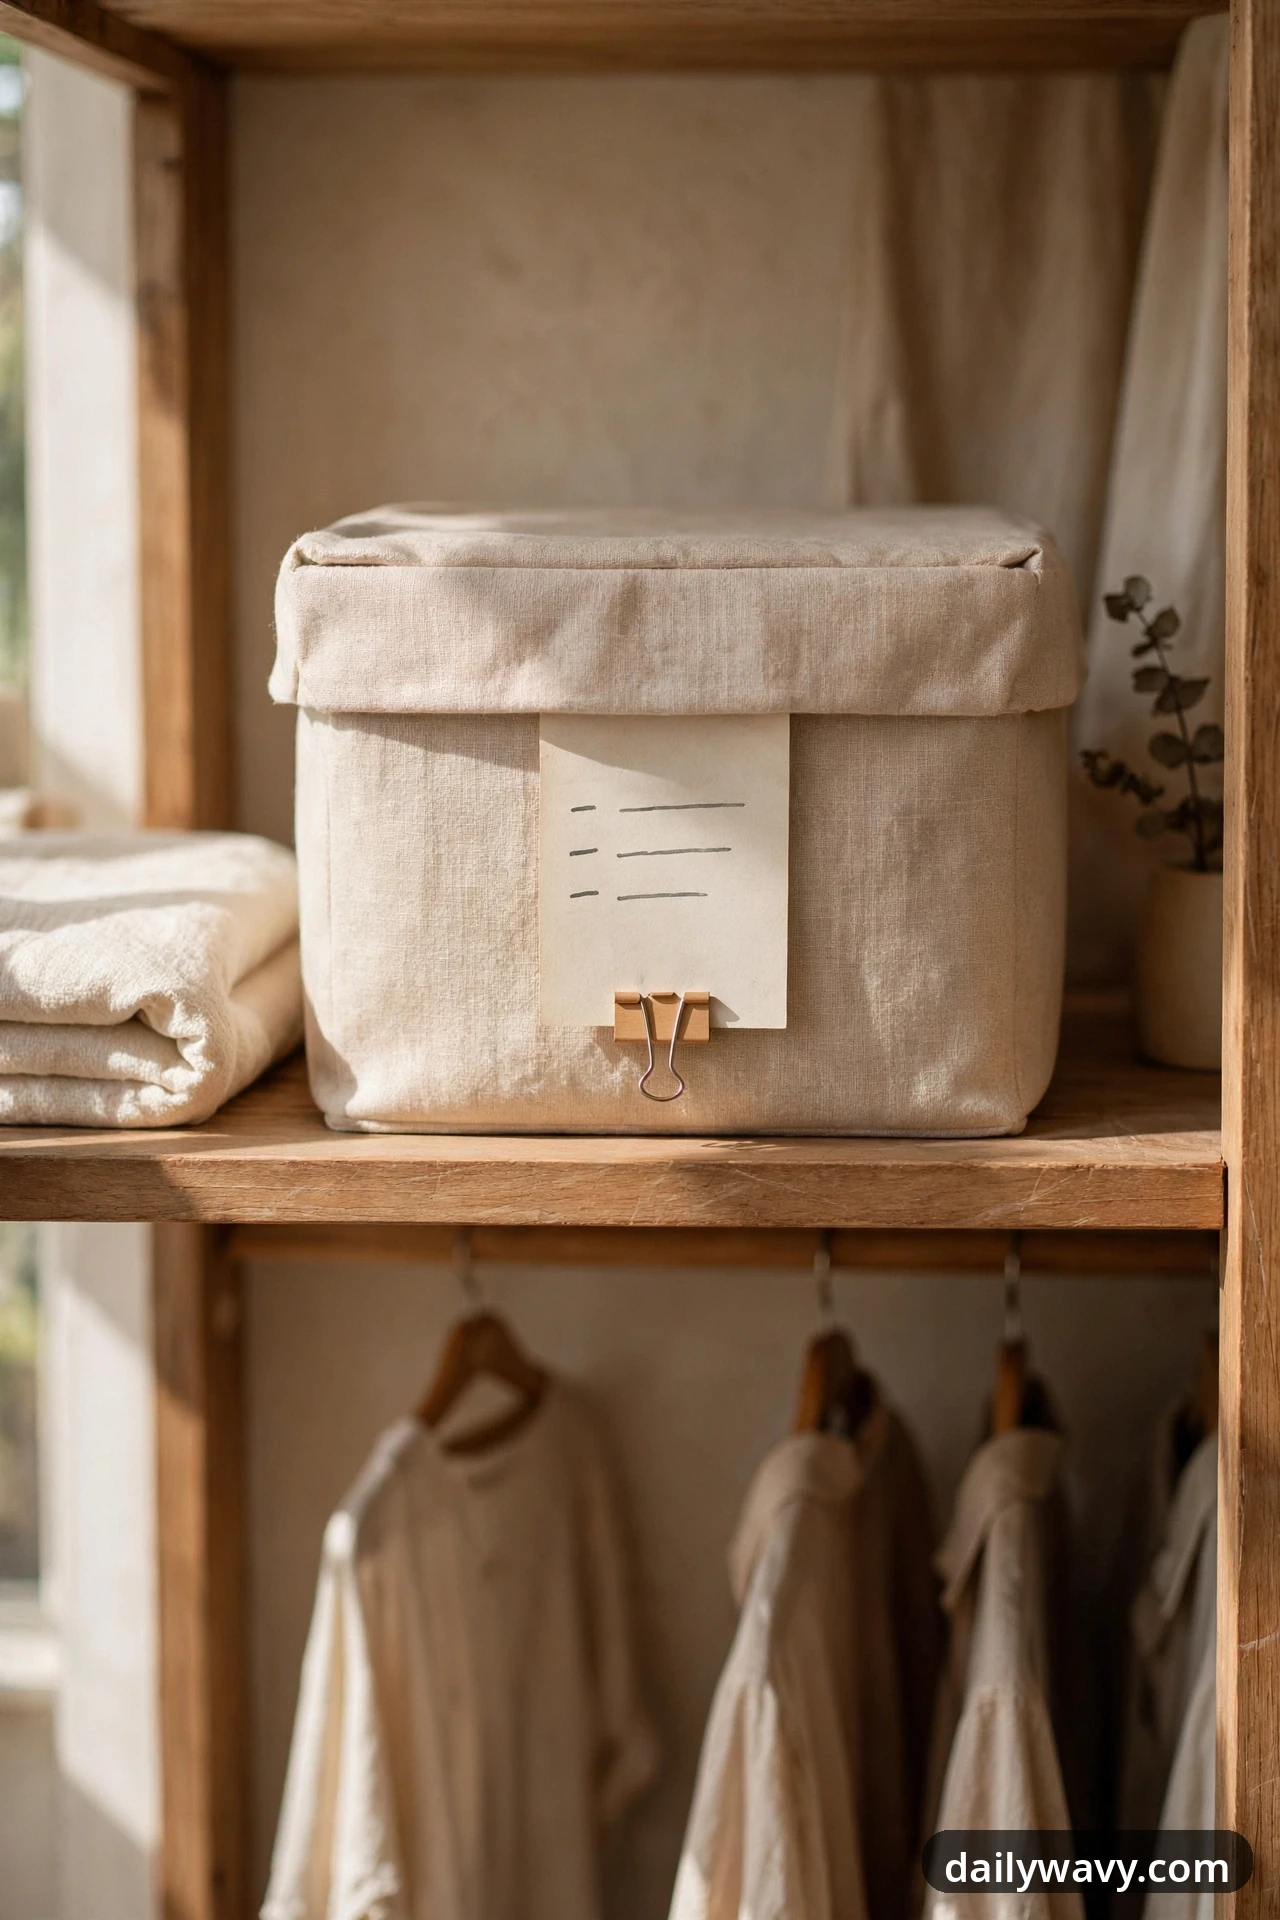
When storage goes deep, you forget what is in the back bins. A small card clipped to the front of each bin lists its contents in three words: “Winter scarves, gloves.” You check the card instead of emptying the bin, which keeps everything else undisturbed.
What to measure: Nothing to measure. Cut cards to about 3 by 5 inches, large enough to read at a glance.
Materials: Blank index cards, a pen with dark ink and small binder clips or washi tape to attach them.
Placement: Clip one card to the front center of every opaque bin and lidded box in the wardrobe. Update the card when the contents change, which takes only a moment.
Approximate effort: Twenty minutes for a whole wardrobe. Lower-cost alternative: Write the contents directly on painter’s tape stuck to the bin.
10. A Basket For Items Awaiting Repair
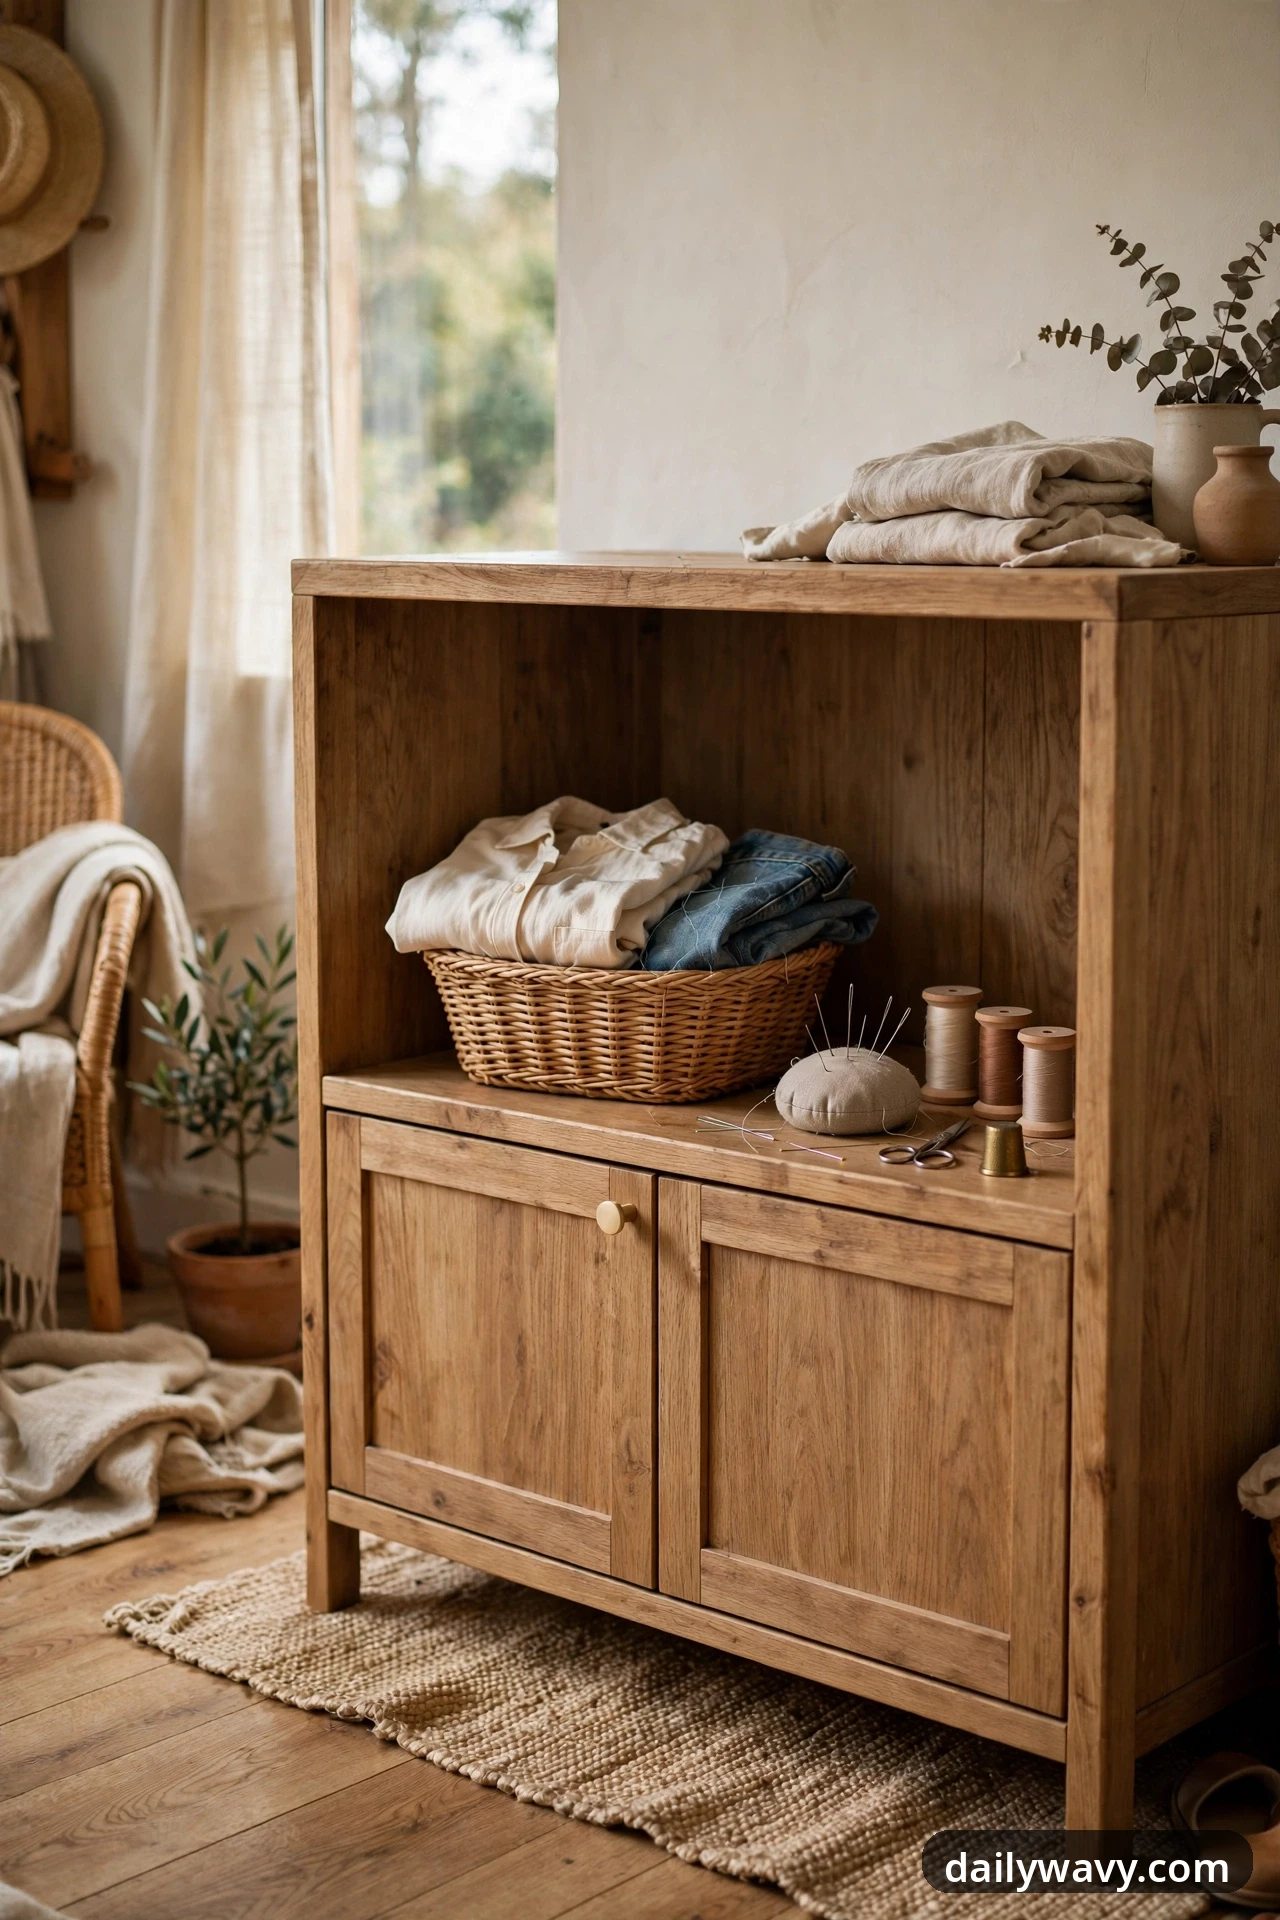
The shirt missing a button and the jeans with a loose hem live in limbo, draped over the rod until you forget them. A small repair basket gathers these items in one visible spot and makes the mending pile feel like a project instead of clutter.
What to measure: Find a shelf corner about 10 inches wide for a basket that holds three to four items.
Materials: A small woven basket and a basic mending kit: needle, thread in neutral colors, two spare buttons, a seam ripper.
Placement: Keep the basket on a low shelf where you will see it. The rule: when the basket holds three items, mend them that weekend.
Approximate effort: Twenty minutes to set up. Lower-cost alternative: A paper shopping bag folded down, with a needle and thread pinned inside.
11. An Adjustable Divider In A Wide Section

Wide shelves turn into avalanches: stacks of folded knits lean, slide and eventually collapse. An adjustable divider stands between stacks like a bookend, so each category keeps its lane. Move it as the seasons change and the stack widths shift.
What to measure: Shelf depth. Dividers come in 10 and 12 inch depths; match your shelf.
Materials: Two spring-loaded or L-shaped shelf dividers, wood or metal. They grip without screws.
Placement: Stand one divider between each clothing category: sweaters on the left, sweatshirts in the middle, jeans on the right. Keep stacks no more than 8 inches tall so they stay stable.
Approximate effort: Ten minutes. Lower-cost alternative: Bookends from a thrift store, one between each stack.
12. A Dedicated Travel-Packing Bin
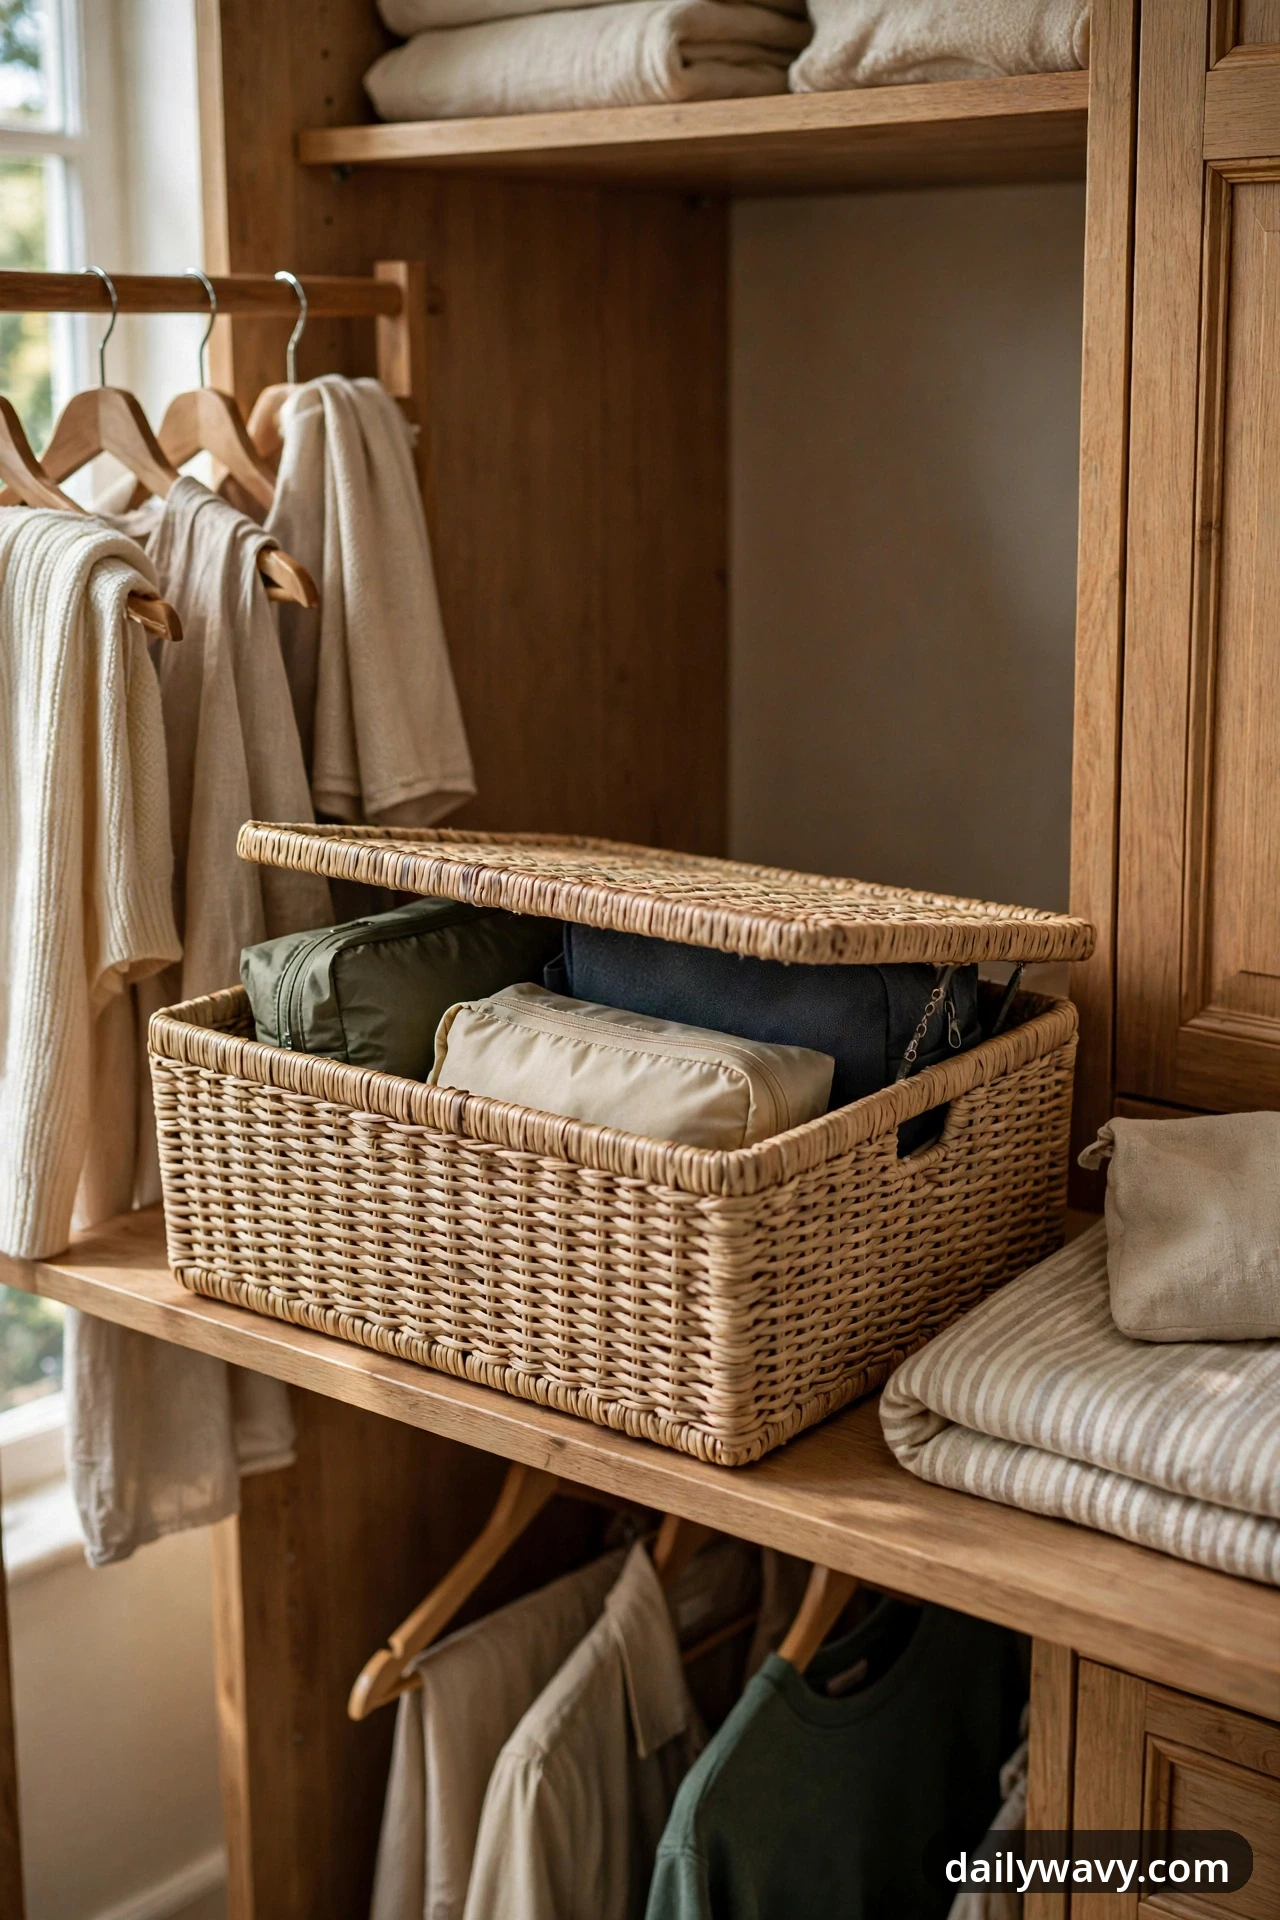
Packing for a trip usually means rummaging through the whole wardrobe. A dedicated bin holding your travel-only items, packing cubes, a dopp kit and a travel adapter, turns packing into a quick grab instead of a treasure hunt.
What to measure: The bin should fit your wardrobe shelf, usually 12 by 16 inches, and still slide out easily.
Materials: One lidded bin, two packing cubes and a small pouch for chargers and adapters. Label the lid “Travel.”
Placement: Store it on a mid-level shelf or the top shelf if you travel rarely. Keep travel-size toiletries inside so you never borrow from the bathroom stash.
Approximate effort: Thirty minutes to gather your travel items into one place. Lower-cost alternative: A reusable grocery bag kept folded on the shelf, labeled with tape.
13. A Grouped Arrangement By Use Frequency
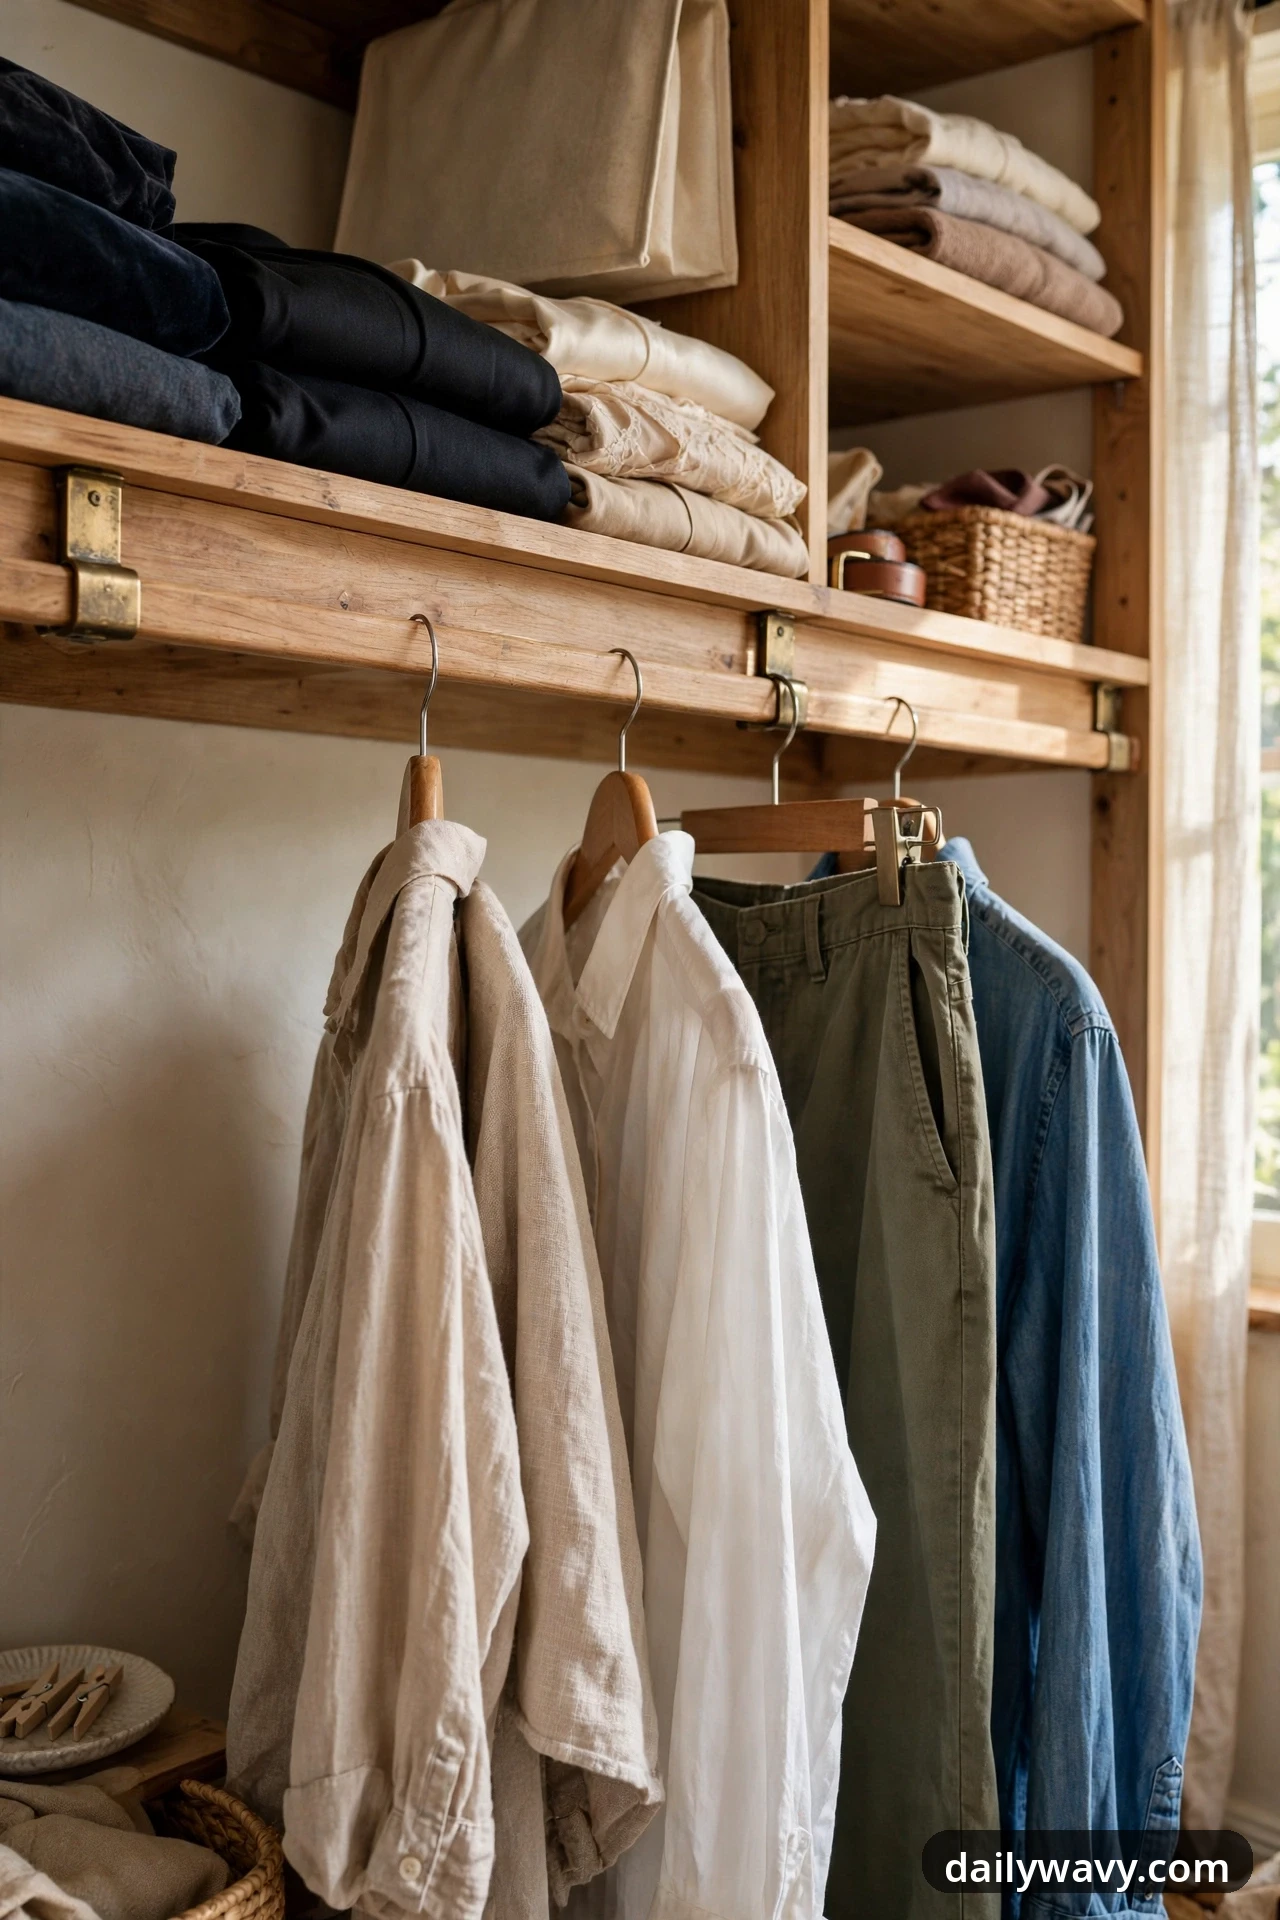
The most powerful organizing rule is also the simplest: the clothes you wear most live at grab height, between your knees and your eyes. Occasion wear and special pieces move higher or to the back. Every morning outfit becomes a quick reach instead of a search.
What to measure: Nothing to measure. Stand in front of your open wardrobe and mark the zone between your knees and your eyes. That is the golden rectangle.
Materials: No purchases needed. Just your attention and one free hour.
Placement: Work shirts, everyday pants and go-to layers go in the golden zone. Formal wear, costumes and rarely worn pieces go above or behind them. Revisit the grouping each season.
Approximate effort: One hour of honest sorting. Lower-cost alternative: This one is already free.
14. A Clear Gap Preventing Overstuffing
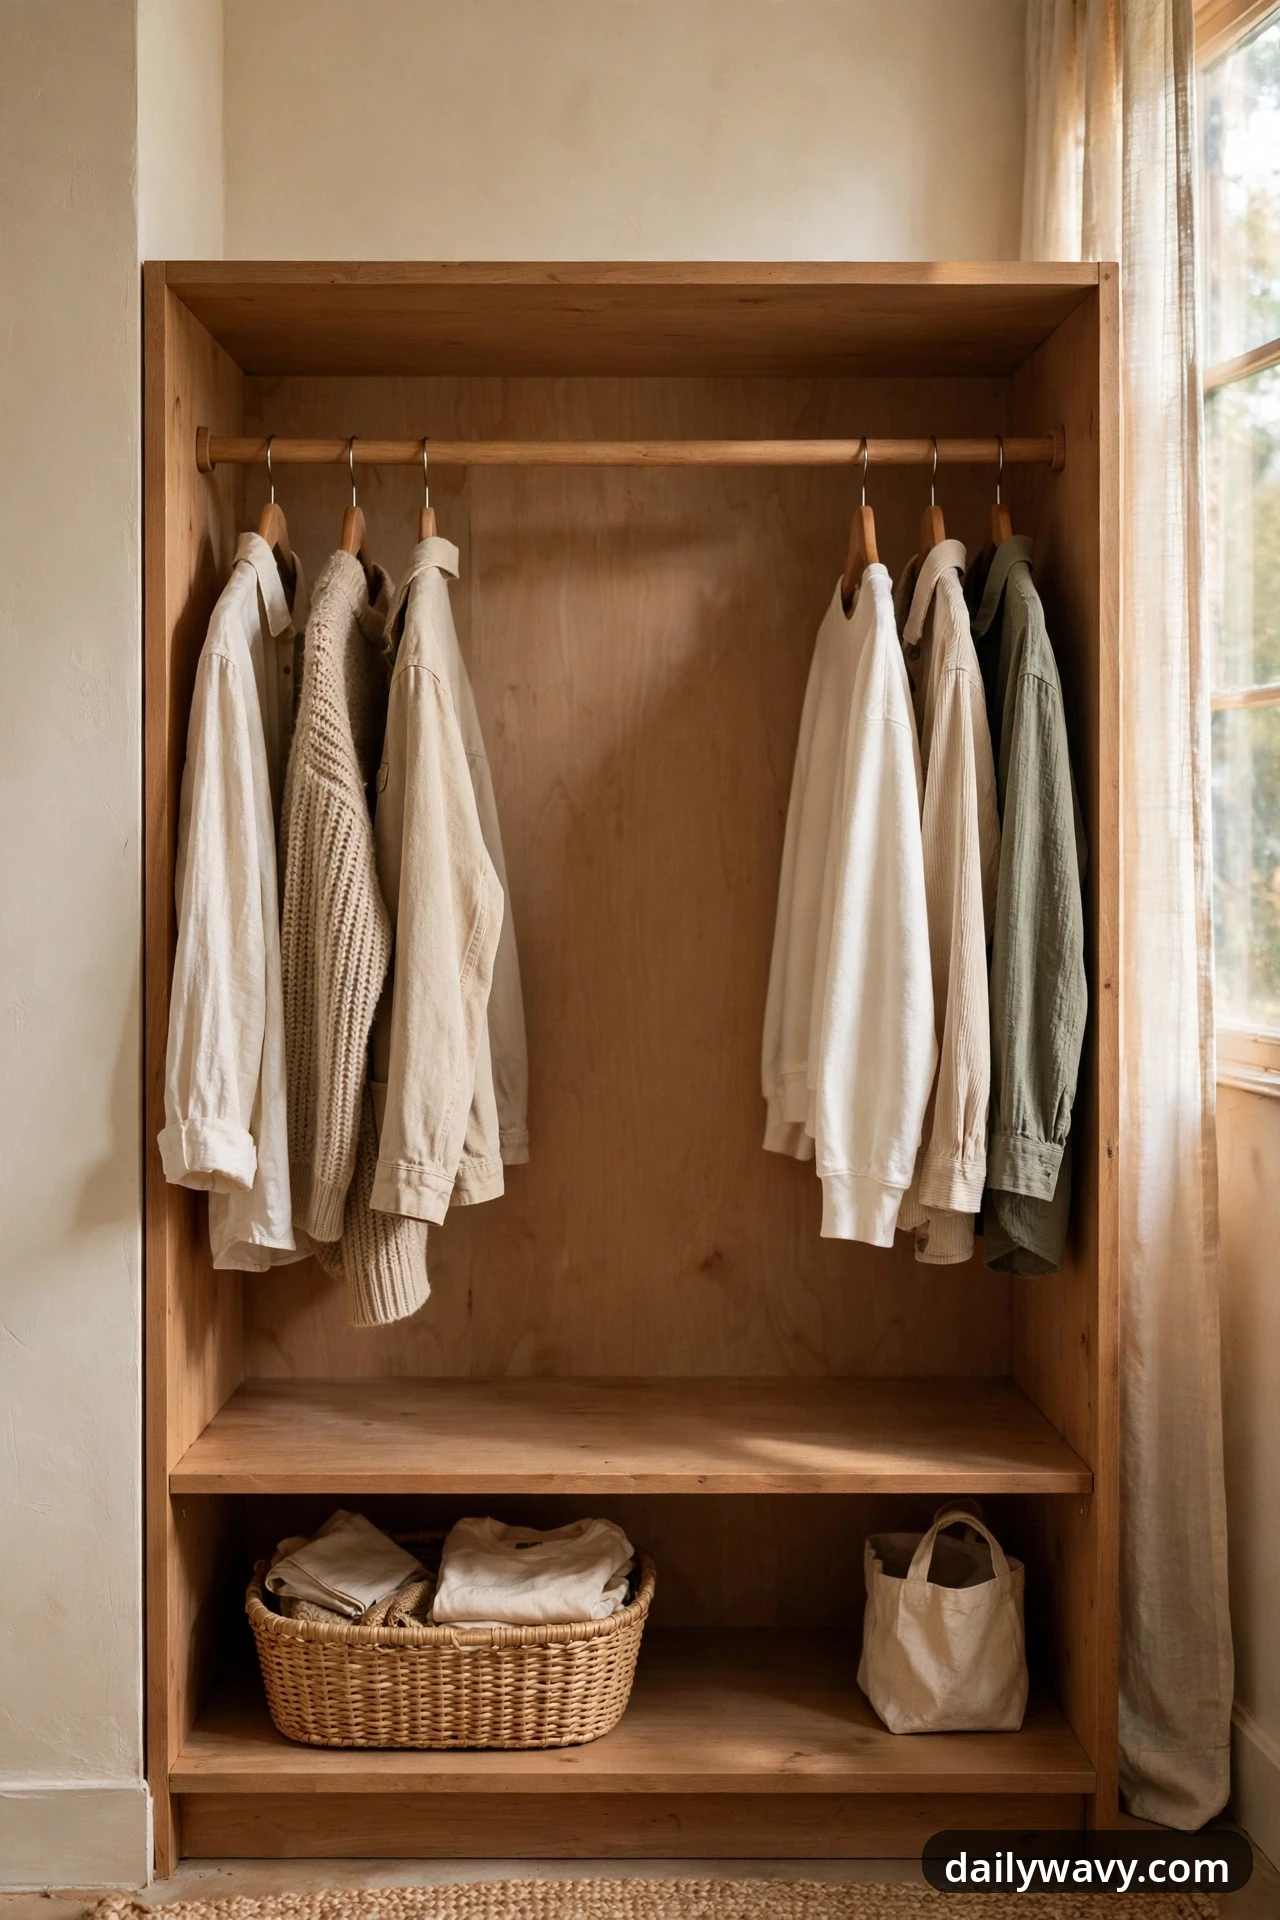
Every small wardrobe needs one deliberate empty spot: a hand-width gap on the rod or a half-empty shelf. That breathing room is what lets you slide hangers, see what you own and put laundry away without a wrestling match. A wardrobe packed to the brim looks and feels worse than one with breathing room.
What to measure: Aim for one empty 6-inch stretch of rod, or one shelf that is at most half full.
Materials: A small donation bag kept nearby. When the gap fills up, something leaves the wardrobe.
Placement: Put the gap in the middle of your most-used rod section, where you will notice it daily. Treat it as a permanent resident, not a temporary luxury.
Approximate effort: Twenty minutes of editing. Lower-cost alternative: Free, and it can save you money by curbing impulse buys.
Small wardrobe organization questions, answered
How do I make a tiny wardrobe feel bigger?
Measure first, edit your clothes down to what you wear, and give everyday items the knee-to-eye zone. Matching hangers, shelf risers and a few labeled bins make a real difference without a bigger closet.
What should never go in a hanging organizer?
Anything heavy. Shoes, handbags, denim stacks and books will stretch the fabric and strain the rod. Keep hanging cubbies for light items like tees, scarves and pajamas.
How do I stop my wardrobe from smelling musty?
Never store damp clothes, leave a small gap for air circulation, and wipe shelves down twice a year. A breathable garment bag protects delicates without trapping moisture the way plastic does.
Where do out-of-season clothes go in a small wardrobe?
Up high in labeled lidded bins or in breathable bags at the back of the top shelf. Keep them light, keep them labeled, and check the bin before the season turns.
What is the fastest way to organize a small wardrobe today?
Pull everything out, group by type, donate what you do not wear, and put everyday items at grab height. The sorting hour matters more than any product you could buy.
How often should I reorganize?
Do a quick edit every season when you swap seasonal items, and a deeper sort once a year. The return-to-place zone and the clear gap keep things tidy between edits.
Start with three, then keep going
You do not need all 14 ideas at once. Start with the top shelf bins, the return-to-place zone and the clear gap. Those three alone will change how your wardrobe feels every morning. Once they become habits, add the dividers, the inventory cards and the repair basket, and your small wardrobe will quietly run itself.
For more small-space wins, see our guides to walk-in closet organization, small pantry organization, small entryway decor and a small bedroom with a queen bed. You can also browse everything in the Home & Decor category.