18 Painted Headboard Ideas for a Distinctive Bed Wall
A painted headboard is the fastest way to give a bedroom a center without buying a single piece of furniture….
A painted headboard is the fastest way to give a bedroom a center without buying a single piece of furniture. A few quarts of paint, a steady hand with a roller, and one quiet weekend can create the layered, intentional look that usually costs hundreds at a furniture store. Every idea below stays flat on the wall, so nothing needs heavy fastening or a stud finder, and most of them reverse with nothing more than a coat of your original wall color. Work through the eighteen treatments one at a time, pick the one that fits your room and your patience, and photograph your progress so you remember exactly what you did when it comes time to touch up.
In This Guide
- A Tall Focal Shape in a Plain Room
- A Contrasting Border Detail
- A Warm Material Paired With Cool Linens
- A Monochrome Bed-Wall Composition
- A Horizontal Line Connecting Bedside Zones
- A Removable Decorative Treatment
- A Subtle Geometric Pattern
- A Single Accent Color Repeated in Cushions
- A Vintage-Inspired Outline
- A Softly Textured Finish
- An Understated Frame Around the Sleeping Area
- A Simple Centered Form With Bedside Lighting
- A Restrained Vertical Rhythm Behind the Bed
- A Soft Neutral Palette With Textured Bedding
- A Darker Focal Area Framed by Light Walls
- An Asymmetric Art Arrangement Nearby
- A Pair of Small Wall Lights
- A Narrow Ledge for One Framed Print
The Painted Headboard Rules Before You Start
Every idea in this guide is a flat wall treatment, which means the wall itself does all the work. That keeps things simple, but a painted surface behind a bed still needs the right setup. Start with a washable finish. Bedrooms collect skin oils, pillow dust, and the occasional coffee splash, so choose an eggshell or satin sheen rather than flat or matte. Satin wipes down with a damp cloth; flat paint marks if you look at it too long. Low-VOC or zero-VOC paint is worth the small price difference in a room where you sleep with your head against the wall every night.
Prep matters more than the paint. Wash the wall with a mild detergent solution, let it dry, and fill nail holes and dents with spackling compound. Sand smooth with 120-grit paper, wipe the dust with a tack cloth, and cut in edges with a brush before rolling. Two thin coats always beat one thick one, and each coat needs to dry for the time printed on the can before the next goes on. Let the final coat cure fully before you push the bed and bedding back against it, because paint that feels dry to the touch can still mark and stick. For dark colors over a light wall, a tinted primer cuts your work to two coats instead of four.
Think about reversibility before you start. Standard latex paint is fully reversible: you simply repaint the original color when your taste changes or your lease ends. If you rent, test this logic against your walls first by painting a small hidden patch, letting it cure, and covering it with one coat of your base color. For zero-commitment options, ideas 6 and 16 use removable treatments that come off without touching the wall paint.
Fastening is rarely an issue here because paint weighs nothing. The fastening notes in each section apply to the things you hang around the painted shape: picture ledges, small sconces, and framed prints. Use picture hooks rated for the frame weight, and in older plaster walls drill pilot holes and use anchors rather than driving nails into crumbling plaster.
Cleanability is simple. A satin or eggshell painted headboard cleans with a soft cloth, warm water, and a drop of dish soap. Avoid scrub pads and harsh cleaners, which dull the sheen and leave uneven spots. If you have kids or pets who treat the bed wall as a headboard in the most literal sense, satin is the safer sheen.
Finally, keep the construction in the keyword. These are painted treatments, not carpentry projects. If an idea tempts you to reach for a saw, scale it back to paint, tape, and stencils. That constraint is what keeps every project in this guide doable in a weekend. For more small-bedroom planning help, our small bedroom with a queen bed ideas work through the furniture layouts and clearances a bed wall has to fit.
1. A Tall Focal Shape In A Plain Room
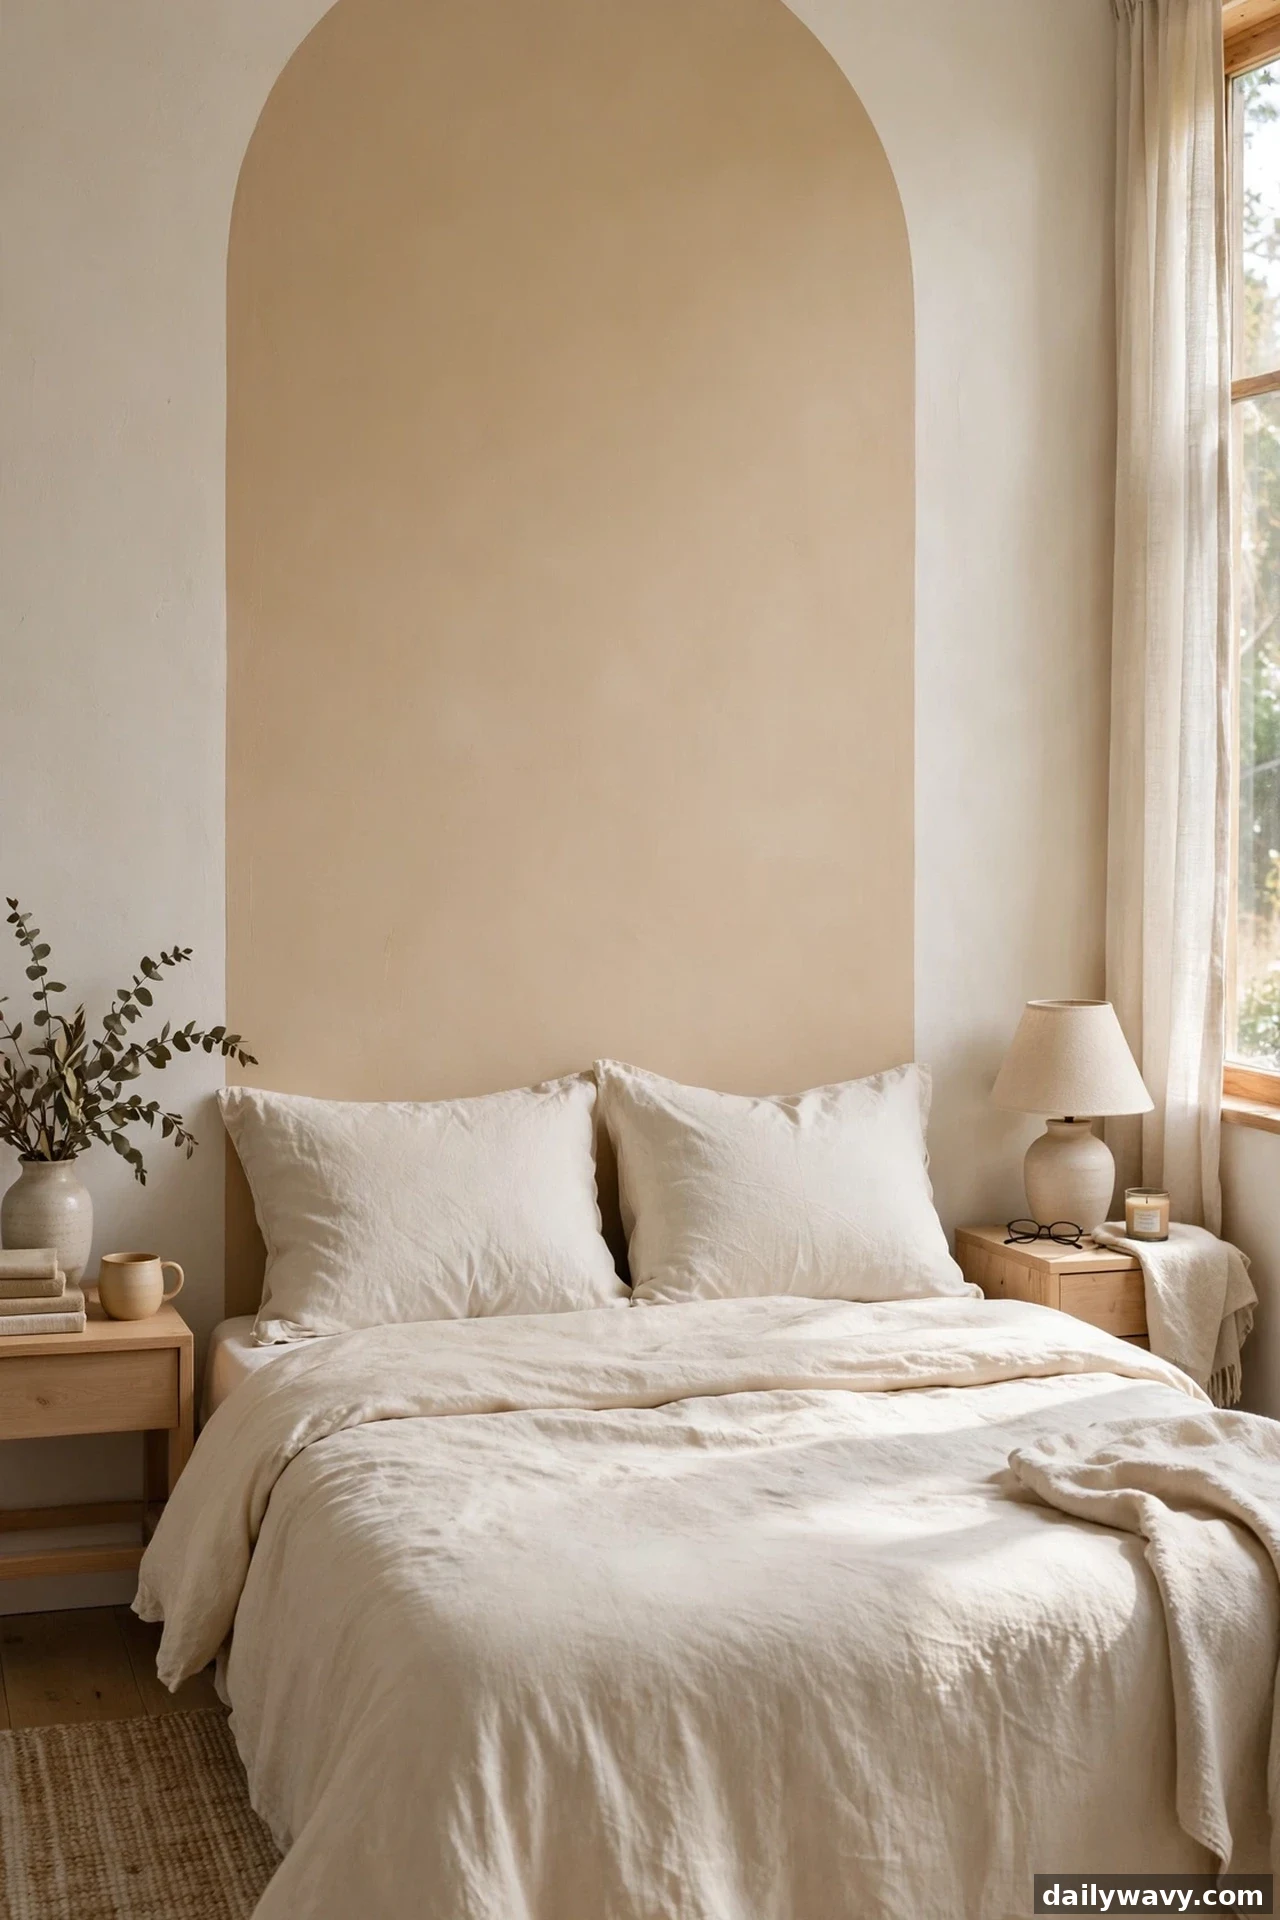
A tall painted arch rising behind the bed turns an ordinary wall into a destination. In the photographed room the arch climbs nearly to the ceiling over a plain linen bed, its warm putty tone the only color decision in the space. The shape reads almost like furniture from across the room, which is exactly the point: when the wall does the visual work, the bed itself can stay simple.
Measure the bed width and add twelve inches on each side. That total is your arch width. For the height, tape a line at least thirty-six inches above the mattress, though taller reads more dramatic in rooms with standard eight-foot ceilings. Find the center point of your width measurement and hang a plumb line or a weighted string from the top tape mark to the bottom. Paint one half, mirror it, and your arch stays symmetric. A small quart of paint covers one generous arch with two coats.
Fastening is a non-issue here; nothing hangs on the painted shape itself. Reversibility is total: repaint the original wall color whenever you like. Cleanability is excellent in satin or eggshell. If a full arch feels like too much commitment, paint the same shape as a tall rounded rectangle instead. It takes half the drawing time and gives the same focal height.
2. A Contrasting Border Detail
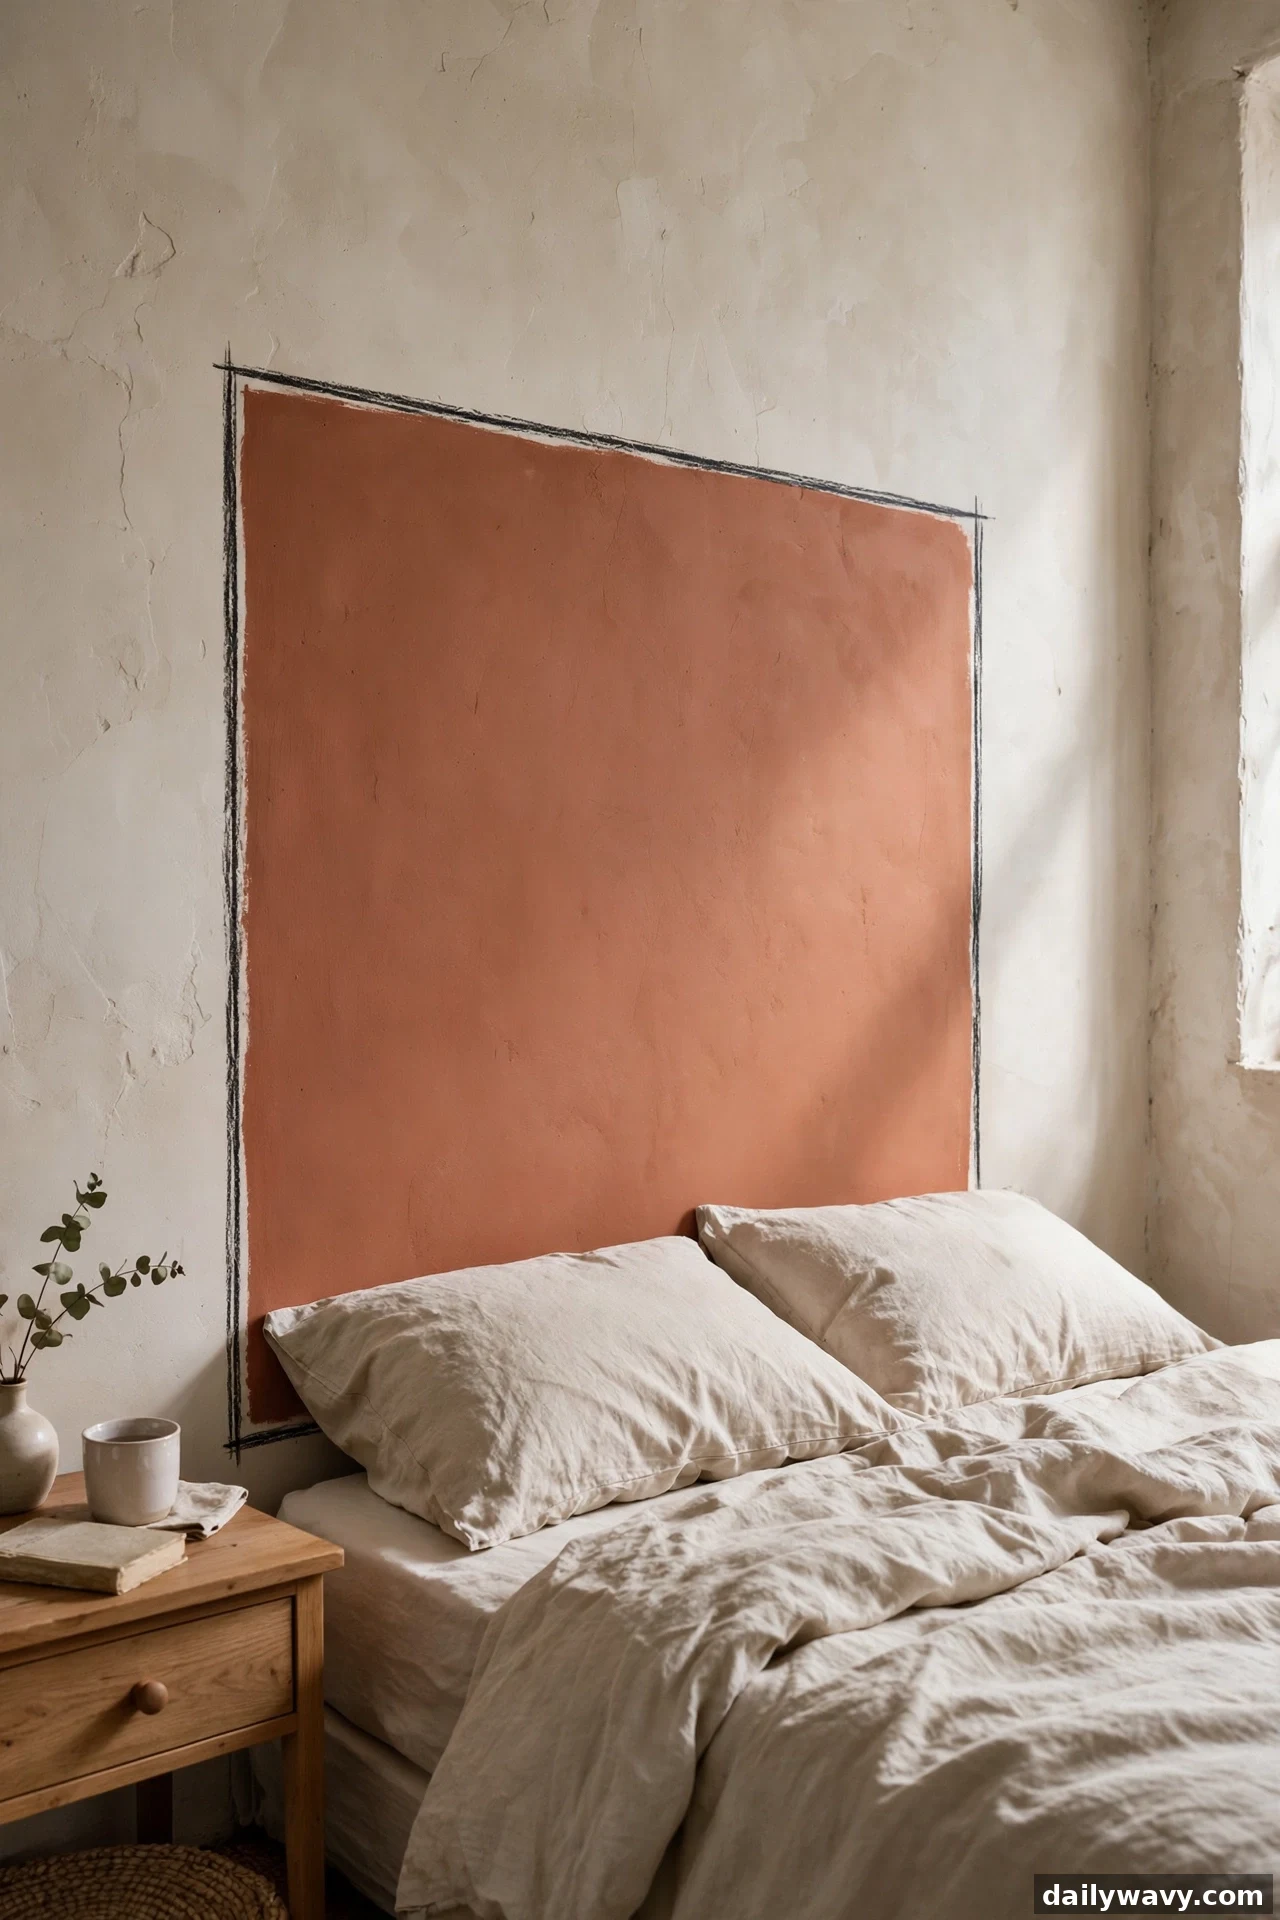
Instead of painting a solid block, outline your headboard zone with a contrasting border. The photograph shows a warm clay field bordered by a thin charcoal line, drawn like a picture frame directly on the plaster. The border makes even a simple rectangle look considered, and it uses far less paint than a full field.
Start with the inner field in your main color and let it cure. Then lay two parallel strips of painter’s tape, one and a half to two inches apart, to form the border path. Fill the gap with the contrasting color using a small angled brush, peel the tape while the paint is still slightly tacky, and touch up any bleed with the field color. The trick to crisp lines is pressing the tape edges firmly with a credit card or a putty knife before painting. A half-pint of the border color is plenty.
This treatment is fully reversible with one coat of the wall color. Cleanability matches whatever sheen you choose. If freehand lines worry you, use a yardstick and a level to pencil the border first, or choose a soft color pair with low contrast so tiny wobbles disappear.
3. A Warm Material Paired With Cool Linens
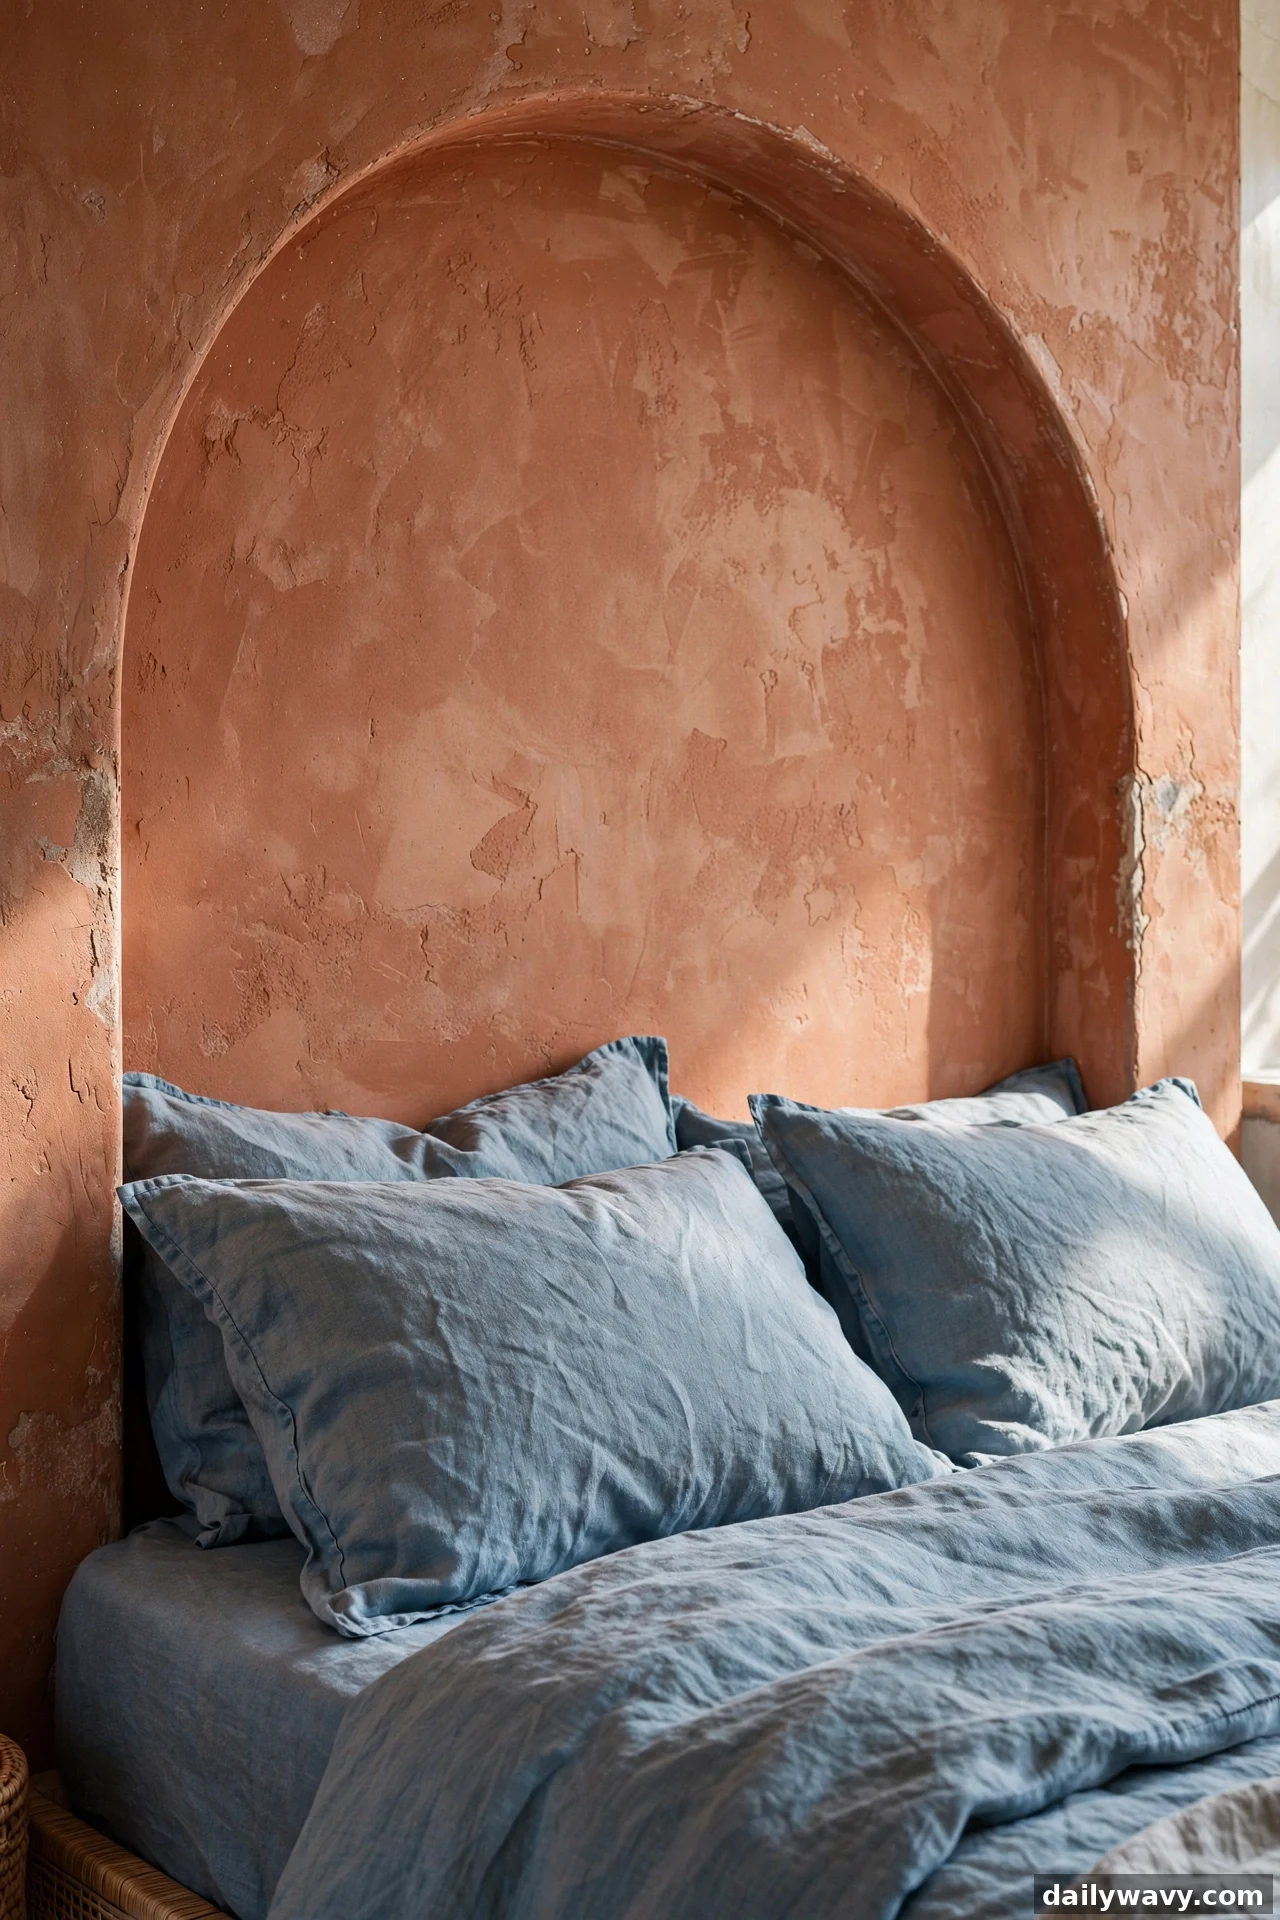
Warm wall, cool sheets. This idea pairs a sun-baked terracotta or ochre painted shape with crisp blue-gray or sage bedding, and the temperature contrast makes both look richer. The close-up photograph shows the chalky matte warmth of the painted plaster against cool stonewashed linen, a combination that feels collected rather than matched.
Choose your warm tone first, then pull the linen color from its opposite side of the color wheel: warm terracotta loves cool gray-blue, warm ochre loves muted sage. Keep the painted shape modest, roughly the width of the bed plus six inches per side, so the pairing reads as an accent rather than a room takeover. Two coats of a quality eggshell paint give the flat, even warmth this idea depends on.
Nothing here needs fastening, and the paint reverses with a single recoat. For cleanability, note that warm mid-tone paints hide dust and scuffs better than pale ones, which is genuinely useful behind a bed that gets used daily. A lower-effort version: paint only the rectangle behind the headboard pillows and let the bedside walls stay plain.
4. A Monochrome Bed-Wall Composition
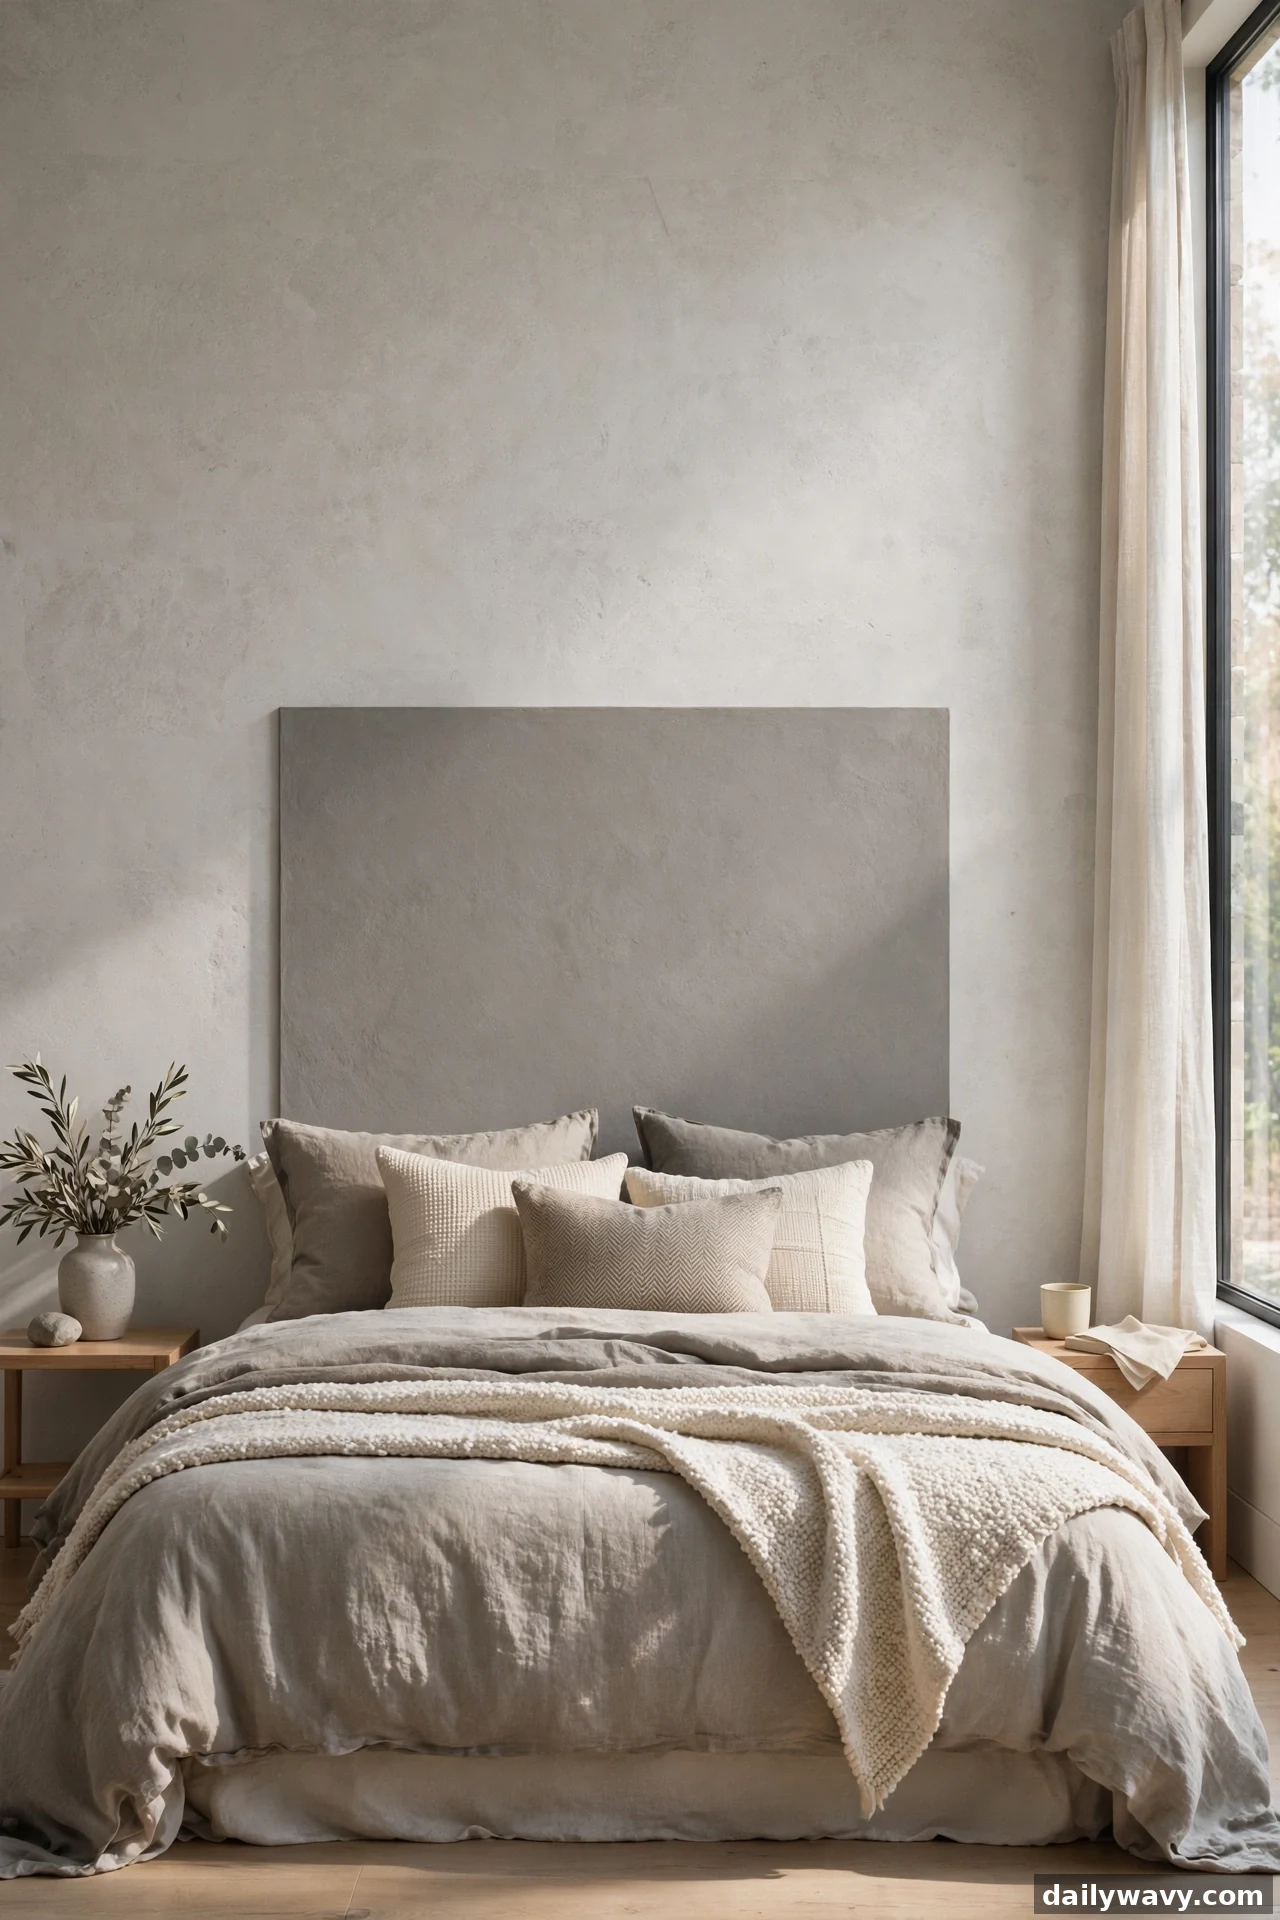
One color, three shades. A monochrome bed wall layers the wall, the painted headboard shape, and the bedding in graduated tones of a single hue, like the warm gray stone palette in the straight-on photograph. The result is calm and gallery-like, and it is the easiest color decision you will ever make because there is only one color to get wrong.
Pick your base from the existing room: the wall color you already have is usually the lightest tone. Go one shade deeper on the paint strip for the headboard shape and two shades deeper, or one shade lighter, for textiles. Paint chips from the same strip guarantee the relationship works. Measure the painted zone to frame the bed plus both nightstands if you want the full-width look in the photo, or keep it bed-width only for a quieter version.
Reversibility is straightforward repainting. Cleanability favors eggshell throughout. The one real risk is flatness, so vary your textures deliberately: a smooth painted shape against nubby boucle or waffle-weave bedding keeps monochrome from reading as one big smudge.
5. A Horizontal Line Connecting Bedside Zones
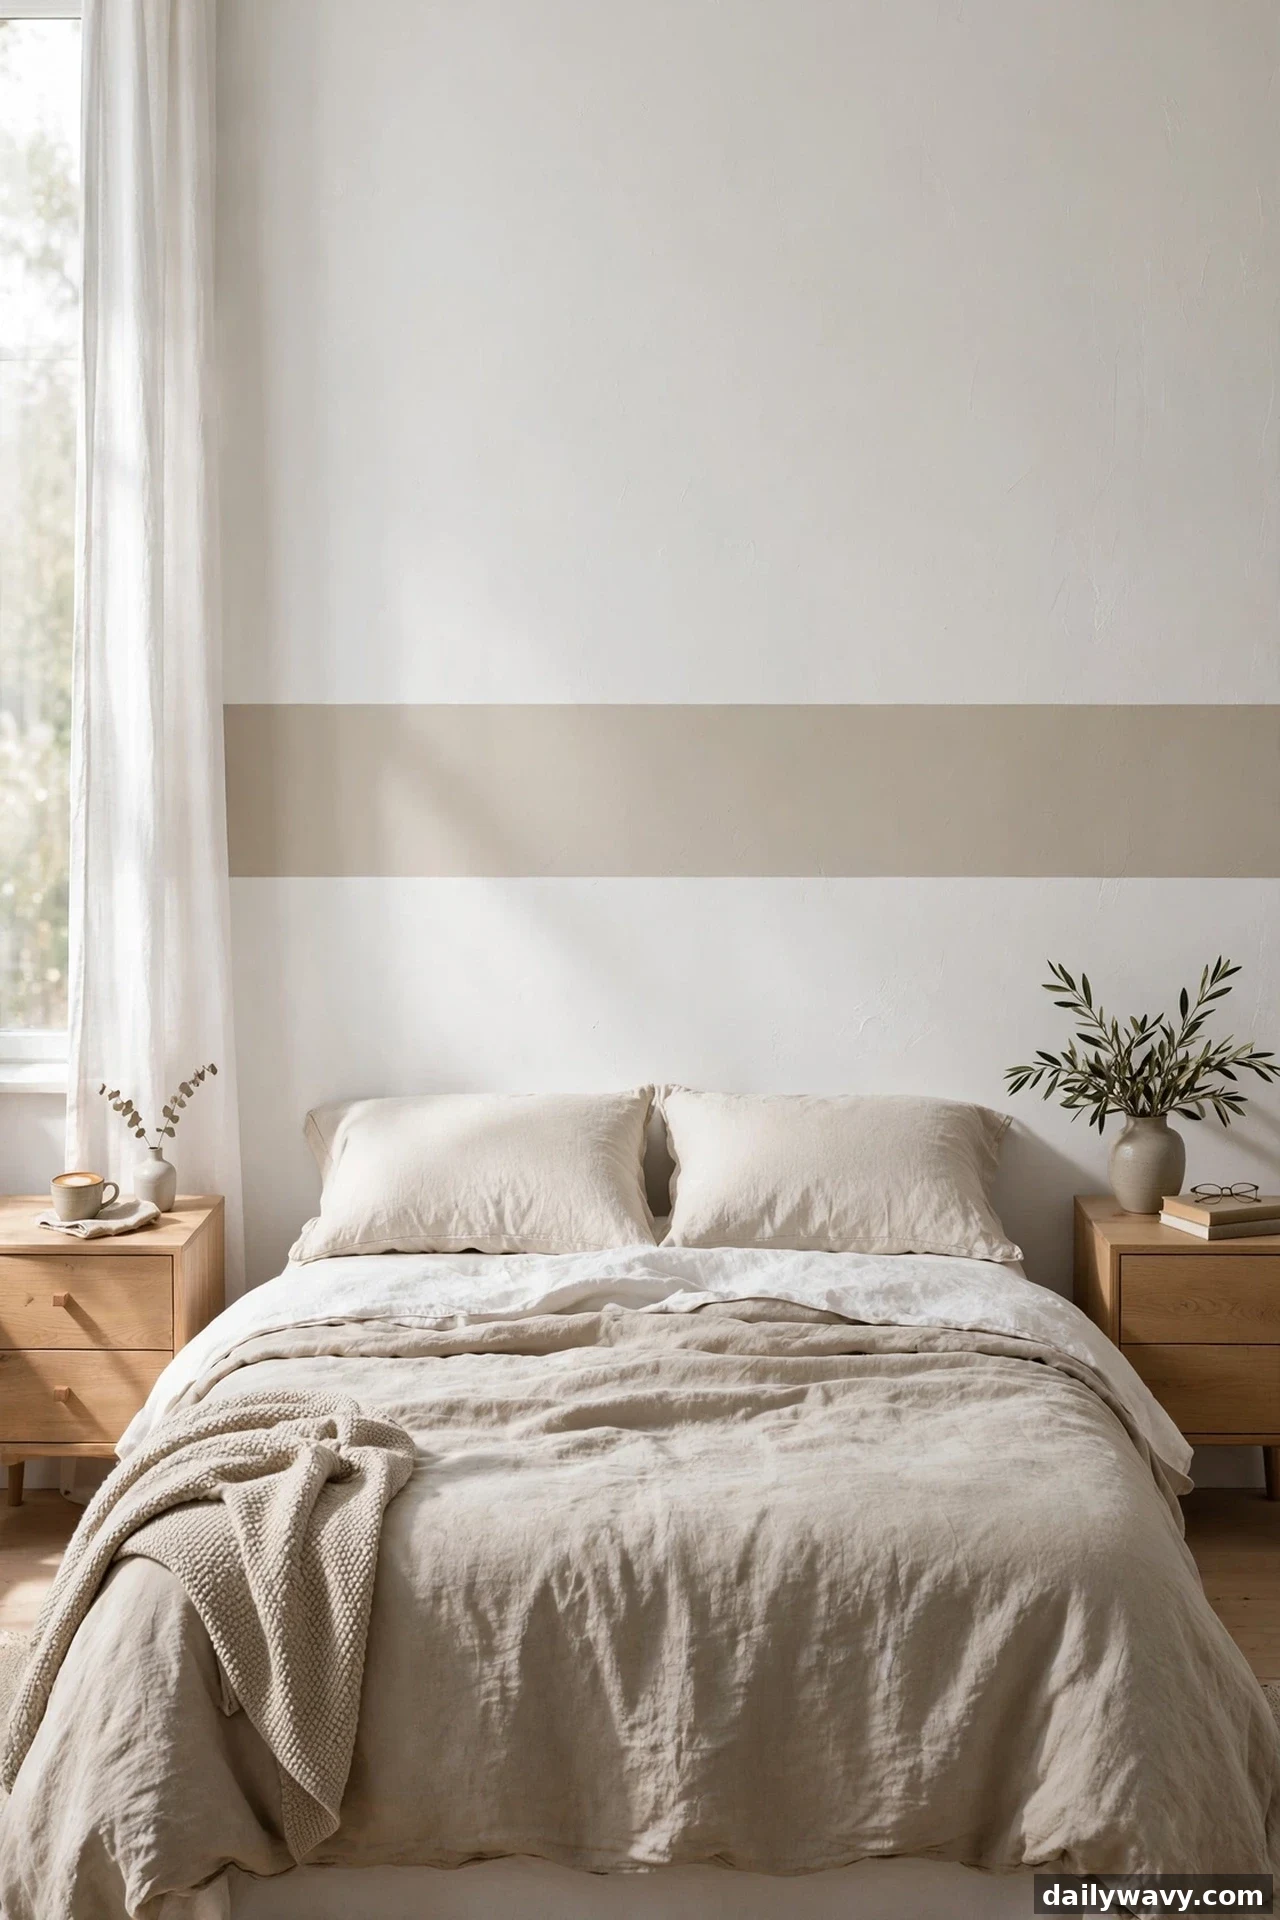
A single horizontal band painted across the bed wall ties the two nightstands into one composition. In the wide photograph the band sits at about pillow height, running wall to wall in a soft greige while the wall above and below stays white. It reads as a modern dado rail and gives the whole sleeping zone a horizon line.
Measure the band height on the wall with painter’s tape first and live with it for a day. Bands between twelve and eighteen inches tall read as an intentional accent; taller bands start to look like a two-tone wall. Level the tape carefully with a long level or a laser level, because a band that slopes even slightly is visible from the doorway. Roll two coats of satin paint inside the taped lines.
This is one of the most renter-friendly painted ideas because a single band disappears under one or two coats of the original color. Cleanability is excellent, and the low position means the band is the easiest painted shape to wipe down. If wall-to-wall feels too bold, run the band just across the bed width plus the nightstands.
6. A Removable Decorative Treatment

For renters and the commitment-shy, a removable treatment gives you the painted headboard look with zero wall alteration. The photographed room uses a large peel-and-stick arch decal in a limewash-look finish behind the bed, and from the doorway it reads as real paint. High-quality removable wallpaper and wall decals have come far enough that the trick holds up at arm’s length.
Measure the wall and the bed carefully, then order the decal at least four inches larger than the finished shape so you have trimming margin. Apply from the top center outward with a felt squeegee, working out air bubbles as you go. The most common mistake is stretching the vinyl during application, which leaves the decal pulling back from the edges days later. Lay it flat, smooth it, and do not pull.
Fastening here means the adhesive itself, so test a small piece behind furniture for a week before committing to a full wall. Removal reverses cleanly on painted drywall in good condition, though walls with old or damaged paint can lose chips. Keep the backing paper if you ever want to move the decal to another room.
7. A Subtle Geometric Pattern
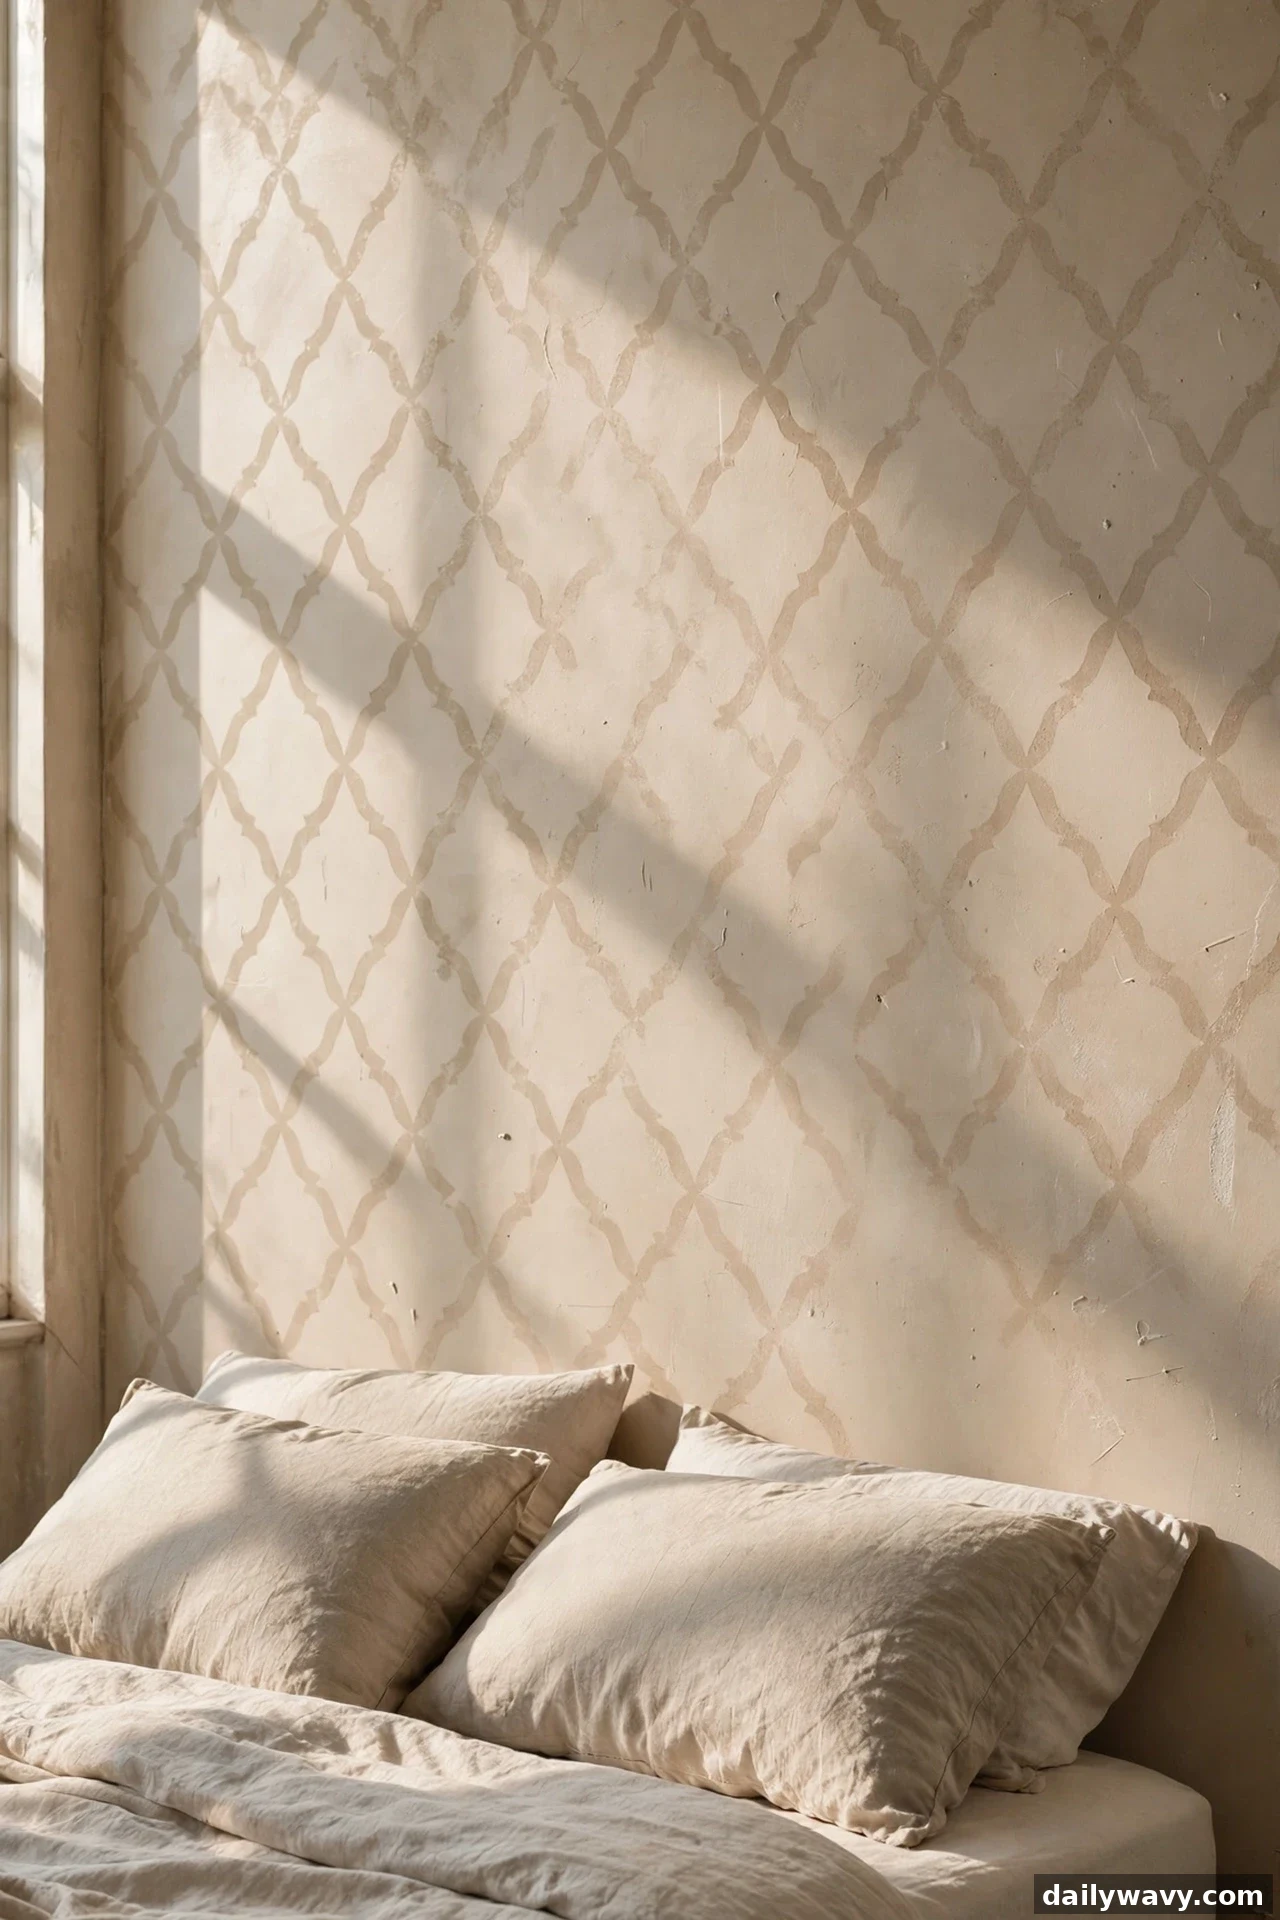
A quiet geometric pattern adds interest without noise. The three-quarter detail photograph shows a tone-on-tone trellis stenciled in the same color family as the wall, visible only when light rakes across it. It is the painted headboard equivalent of a whisper, and it suits bedrooms that already have pattern in the bedding or rug.
Stencils are the practical route here. Mark the wall in a light pencil grid following the stencil’s repeat size, start at the center top, and work outward so the pattern stays symmetric around the bed. Use a nearly dry stencil brush or a small foam roller with minimal paint; loading too much is what causes bleed under the edges. One quart of paint handles a full bed-width pattern with two light passes.
Reversibility is one coat of the wall color. Cleanability is good in eggshell, and tone-on-tone patterns hide wear better than high-contrast ones. For the lowest effort version, stencil only a border band at pillow height instead of the full shape, which takes under an hour.
8. A Single Accent Color Repeated In Cushions
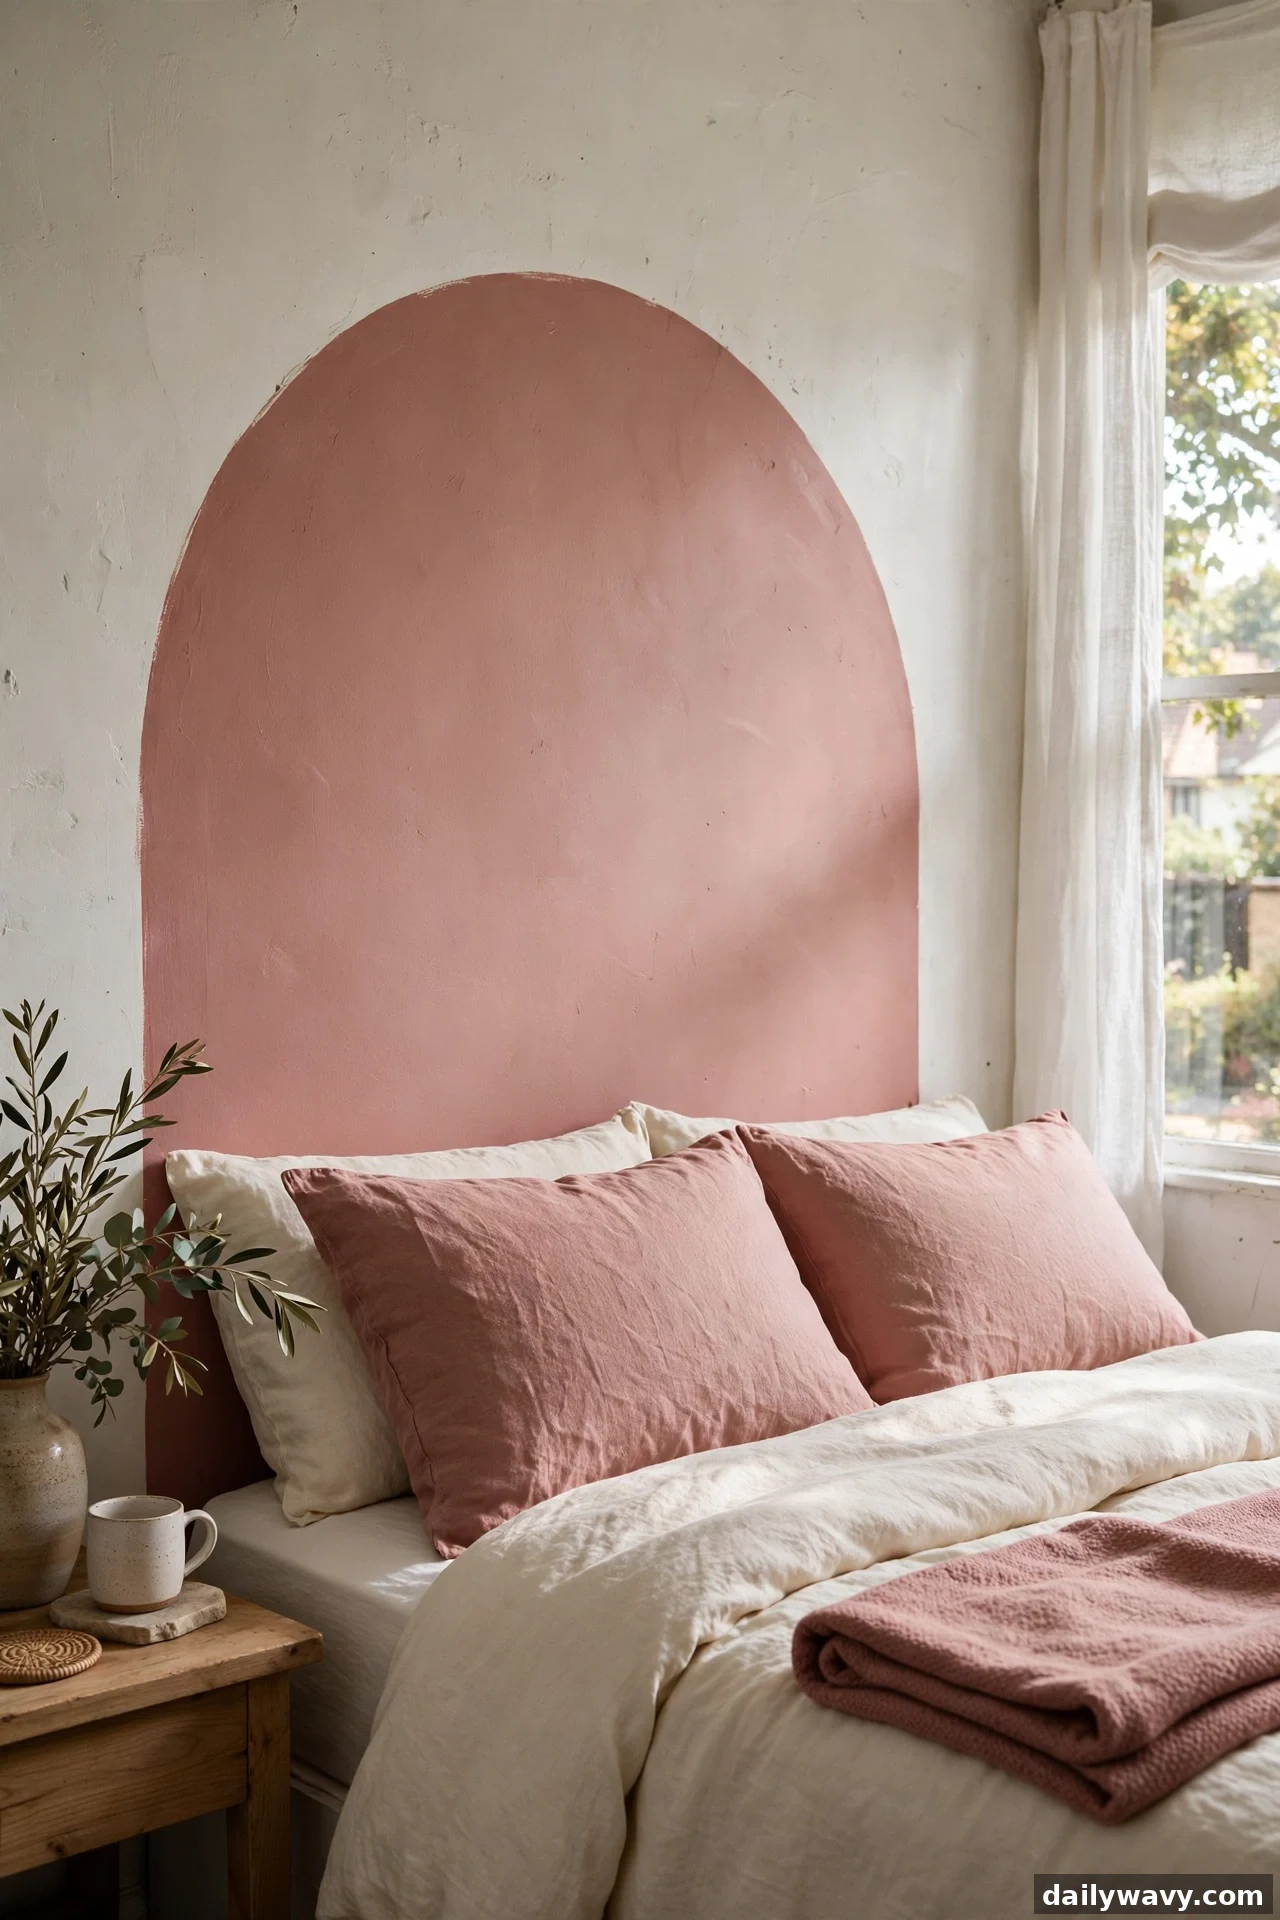
The smartest painted headboard trick is also the cheapest: repeat the wall color somewhere soft. The close detail photograph shows a dusty rose painted shape echoed in two euro shams and a folded throw, and that repetition is what makes the painted color feel chosen rather than random. Without the echo, a bold wall color can feel stranded.
Paint the headboard shape first, then shop the bedding second. Bring a dried paint chip to the store and match the cushions to the chip, not to the wet wall, since paint dries darker than it looks. You need surprisingly little fabric to close the loop: two shams and one lumbar pillow in the accent color do it. If your bedding is already patterned, pick the accent from the pattern’s secondary color instead.
The painted shape reverses with one recoat and wipes clean in satin. The cushions themselves are the reversible part, which is the point. When you tire of the color, swap the pillows and the wall treatment suddenly reads as a neutral backdrop, no repainting required.
9. A Vintage-Inspired Outline

Draw the headboard you wish you owned. A vintage-inspired outline, like the curved French silhouette in the straight-on photograph, sketches a classic bed frame directly onto the plaster with a single paint color. It is charming, inexpensive, and oddly convincing, especially in rooms with other vintage pieces.
Sketch the outline on paper first at roughly the right proportions, then transfer it to the wall with light pencil and a level. A yardstick helps with straight sections, and a piece of string pinned at the center point draws true curves. Fill the outline with two coats of your color using a brush for edges and a small roller for the field. A quart covers one bed-width outline comfortably.
Nothing here requires fastening, and the outline repaints in one coat. Cleanability is standard for the sheen you choose. If drawing freehand feels risky, project the design with a phone flashlight and a printed template in a dark room, trace it, and paint inside the lines. The result looks hand-drawn in the best way even when it is not.
10. A Softly Textured Finish
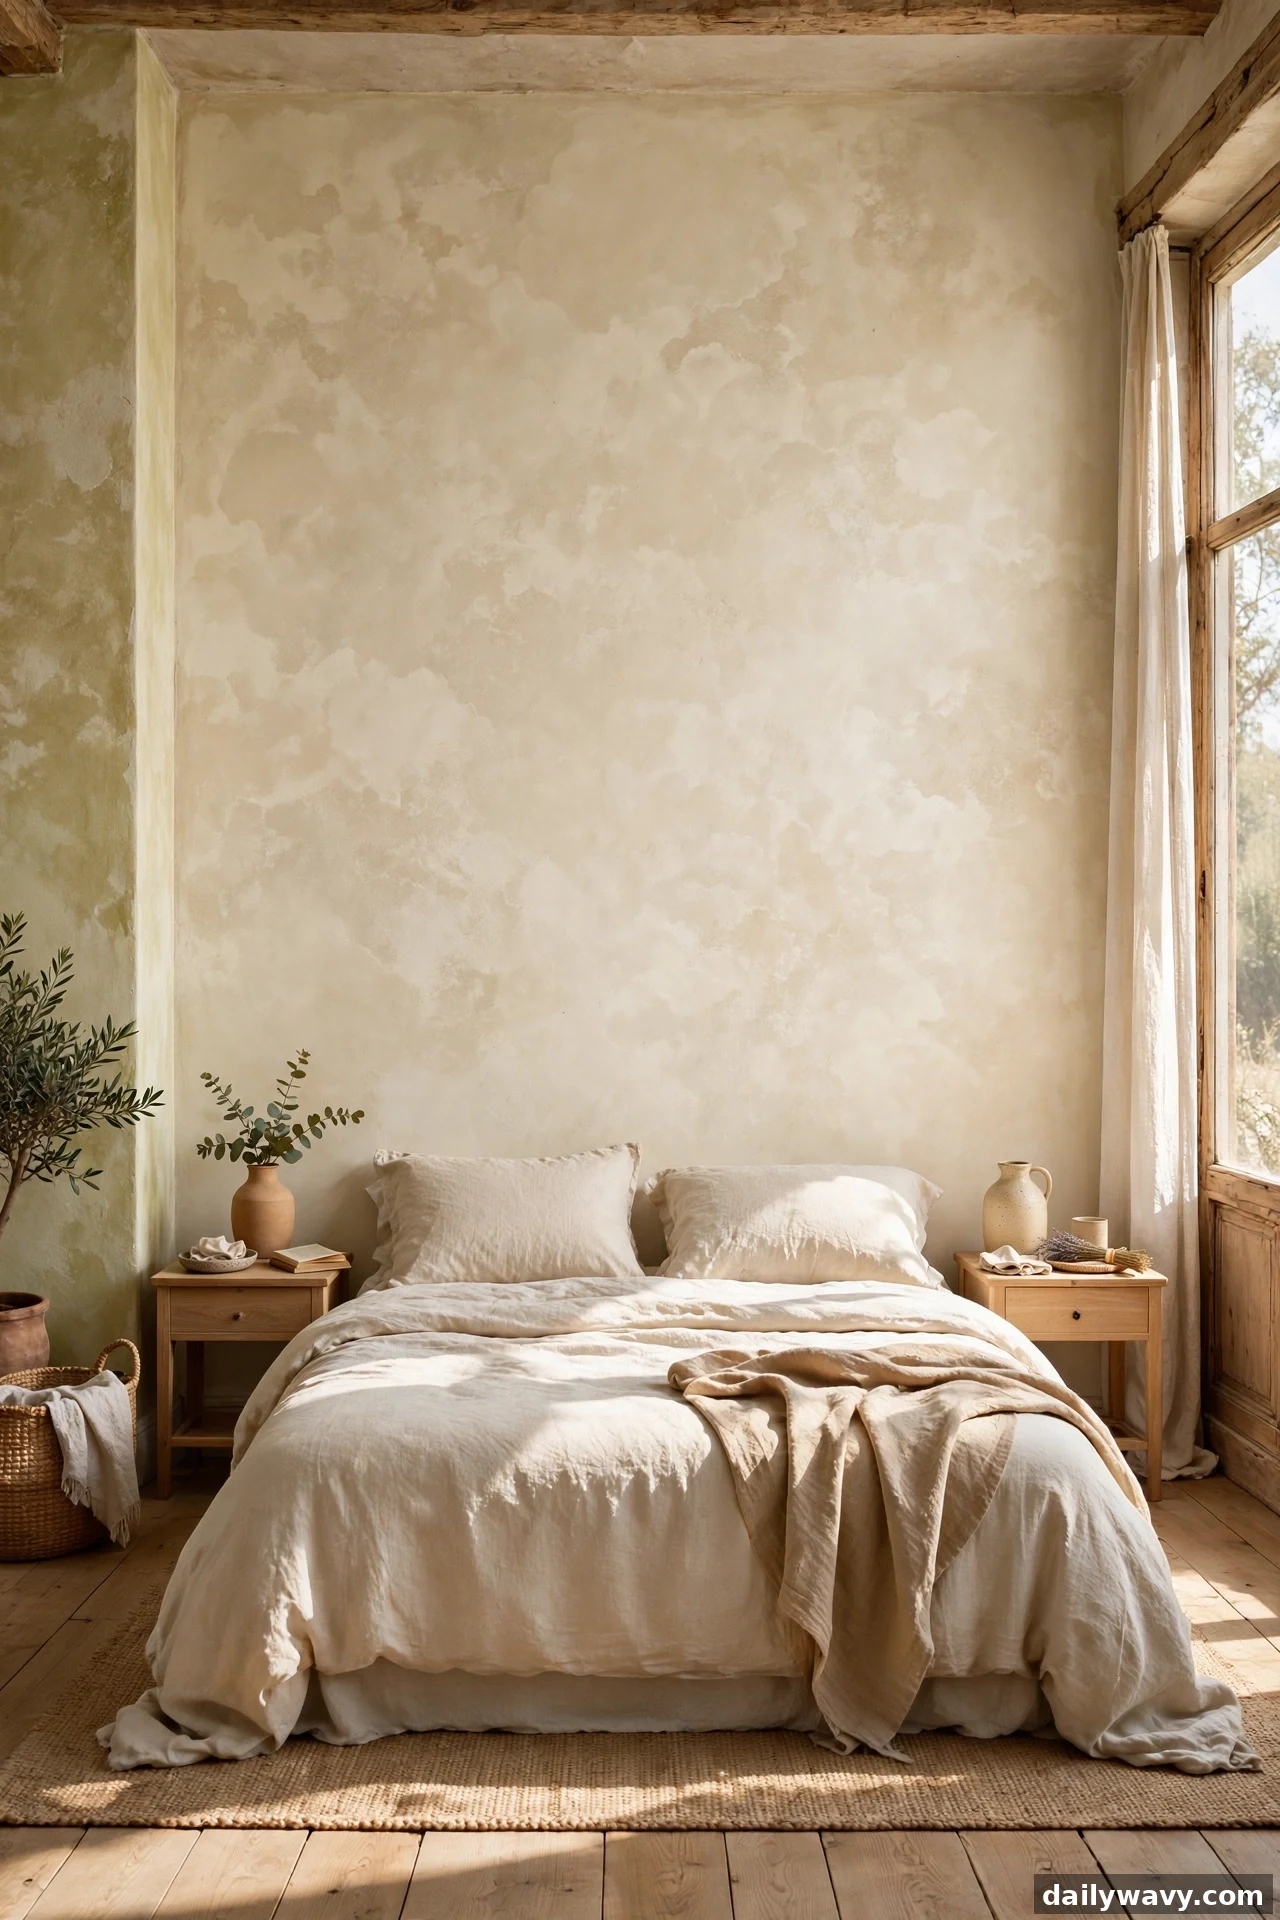
Texture does what color alone cannot. A softly textured finish, like the limewash-style wash in the wide photograph, gives the painted headboard a chalky, cloud-like surface that changes with the light. It reads as old-world and calm, and it forgives imperfect walls better than flat paint does.
Limewash-effect paints are sold ready mixed, and they apply with a large block brush in loose crisscross strokes. The uneven application is the technique, so work quickly and do not overwork any section. Two coats give full coverage. Because the finish is inherently mottled, touch-ups blend invisibly, which is a genuine advantage behind a bed that takes daily bumps.
Reversibility needs a primer coat first since textured finishes can telegraph through standard paint. Cleanability is the trade-off: matte limewash marks more easily than satin, so this idea suits adult bedrooms more than kids’ rooms. For a simpler version of the same feel, sponge a second tone of standard latex over a solid base coat with a barely damp sea sponge.
11. An Understated Frame Around The Sleeping Area
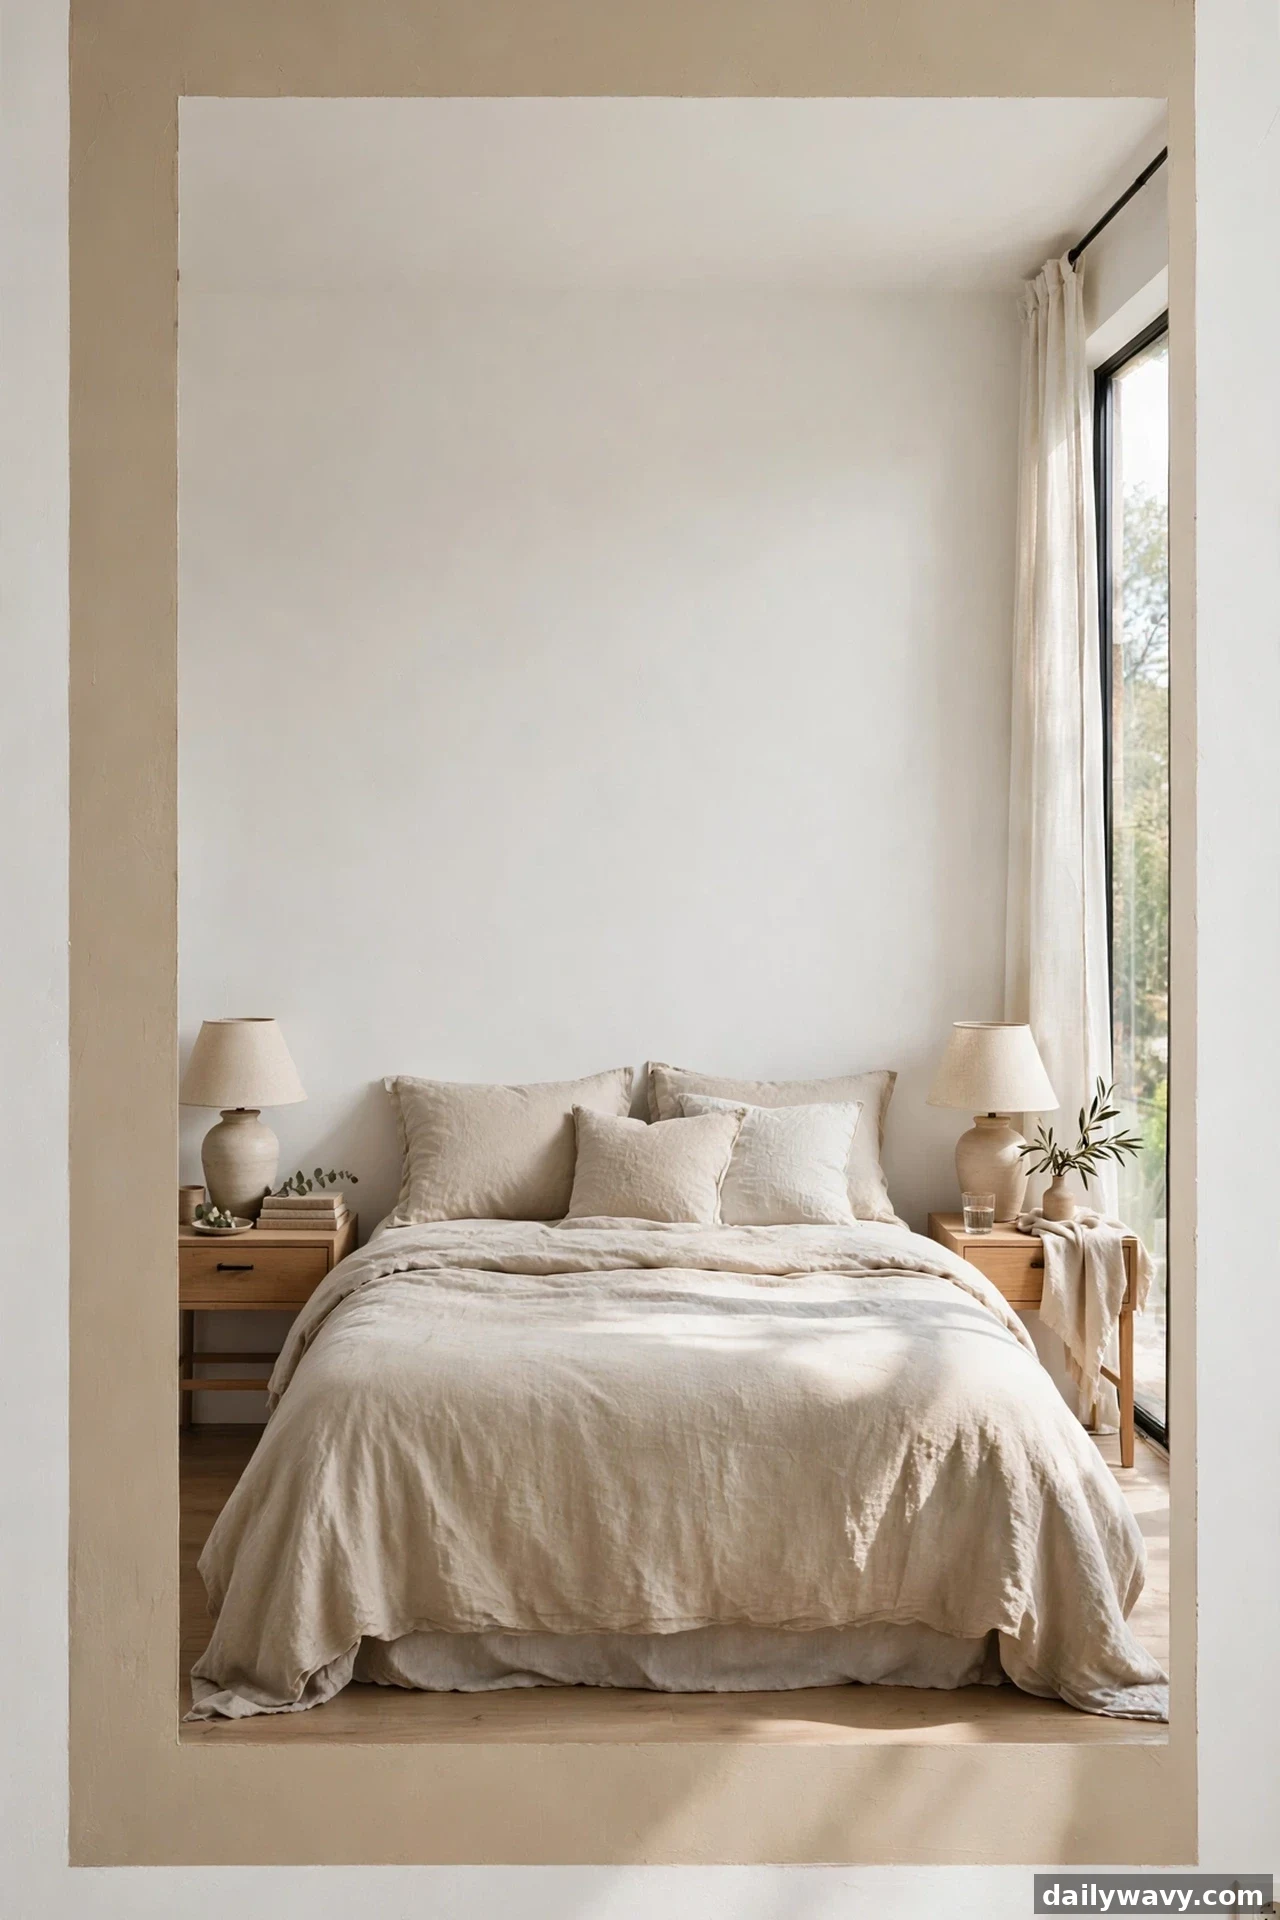
Instead of a filled shape, paint a frame. A wide painted border that outlines the entire sleeping zone, bed plus nightstands, creates the feeling of a separate room within the room. In the eye-level photograph the frame sits in warm greige against white walls, and the bed inside it looks deliberately placed even though nothing moved.
Measure the full zone width, wall to nightstand edge, and mark the frame corners with a level. Frame widths between four and eight inches read as architectural; thinner starts to look like a picture frame and thicker starts to look like a border. Tape both edges of the frame path and fill with two coats. Step back from the doorway before the second coat to check the proportions, because frames look narrower from a distance.
The frame reverses with one coat of the wall color and cleans like any painted surface. No fastening needed. This is a strong choice for long walls where a filled shape would feel heavy, since the empty middle keeps the wall feeling open.
12. A Simple Centered Form With Bedside Lighting
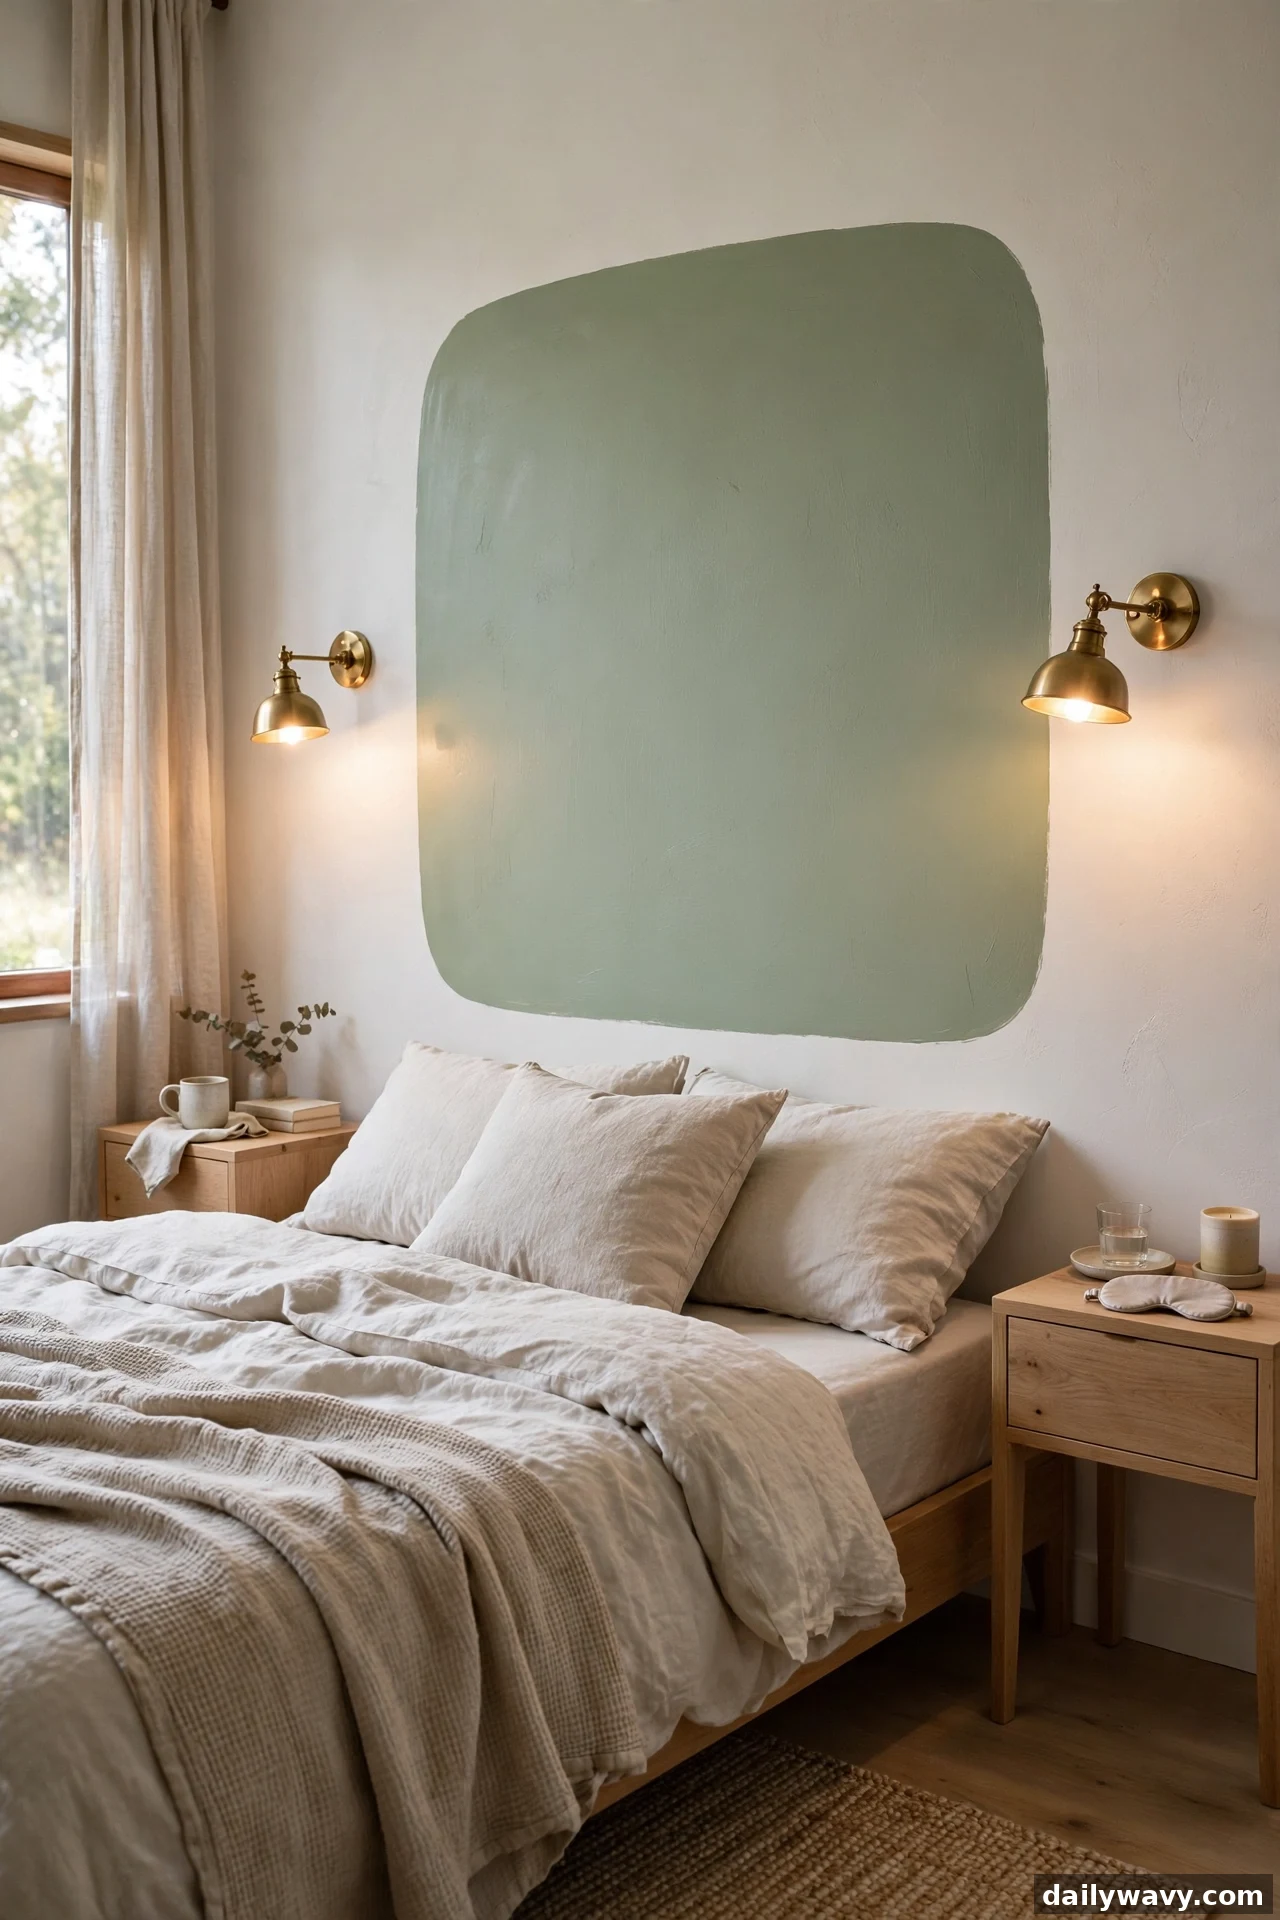
Pair a simple centered painted shape with the lighting you hang around it. The three-quarter photograph shows a soft sage rounded rectangle behind the bed, flanked by two small swing-arm sconces whose warm pools of light overlap the paint. The shape anchors the lighting, and the lighting makes the shape glow at night. Neither would look half as good alone.
Paint the centered form first: bed width plus six inches per side, top edge at least thirty inches above the mattress. Then mount the sconces so their lowest point sits just outside the painted shape and roughly at seated eye level. This is the one idea where fastening matters. Plug-in sconces with cord covers avoid an electrician, but they must be anchored into studs or proper drywall anchors, never into paint and hope.
The painted form itself reverses with one recoat and wipes clean. Position the lights before you paint if possible, marking their outlines in pencil so the painted shape frames them correctly. For a lower-effort version, use matching table lamps on the nightstands instead of wall lights and keep the same centered shape.
13. A Restrained Vertical Rhythm Behind The Bed
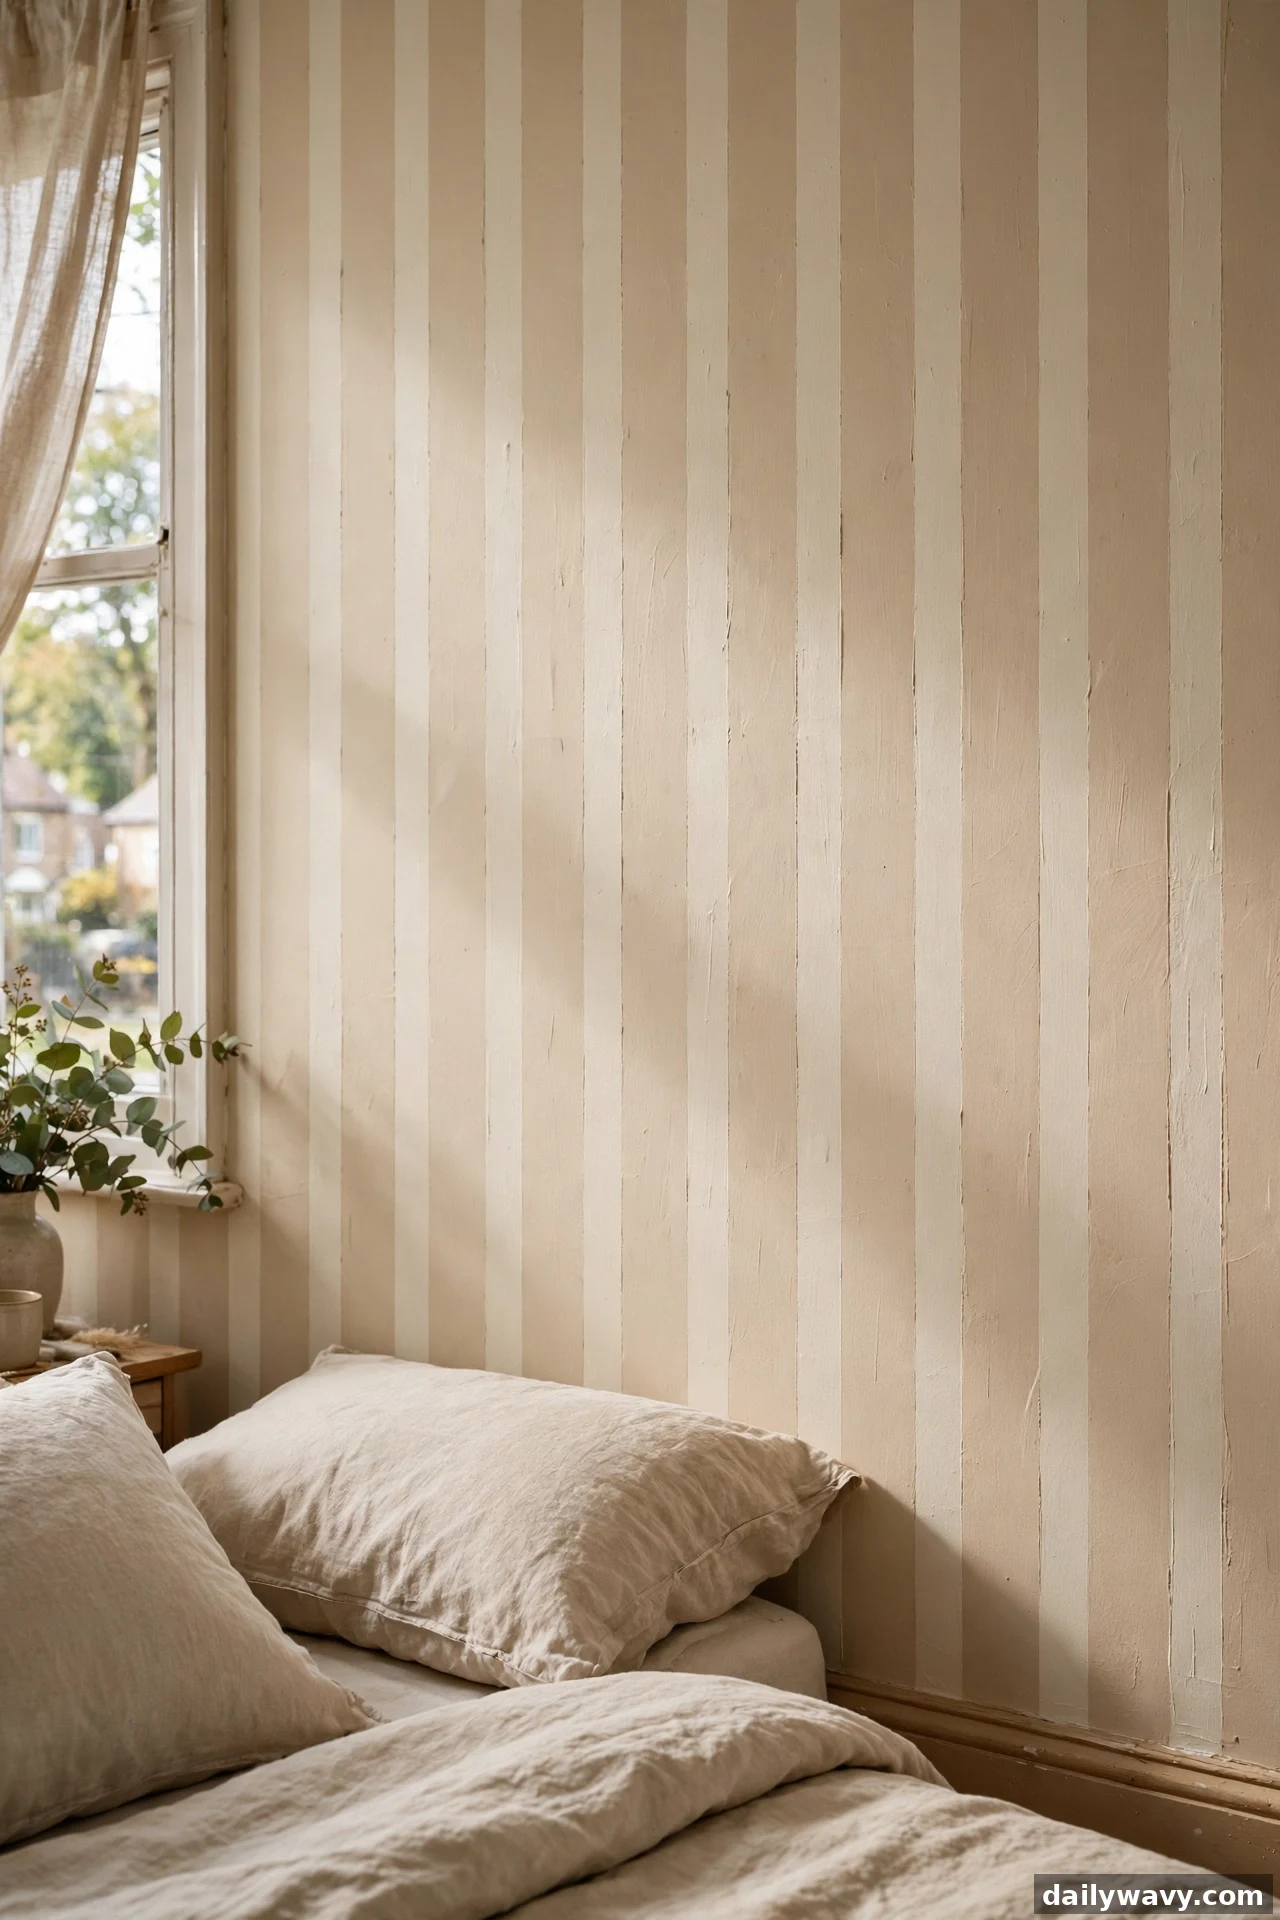
Vertical stripes do something a solid shape cannot: they add height. The close detail photograph shows slim painted bands in two warm neutrals running floor to nearly ceiling behind the bed, and the room genuinely feels taller in the image. It is an old decorator trick, and it works because the eye follows the lines upward.
Mark the stripe boundaries with a long level and painter’s tape, starting from the center of the bed and working outward for symmetry. Stripe widths between four and eight inches feel current; hairline stripes read busy and very wide stripes read like separate panels. Alternate your two tones and roll each stripe with a small roller for even coverage. Two tones from the same paint strip keep the contrast restrained, which is what makes this feel calm rather than circus-like.
Reversibility is a single recoat, and cleanability is standard. This idea uses more tape and patience than the others, so budget a full afternoon. If taping eighteen stripes sounds like too much, paint just five centered stripes behind the bed and let the plain wall continue on both sides.
14. A Soft Neutral Palette With Textured Bedding
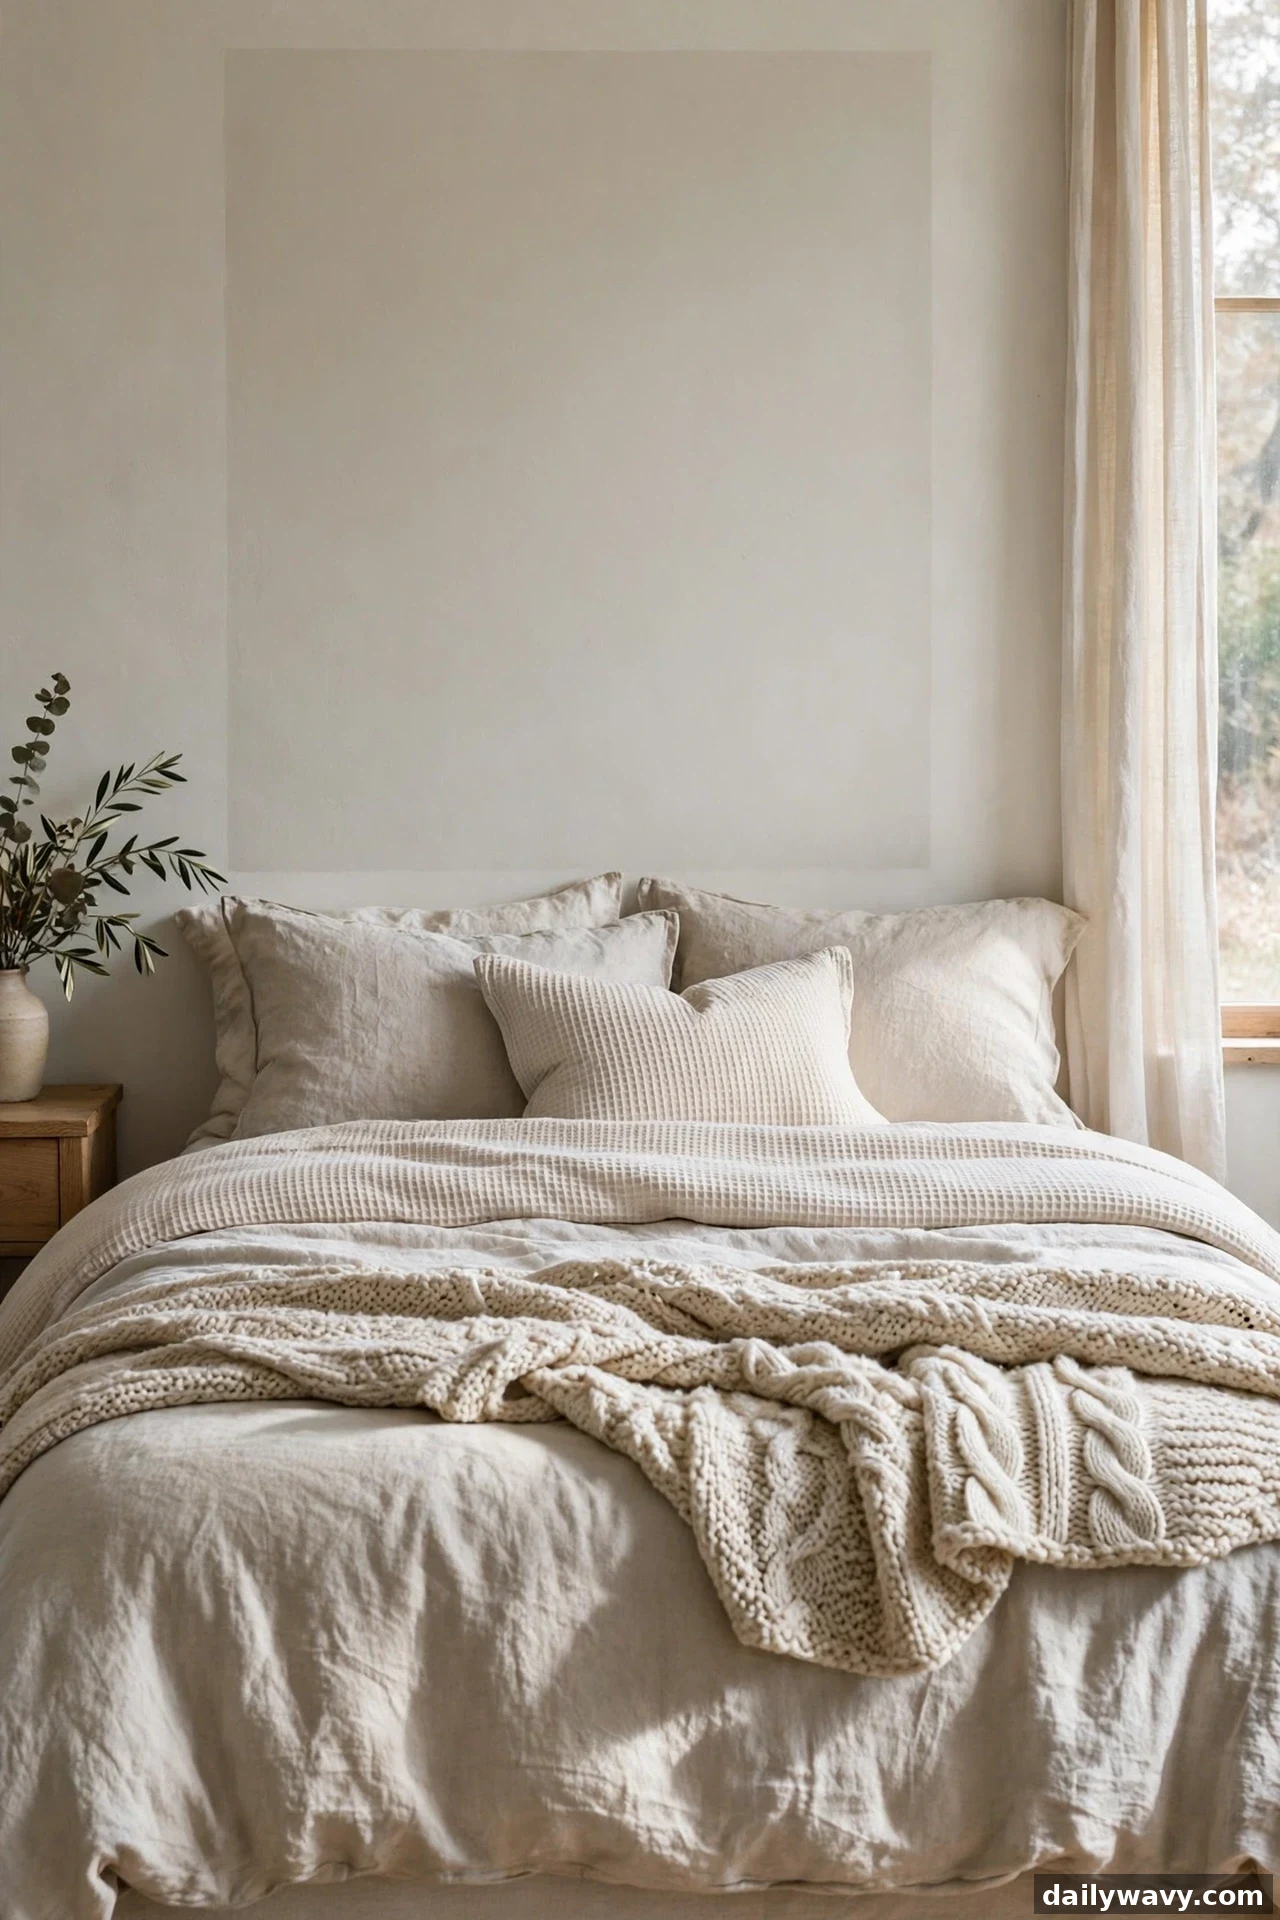
Sometimes the painted headboard should be the quietest thing in the room. This idea keeps the wall treatment in soft greige or warm white and lets textured bedding carry the interest. The straight-on photograph shows a barely-there painted rectangle behind layers of waffle weave, linen, and a chunky knit throw. The wall shape is almost invisible until you look for it, and that is the elegance.
Choose a painted tone just two or three steps deeper than the surrounding wall. Test the color on a large board and hold it against the wall at different times of day, because near-neutrals shift dramatically between morning and lamplight. The painted shape can be simple, a clean rectangle at bed width, since the bedding does the decorating. Invest the effort you save into the textile layers: three textures minimum, one of them with visible weave.
Nothing needs fastening, reversibility is trivial, and pale neutrals in eggshell wipe clean easily. This is the safest painted headboard for a room you might redecorate soon, because it works under almost any future bedding.
15. A Darker Focal Area Framed By Light Walls
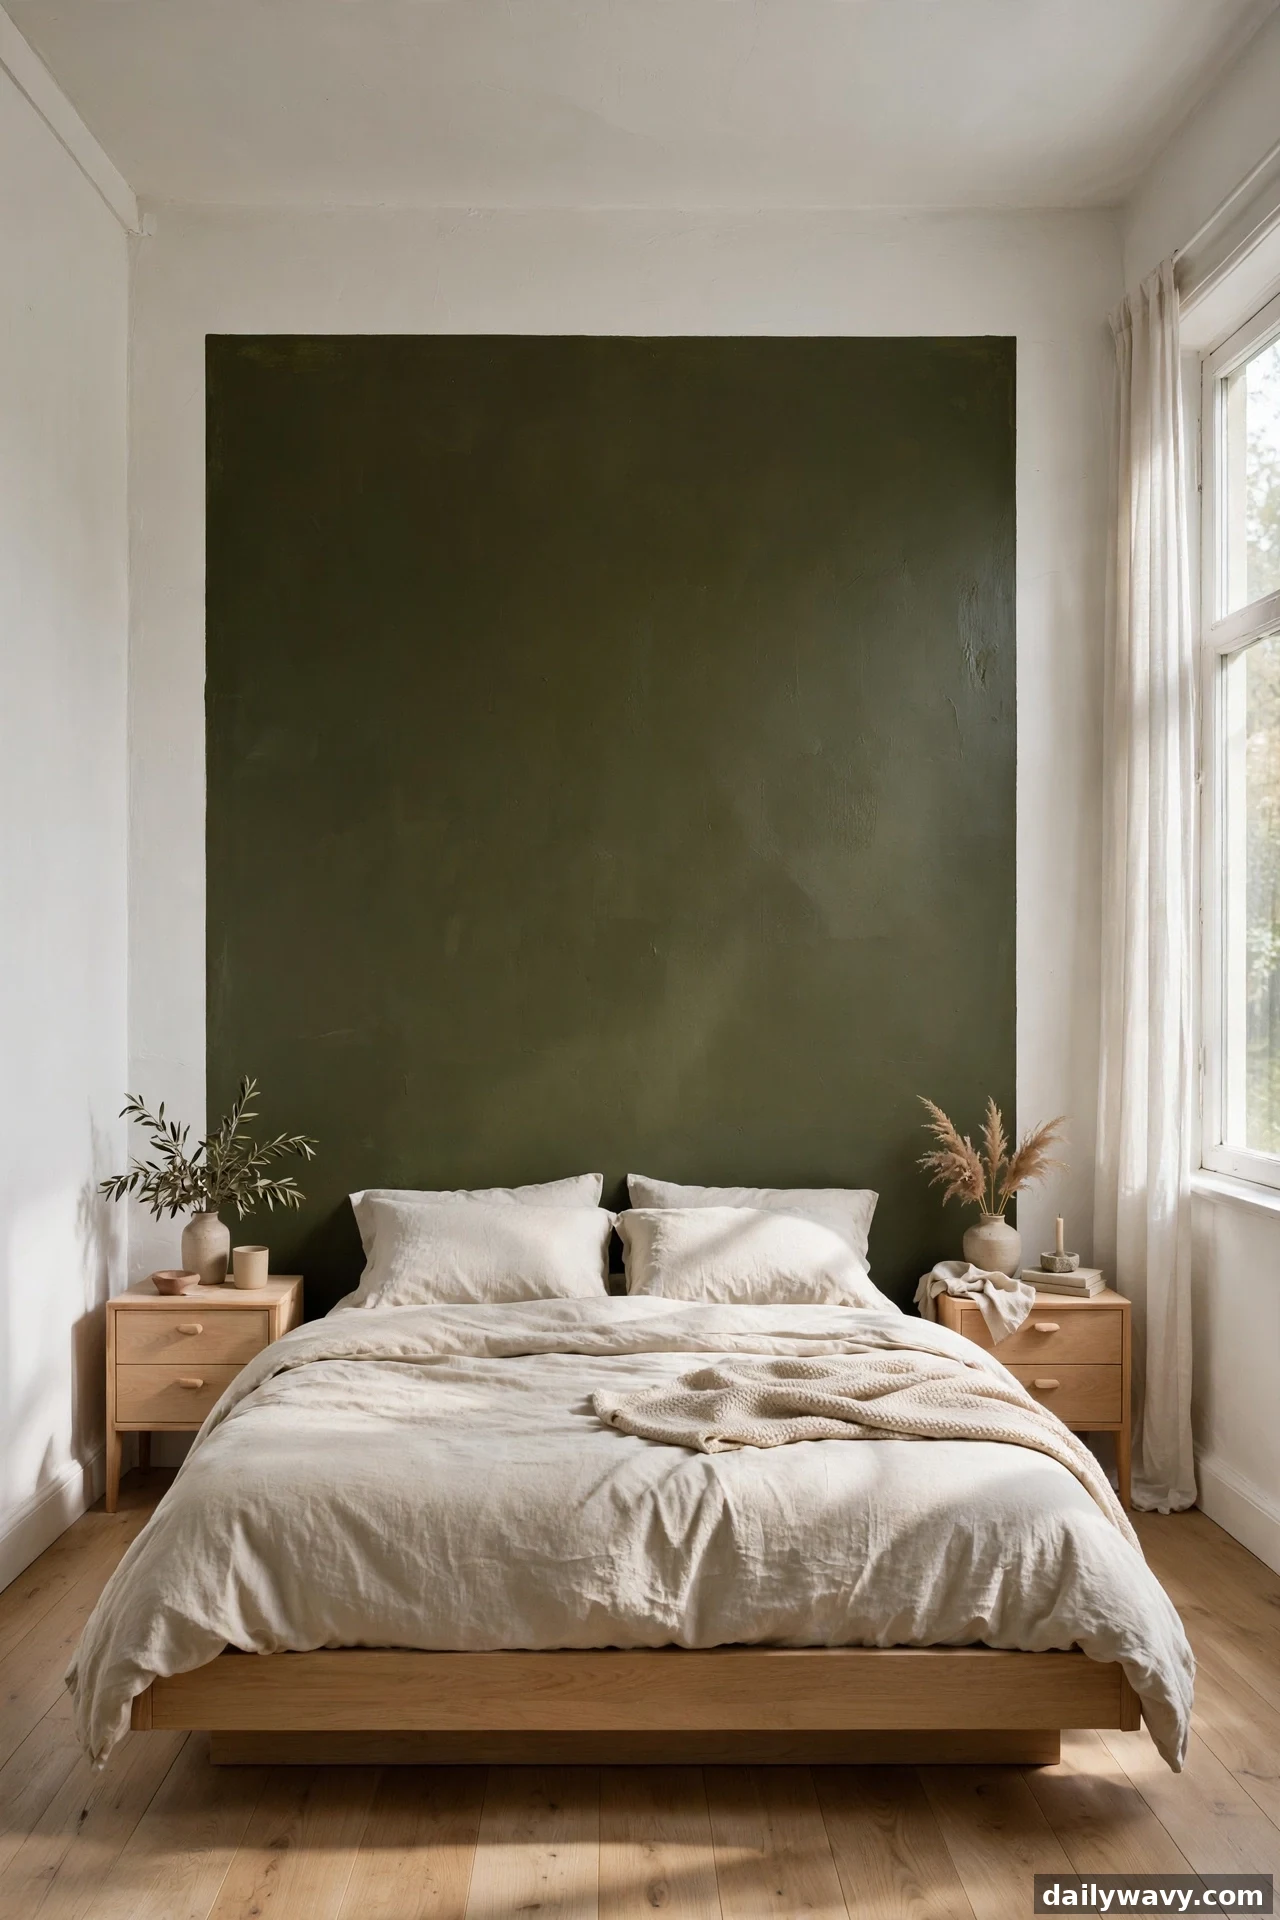
Drama without darkness everywhere. A deep, moody painted zone behind the bed, set against light walls on all sides, creates the coziest kind of contrast. In the wide photograph the deep olive shape fills the wall behind a light oak bed, and the pale surroundings keep the room feeling airy instead of cave-like. Dark paint recedes visually, so paradoxically this can make a small bedroom feel deeper.
Dark colors need a tinted primer and a full two coats, sometimes three at the edges, so buy more paint than you think you need. Cut in carefully with a brush because dark edges against a light wall show every wobble. A satin sheen keeps the dark color from looking flat and makes it wipeable. Keep the dark zone to the bed wall only; carrying it around corners changes the effect from focal to enveloping.
Reversibility takes two coats of primer plus the original color, so this is the least renter-friendly idea in the guide. Compensate with confident commitment: dark painted headboards look best when the color is decisive rather than timid. Test three dark shades on the wall and live with them for two days before you choose.
16. An Asymmetric Art Arrangement Nearby
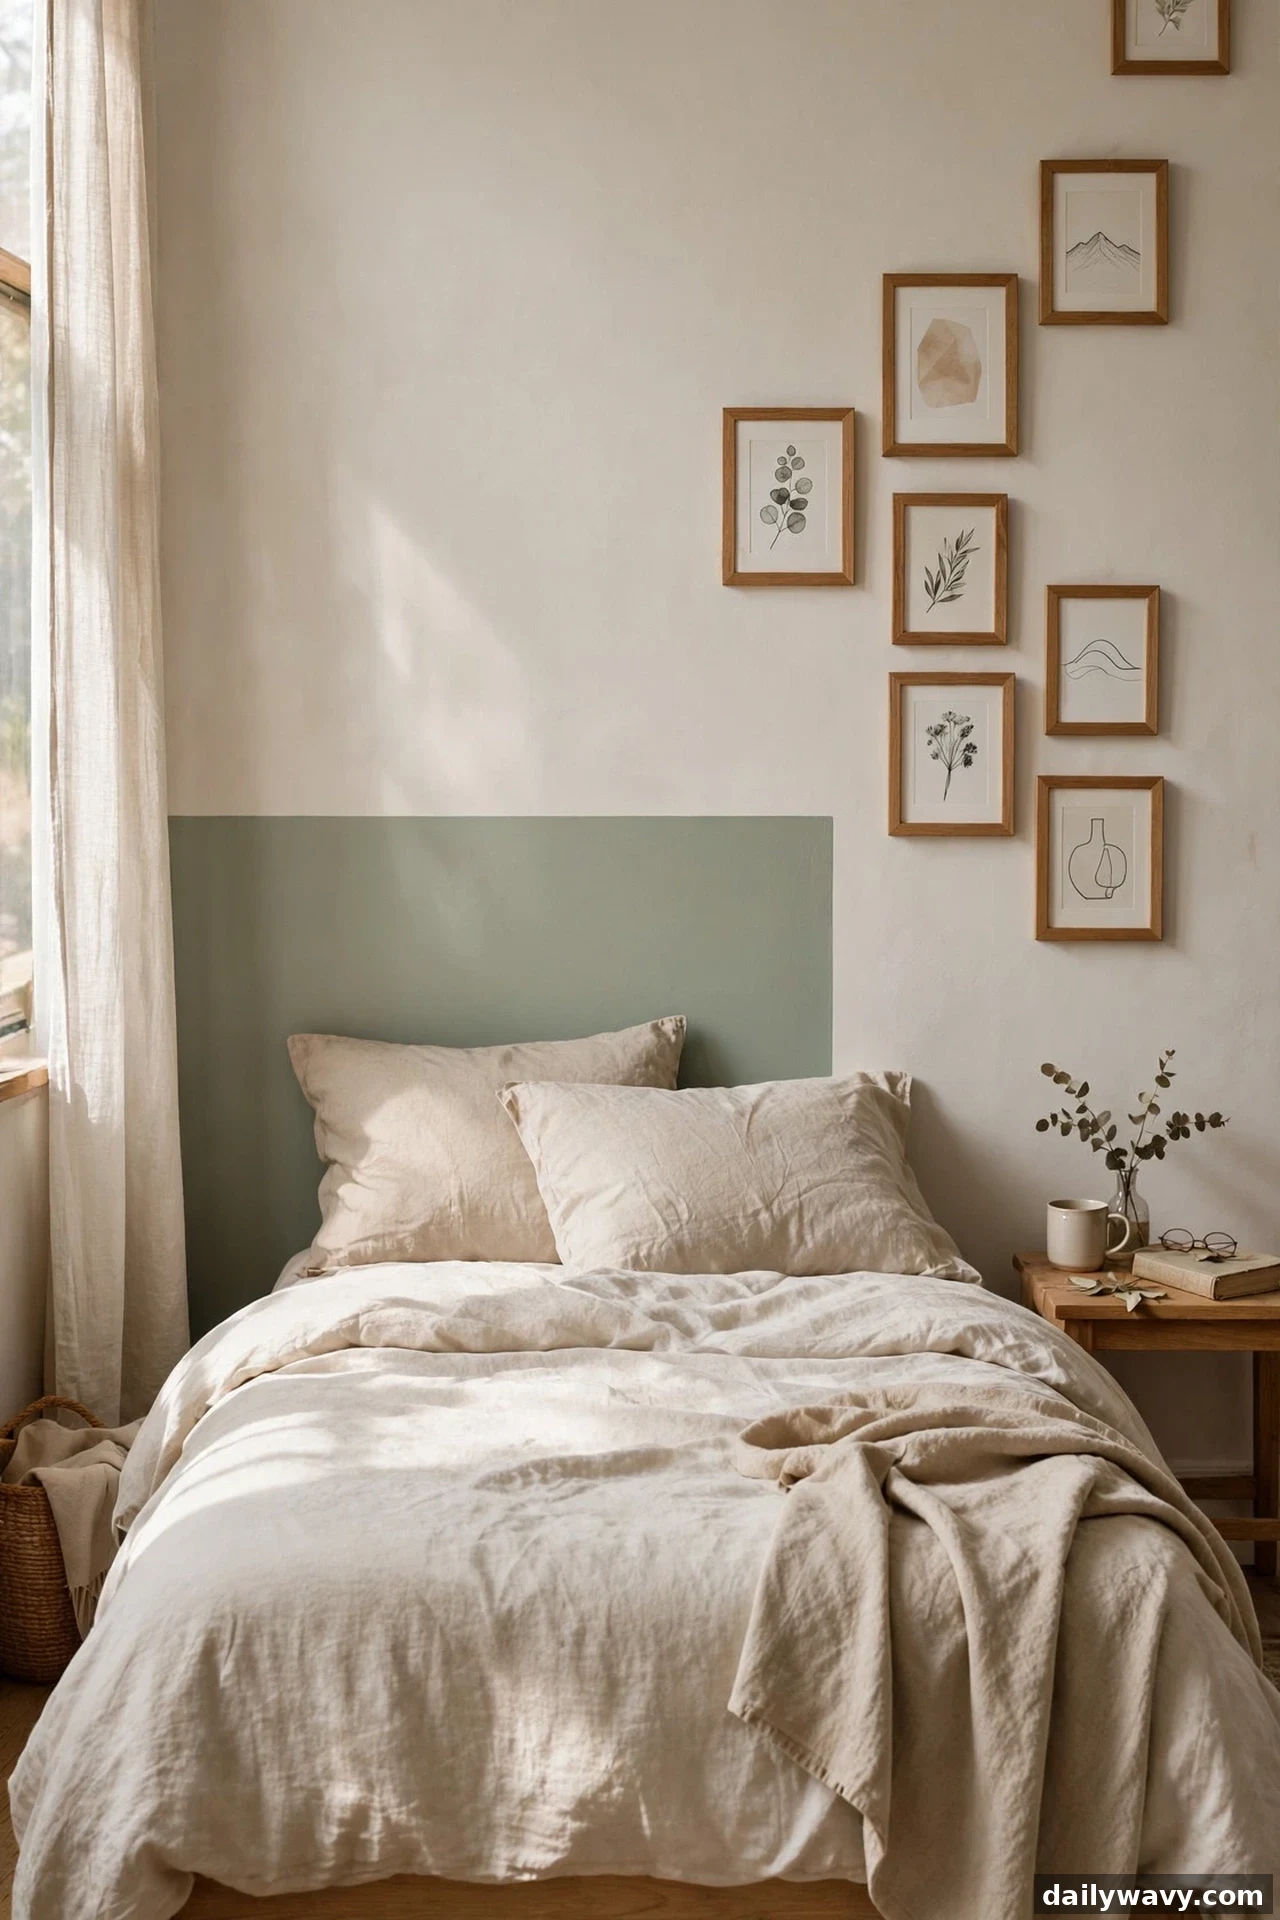
Let the painted shape be the quiet partner and give the wall’s energy to art. This idea keeps the painted headboard modest, a simple low rectangle, and builds an asymmetric gallery of small frames climbing the wall beside the bed. The eye-level photograph shows the arrangement stepping upward in a loose zigzag, and the painted rectangle underneath grounds the whole composition.
Paint the simple shape first, then arrange the frames on the floor before a single nail goes in. Trace each frame onto kraft paper, tape the paper to the wall, and live with it for a day before hanging. Vary the frame sizes but keep two things consistent: the frame finish and the mat color. That consistency is what keeps asymmetry looking curated instead of accidental.
Fastening matters here. Use picture hooks rated for each frame’s weight, and space the paper templates so no frame crowds the painted shape’s edge. The painted rectangle reverses with one recoat; the art arrangement comes down in minutes. For a lower-effort version, lean three framed prints on the nightstand against the painted shape instead of hanging anything.
17. A Pair Of Small Wall Lights
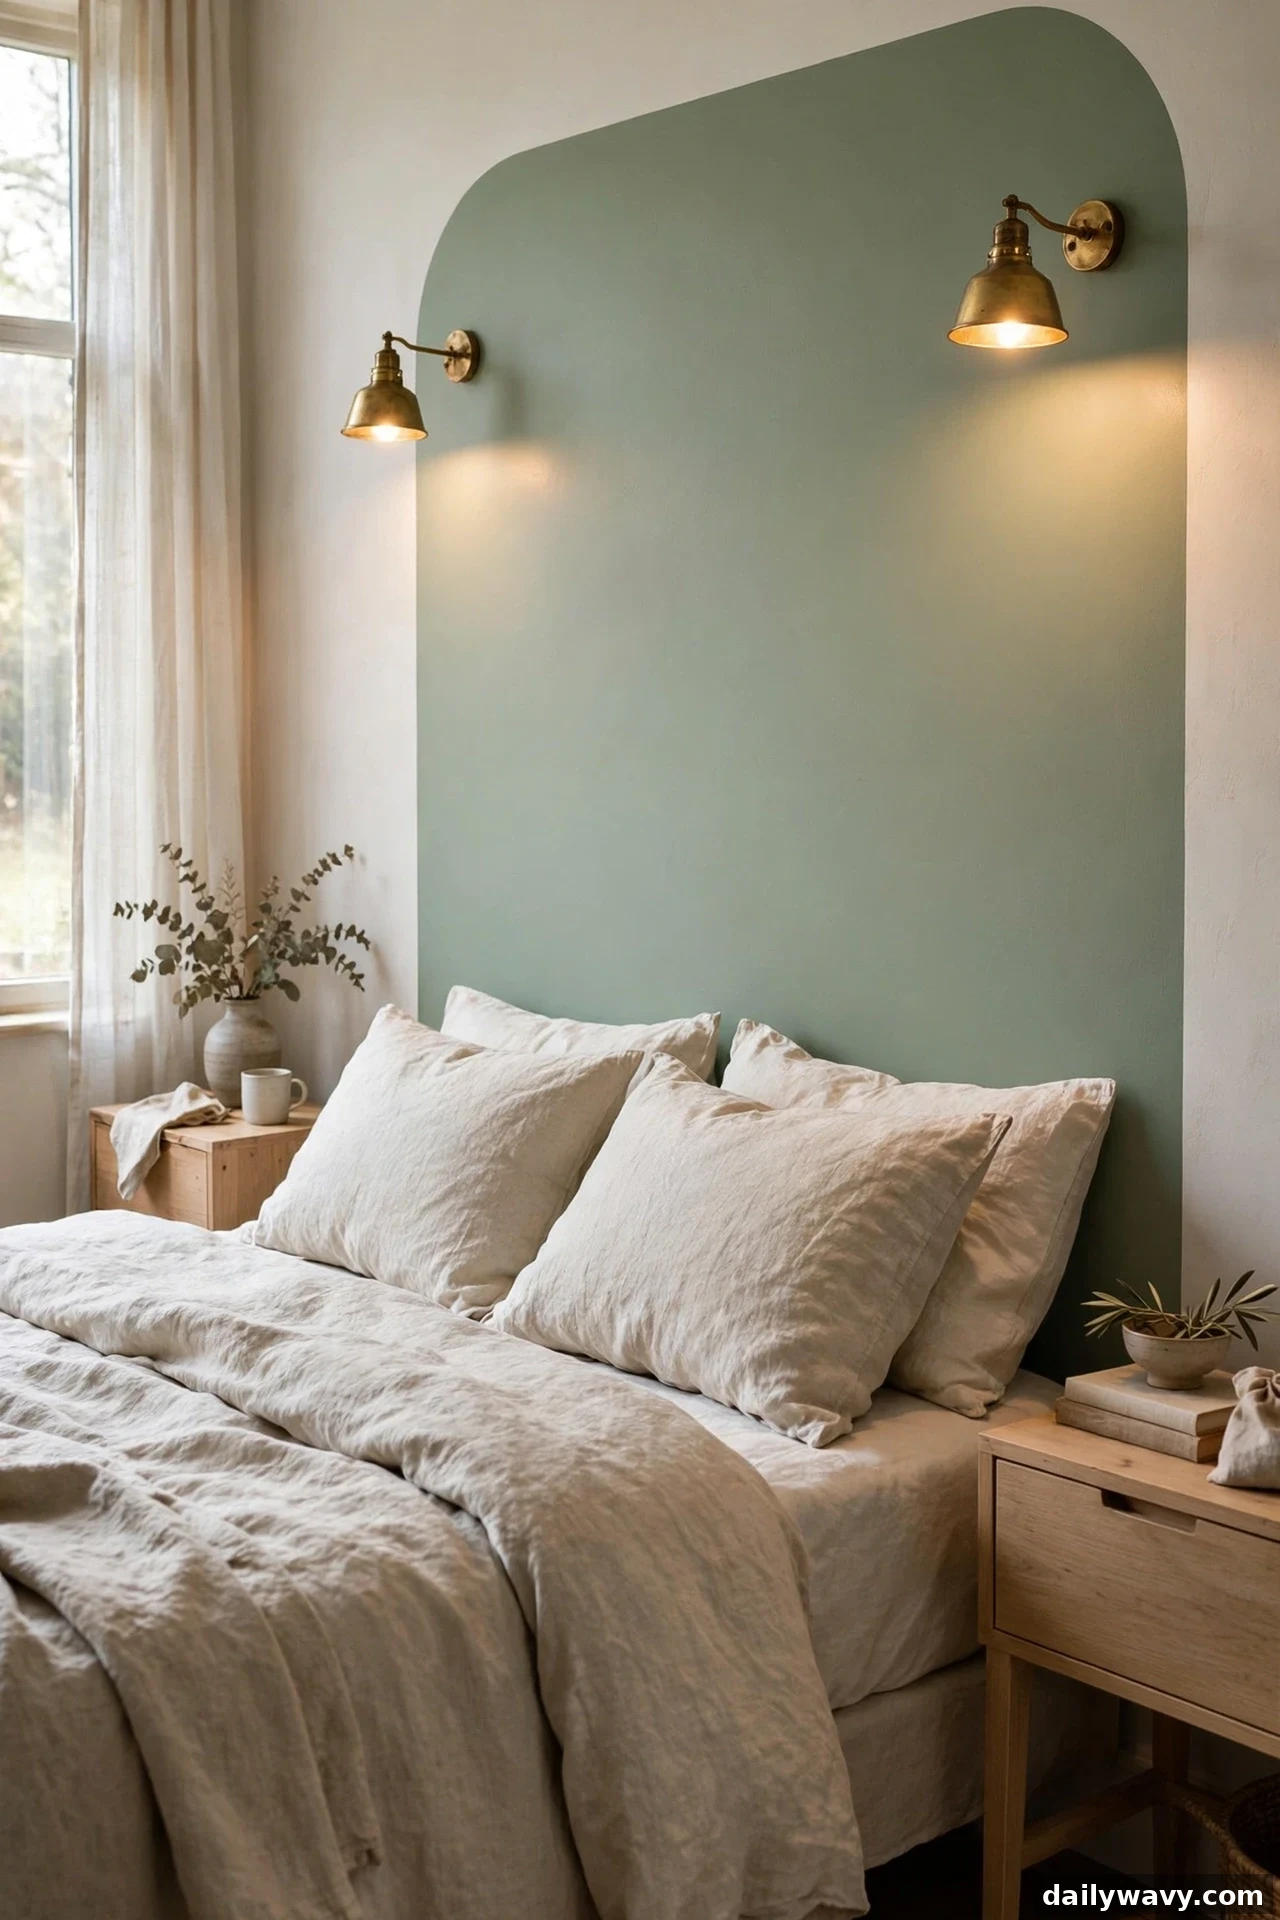
A painted headboard plus two small wall lights is the boutique hotel formula, and it works at home for the same reason it works in hotels: the light flatters the paint, and the paint gives the light somewhere to land. The three-quarter photograph shows small brass picture-style lights mounted just above a sage painted band, washing the color in warm light that makes the wall glow.
Mount the lights first and paint around them, or paint first and mark the light positions in pencil. Either way, the lights should sit six to twelve inches above the top edge of the painted shape and roughly centered over each nightstand. Plug-in fixtures with slim cord covers are the practical choice for most bedrooms; hardwired lights need an electrician and a hole in the wall you may not want. Whatever you choose, anchor into studs or use proper drywall anchors rated for the fixture weight.
The painted shape itself is fully reversible and wipes clean. Keep the fixture finish consistent with your other metals in the room. If new fixtures are not in the budget, two clip-on picture lights on a narrow shelf above the painted shape give a similar glow for far less.
18. A Narrow Ledge For One Framed Print
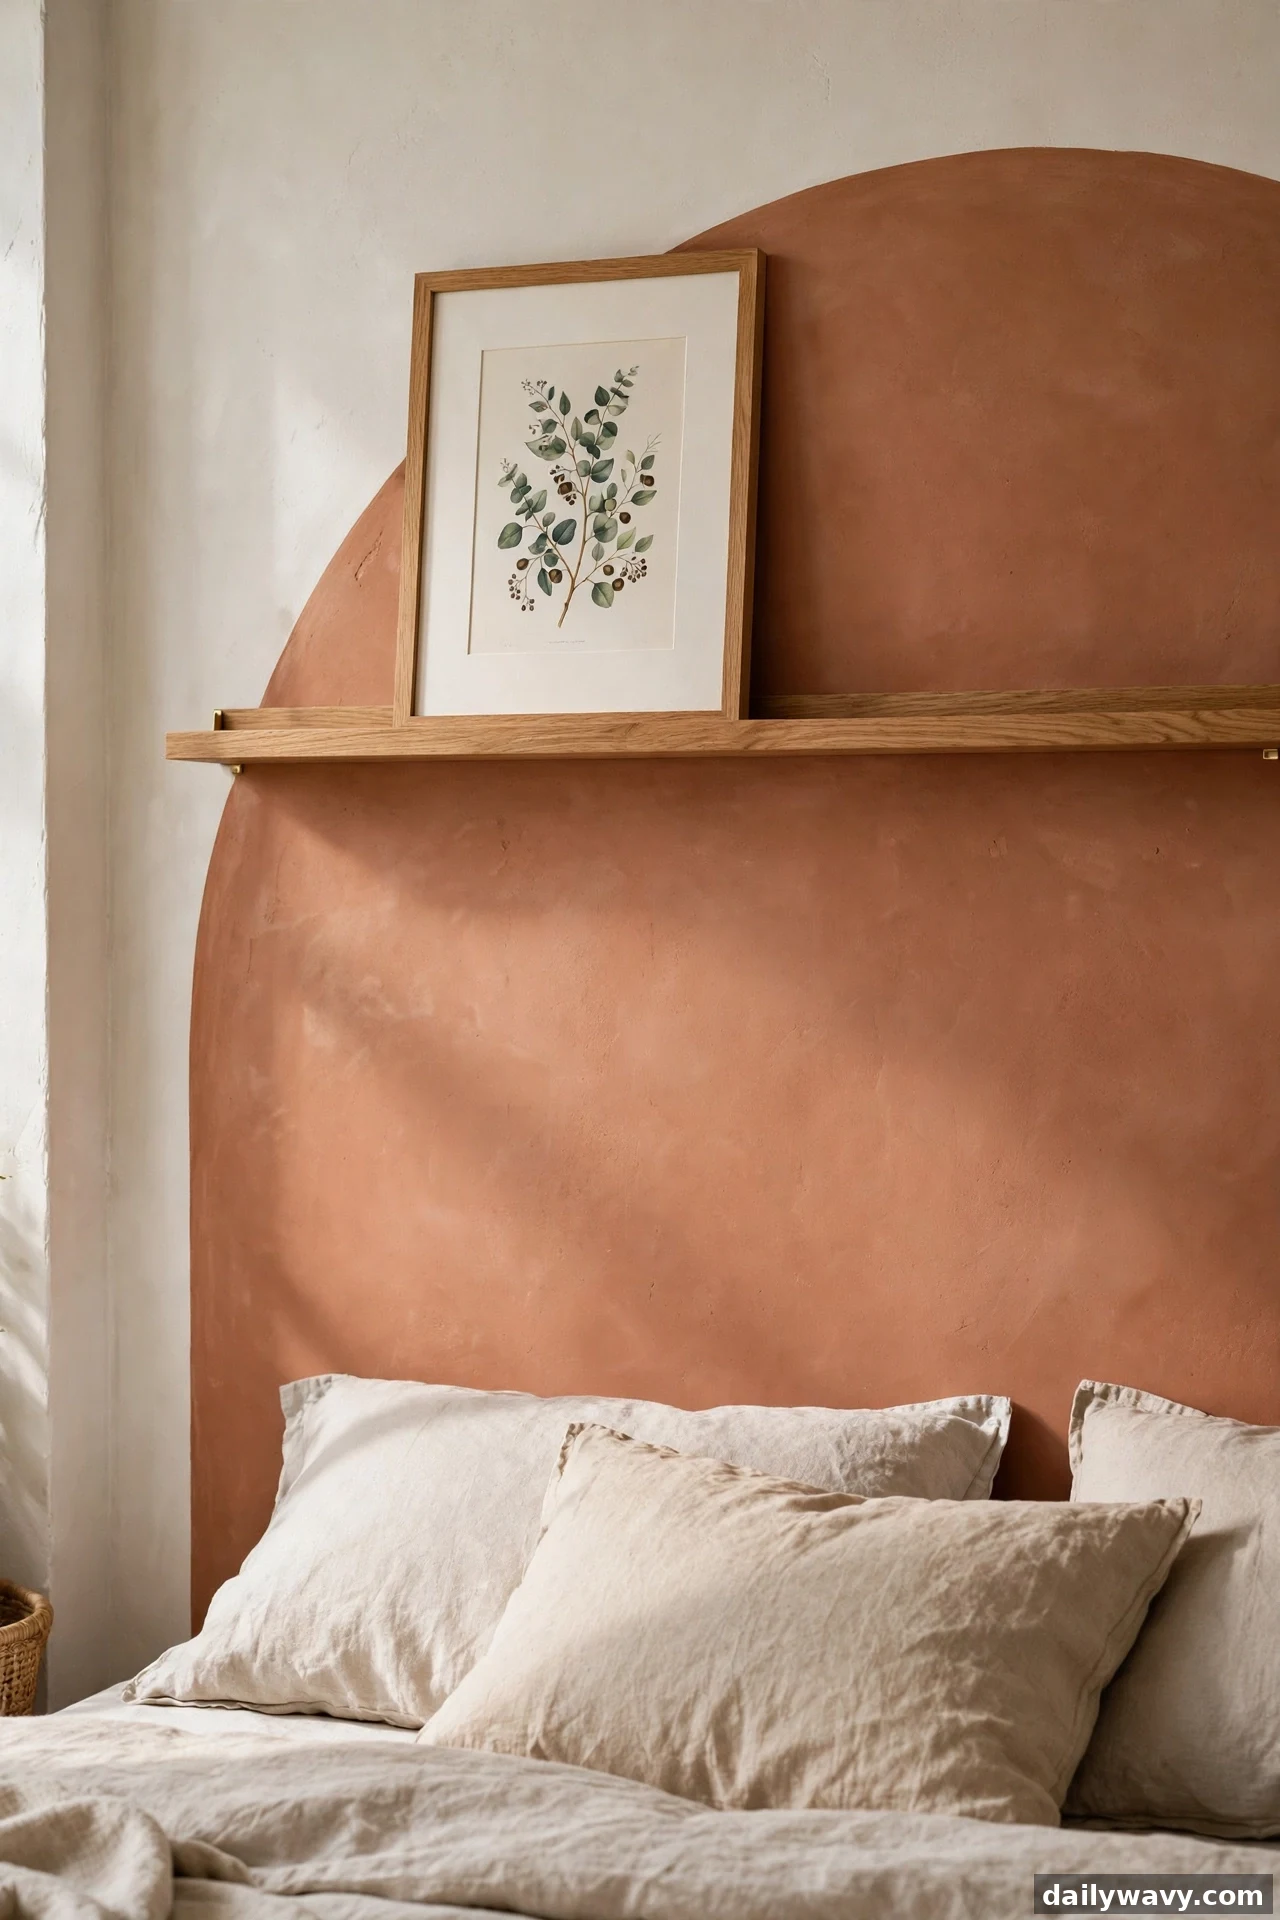
One ledge, one print, endless swapping. A narrow picture ledge mounted above the painted headboard lets you change the art with the seasons without touching the wall again. The close photograph shows a slim oak ledge holding a single botanical print above a warm clay painted shape, and the layered depth of ledge over paint looks far more expensive than it is.
Mount the ledge with screws into studs or heavy-duty drywall anchors, because a ledge plus a framed print is heavier than it looks. Standard picture ledges are three to four feet long; center yours over the bed and keep it at least eight inches above the top of the painted shape so the print does not crowd the paint. Choose a print with a mat, which reads more finished than a bare print in a frame.
The painted shape reverses with one recoat. The ledge leaves four to six screw holes when removed, which spackle and touch-up paint handle in an afternoon. This is the most flexible idea in the guide: the paint stays put while the art rotates, so the room never feels finished in a way that bores you.
Frequently Asked Questions
How much paint do I actually need for a painted headboard?
A single quart covers most bed-width shapes with two coats, since you are painting roughly twenty to forty square feet. Dark colors over light walls need a tinted primer first. Buy the primer and the topcoat at the same time so the colors match.
Will a painted headboard work in a rental?
Yes, with two conditions. Standard latex paint reverses completely when you repaint in the original color (dark colors may need a primer coat first), so keep a record of that color. If your lease forbids painting at all, use idea 6, a removable decal treatment, which comes off without touching the wall paint. Always test removal in a hidden spot first.
What paint sheen is best behind a bed?
Eggshell or satin. Both wipe clean with a damp cloth, which matters because bed walls collect oils and dust. Avoid flat or matte finishes behind the bed unless the room is purely decorative; they mark easily and do not wash well.
Do I need to prime the wall first?
If you are painting a darker color over a light wall, or if the wall has patches of spackle, yes. Primer evens out the surface so the topcoat color reads true. Painting a similar or lighter color over clean, sound paint usually needs no primer.
How do I get crisp edges on painted shapes?
Use quality painter’s tape, press the edges down firmly with a putty knife or a credit card, and paint a thin first coat. Peel the tape while the final coat is still slightly tacky, pulling slowly at a forty-five-degree angle. Touch up any bleed with the background color and a small brush.
Can I combine these ideas?
Absolutely. The strongest combinations pair one structural idea with one styling idea: a tall arch (idea 1) with wall lights (idea 17), a monochrome wall (idea 4) with the accent cushions (idea 8), or a dark focal area (idea 15) with the picture ledge (idea 18). Keep one painted shape per wall so the ideas do not compete.
A Last Thought Before You Pick Up the Roller
A painted headboard succeeds or fails on preparation and proportion, not on artistic talent. Tape your shape on the wall and live with it for a day before you open the paint. Wash and patch the wall, use the right sheen, and give each coat its full drying time. Every idea in this guide stays flat on the wall, reverses with a recoat, and asks for nothing more than paint, tape, and patience. Start with the idea that made you stop scrolling, measure twice, and enjoy the rare project that transforms a room in a single weekend. For more bedroom wall inspiration, browse our Home and Decor collection, and if your room runs long and narrow, the narrow living room layout principles adapt surprisingly well to awkward bedroom footprints.