10 Family Photo Wall Ideas with Layouts You Can Recreate
There is a special kind of warmth that only family photos give a room. The wedding portrait, the beach trip…
There is a special kind of warmth that only family photos give a room. The wedding portrait, the beach trip from three summers ago, your grandmother’s black-and-white wedding photo next to last year’s holiday card: together they turn an empty wall into the story of your people. These ten family photo wall ideas are all about layouts you can actually recreate, with real measurements, hanging templates you can copy, and frame choices that work on real budgets. Every idea below comes with a matching photo, so pick the layout that fits your wall and start hanging.
In This Guide:
- A Repeated Shape With Varied Textures
- A Corner-Spanning Arrangement
- A Paired Composition With Generous Space
- A Layered Display On A Secure Ledge
- A Narrow Grouping Beside A Doorway
- A Single Oversized Focal Item
- A Small Grouping Over A Bench
- A Composition Anchored To Furniture Width
- A Balanced Grid Of Similar Sizes
- A Loose Asymmetrical Cluster
The Family Photo Wall Rules Before You Start
A photo wall looks effortless only when the planning behind it is solid. These rules apply to every layout in this guide, so read them once and save yourself the re-hanging.
Measure the wall first. Sketch the wall on paper and mark the usable rectangle: the space between the nearest door trim, the ceiling, and any furniture below. A good rule of thumb is that a gallery arrangement should span roughly two-thirds to three-quarters of the wall’s width. For a 10-foot wall, that means an arrangement about 80 to 90 inches wide.
Use a paper template. Trace each frame onto kraft paper or newspaper, cut them out, and tape them to the wall with painter’s tape. Live with the layout for a day before you drive a single nail. Adjusting tape is free; patching holes is not.
Hang at the right height. The center of the whole arrangement should sit about 57 to 60 inches from the floor, which is average eye level. Above furniture, leave 6 to 8 inches between the top of the furniture and the bottom of the lowest frame.
Keep spacing consistent. For most layouts, leave 2 to 3 inches between frames. Wider gaps feel airy and modern; tighter gaps feel cozy and collected. Pick one spacing and keep it uniform across the arrangement.
Check your wall and your lease. If you rent, read your lease before hanging anything heavy. Adhesive strips work for frames under a few pounds on smooth painted walls, but anything over 10 pounds needs a proper anchor, and heavy pieces need a stud. If your walls are plaster or concrete, use the right anchors for that surface. A single oversized frame can weigh 20 pounds or more, so check the weight rating on every hanger you buy.
Budget smart. Simple wood or matte-black frames in standard sizes (8×10, 11×14, 16×20) cost a few dollars each at big-box stores, while custom framing for an oversized piece can run $100 to $300. Most of the layouts in this guide mix standard sizes to keep the total under $80 for frames.
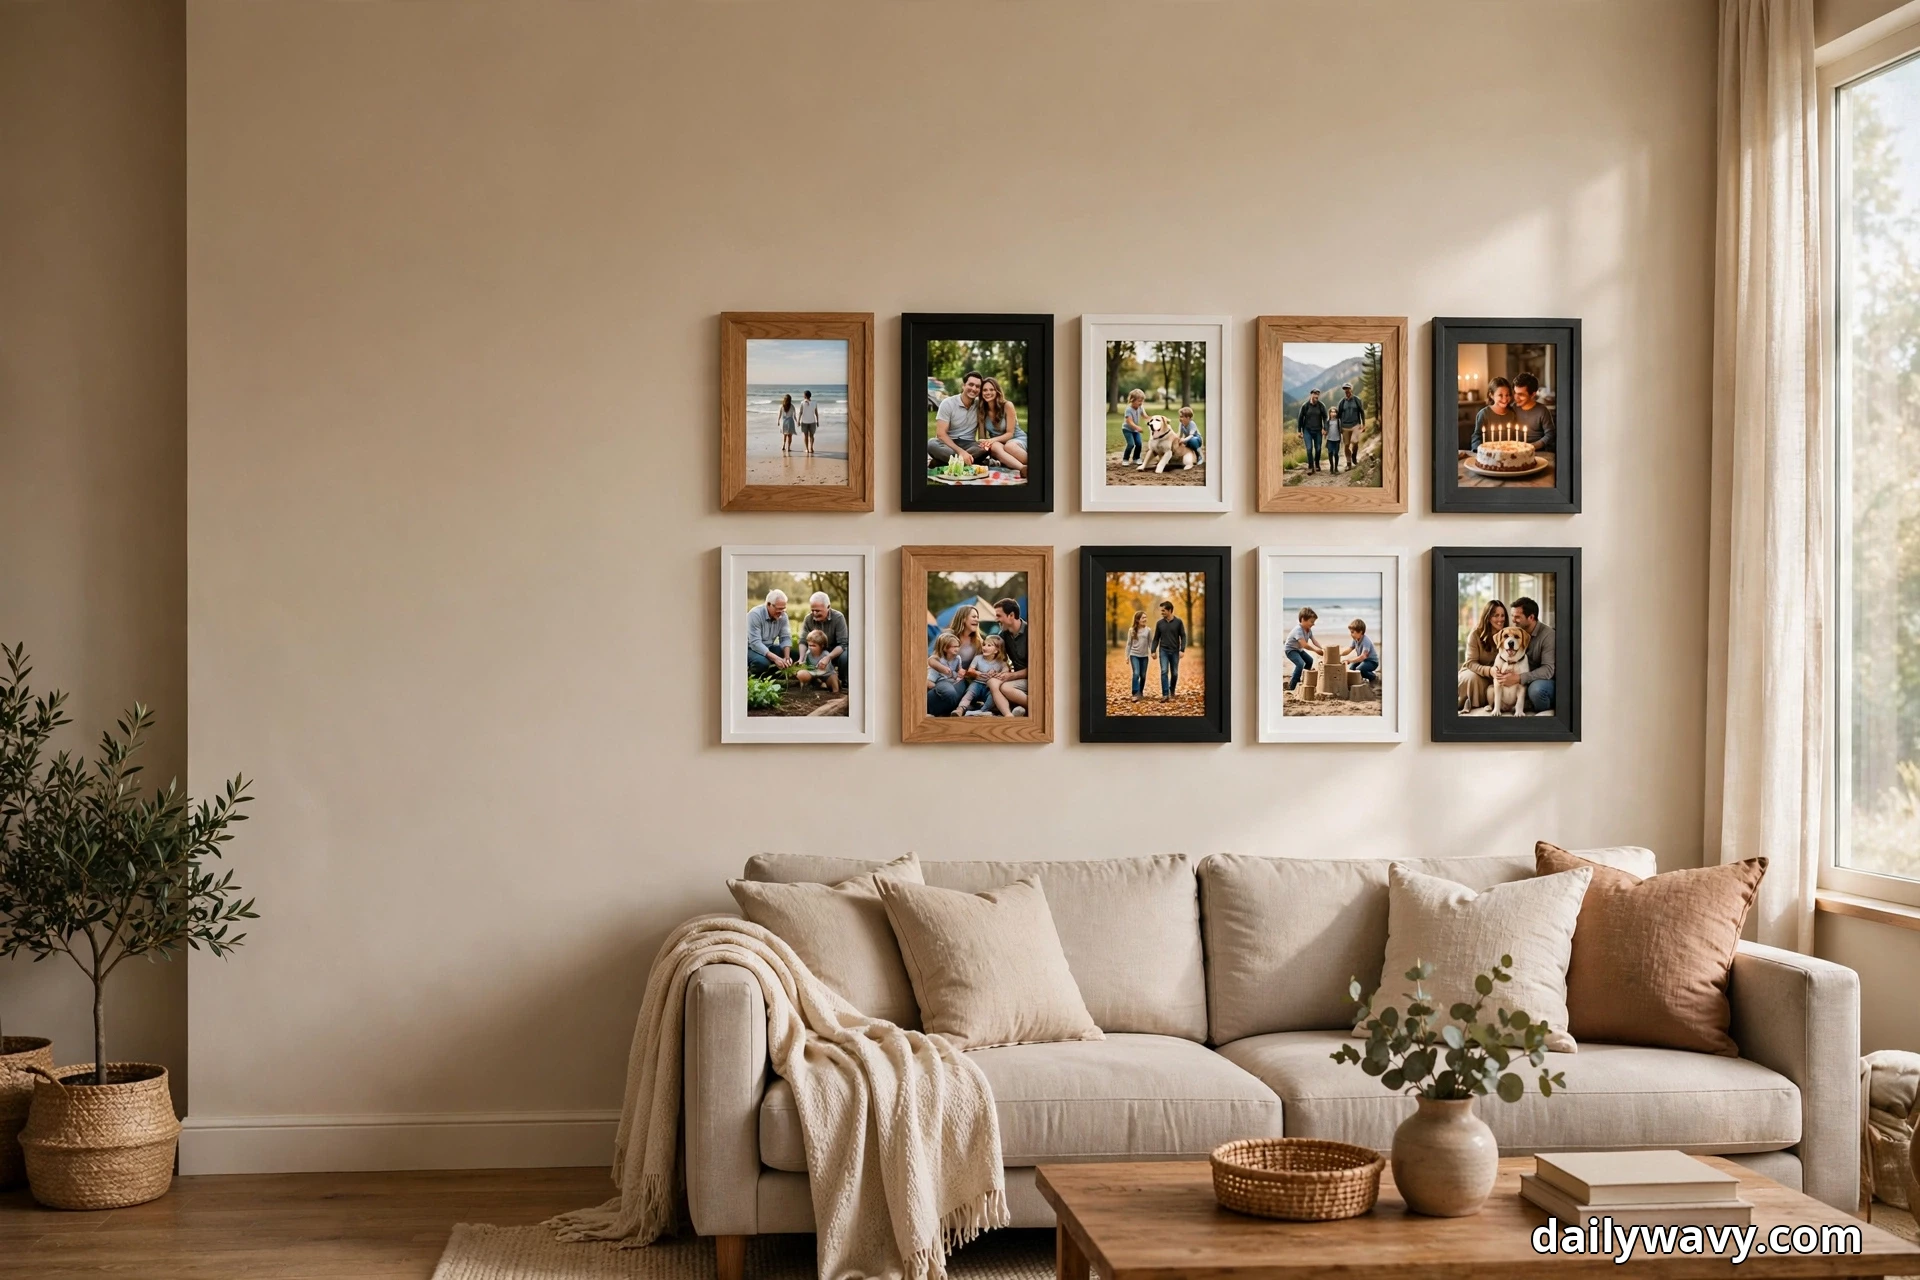
1. A Repeated Shape With Varied Textures

The simplest gallery trick there is: use the same shape everywhere, then let texture do the talking. Ten square frames, all identical in size, but split between warm oak, matte black, and soft white finishes. The repetition keeps the wall calm while the mixed finishes give it character. It is the best layout for a first gallery wall because the grid forgives small imperfections.
What you need: Ten 12×12 frames in three finishes (buy 4 oak, 3 black, 3 white), 10 square prints, a level, painter’s tape, kraft paper for templates.
How to recreate it: Map a rectangle roughly 72 inches wide by 27 inches tall on the wall. Hang the frames in two rows of five, or a three-two-three-two pattern for a slightly broken rhythm. Keep 2.5 inches between every frame. Alternate finishes so no two matching frames touch: think black, oak, white, oak, black on the top row and the mirror below. Hang the center of the whole block at 57 to 60 inches from the floor.
Effort and budget: One afternoon, about $60 to $90 for frames plus printing. Print photos at any drugstore or online printer for roughly $3 to $5 per square print.
Troubleshooting: If the wall looks busy, the problem is usually color, not layout. Switch the prints to black and white and the whole thing calms down instantly.
2. A Corner-Spanning Arrangement
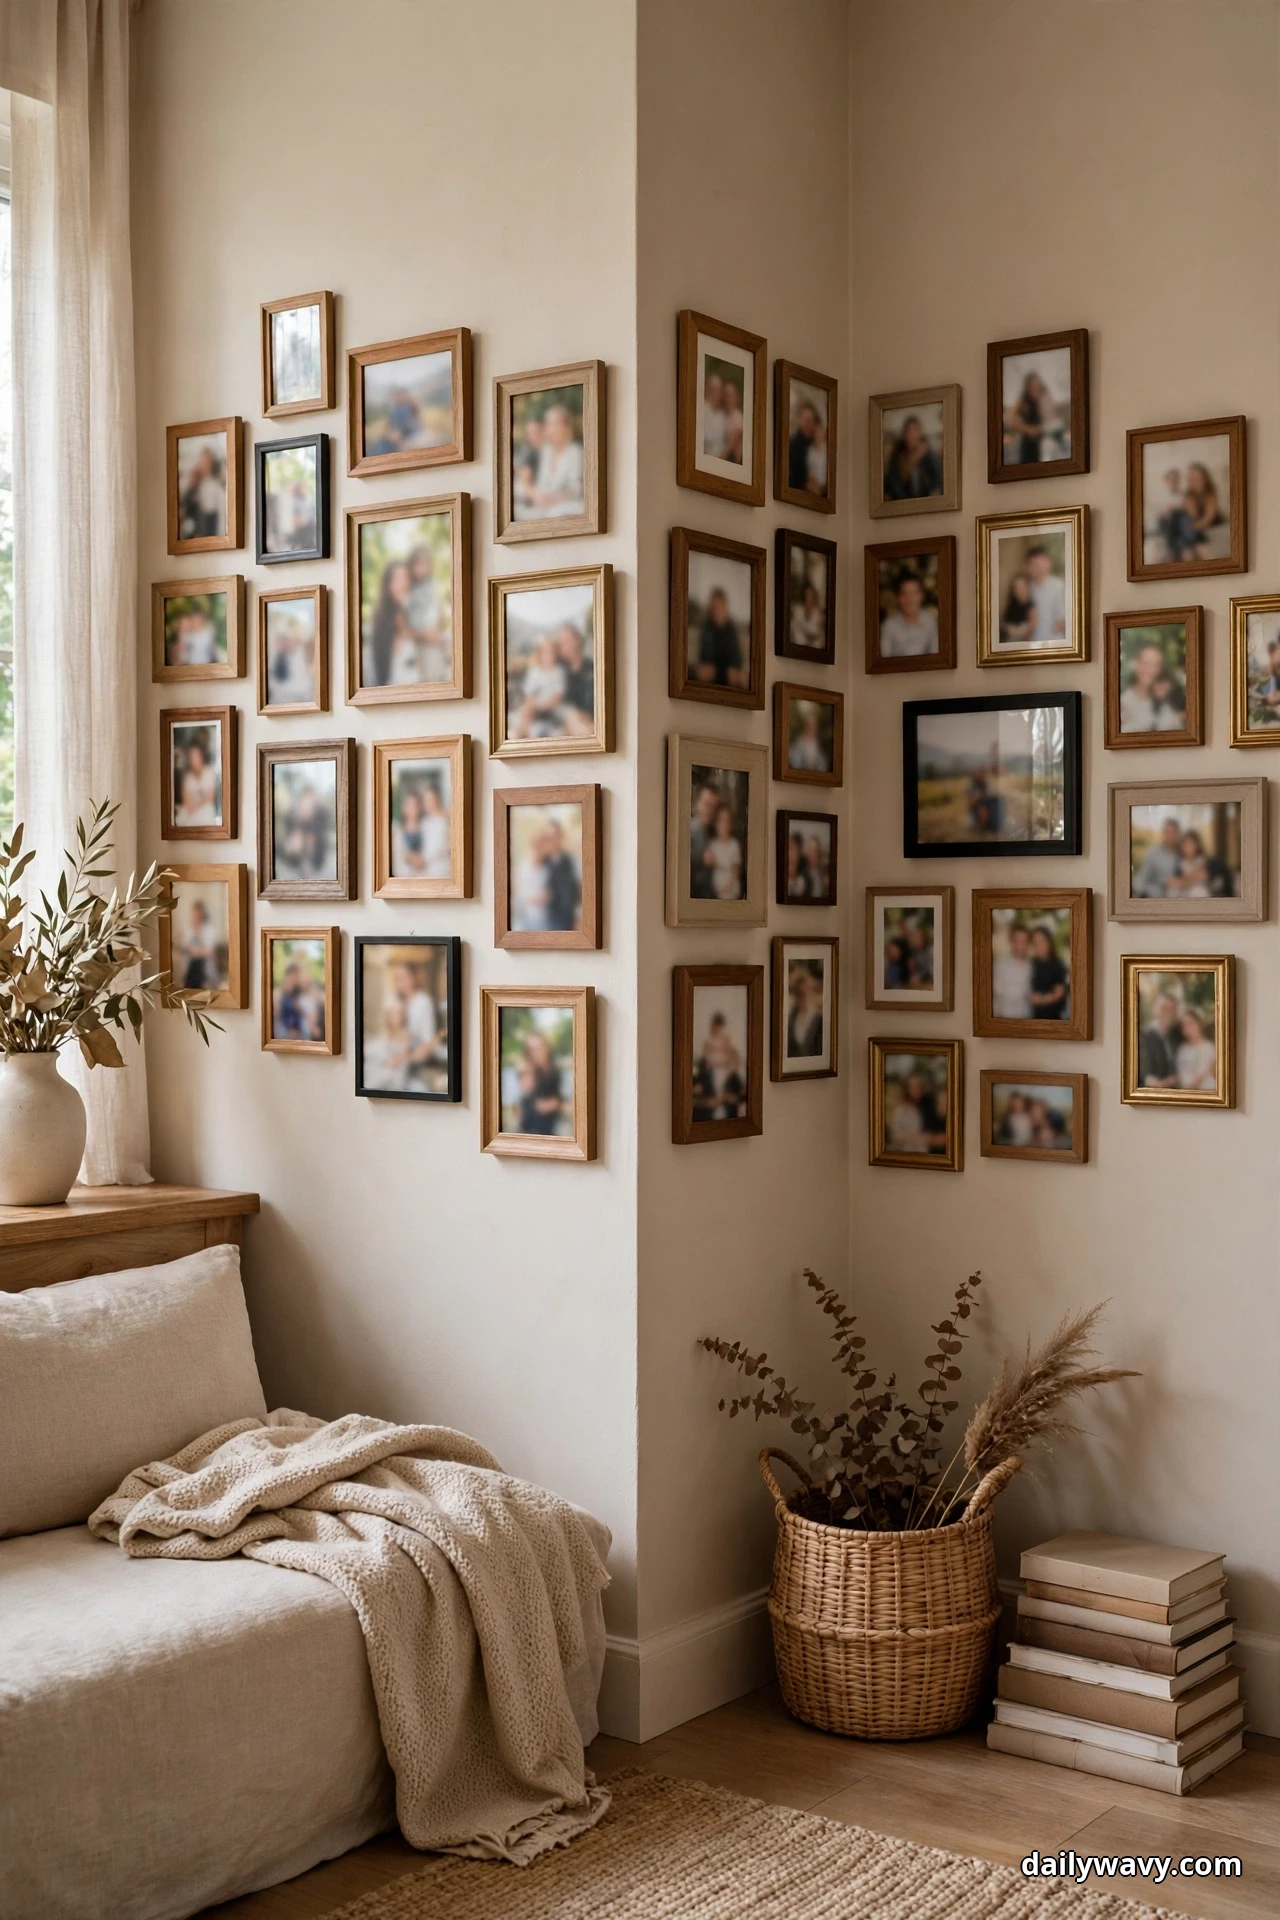
Most people treat corners as dead space. A corner-spanning arrangement turns one into the most interesting part of the room. A loose river of frames starts on one wall, flows around the corner, and continues on the next. It works beautifully in hallways, stairwells, and anywhere two walls meet at a right angle.
What you need: Twelve to fifteen frames in mixed sizes (8×10, 11×14, and a few 5×7), assorted finishes that share one undertone, small battery picture lights if you want to highlight the corner without any wiring.
How to recreate it: Choose one wall as the anchor side and build the densest part of the arrangement there, about 60 inches wide. Let the outer frames spill past the corner onto the second wall by 18 to 24 inches. Keep 2 to 3 inches between frames. The key detail: make sure at least two frames on each side sit within a foot of the corner itself, so the arrangement reads as one continuous composition rather than two separate walls.
Effort and budget: One weekend, $70 to $110 for frames. A roll of kraft paper and a weekend afternoon is most of the work.
Troubleshooting: If the corner looks like two unrelated clusters, add one frame directly on the corner seam itself (use a corner-friendly hook or angle bracket) to stitch the sides together.
3. A Paired Composition With Generous Space
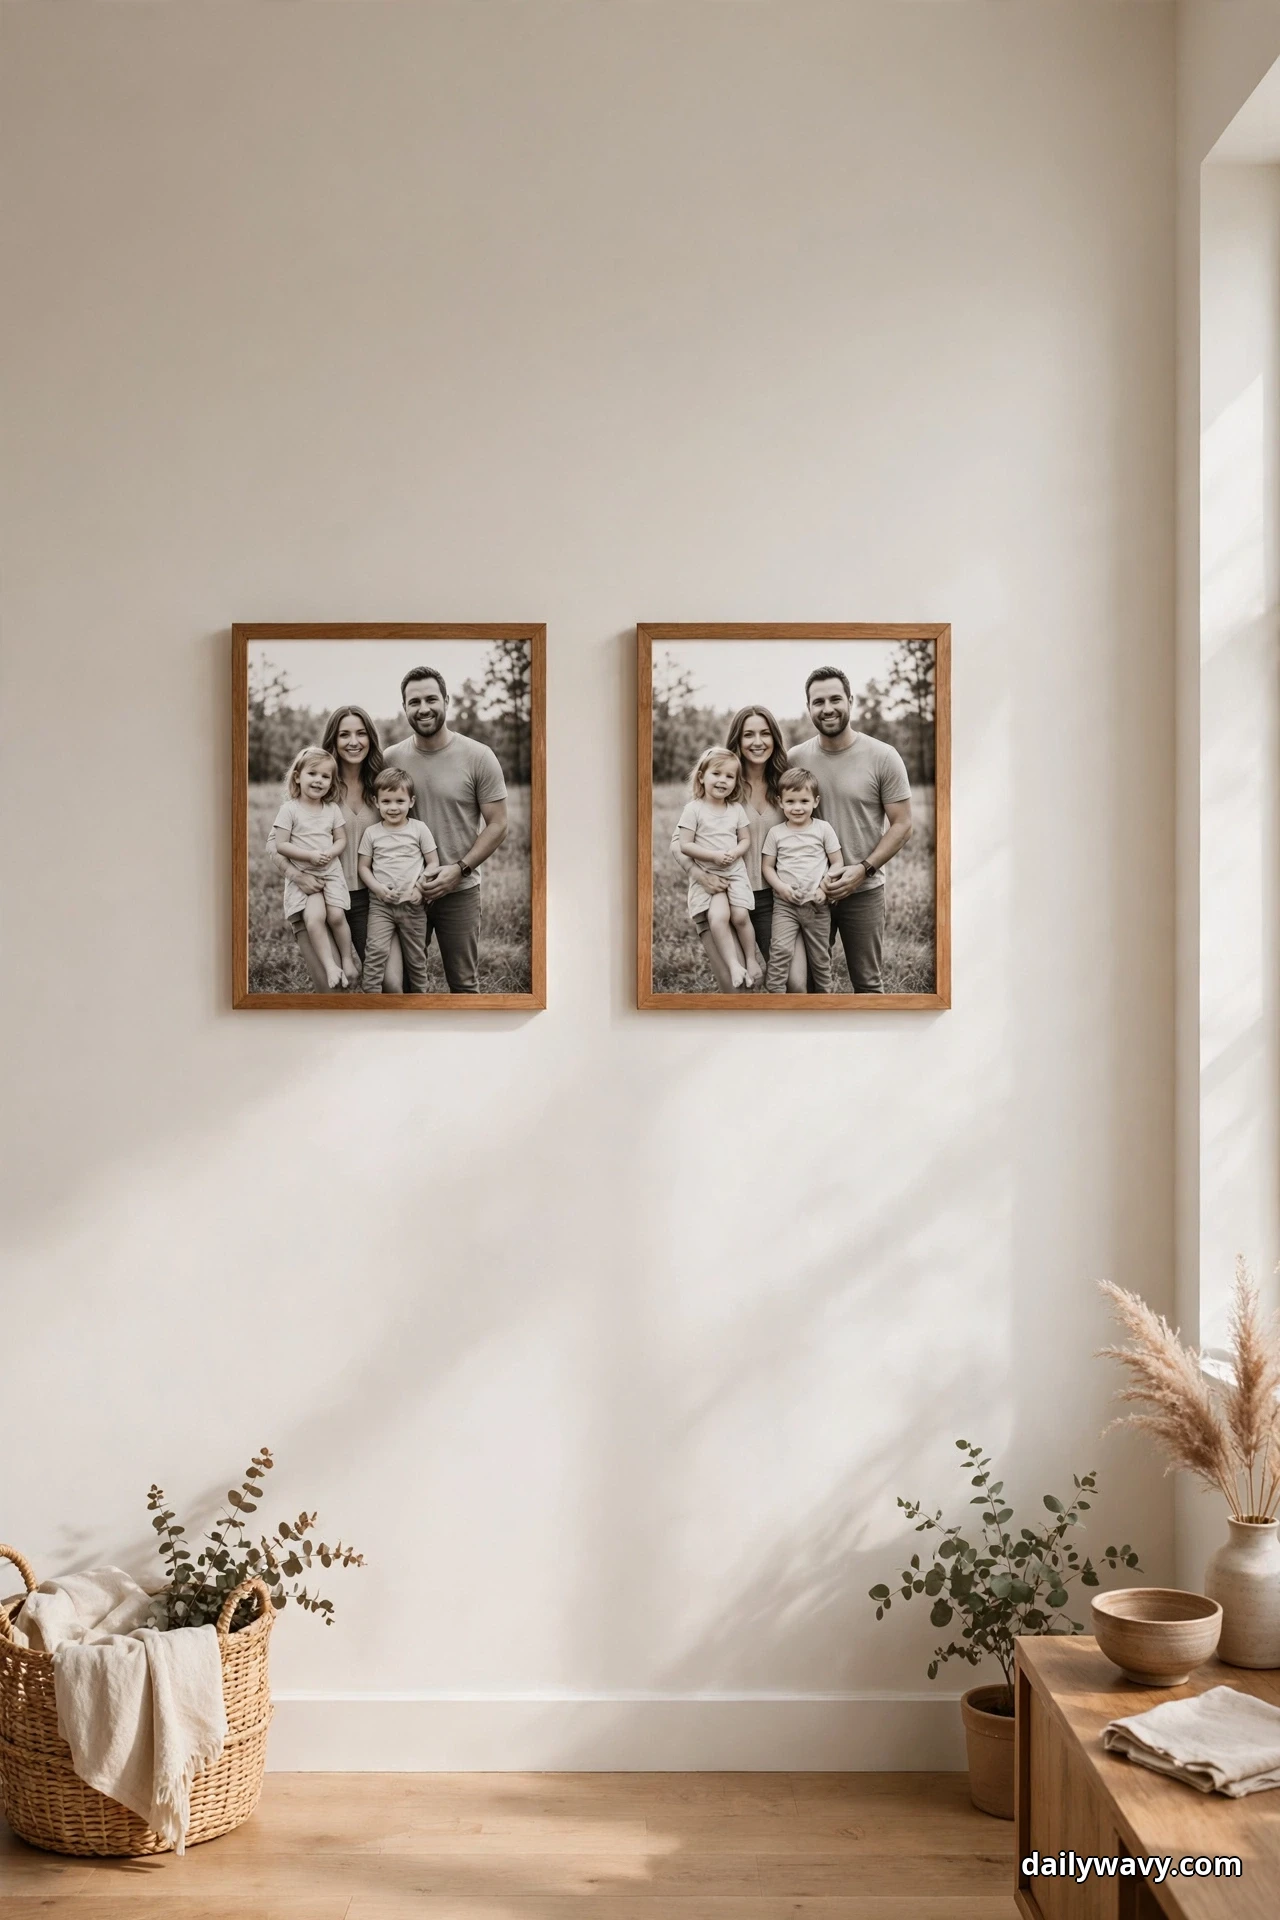
Sometimes two frames are more powerful than twenty. This layout is just a pair of matching frames hung side by side with a lot of breathing room around them. It suits bedrooms, narrow hallways, and anyone whose style runs minimal. The empty wall becomes part of the design.
What you need: Two identical frames (16×20 works best), two photos with a visual connection (two generations, two seasons, before and now), a level.
How to recreate it: Hang the frames at the same height, 4 to 5 inches apart, centered on the wall. The pair should occupy only about one-third of the wall width. The center of the frames sits at 57 to 60 inches from the floor. That is the whole recipe.
Effort and budget: Under an hour, $30 to $50 for two frames and prints. This is the cheapest layout in this guide.
Troubleshooting: If it feels lost on a big wall, the frames are too small. Go up a size rather than adding a third frame; adding a third changes the layout into something else entirely.
4. A Layered Display On A Secure Ledge
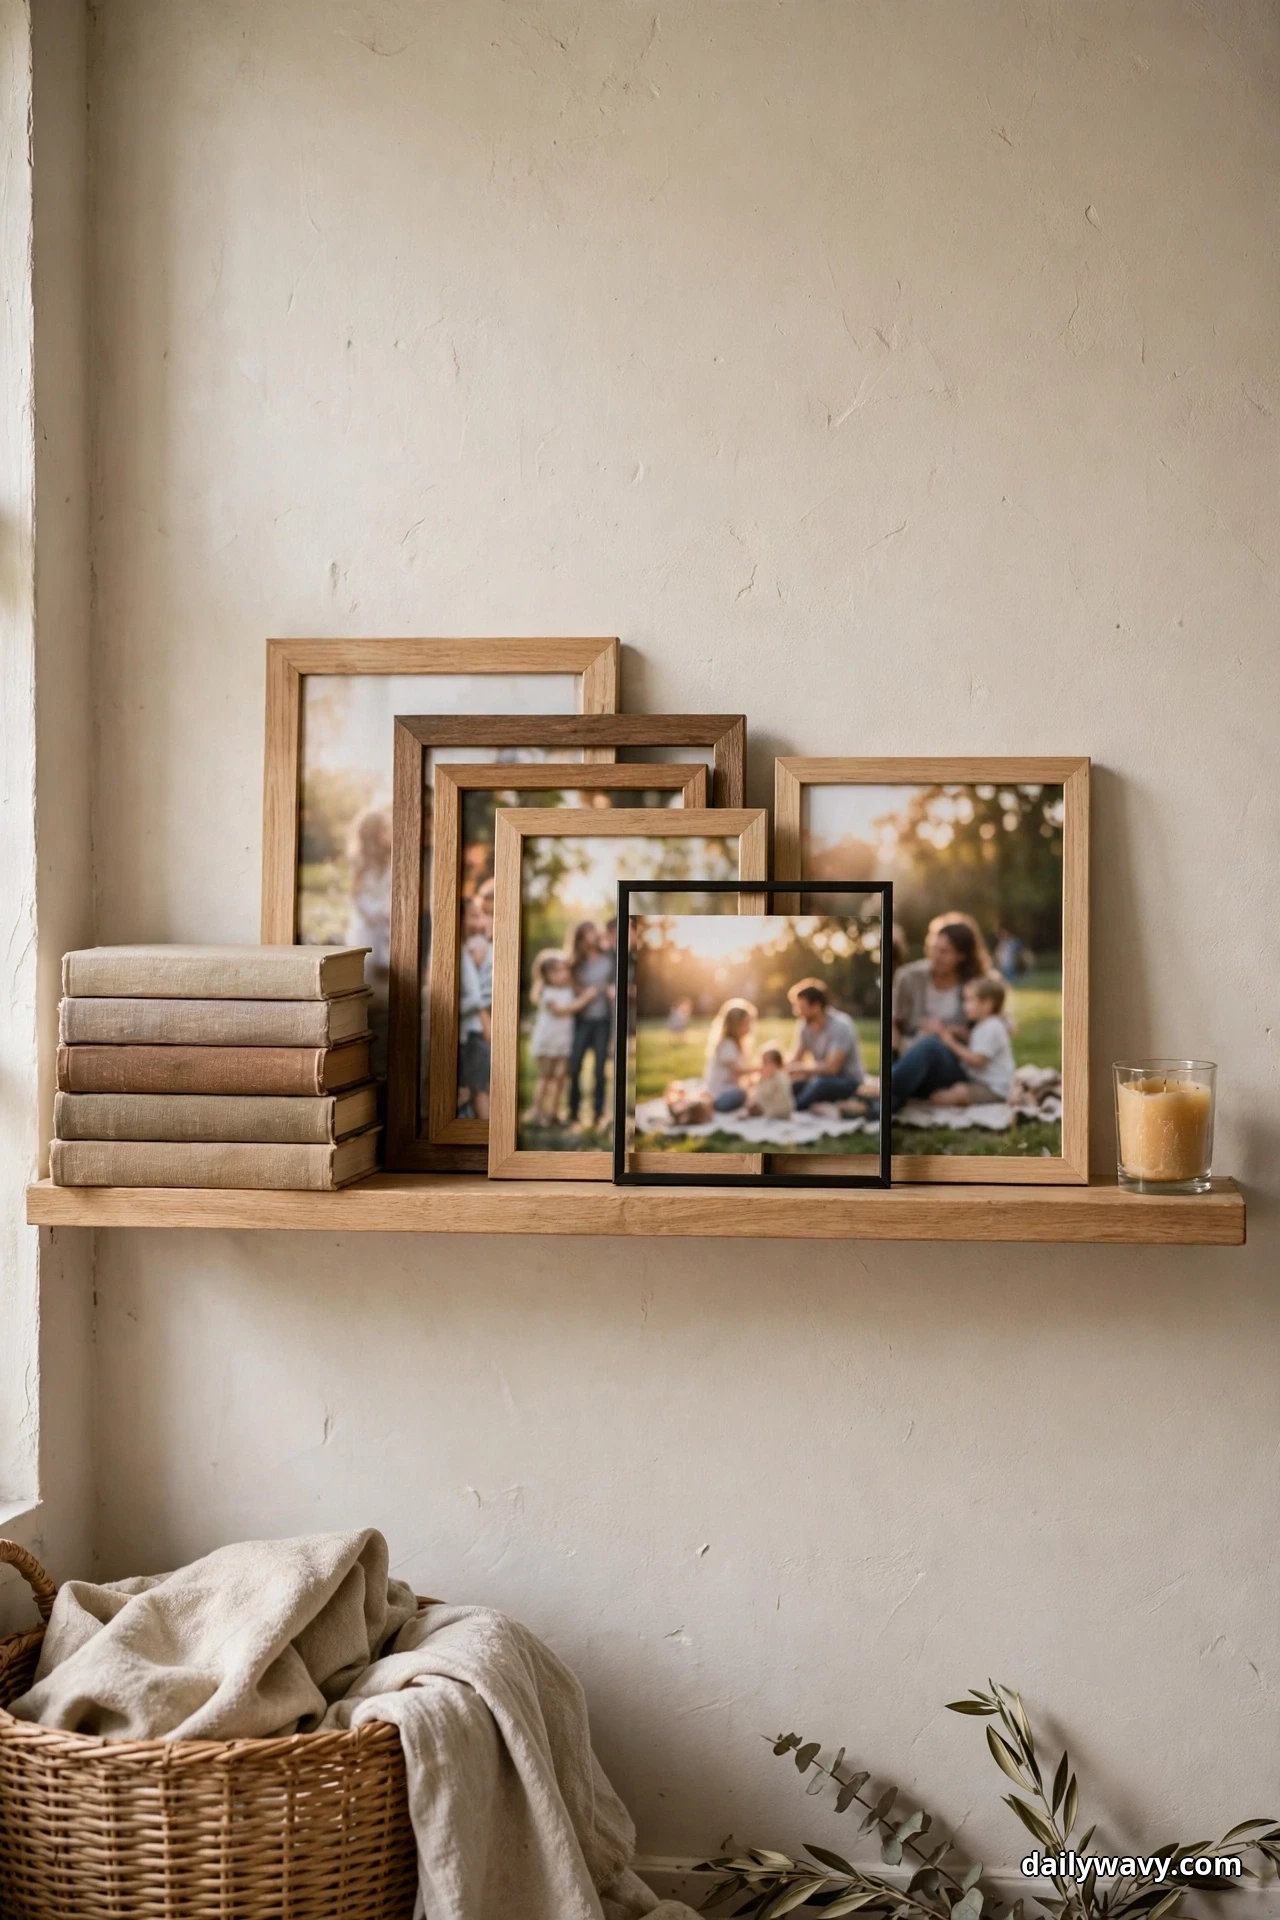
Picture ledges are the renter-friendly hero of photo walls. Frames sit on a shallow shelf instead of hanging on nails, so you can restyle in minutes and leave only two screw holes when you move out. Layering frames, with a small frame leaning in front of a large one, gives the arrangement depth that flat walls never have.
What you need: One or two picture ledges (48 to 60 inches long, 3 to 4 inches deep), 8 to 12 frames in varied heights, small objects for the gaps (a candle, a small plant, a stack of books).
How to recreate it: Mount the ledge at 54 to 58 inches from the floor, checking first that the wall can hold it: use a stud or a proper hollow-wall anchor, because a loaded 60-inch ledge can weigh 25 pounds or more. Stand the largest frames at the back, lean medium frames in front of them, and tuck the smallest ones at the ends. Overlap edges by an inch or two. Leave 8 to 12 inches of open ledge between clusters so it reads as styled, not crowded. If you rent, confirm with your landlord that shelf mounting is allowed, and use the smallest anchors that will safely carry the load.
Effort and budget: Two hours including mounting, $50 to $80 for the ledge and hardware if you do not already own one.
Troubleshooting: If frames slide or feel unstable, the ledge lip is too shallow. Add small museum gel dots under the frame bases, and keep anything above a kids’ play area securely anchored.
5. A Narrow Grouping Beside A Doorway
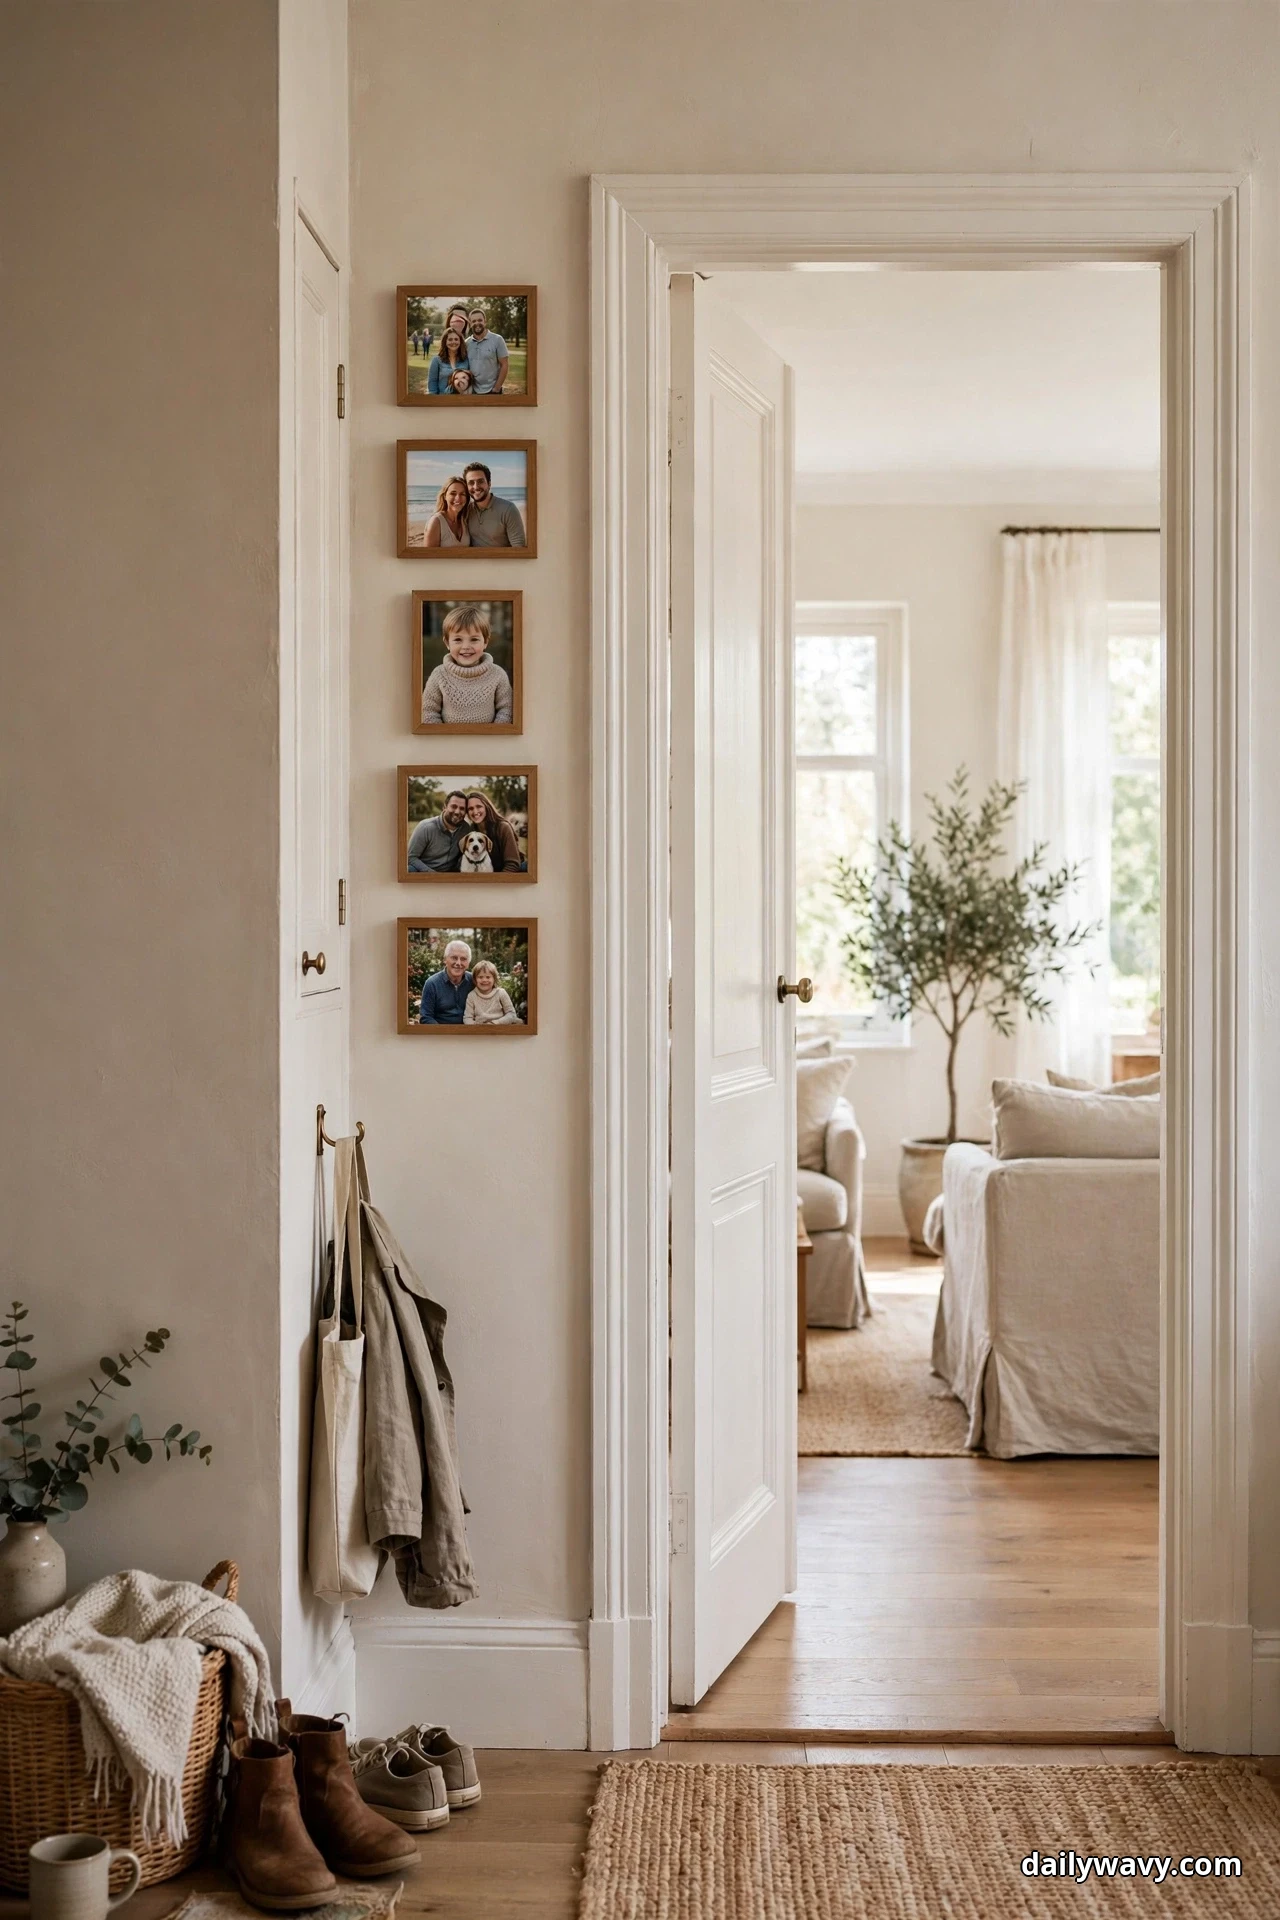
That strip of wall beside a doorway is gallery real estate hiding in plain sight. A narrow vertical stack of small frames turns it into a photo column that guests see every time they walk through. It is perfect for a chronological series: childhood photos at the bottom, recent ones at the top.
What you need: Five to seven small frames (5×7 and 8×10), a level, a tape measure.
How to recreate it: Measure the wall strip; you need at least 14 inches of width. Stack the frames vertically with 2.5 inches between them, alternating sizes so the column has rhythm. Center the column on the strip, and keep the middle frame at 57 to 60 inches from the floor. Leave 4 inches of clearance from the door trim so the frames never collide with the door swing.
Effort and budget: One hour, $35 to $60 for small frames and prints.
Troubleshooting: A narrow column can look like it is tipping. Fix it by making the bottom frame the heaviest-looking one (dark frame, large mat) to anchor the column visually.
6. A Single Oversized Focal Item
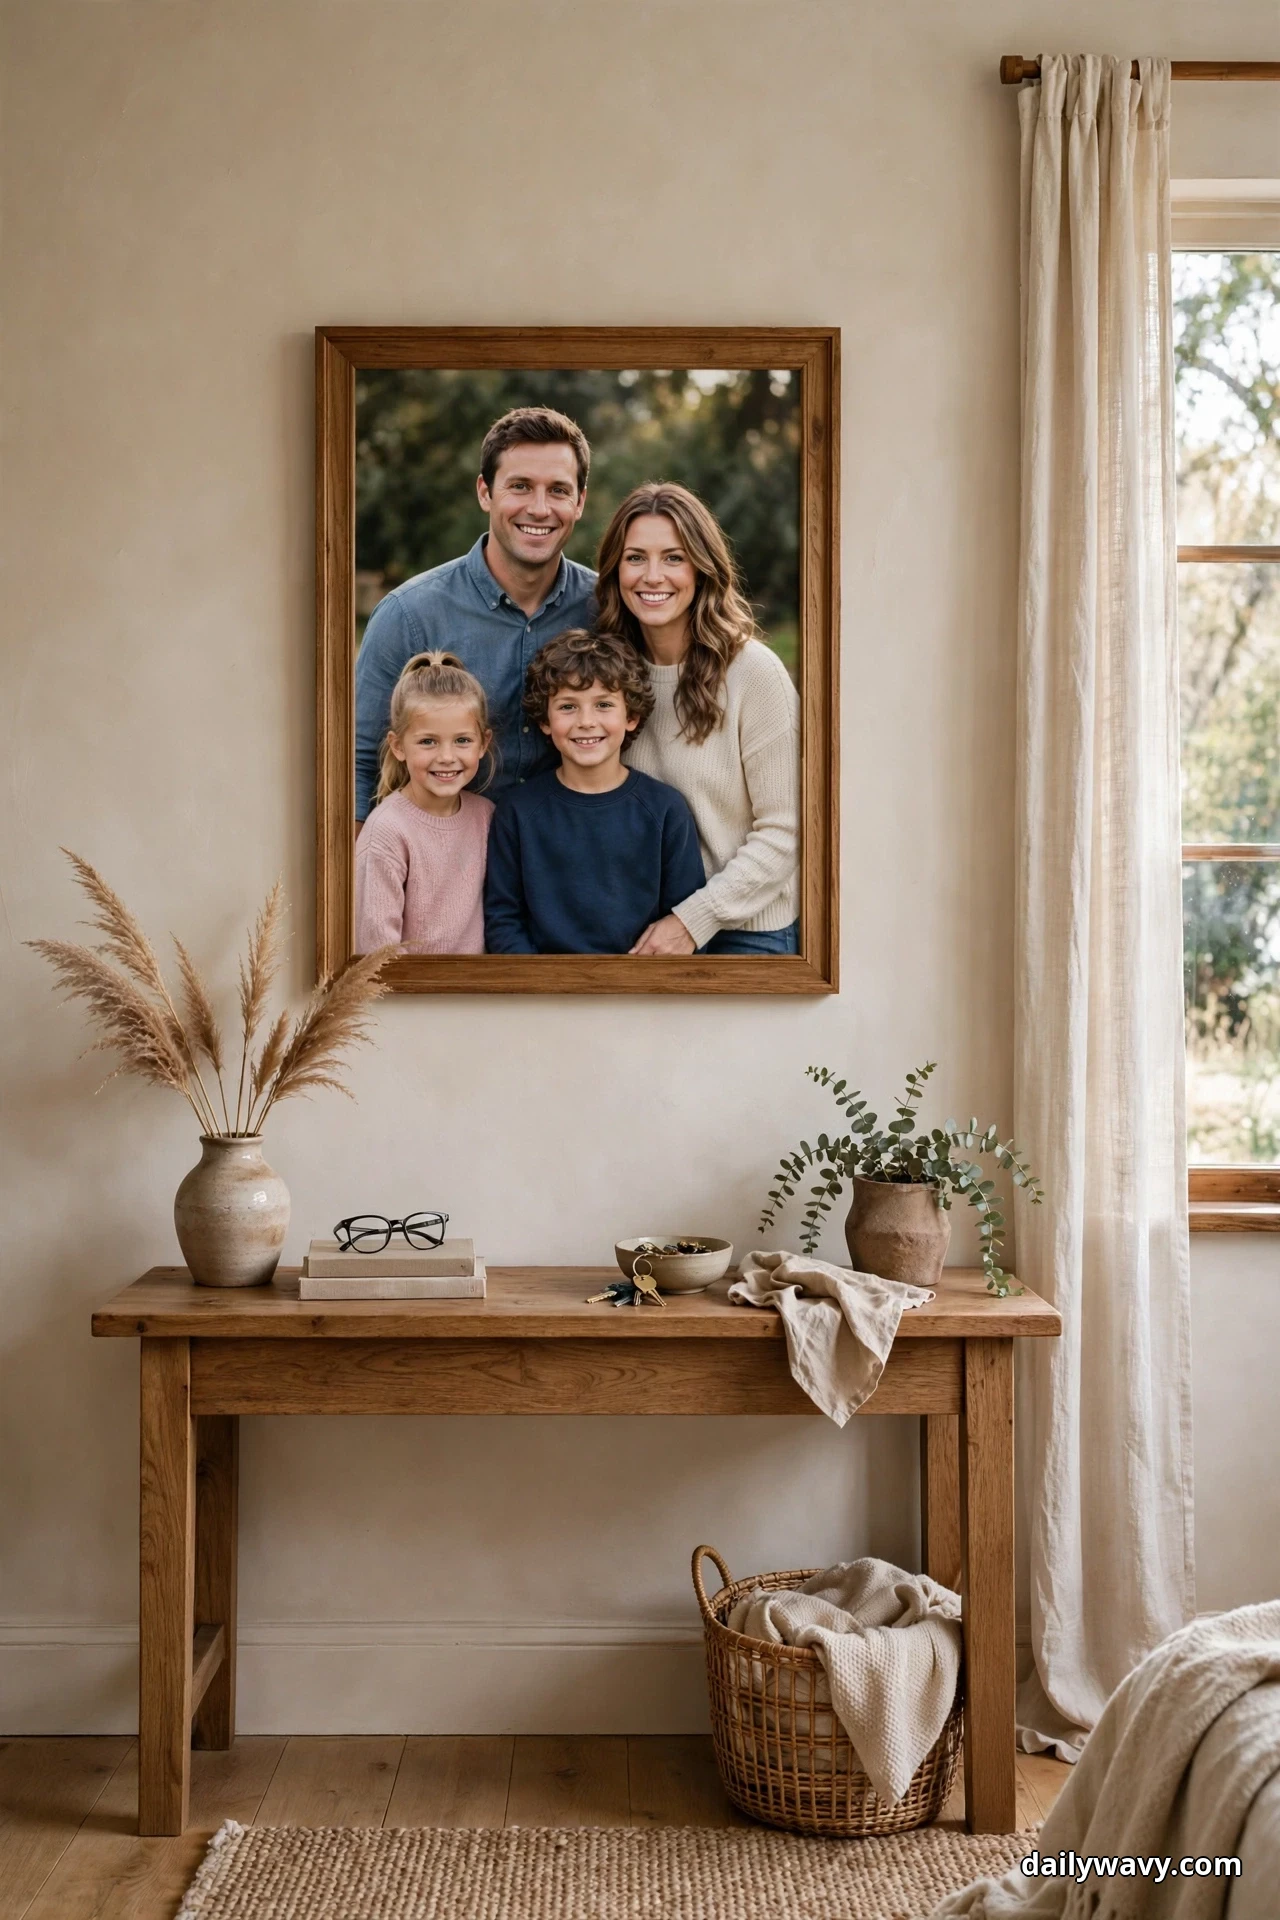
One big photograph, printed large and framed well, can carry an entire wall. This is the layout for the photo you love most: the family portrait session, the wedding photo, the candid that makes everyone laugh. Oversized means going 24×36 inches or bigger.
What you need: One large print (24×36 or 30×40), a frame or a gallery-wrapped canvas, two D-ring hangers and a picture wire rated for the weight, a stud finder.
How to recreate it: Center the piece on the wall or above the furniture below it, with the center at 57 to 60 inches from the floor. If it hangs above a console or sofa, keep the width of the frame between half and two-thirds of the furniture’s width. For anything over 15 pounds, hang it on a stud or use two anchors rated well above the frame’s weight. A 30×40 framed print can weigh 20 to 30 pounds, so check the hardware rating on the package.
Effort and budget: An afternoon including a trip to the print shop, $80 to $250 depending on print size and whether you choose custom framing. Many online printers ship a framed 24×36 for under $150.
Troubleshooting: A lone frame can look like an afterthought on a huge wall. If the wall is wider than 12 feet, pair the oversized piece with a narrow console or bench beneath it so the wall feels intentionally composed.
7. A Small Grouping Over A Bench

An entryway bench is a natural anchor for a small gallery. Three to five frames above it give guests something lovely to look at while they put on their shoes, and the bench below makes the whole vignette feel finished. This is one of the easiest layouts to get right.
What you need: Three to five frames (a mix of 8×10 and 11×14), the bench you already own.
How to recreate it: The bottom of the lowest frame should clear the bench by 8 to 10 inches, a little more than the usual 6 to 8 inches above furniture, so nothing gets knocked when someone sits down. Arrange the frames in a loose triangle or a straight row spanning about two-thirds of the bench’s width. Keep the center of the arrangement at 57 to 60 inches from the floor if the bench is low, or slightly higher if the bench back is tall.
Effort and budget: One hour, $40 to $70 for frames and prints. If you already own the bench, that is the whole project.
Troubleshooting: If the bench area feels cluttered, the frames are competing with what is on the bench. Style the bench surface down to two items (a cushion and a basket) and let the photos have the wall.
8. A Composition Anchored To Furniture Width

A gallery wall above a sofa looks intentional when its total width relates to the sofa’s width. The rule: the arrangement should span roughly two-thirds to three-quarters of the furniture below it. A 84-inch sofa wants a gallery about 56 to 63 inches wide. This single measurement trick fixes the most common gallery mistake, which is hanging an arrangement that is either too small or too sprawling.
What you need: Eight to twelve frames in mixed sizes, tape measure, kraft paper templates.
How to recreate it: Measure the sofa, multiply by 0.7, and mark that width on the wall with painter’s tape. Build your arrangement inside that boundary. The bottom of the lowest frame should sit 6 to 8 inches above the sofa back. Any layout style works inside the boundary: a loose cluster, a salon-style mix, or rows. The anchor measurement is what makes it feel designed.
Effort and budget: An afternoon, $60 to $100 for frames. The template step takes the most time and saves the most mistakes.
Troubleshooting: If the arrangement drifts wider than the sofa, it looks like it is floating. Pull the outermost frames back inside the tape boundary and re-hang.
9. A Balanced Grid Of Similar Sizes
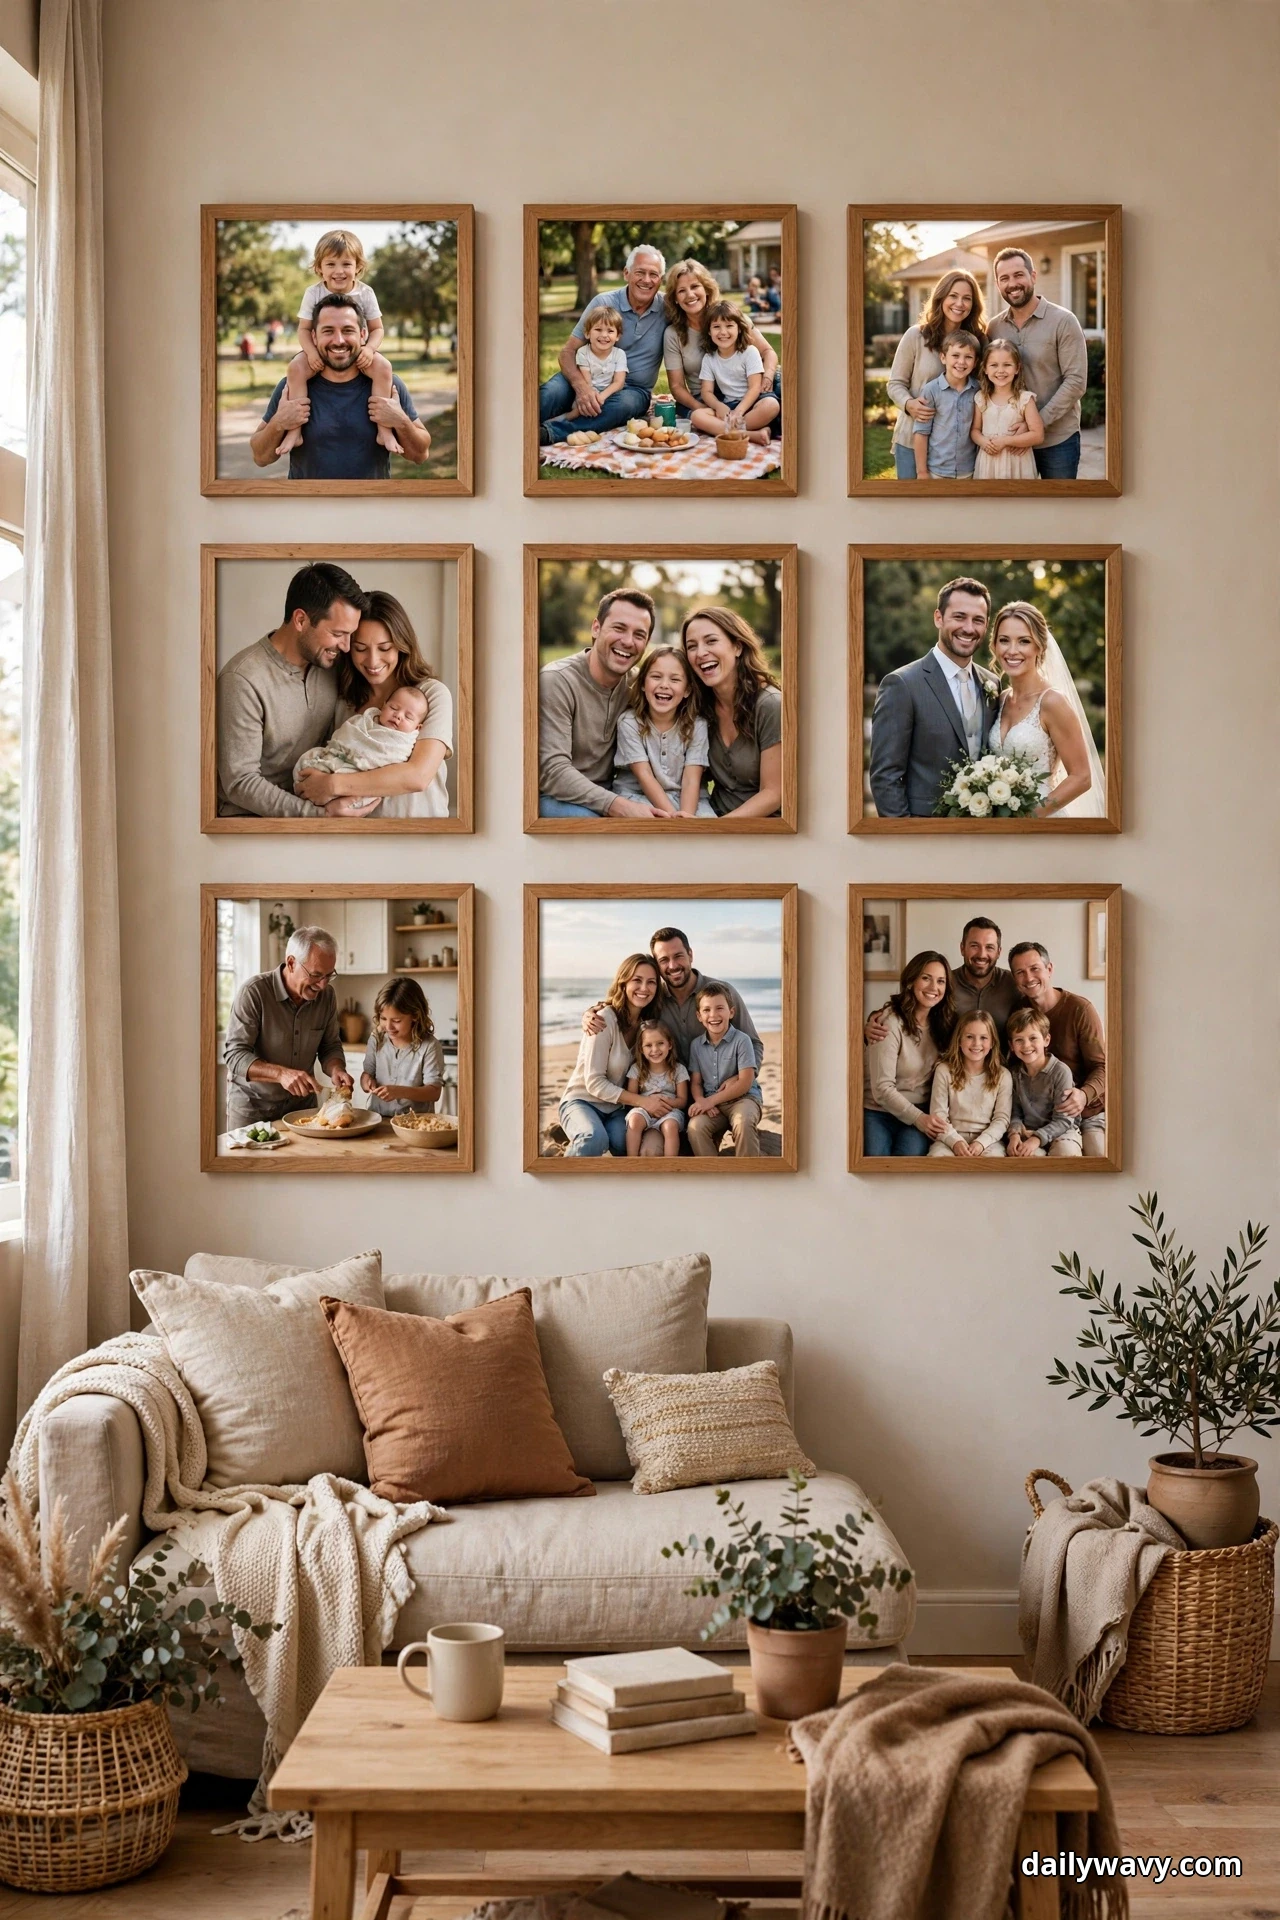
The grid is the most orderly of all photo walls: identical frames, identical spacing, perfect rows. It suits modern rooms, home offices, and anyone who finds asymmetry stressful. A 3×3 grid of nine square frames is the classic version, and it photographs beautifully.
What you need: Nine identical 12×12 frames (buy one extra in case of damage), nine prints, a laser level if you have one, painter’s tape.
How to recreate it: Mark a square about 42 inches per side on the wall (three 12-inch frames plus two 3-inch gaps per direction). Hang the top row first, keeping a 3-inch gap between frames both horizontally and vertically. Use the level on every single frame; a grid forgives nothing. Center the whole square at 57 to 60 inches from the floor.
Effort and budget: Two to three hours, $70 to $120 for nine matching frames and prints. The patience is the real cost.
Troubleshooting: If the grid looks stiff, the problem is usually identical photos. Vary the images: alternate close portraits with wider group shots, or mix color and black-and-white in a checkerboard pattern.
10. A Loose Asymmetrical Cluster
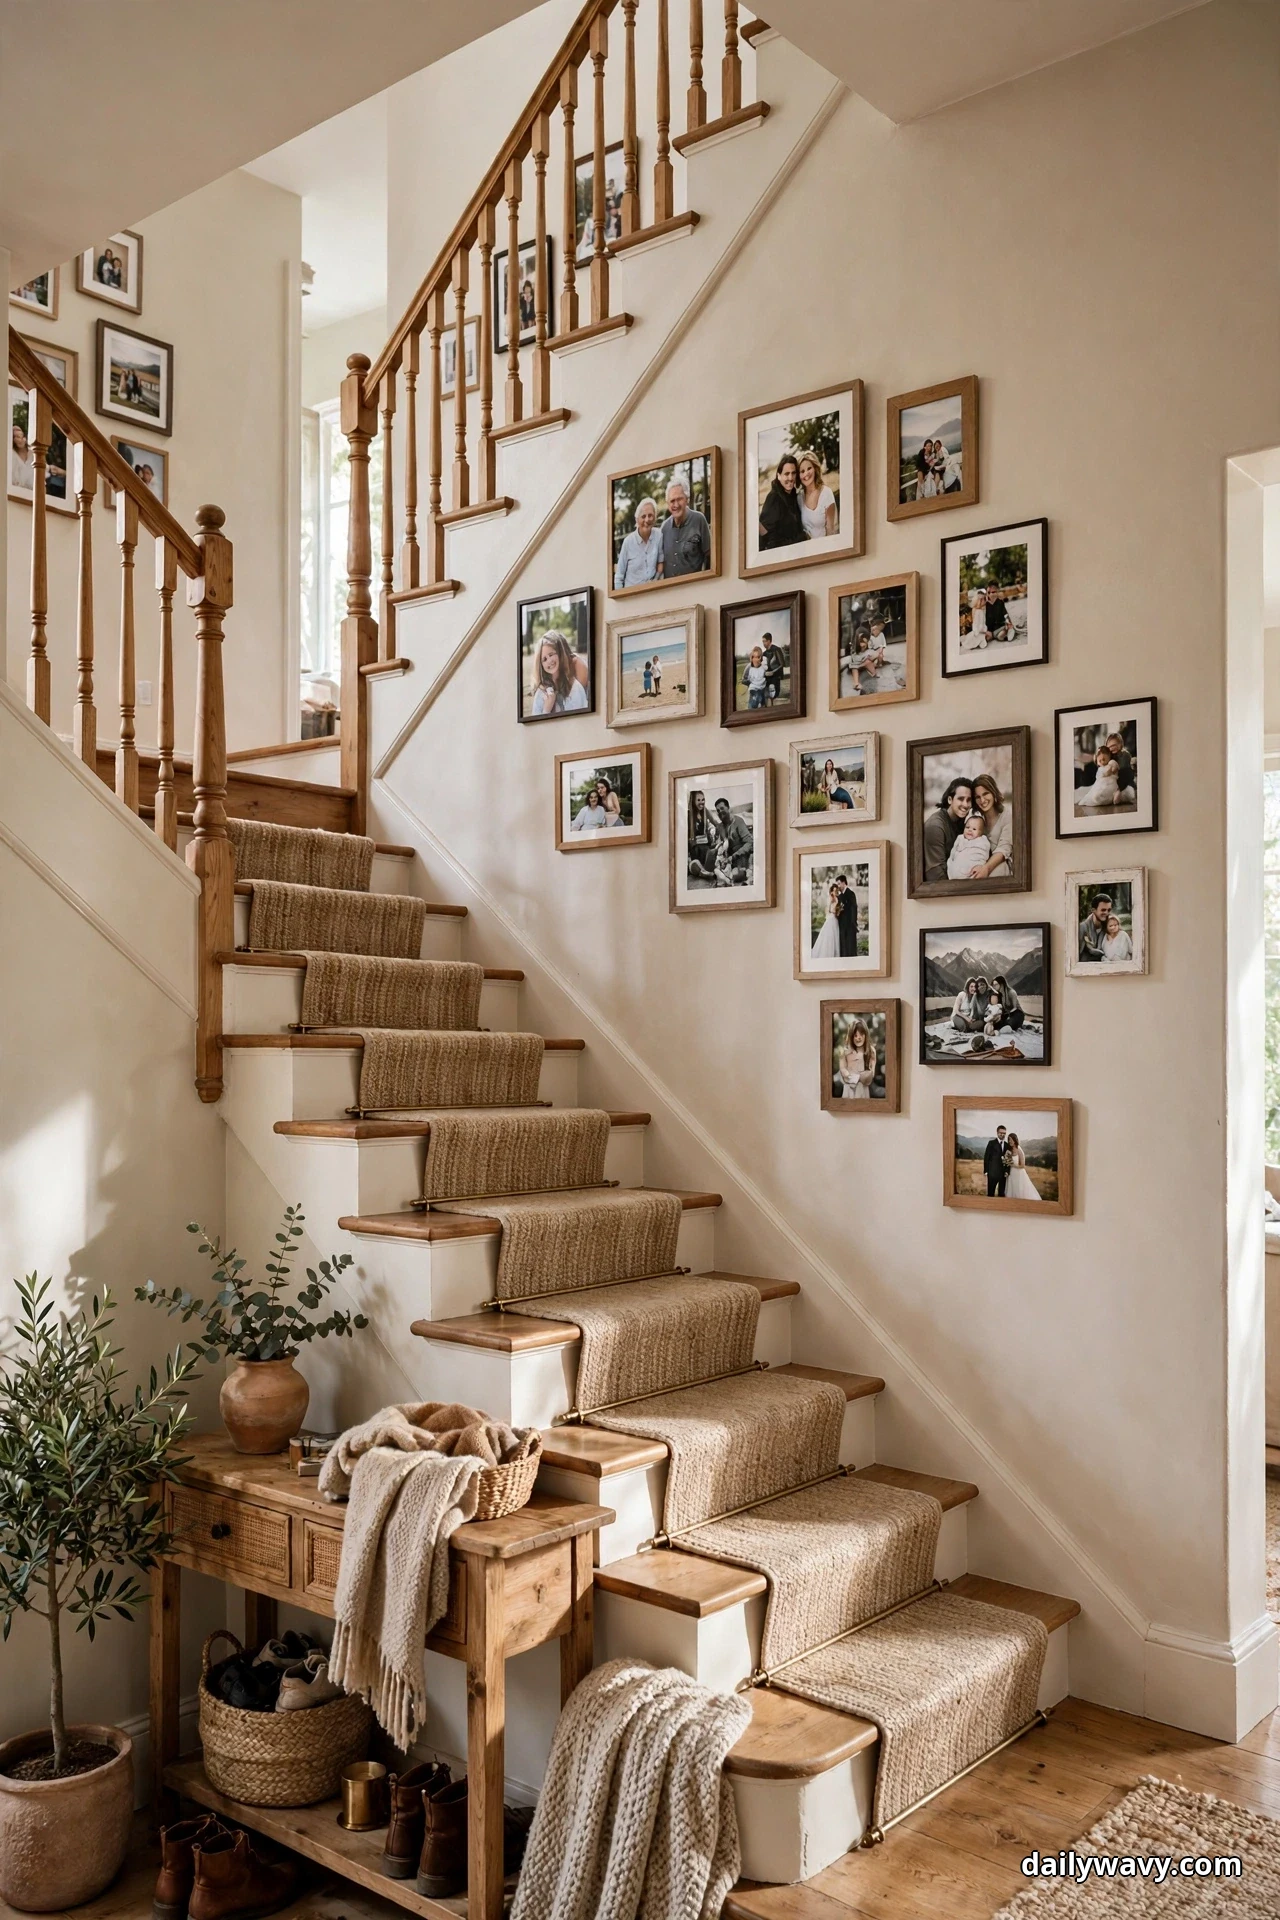
The salon-style cluster is the collected-over-time look: frames of every size, mixed finishes, photos from every era, arranged organically around a visual center. It is the best layout for a growing collection, because you can always add one more frame without breaking the pattern. Staircase walls are its natural home.
What you need: Twelve to eighteen frames in assorted sizes and finishes, kraft paper templates, patience.
How to recreate it: Start with the largest frame at the visual center, slightly left of the wall’s middle, with its center at 57 to 60 inches from the floor. Build outward in a rough oval, keeping 2 to 3 inches between frames. Fill gaps with the smallest frames. For a staircase, let the arrangement follow the stair angle: keep the bottom of the arrangement roughly 8 inches above the stair nosing line and let it climb with the stairs. On a staircase this usually means 12 to 15 feet of wall, so measure first.
Effort and budget: A full afternoon, $80 to $130 for a large frame collection. Thrift stores are a gold mine for mixed vintage frames at a few dollars each.
Troubleshooting: If the cluster looks chaotic, step back and squint. You should see one connected shape, not scattered islands. Move any frame that sits more than 6 inches from its nearest neighbor back toward the group.
Frequently Asked Questions
How do I choose which photos to print?
Pick for variety, not perfection. Mix close portraits with wider shots that show places and seasons. Black-and-white printing unifies photos from different cameras and eras. If a phone photo is low resolution, print it small (5×7 or smaller) rather than blowing it up, where pixelation shows.
What frames should I buy on a budget?
Standard-size wood frames from big-box or craft stores are the sweet spot: they look good, cost a few dollars each, and come in finishes that mix well. Buy all your frames from two or three finish families (oak, matte black, white) so any layout in this guide looks cohesive.
How do I hang frames without damaging the walls?
Adhesive strips hold lightweight frames (a few pounds) on smooth painted drywall and remove cleanly. Anything heavier needs nails or screws with the right anchor for your wall type. Never trust adhesive strips on textured walls, wallpaper, or brick, and check the weight rating on the package before you hang.
How high should a photo wall go?
Keep the visual center of the whole arrangement at 57 to 60 inches from the floor, which is standard gallery height. On a staircase, follow the stair angle instead of the floor line. Above furniture, leave 6 to 8 inches between the furniture top and the lowest frame.
Can I build a photo wall in a rental?
Yes. Picture ledges need only a few anchors, adhesive strips handle small frames, and a lean-to arrangement on a console or shelf needs no wall holes at all. Check your lease for hanging rules first, and photograph the walls before you start so you have a record at move-out.
How do I keep a photo wall from looking dated?
Swap prints seasonally rather than rebuilding the wall. Keep frames neutral and timeless, and let the photos be the part that changes. A yearly refresh of two or three prints keeps the wall feeling current without any new holes.
The Takeaway
A family photo wall is the rare decor project that gets more meaningful the longer it lives on your wall. Start with the layout that fits your space: the repeated-shape grid if you want calm, the asymmetrical cluster if your collection is always growing, the single oversized piece if one photo deserves the spotlight. Measure first, template with paper, hang once. And if you are styling the rest of the room around it, our narrow living room layout ideas and small entryway decor ideas pair naturally with a photo wall project, while the full Home and Decor collection has every room covered.
If this whetted your appetite for wall styling, our staircase gallery wall ideas are worth a look too. For now, pick your layout, print your favorites, and give your family’s story the wall it deserves.