
18 Bathroom Drawer Organization Ideas to Keep Essentials Within Reach
A bathroom drawer that opens to chaos costs you minutes every day. The toothpaste is under the cotton pads, the…
A bathroom drawer that opens to chaos costs you minutes every day. The toothpaste is under the cotton pads, the nail clippers have vanished again, and that spare deodorant you know you bought is hiding somewhere at the back. The good news is that a drawer is one of the easiest storage spaces in the house to fix. It is small, contained, and every improvement shows immediately. These 18 ideas give you a plan for each drawer: what to measure, what to buy, and where everything goes. Most of them take under half an hour and a few inexpensive trays. Pick the ones that match how you actually live, and your mornings will start to feel calmer from day one.
Jump to an idea
- A Narrow Divider For Small Tools
- A Repeated Row Of Containers
- A Soft Non-Slip Liner
- A Tiered Insert Suited To Drawer Depth
- A Separate Section For Each User
- A Small Labeled Lidded Box
- A Front-To-Back Frequency-Of-Use Layout
- A Dedicated Spare-Items Section
- A Compact Travel-Kit Section
- A Grouped Arrangement By Routine
- An Upright File-Style Row
- A Small Catchall For Temporary Items
- A Visible Empty Buffer Space
- A Removable Full-Width Divider
- Long Adjustable Dividers
- Small Square Trays
- A Shallow Front-Row Essentials Tray
- A Compartment For Backup Items
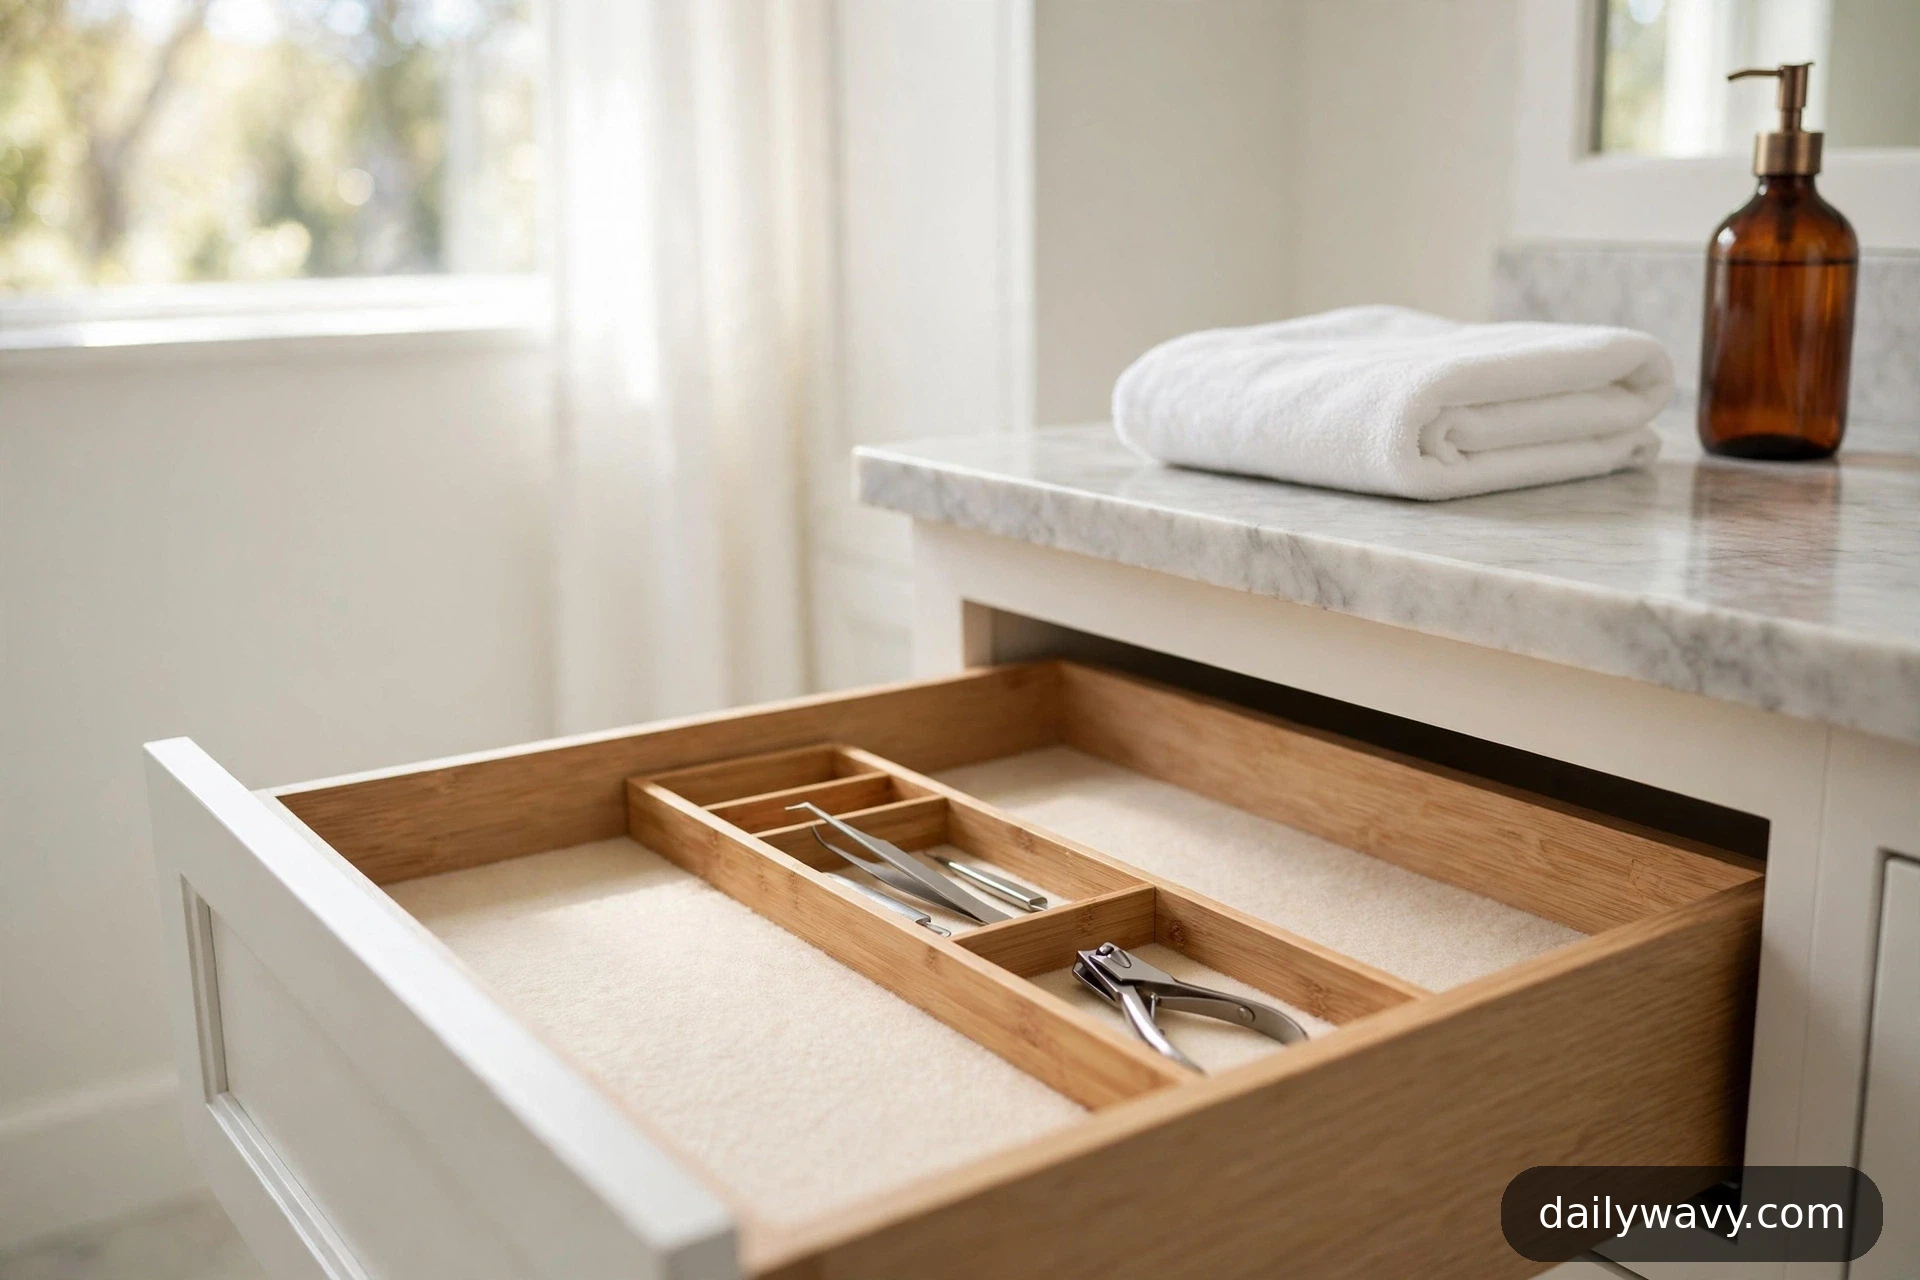
Measure before you buy anything
Every idea below starts with a tape measure, and there is a reason for that. Bathroom drawers are not standard. A vanity drawer might be 18 inches wide and 4 inches deep, or it might be 24 inches wide and barely 3 inches deep if the plumbing eats into the cabinet. Depth is the measurement most people skip, and it is the one that matters most: a beautiful organizer that is half an inch too tall will keep the drawer from closing.
Measure the inside width, the inside depth from front to back, and the usable height from the drawer bottom to the top edge of the drawer box. Then measure the height of the tallest item you plan to store standing up. If your toothpaste tube is 8 inches tall and your drawer is 7 inches deep front to back, that tube has to lie down, and your layout should plan for that. For a whole-bathroom approach to small-space storage, our small bathroom storage guide covers the spaces beyond the drawer too.
Once you have the numbers, pull everything out of the drawer and sort it into three piles: use daily, use weekly, and use rarely. Toss expired sunscreen, dried-out mascara, and the hotel lotions from two trips ago. Now you are working with a clean drawer and a short list, and every idea below slots into place.
1. A Narrow Divider For Small Tools
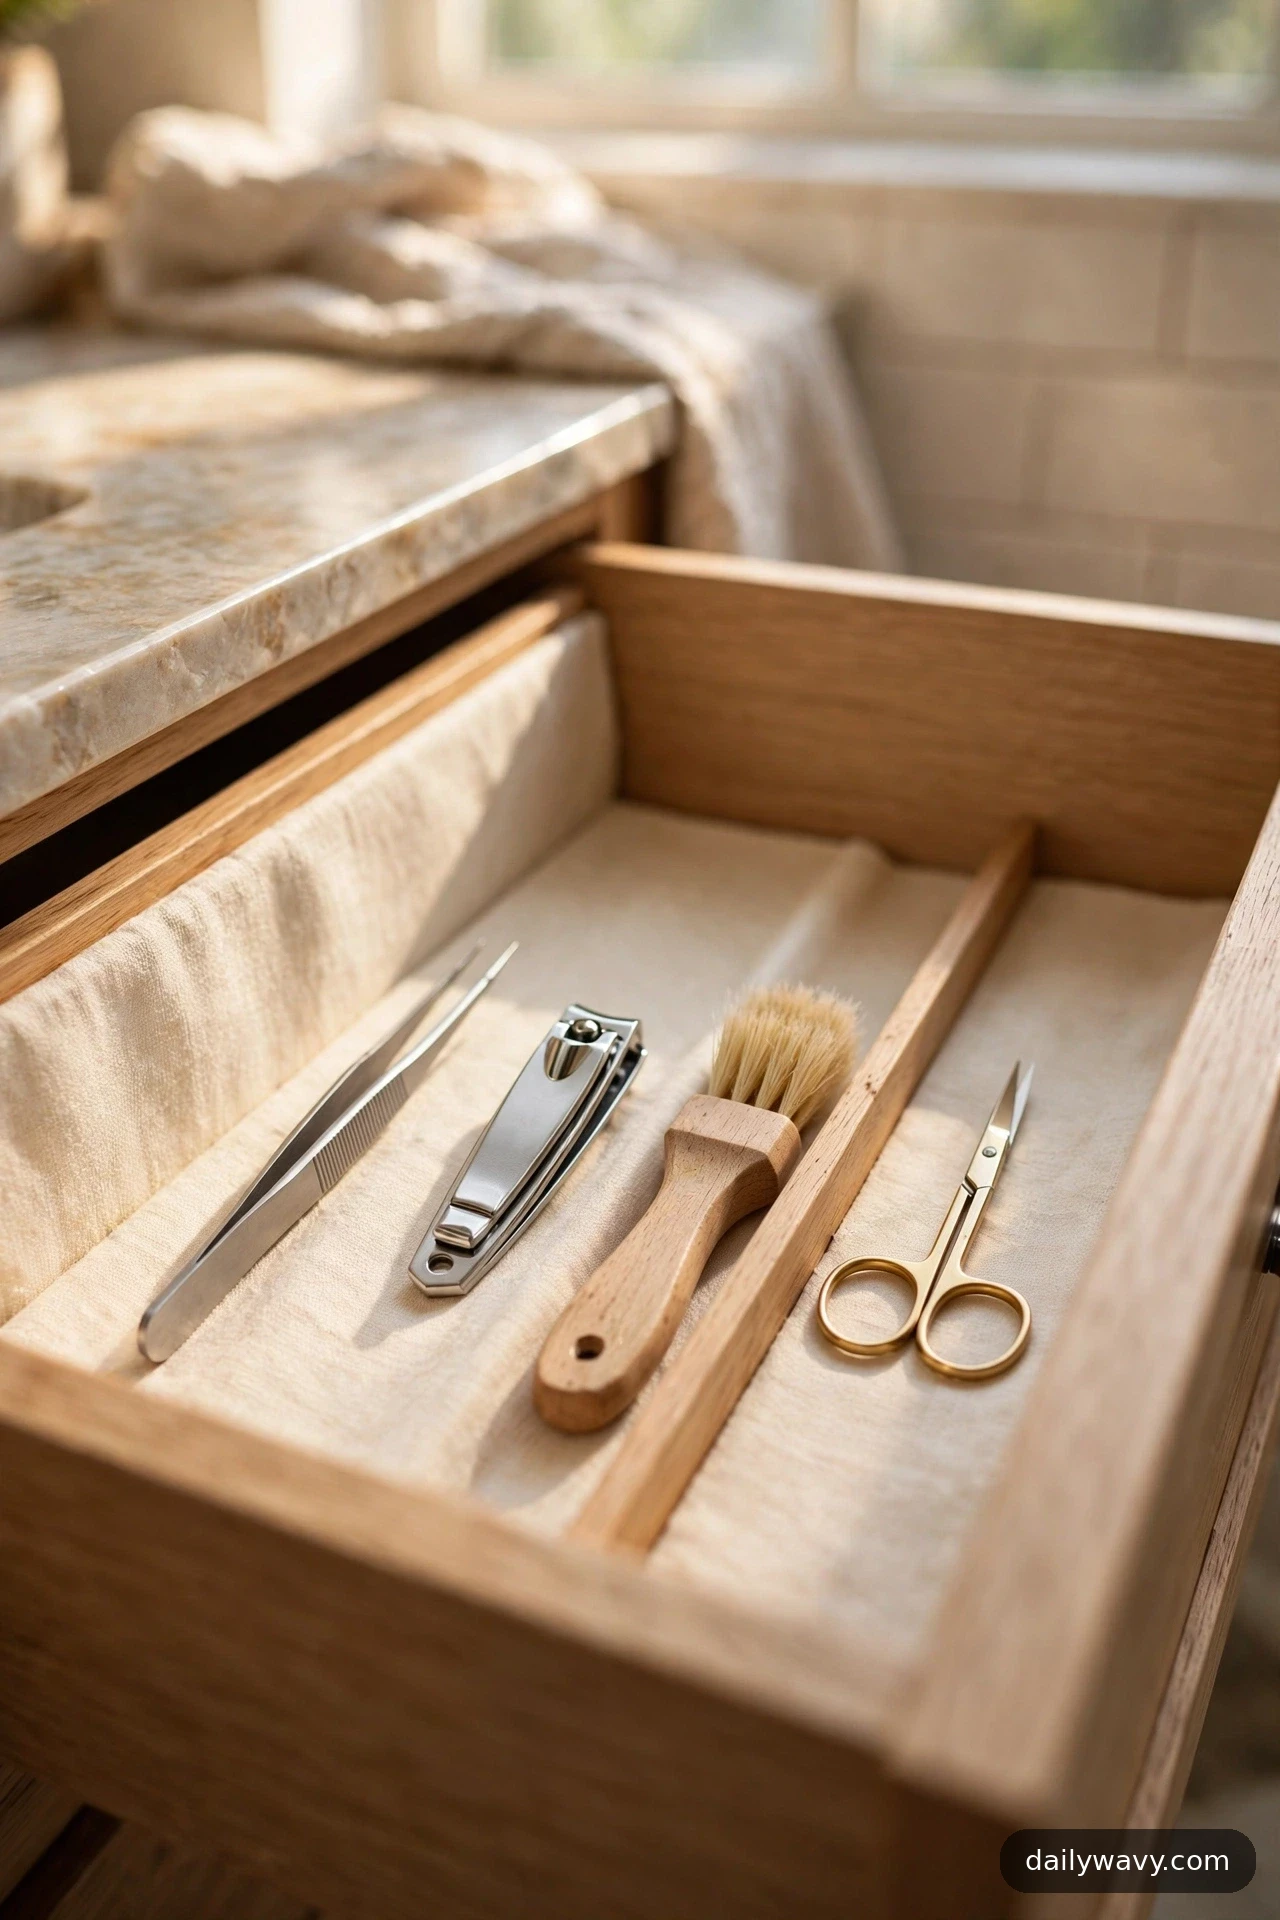
Small tools are the worst offenders in a bathroom drawer. Tweezers, nail clippers, a cuticle pusher, an eyebrow brush: each one is thin, light, and perfectly shaped to slide into a crack and disappear. A narrow divider gives them a lane of their own where they cannot migrate.
What to measure: Find a strip of your drawer about 3 to 4 inches wide along one side. Measure its length front to back so the divider sits flush without rattling.
Materials: One narrow bamboo or acrylic divider tray (look for a 3-inch-wide utensil-style tray), plus the existing items sorted by type.
Placement: Set the divider along the left or right edge of the drawer so it reads as a dedicated tool lane. Stand tweezers and clippers with the handle end up if the tray has small compartments, or lay them flat in a single row if it does not.
Effort: About 10 minutes, including sorting.
Lower-cost alternative: Cut the bottom off a sturdy cardboard box and wrap it in contact paper for a free narrow lane. It will not last forever, but it proves the concept before you spend money.
2. A Repeated Row Of Containers
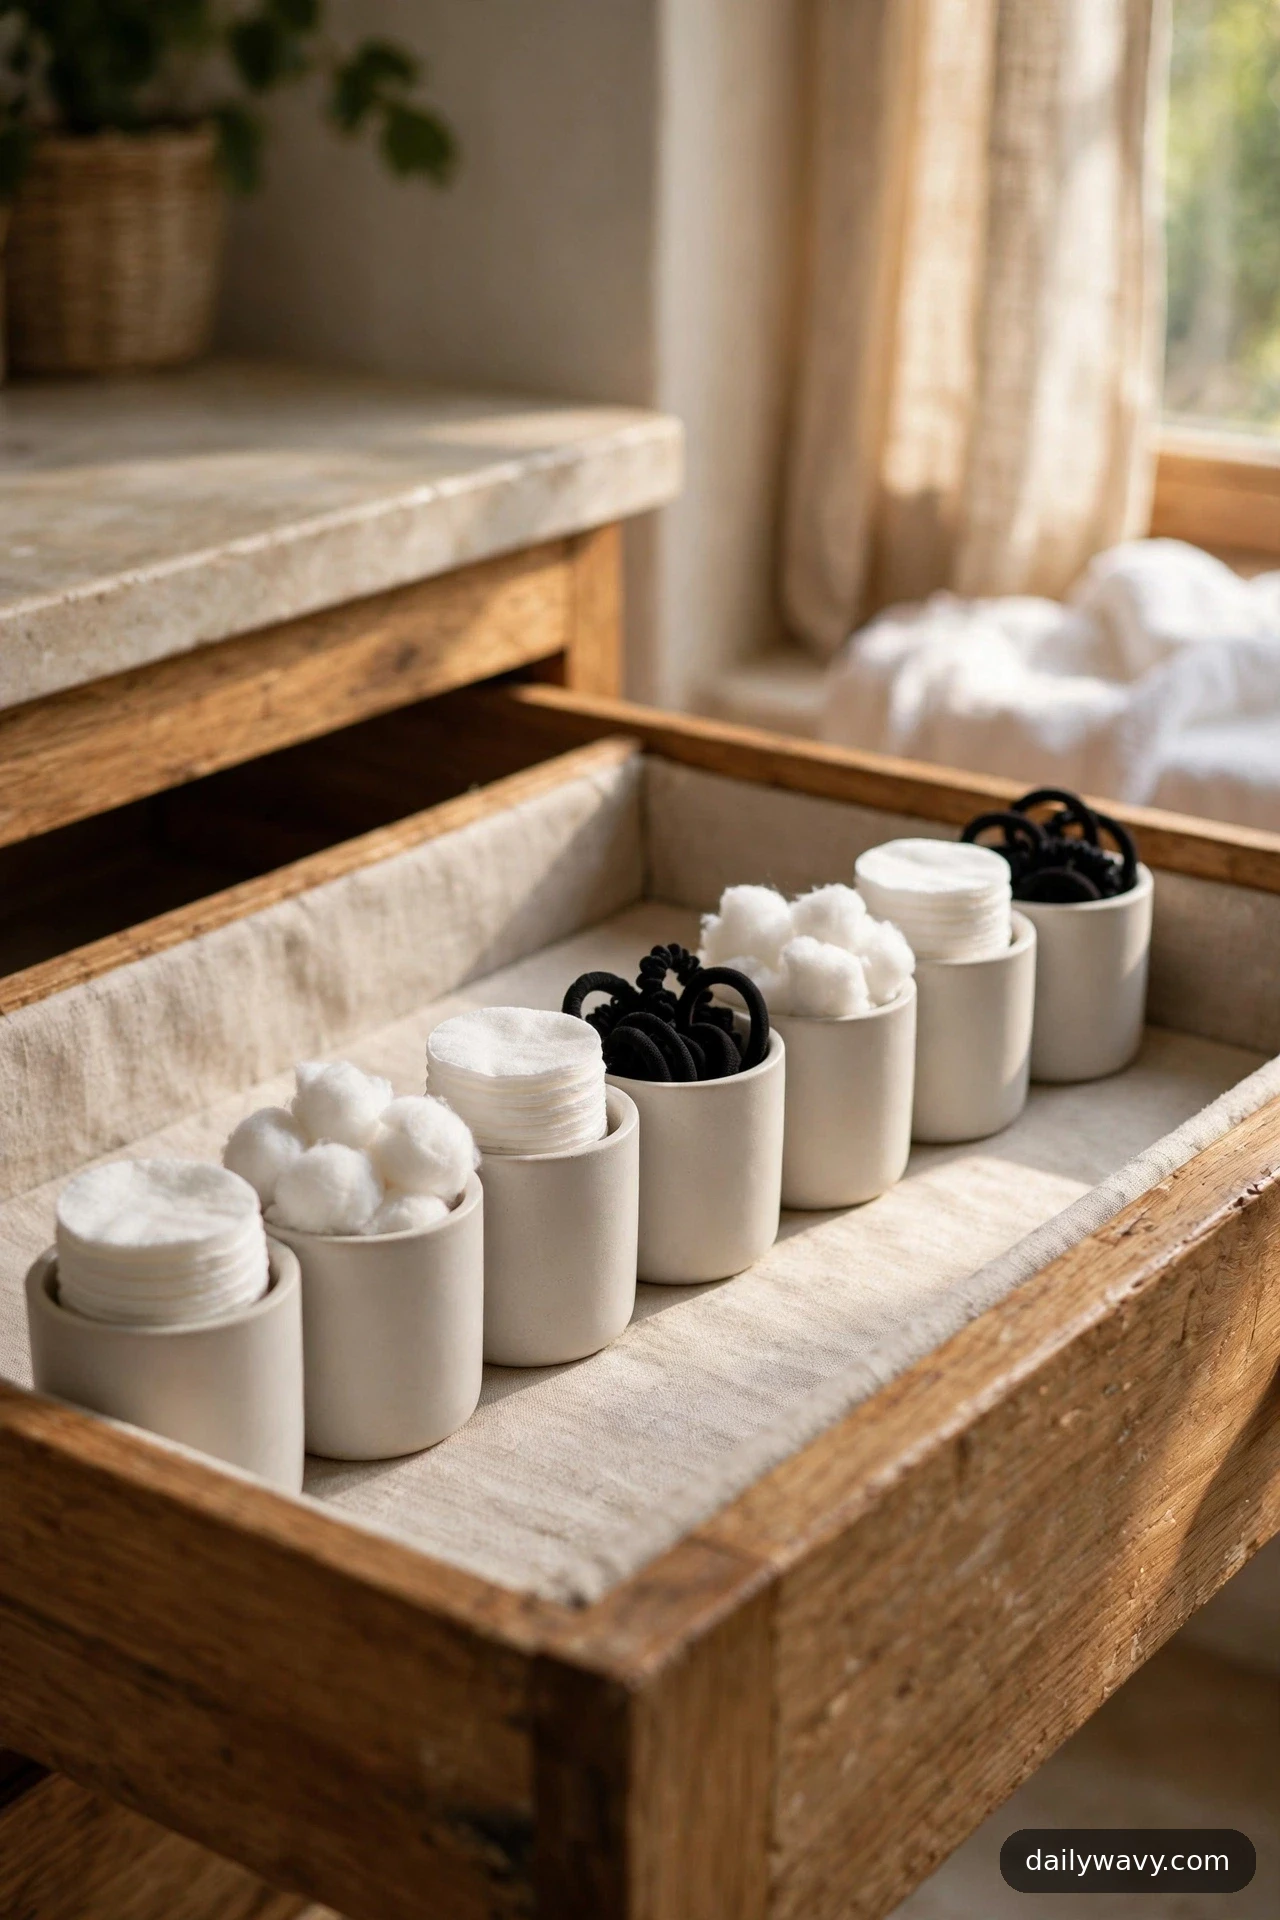
There is a reason stores display things in rows: repetition looks calm and makes each item findable at a glance. Fill one drawer zone with a row of identical small containers, and the drawer instantly reads as organized even when the contents are ordinary cotton pads and hair ties.
What to measure: Measure the zone you want the row to occupy. Divide the width by the container diameter (a 3-inch container in a 16-inch zone gives you five across). Leave a quarter inch of wiggle room per container so you can lift one out.
Materials: A set of 5 to 8 matching small containers: matte ceramic ramekins, small acrylic cups, or lidded glass jars. Uniformity is the whole point, so buy them as a set.
Placement: Line them across the back half of the drawer or down one side. Put the most-used container closest to the front.
Effort: 15 minutes, plus a shopping trip or an online order.
Lower-cost alternative: Small mason jars or clean baby-food jars give the same repeated-row effect for almost nothing, and they are easy to wash.
3. A Soft Non-Slip Liner
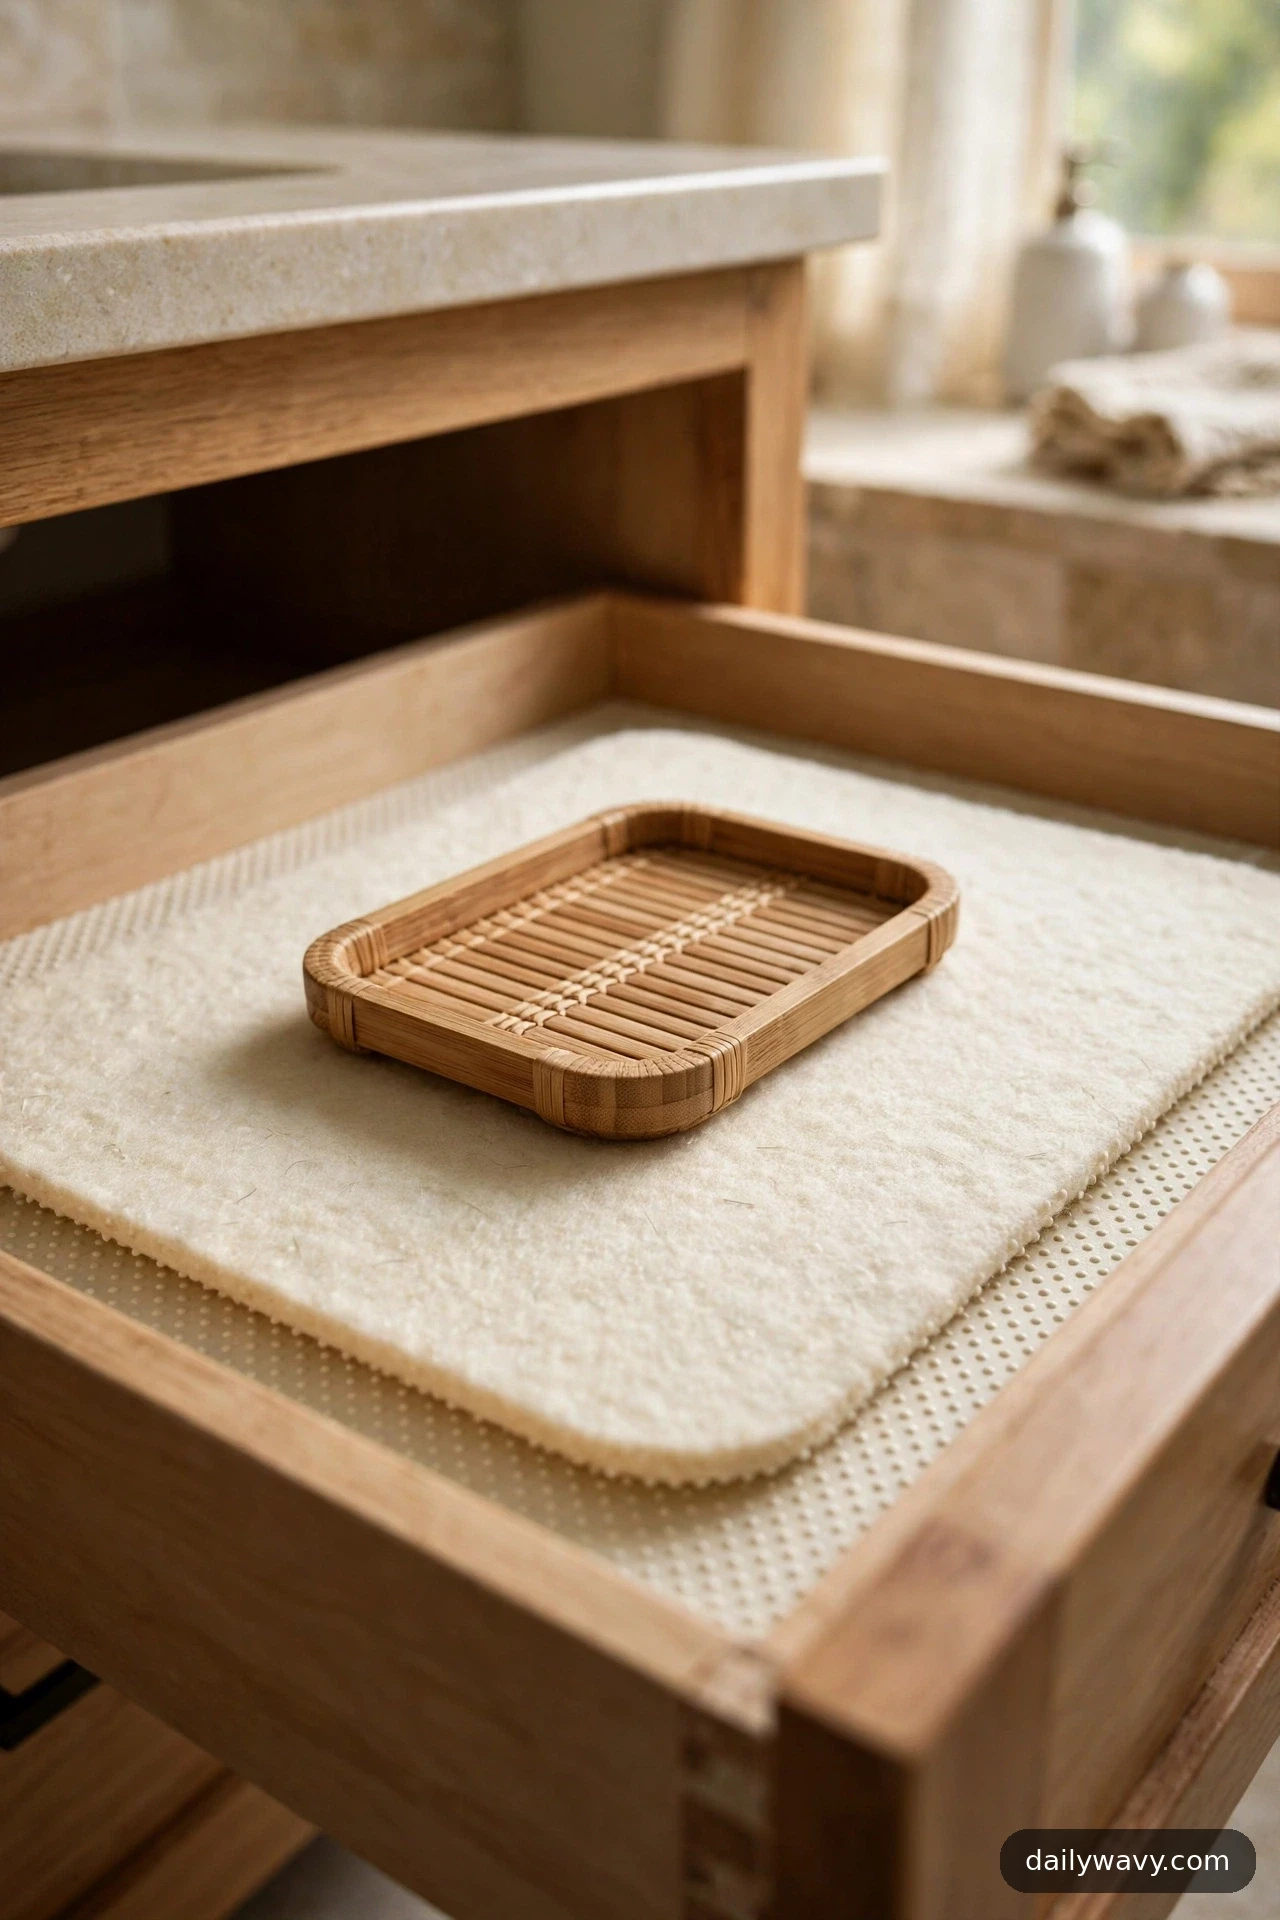
Everything you organize will slide out of place the first time you yank the drawer open if the drawer bottom is bare wood or slick laminate. A soft non-slip liner is the invisible foundation that keeps every tray and bottle exactly where you left it.
What to measure: Measure the drawer floor, then subtract a quarter inch on each side so the liner lies flat without buckling at the edges.
Materials: One roll of non-slip drawer liner (the cushioned felt-backed kind feels softer under trays than plain rubber mesh) and scissors. A marker helps for tracing.
Placement: Lay it flat across the whole drawer floor before any organizer goes in. If your drawer has a curved front edge, cut a gentle curve rather than folding the liner up.
Effort: 20 minutes, mostly careful cutting.
Lower-cost alternative: A piece of shelf liner you already own, or even a cut-to-size silicone baking mat for a small drawer, works surprisingly well and wipes clean.
4. A Tiered Insert Suited To Drawer Depth
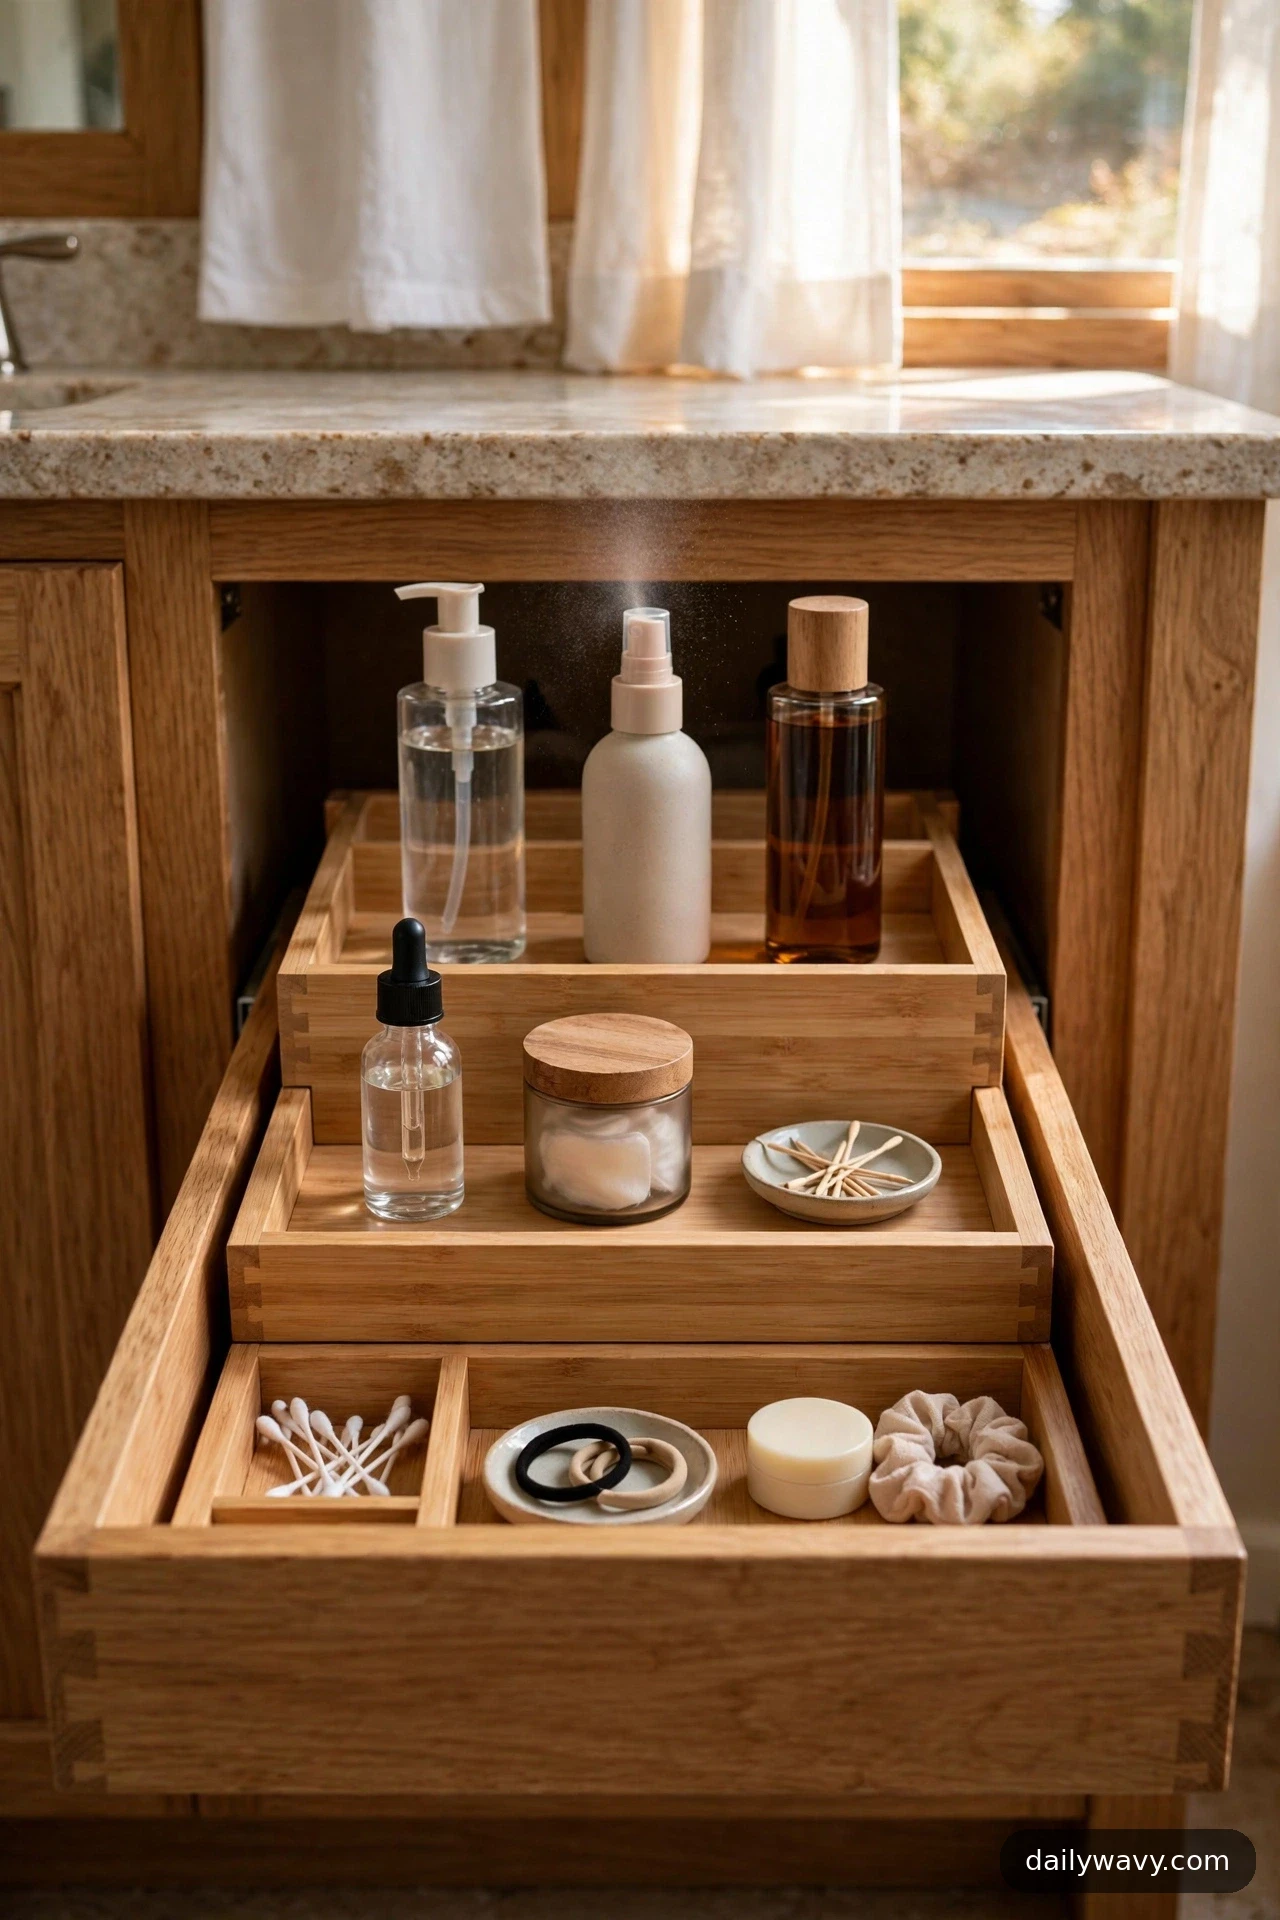
Deep vanity drawers waste their own space. Tall bottles stand at the back and hide everything in front of them, so you end up buying duplicates of things you already own. A tiered insert turns that depth into an advantage: each row steps down toward you like stadium seating, so every label stays visible.
What to measure: Measure the drawer depth front to back and the height from the drawer floor to the top of the drawer box. The insert must be shorter than that height by at least half an inch or the drawer will jam. Measure your tallest bottle too.
Materials: One stepped drawer insert (bamboo or plastic, typically 3 tiers), sized to your drawer. Some are expandable widthwise, which is handy for odd sizes.
Placement: Push the insert to the back of the drawer. Tallest items go on the highest back tier, shortest at the front. Keep the very front row for things you grab daily.
Effort: 20 minutes to position and load.
Lower-cost alternative: Stack two small sturdy boxes of different heights (a shoebox and a tissue box, wrapped in kraft paper) to fake the stepped effect for free as a temporary trial.
5. A Separate Section For Each User
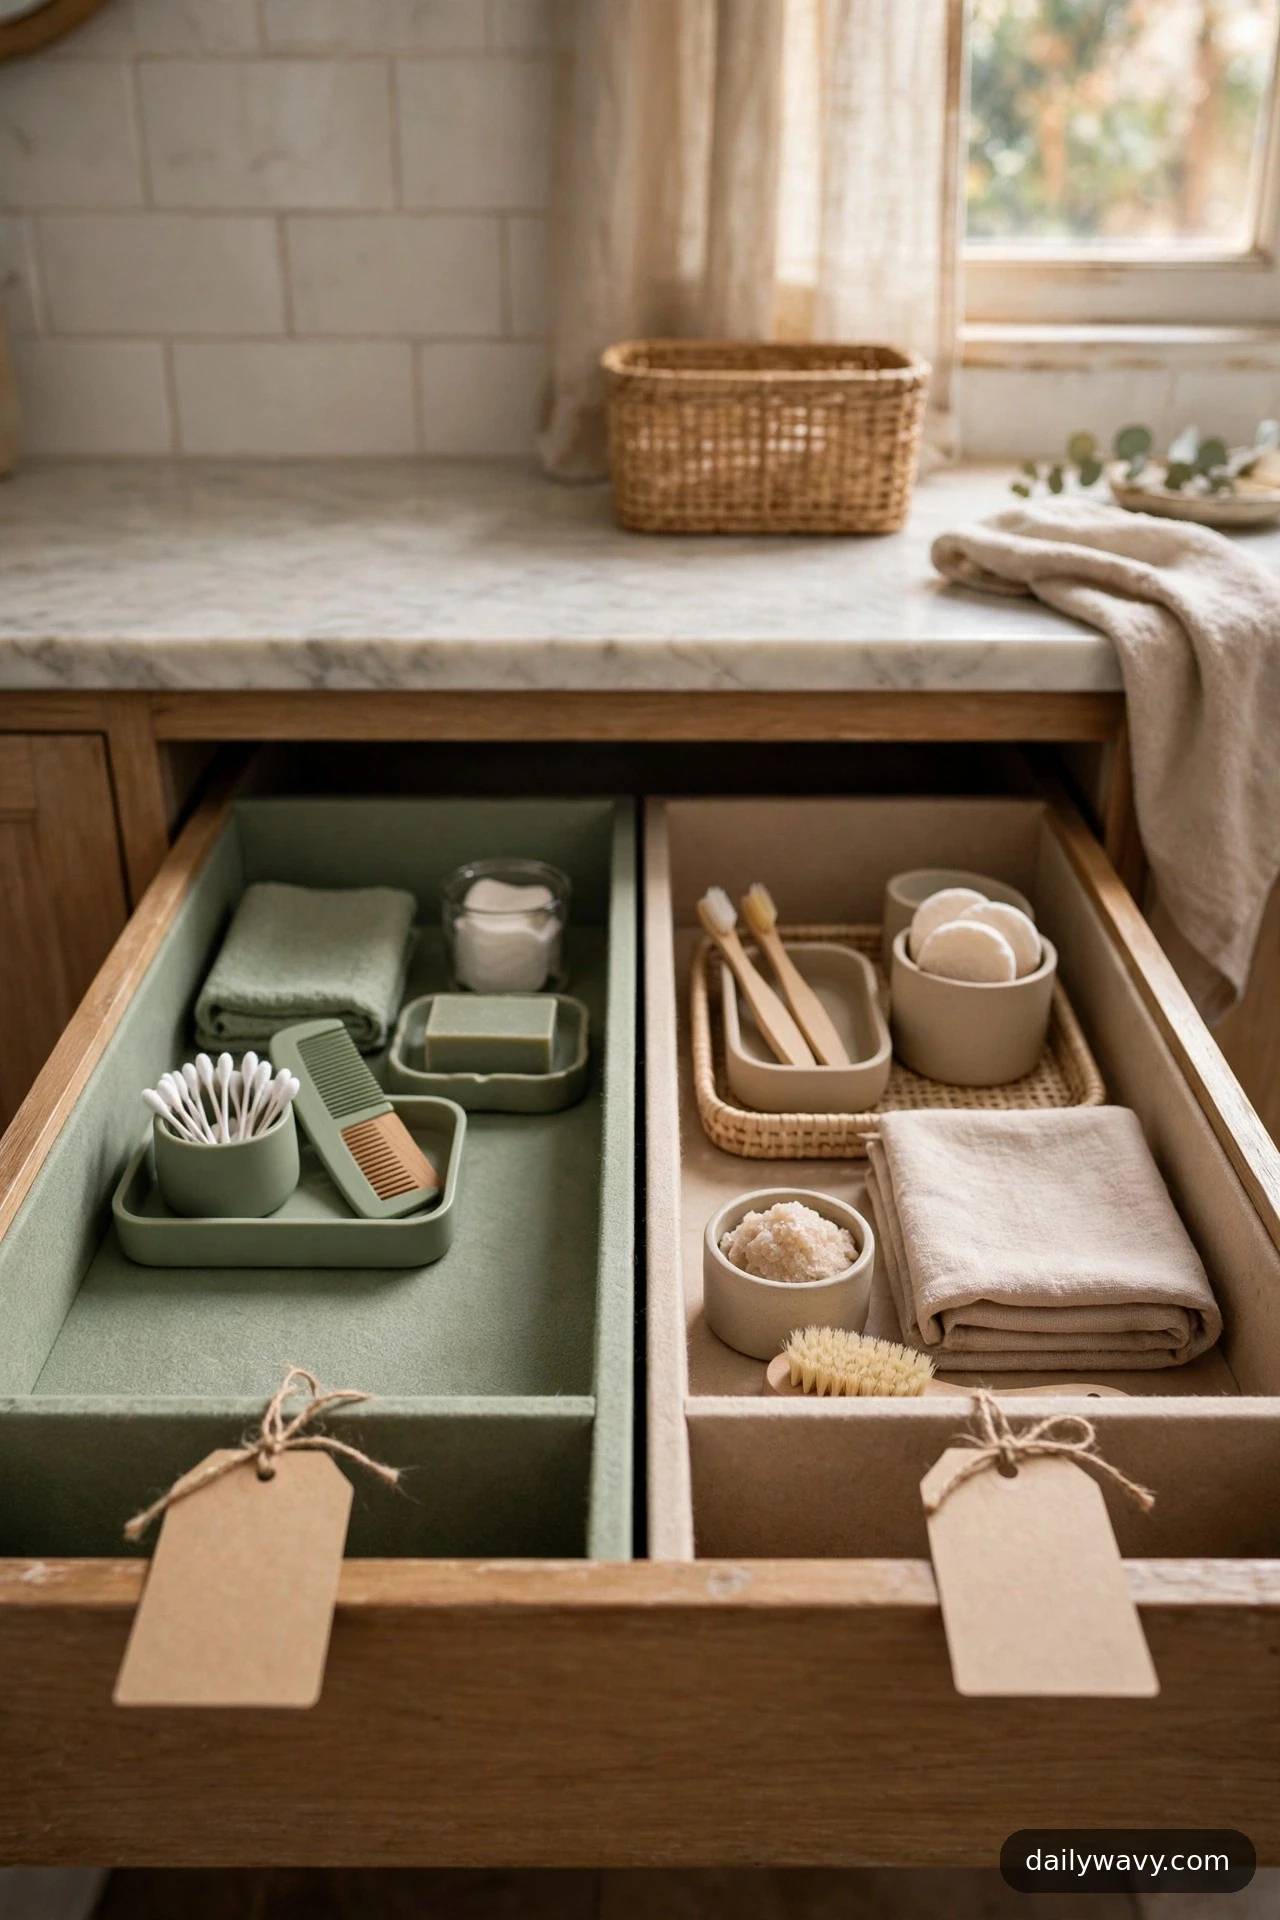
A shared bathroom drawer turns into a border dispute fast. One person’s razor ends up in the other’s moisturizer zone, and nobody can find anything. Splitting the drawer into clear per-person sections ends the friction: each user gets a defined territory, and the shared middle holds the things you both use.
What to measure: Set aside a 2 to 3 inch shared strip in the middle for communal items like hand soap refills and spare floss, then divide the remaining width by the number of users.
Materials: Two trays in the same style but different colors or materials (one sage green, one warm beige, for example) plus one smaller neutral tray for the shared middle. Small blank tags help mark boundaries.
Placement: Left zone for one user, right zone for the other, shared tray between them. Keep each person’s daily items at the front of their own zone.
Effort: 30 minutes including a sorting session per person.
Lower-cost alternative: Two different-colored washcloths laid as zone mats, with a folded towel as the divider line. It is not fancy, but the boundary is unmistakable.
6. A Small Labeled Lidded Box
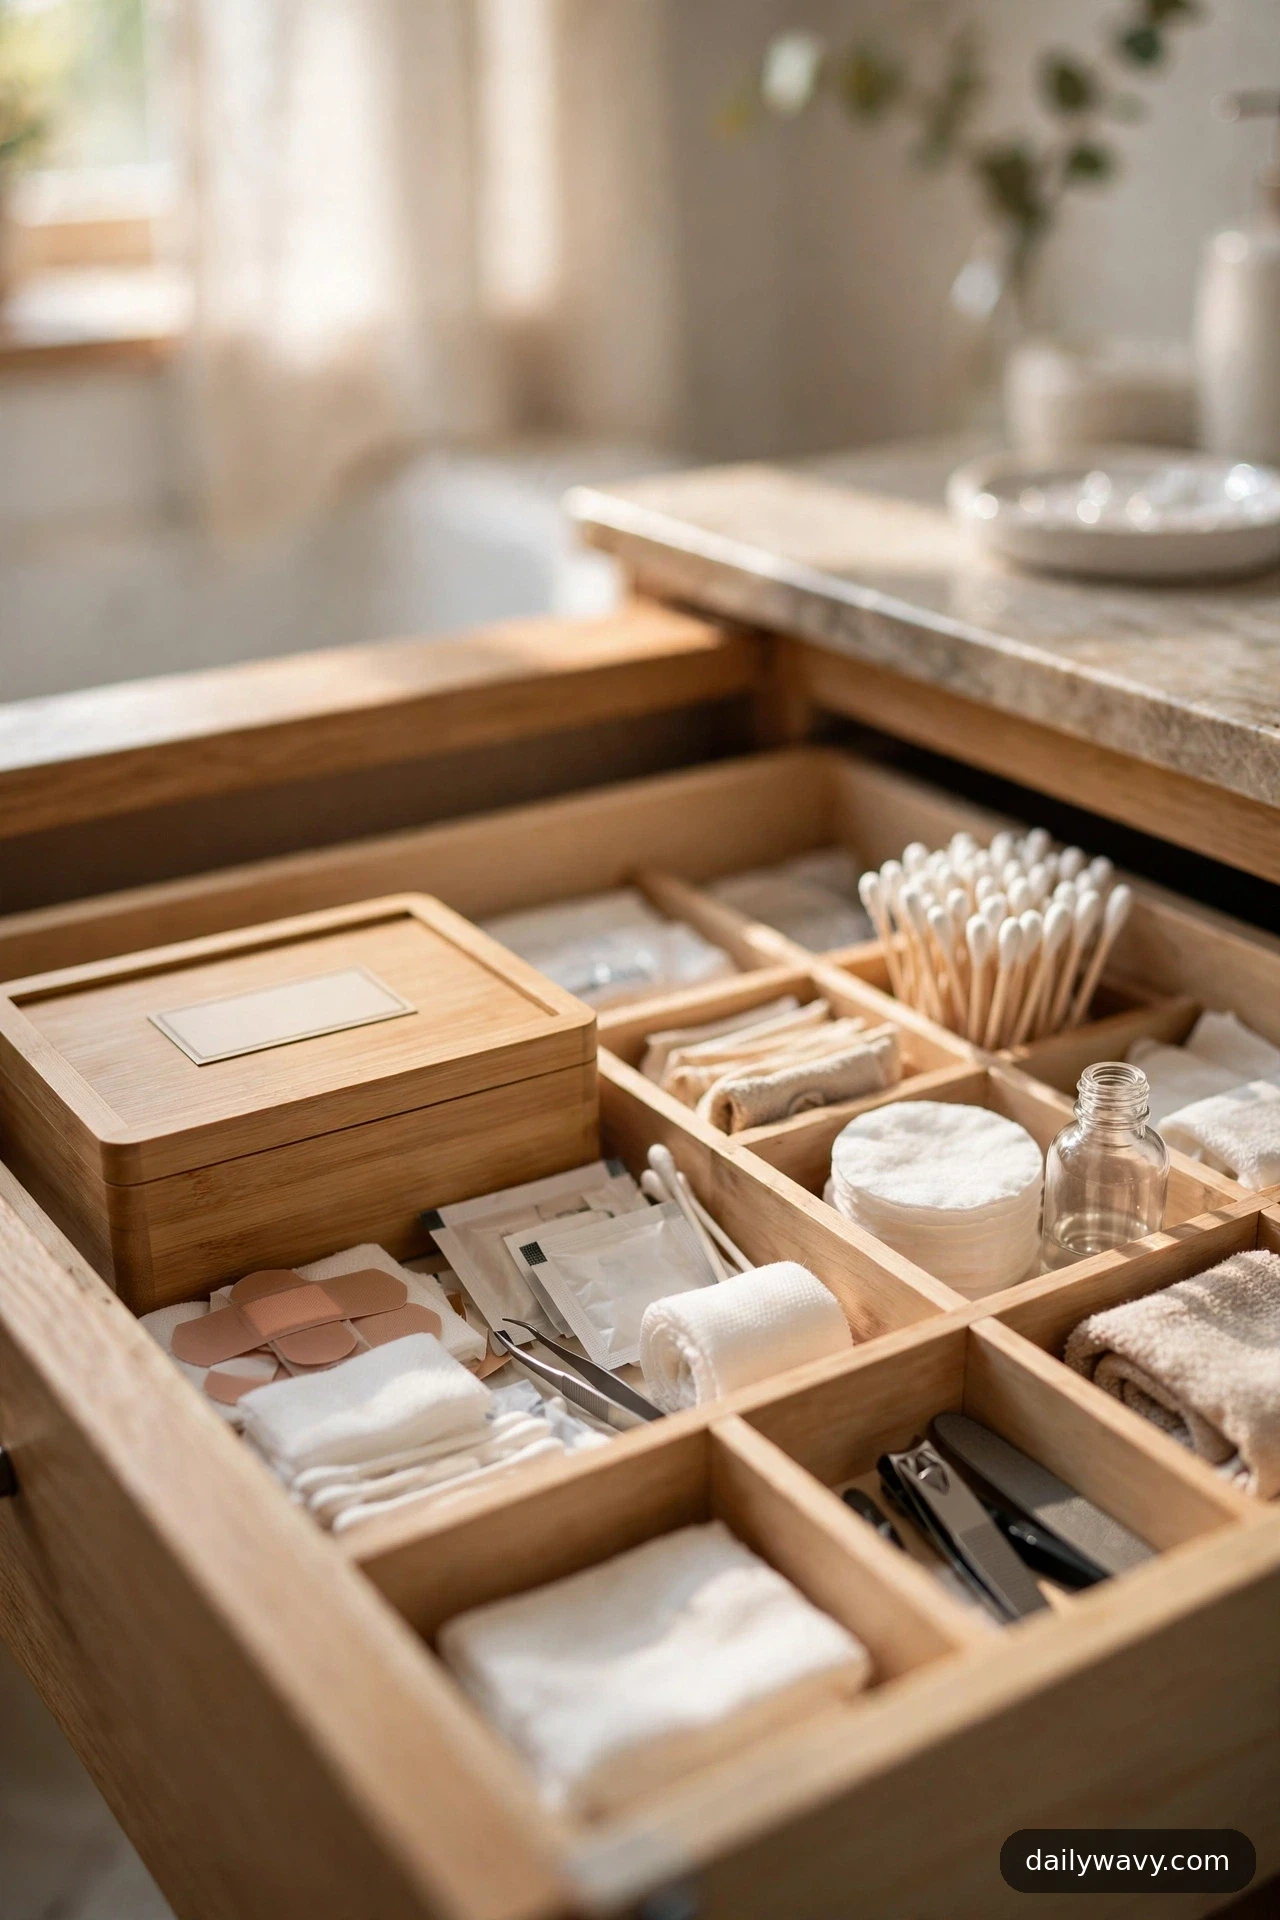
Some things do not want to be seen. First-aid ointments, spare contact lens cases, the backup tweezers: useful, but visually noisy. A small lidded box hides the clutter while a simple label tells you exactly what is inside, so you get the calm look of a styled drawer without losing track of the practical stuff.
What to measure: Pick a box around 4 by 6 inches and no taller than half your drawer interior height, so the lid closes flat under the drawer above.
Materials: One small bamboo or lacquered box with a lid, plus a blank adhesive label or a small chalkboard-style tag (write nothing fancy, just the category name).
Placement: Tuck the box toward the back or a back corner of the drawer. Put the items you reach for weekly inside, not the daily ones, since opening a lid adds one small step. If young children use the bathroom, keep medicines and sharp tools in a latched cabinet or on a high shelf instead of in an open drawer.
Effort: 10 minutes.
Lower-cost alternative: A clean shoebox lid flipped over as a tray with a folded index card as the label. It sounds plain, but closed and labeled beats open and chaotic every time.
7. A Front-To-Back Frequency-Of-Use Layout
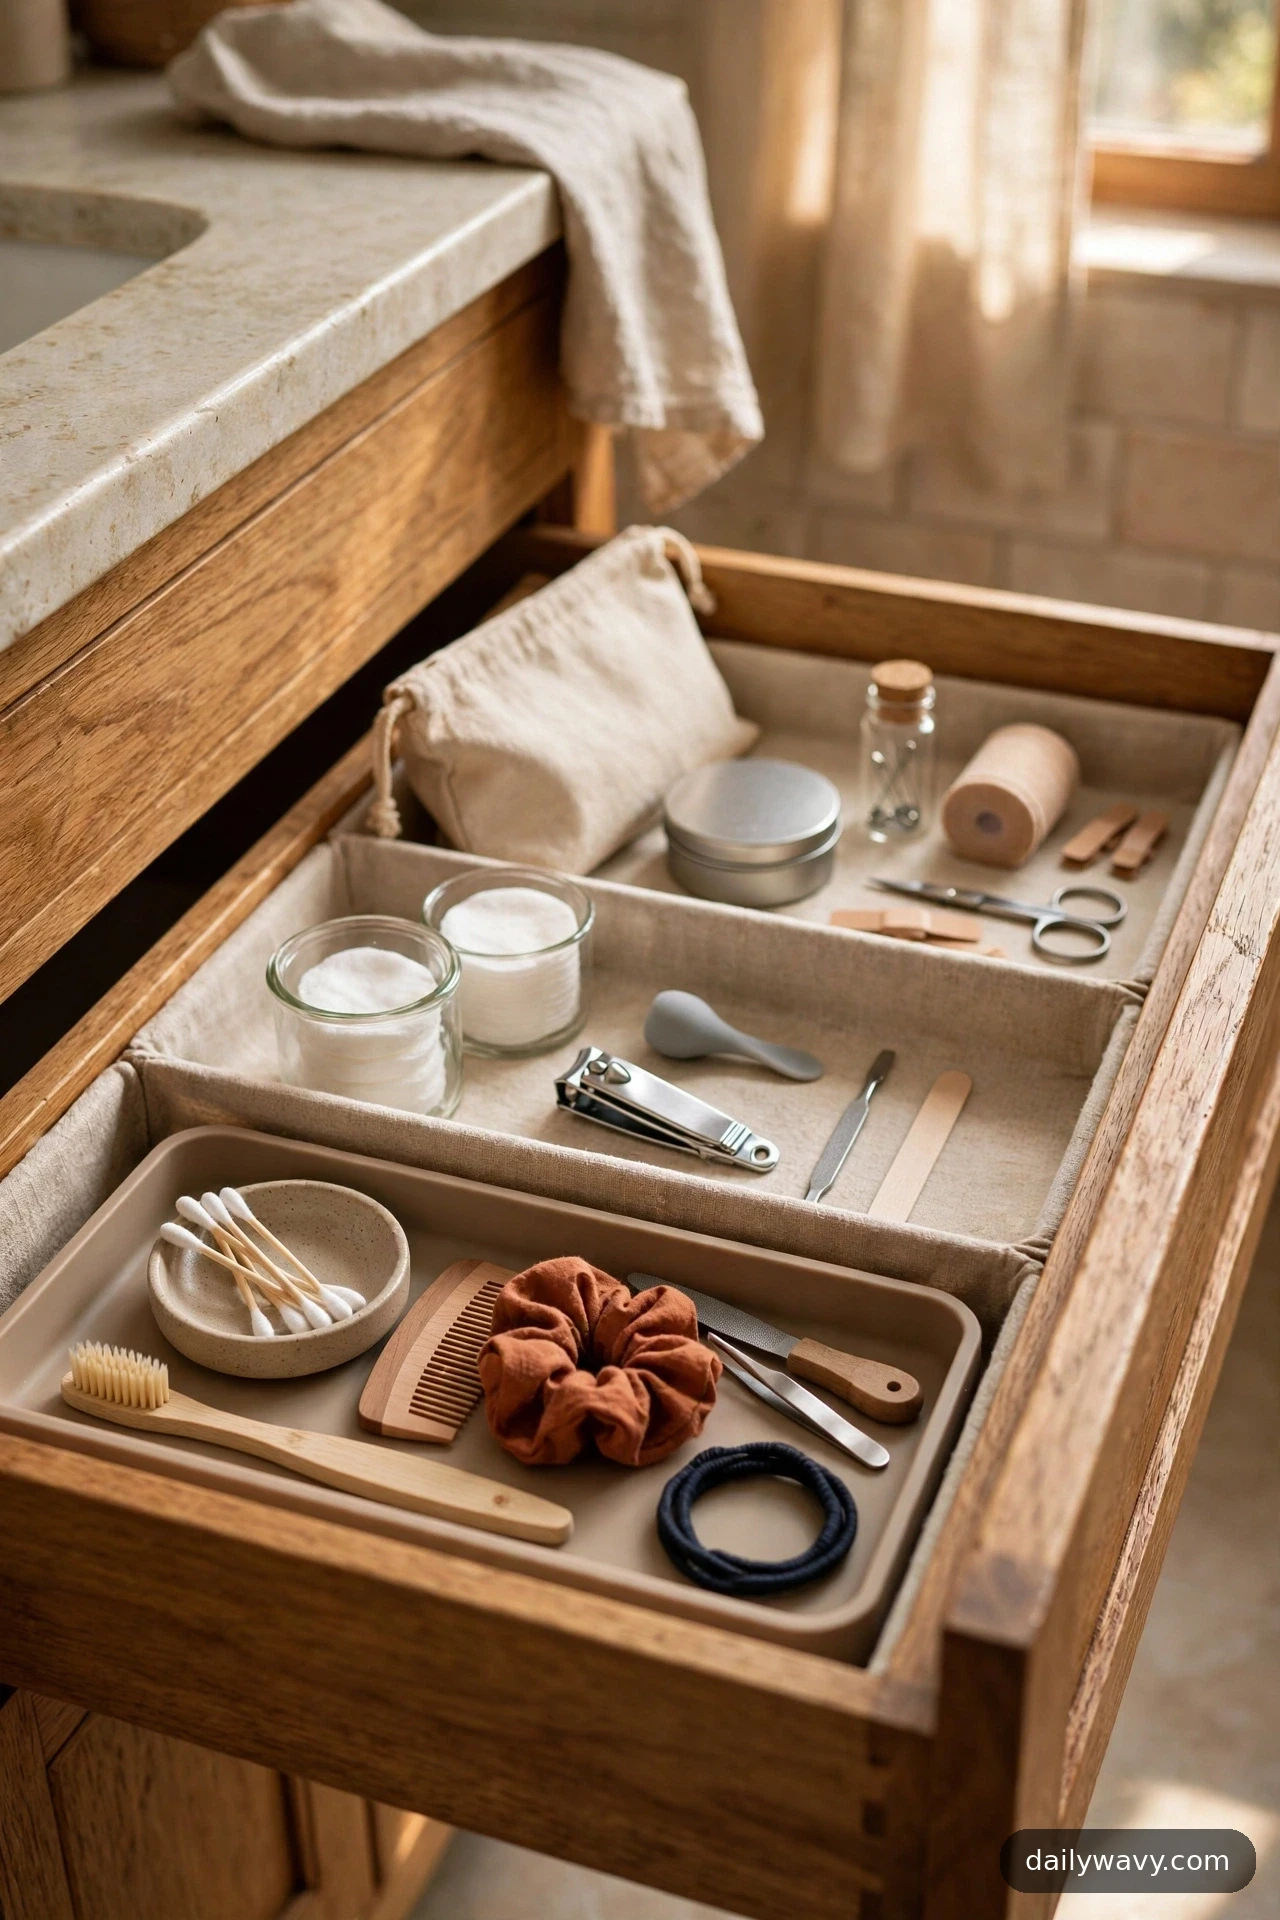
You reach for your toothbrush and deodorant every day, your face mask twice a week, and that fancy serum only when you remember it exists. Arranging the drawer front to back by how often you use things means your hand lands on the daily items first and the occasional ones never block them.
What to measure: Measure three zones front to back: about 5 inches at the front for daily items, the middle for weekly items, and the back for occasional ones. Adjust the split to your own routine.
Materials: One shallow front tray for the daily zone, plus your existing items sorted by frequency. No special organizers needed for the middle and back zones.
Placement: Daily tray at the very front of the drawer where your fingers land first. Weekly items behind it, occasional items at the back. If you are right-handed, bias the daily tray slightly right.
Effort: 25 minutes, mostly honest sorting.
Lower-cost alternative: Use a folded hand towel as the daily zone mat and leave the rest of the drawer open. The towel boundary is enough to keep the zones from drifting together.
8. A Dedicated Spare-Items Section
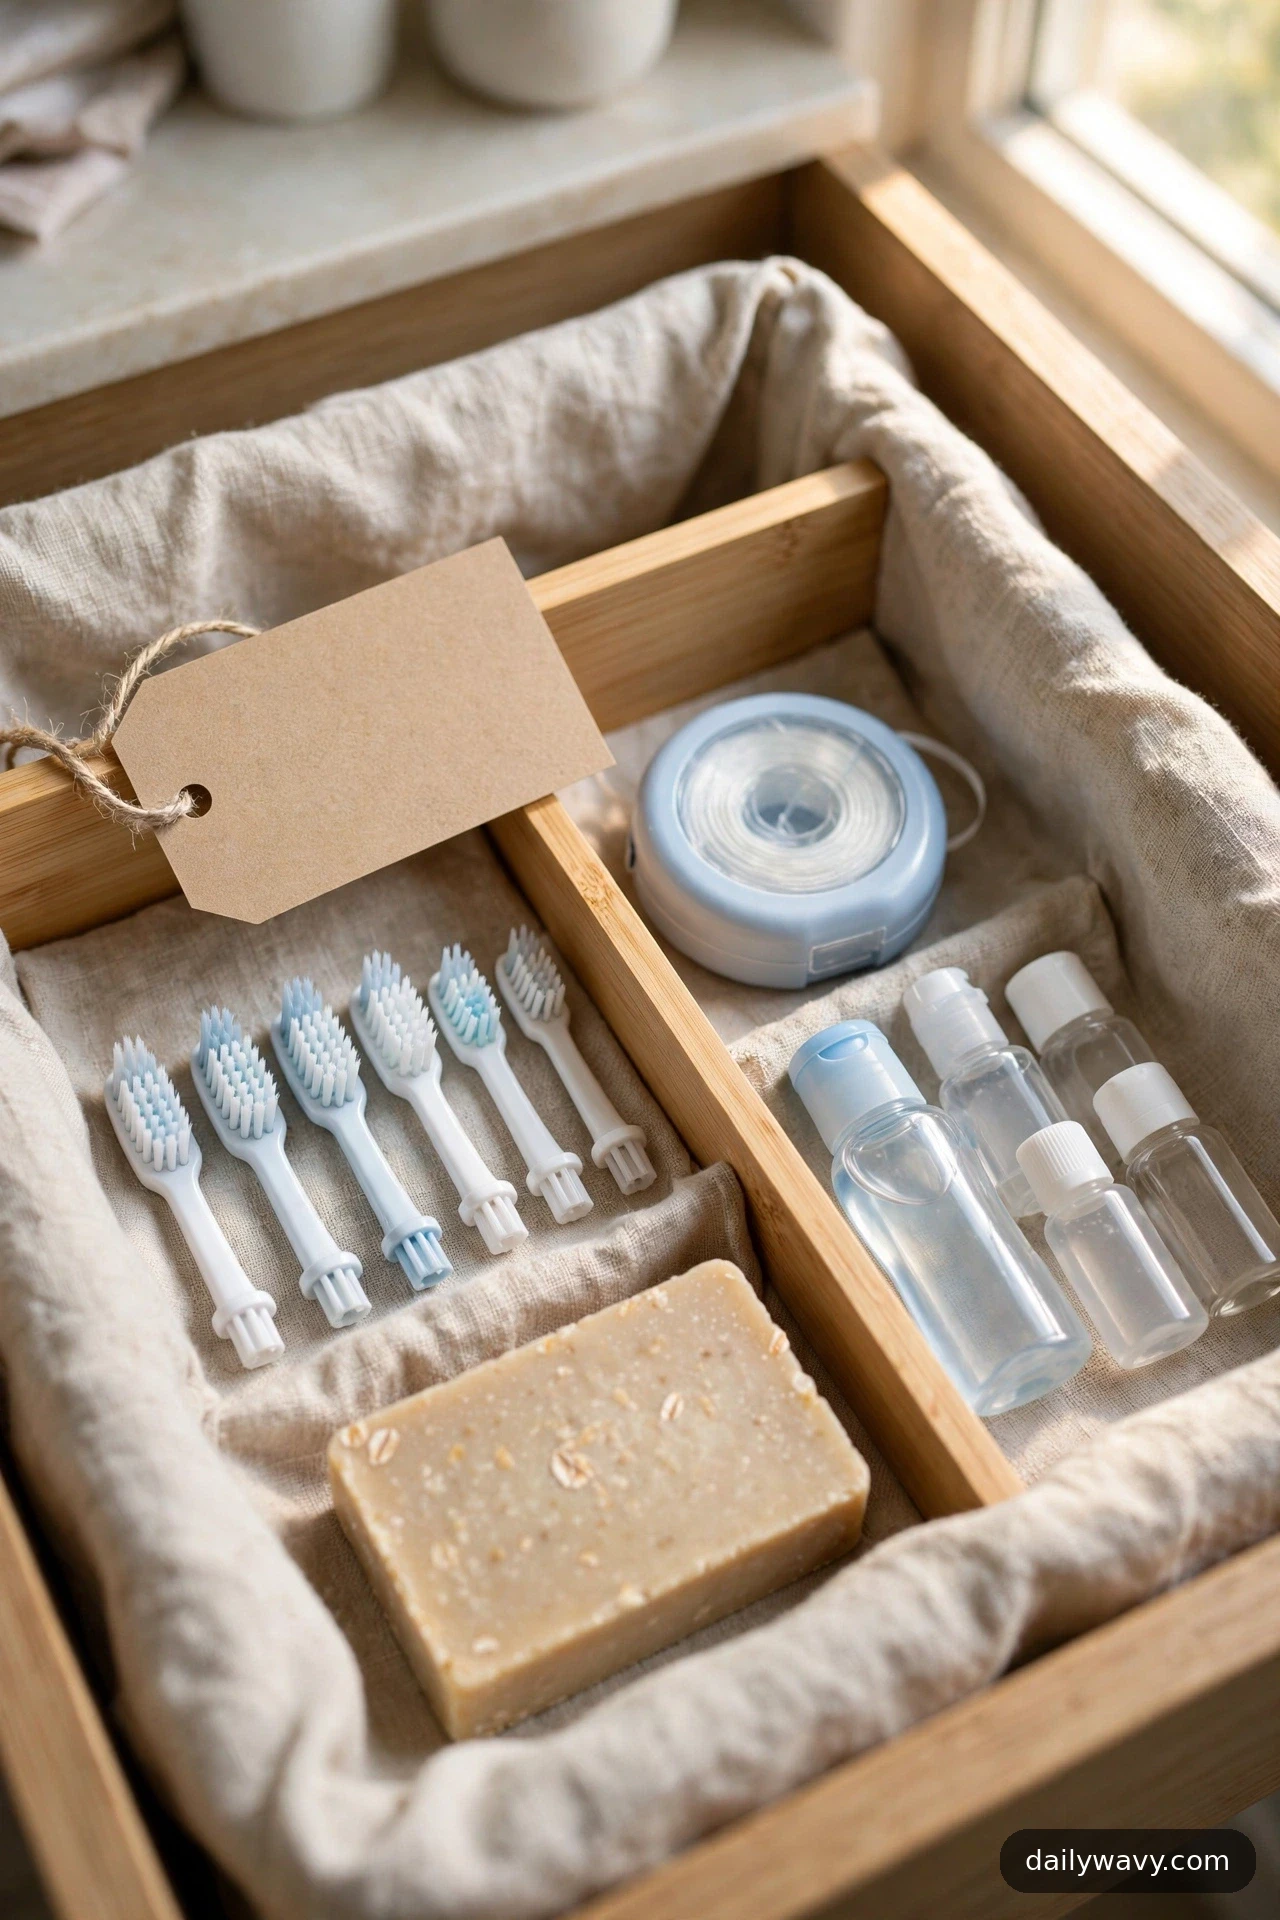
Running out of floss mid-routine is a small annoyance that a spare-items section eliminates completely. Keep one backup of each consumable you use, stored in a defined zone, and restock it the day you open the backup. You are far less likely to discover an empty tube at the worst moment.
What to measure: Reserve a strip about 4 inches wide along the back of the drawer. Count your consumables: toothpaste, floss, soap, razor cartridges, contact solution. One backup each is plenty.
Materials: One narrow tray or lidded box for the back strip, plus one backup of each consumable. A small note inside the tray lid listing what lives there helps everyone in the household restock correctly.
Placement: Back strip of the drawer, behind the daily items. The rule is simple: when you open a backup, write it on the shopping list the same day.
Effort: 20 minutes plus a one-time stock-up shop.
Lower-cost alternative: A gallon zip bag holds the spares just as well as a tray while you decide on a permanent container. It is clear, so you can see what needs restocking.
9. A Compact Travel-Kit Section
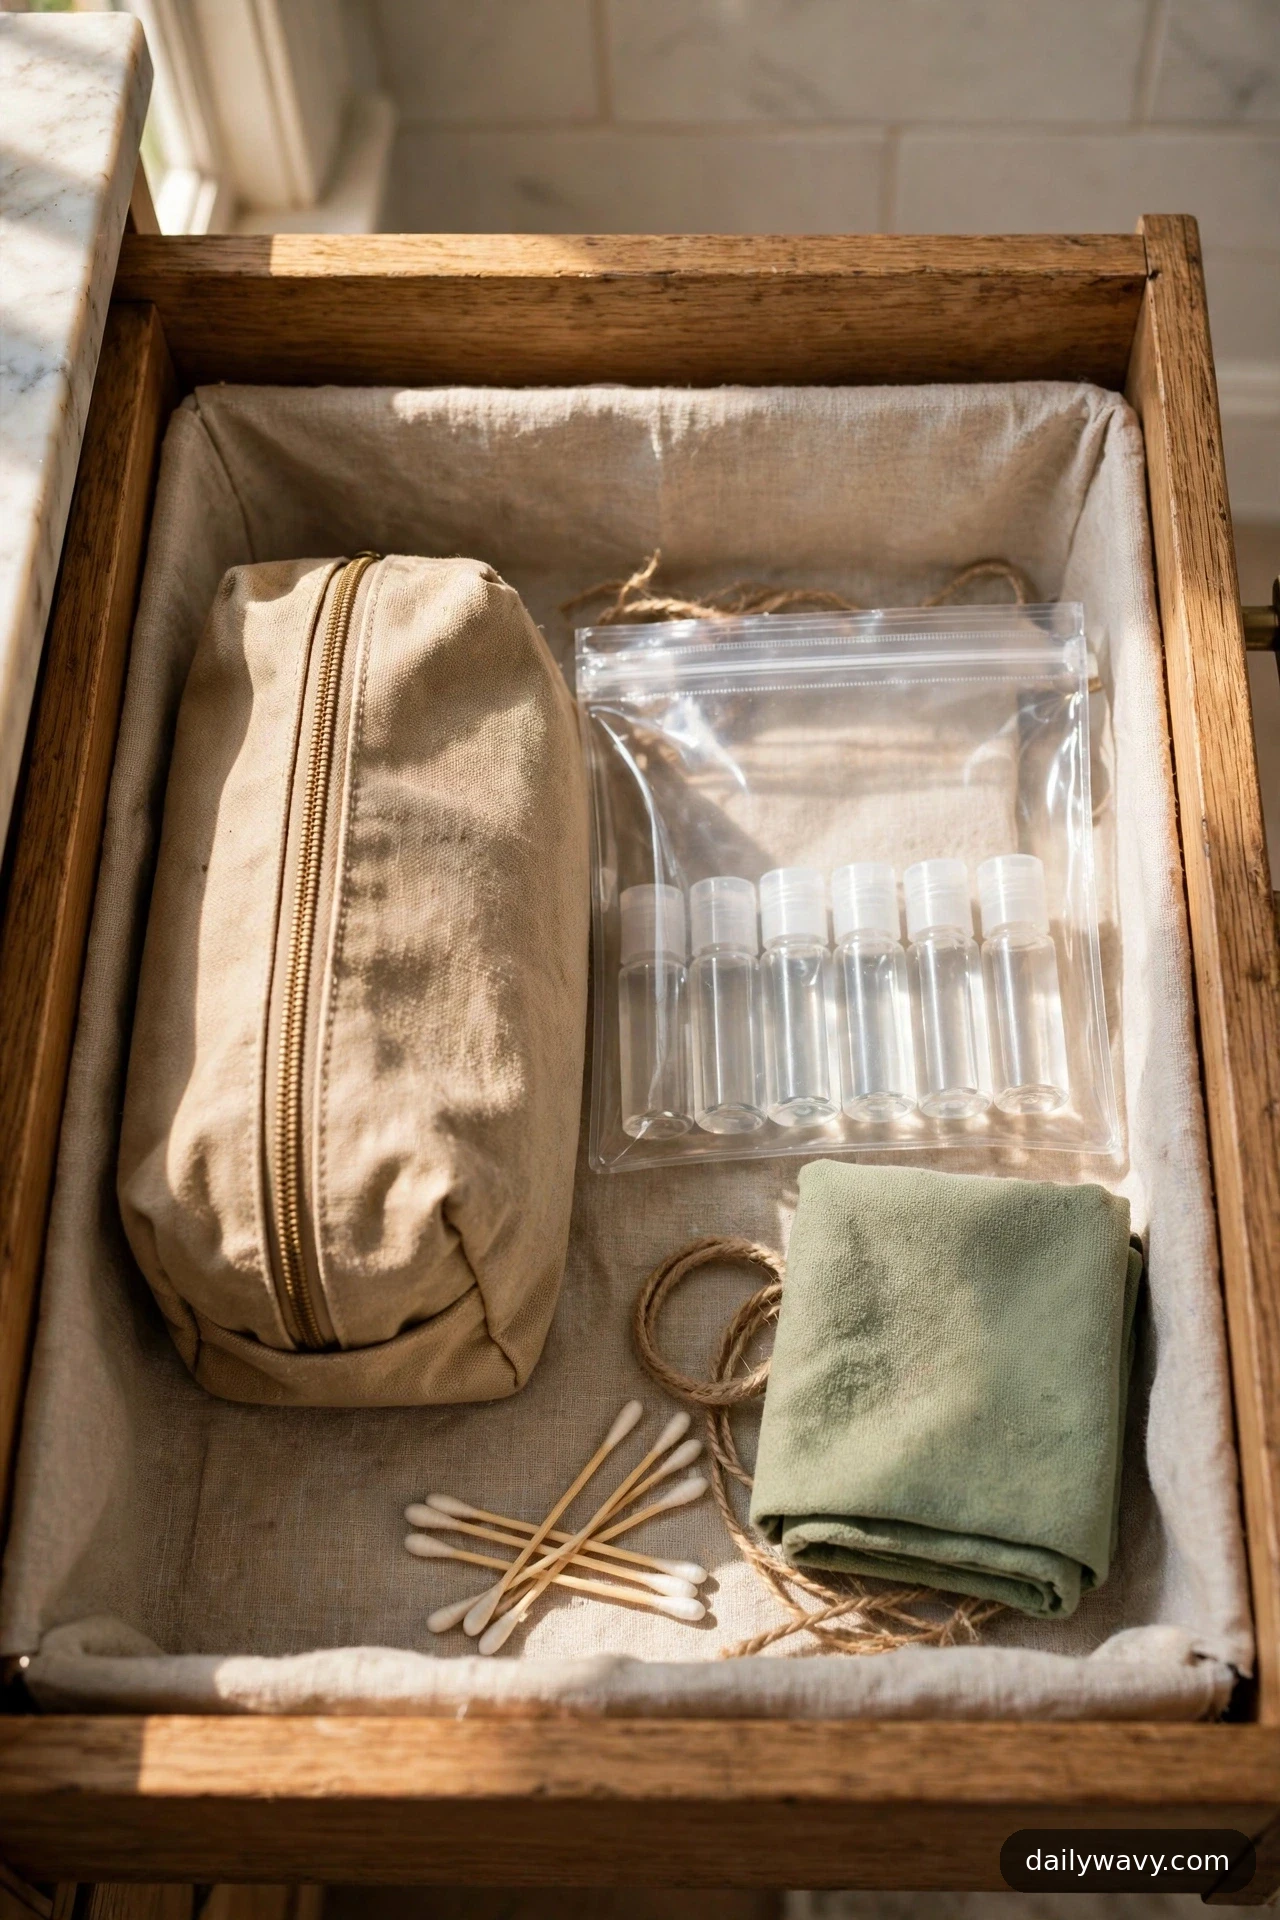
Packing for a trip usually means raiding the bathroom drawer and forgetting half of it. A dedicated travel-kit section changes that: a packed toiletry bag lives in the drawer, always ready, and the clear pouch beside it holds the travel-size bottles you refill from your full-size products.
What to measure: You need a zone about 8 inches wide and as deep as your drawer to fit a standard hanging toiletry bag lying flat.
Materials: One compact toiletry bag that fits your drawer, one clear zip pouch, and a set of small refillable bottles (3-ounce size, which sits under the 3.4-ounce carry-on liquid limit used by airlines).
Placement: One corner of the drawer, packed and zipped, so it reads as a single unit rather than loose items. After each trip, unpack, air out and wipe down the bag, and repack it the same day so it is ready next time.
Effort: 30 minutes to assemble the kit the first time.
Lower-cost alternative: A quart-size freezer bag with travel bottles inside, plus a pencil case for the rest. It packs flat and costs almost nothing.
10. A Grouped Arrangement By Routine
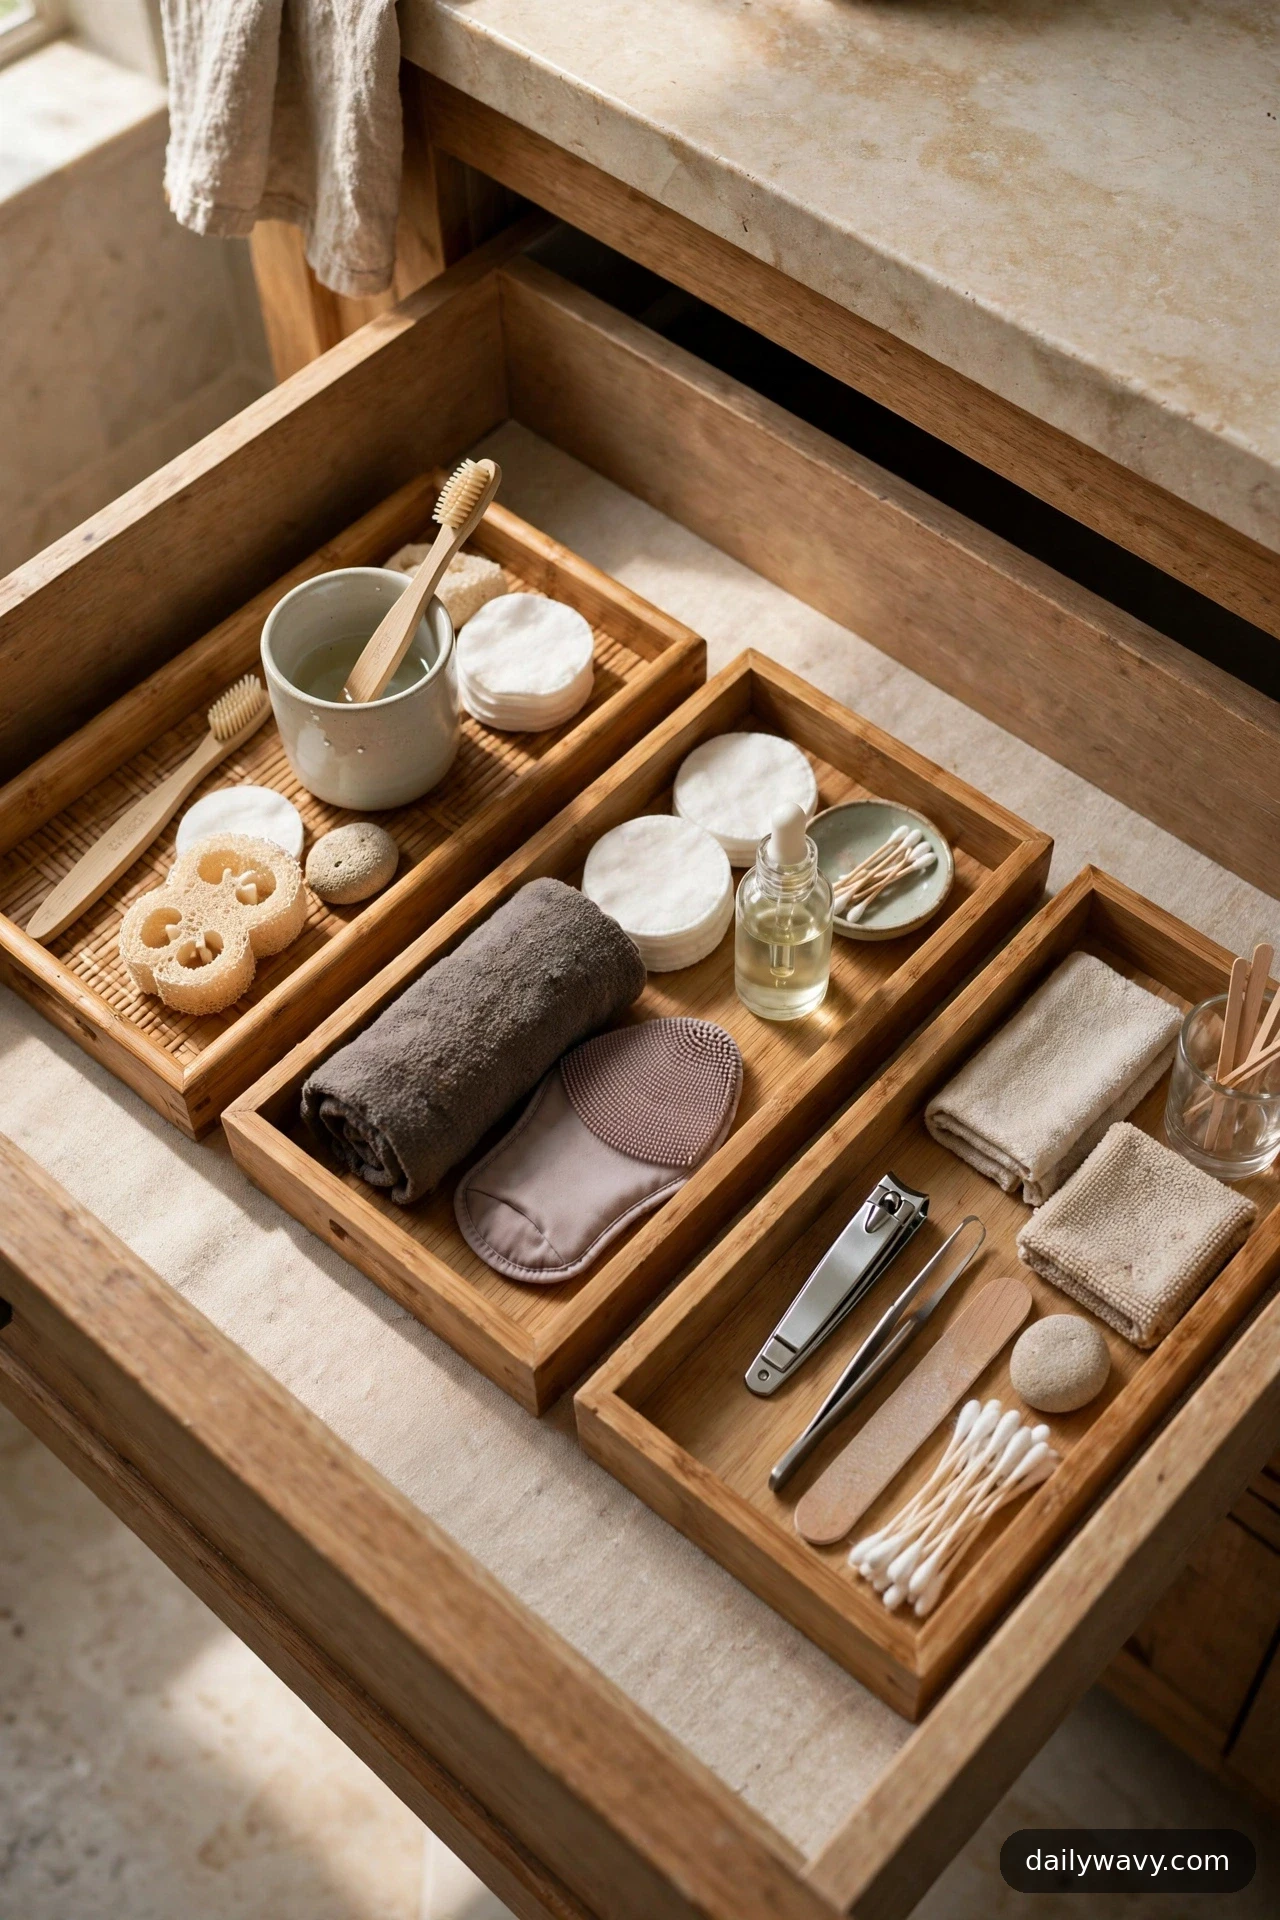
Instead of organizing by product type, organize by the order you use things. A morning tray with your cleanser, moisturizer, and sunscreen. An evening tray with your makeup remover and night cream. A weekly tray with the mask and the exfoliant. You grab one tray, do the routine, and put it back. Nothing gets scattered.
What to measure: Count your routine steps. A morning routine of 4 items fits in a 6 by 4 inch tray; most routines need a tray no bigger than 8 by 6 inches.
Materials: Two or three small cluster trays (bamboo, ceramic, or melamine), one per routine. Keep each tray to a single color family so the drawer looks intentional.
Placement: Morning tray at the front left, evening tray at the front right, weekly tray behind them. If the drawer is narrow, stack the routine order front to back instead.
Effort: 25 minutes of sorting by routine.
Lower-cost alternative: Shallow gift-box lids or the lids of storage containers, one per routine. They are free, and the raised edge keeps items together.
11. An Upright File-Style Row
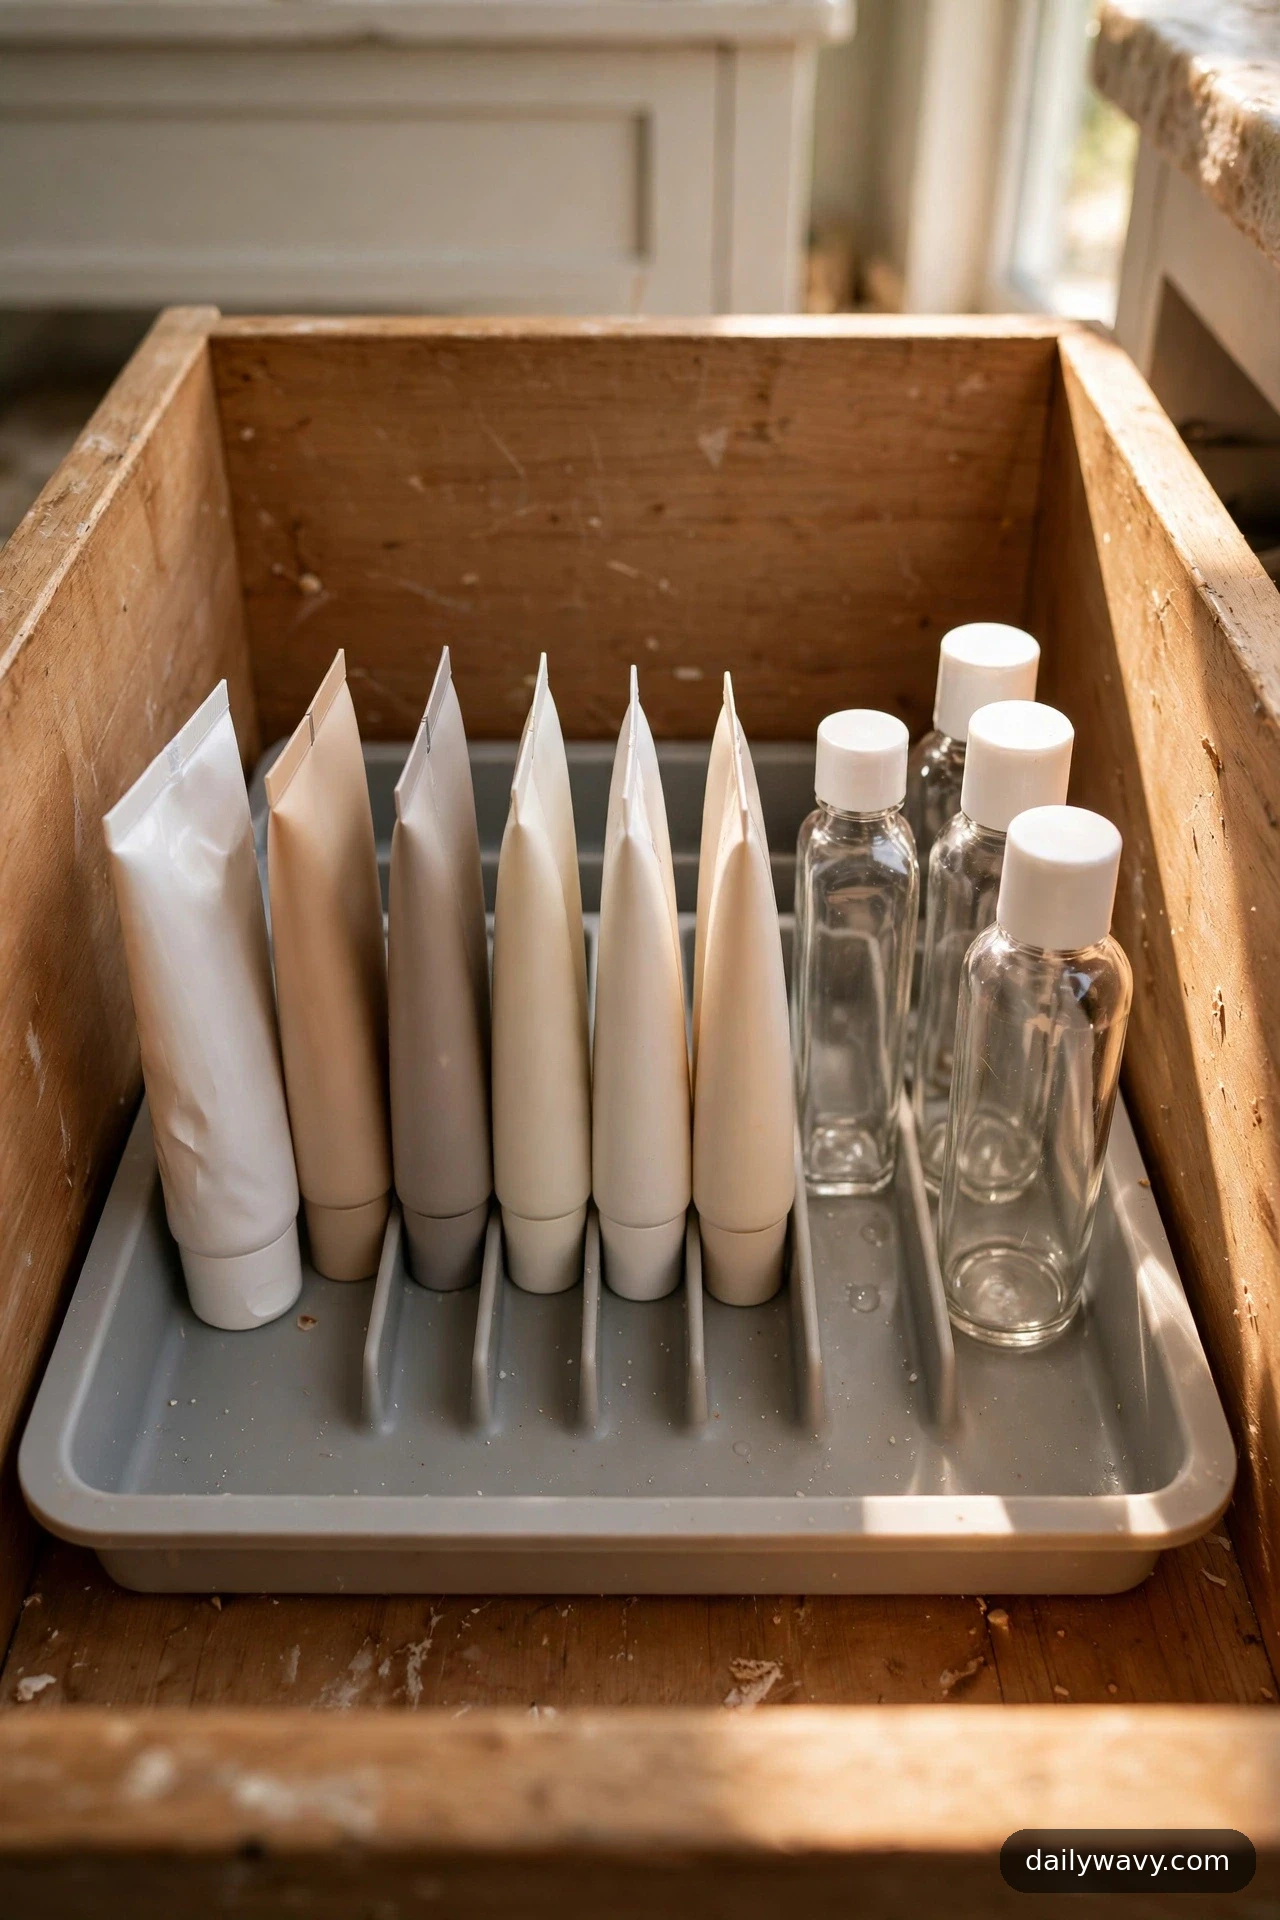
Tubes and bottles stored lying down hide their labels and waste the drawer’s vertical space. Standing them upright in a file-style row, like books on a shelf, makes every label readable and every item grabbable. It is one of the biggest visibility upgrades a drawer can get.
What to measure: Measure the drawer height from floor to top edge. Your tallest standing item must clear it by at least half an inch. Also measure the row length: each tube needs about 1.5 inches of width.
Materials: One drawer insert with vertical slots, or a simple box with a cut-down front so tubes lean slightly forward without tipping. A narrow bookend-style divider keeps the row tight.
Placement: Along one side of the drawer, labels facing forward. Heaviest bottles at the back of the row so they do not topple the light ones.
Effort: 20 minutes to stand everything up and arrange by height.
Lower-cost alternative: Cut a cereal box to drawer height, slit the front down, and stand the tubes inside it. It works and it is free.
12. A Small Catchall For Temporary Items
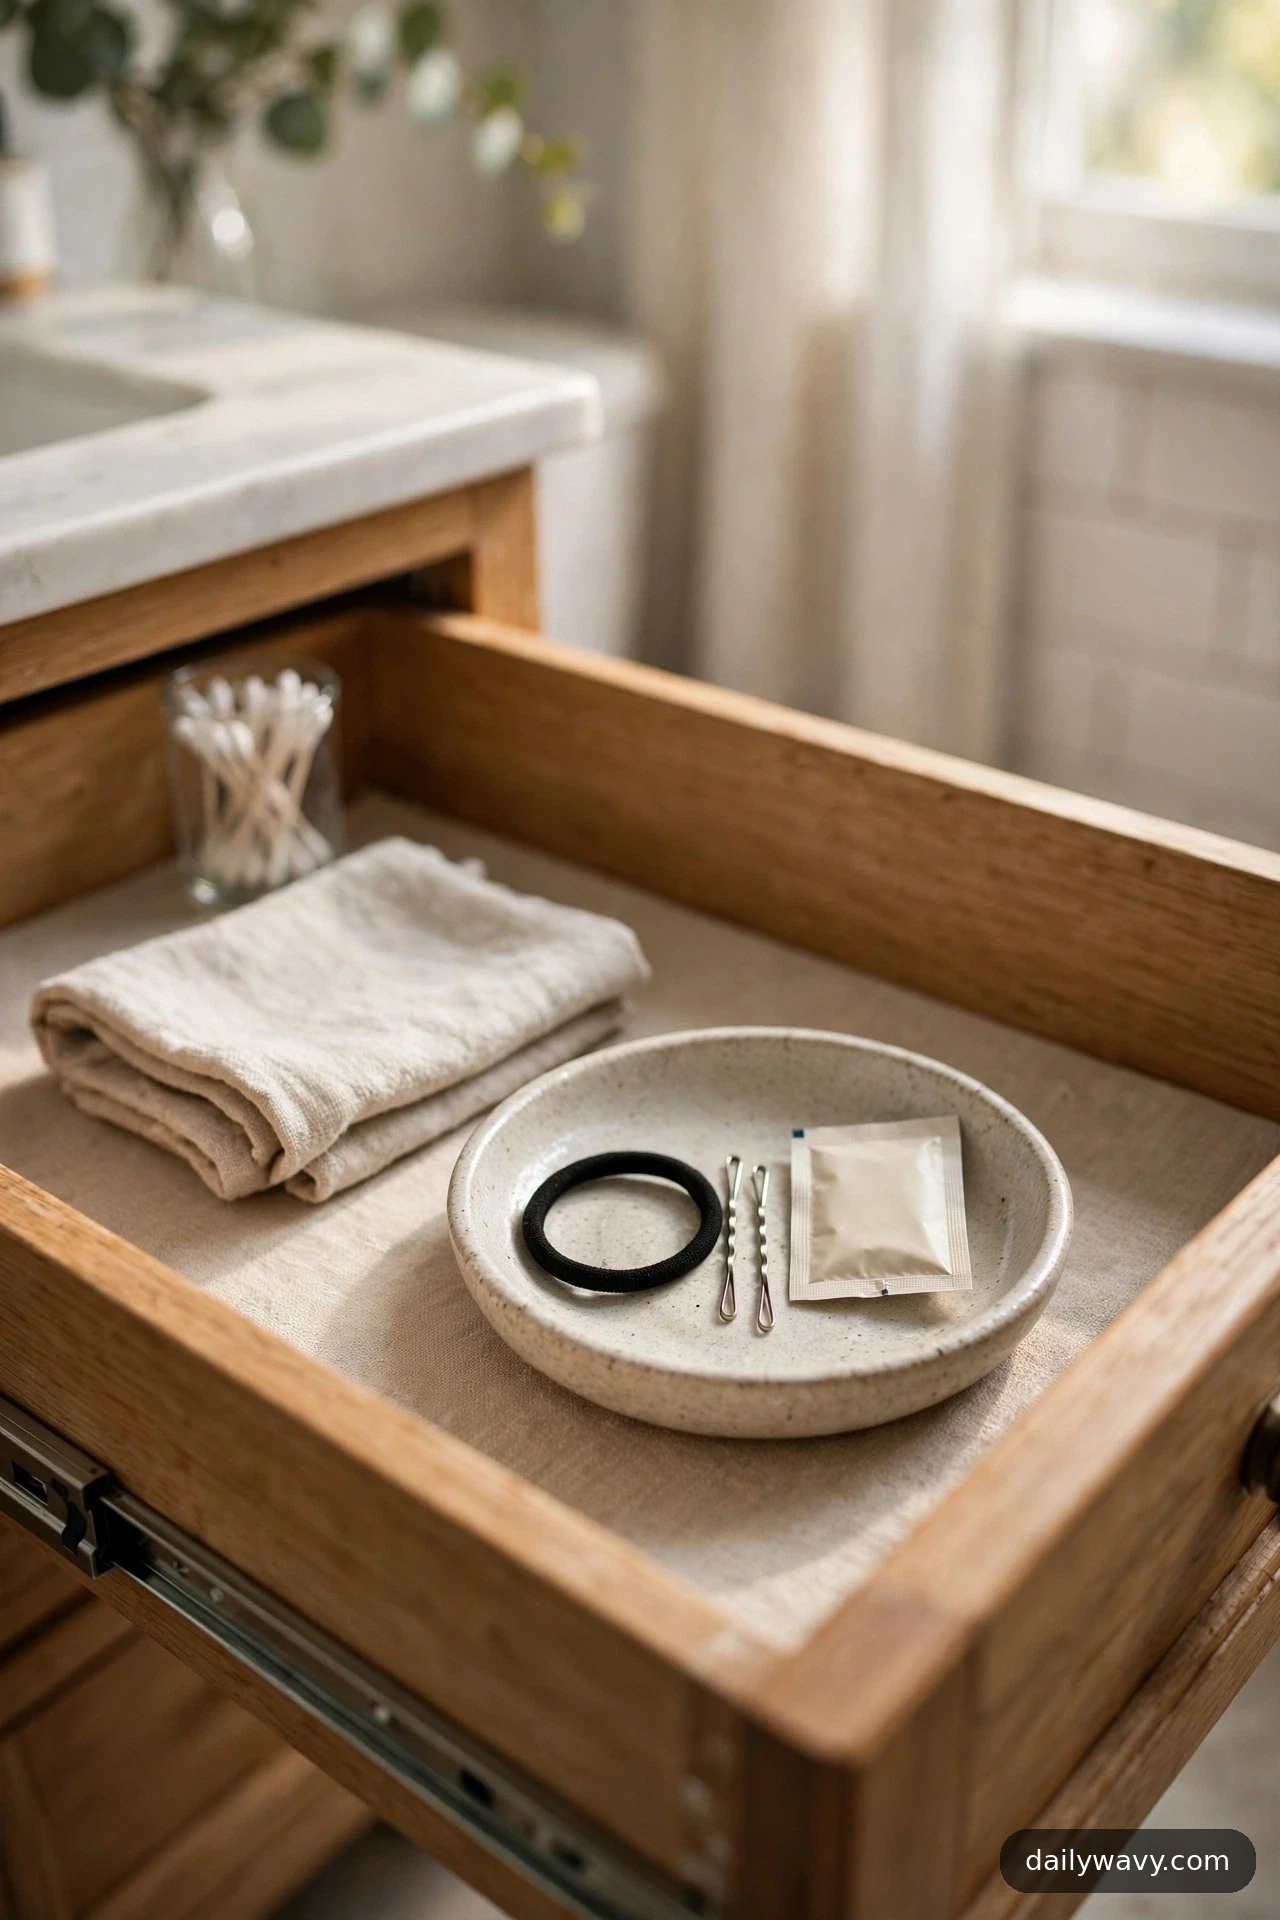
No drawer stays organized if there is nowhere to put the in-between stuff. The hair tie you took out mid-morning, the sample sachet from a subscription box, the bobby pin from last night: these temporary items need a landing pad or they will scatter across the whole drawer. A small catchall dish gives them a home with clear boundaries.
What to measure: A 3 to 4 inch dish fits in almost any drawer corner. Reserve a back corner so the catchall never blocks your daily items.
Materials: One small shallow dish or ramekin: ceramic, stone, or even a pretty soap dish. It should be heavy enough not to slide and shallow enough that you can see everything inside at a glance.
Placement: Back corner of the drawer, always the same spot. Sort it once a week: put things away, toss the trash, and it stays useful instead of becoming a junk pile.
Effort: 5 minutes to place, plus a weekly 2-minute sort.
Lower-cost alternative: A teacup saucer or the washed lid of a candle jar. Both are the right size, look intentional, and cost nothing if you already own them.
13. A Visible Empty Buffer Space
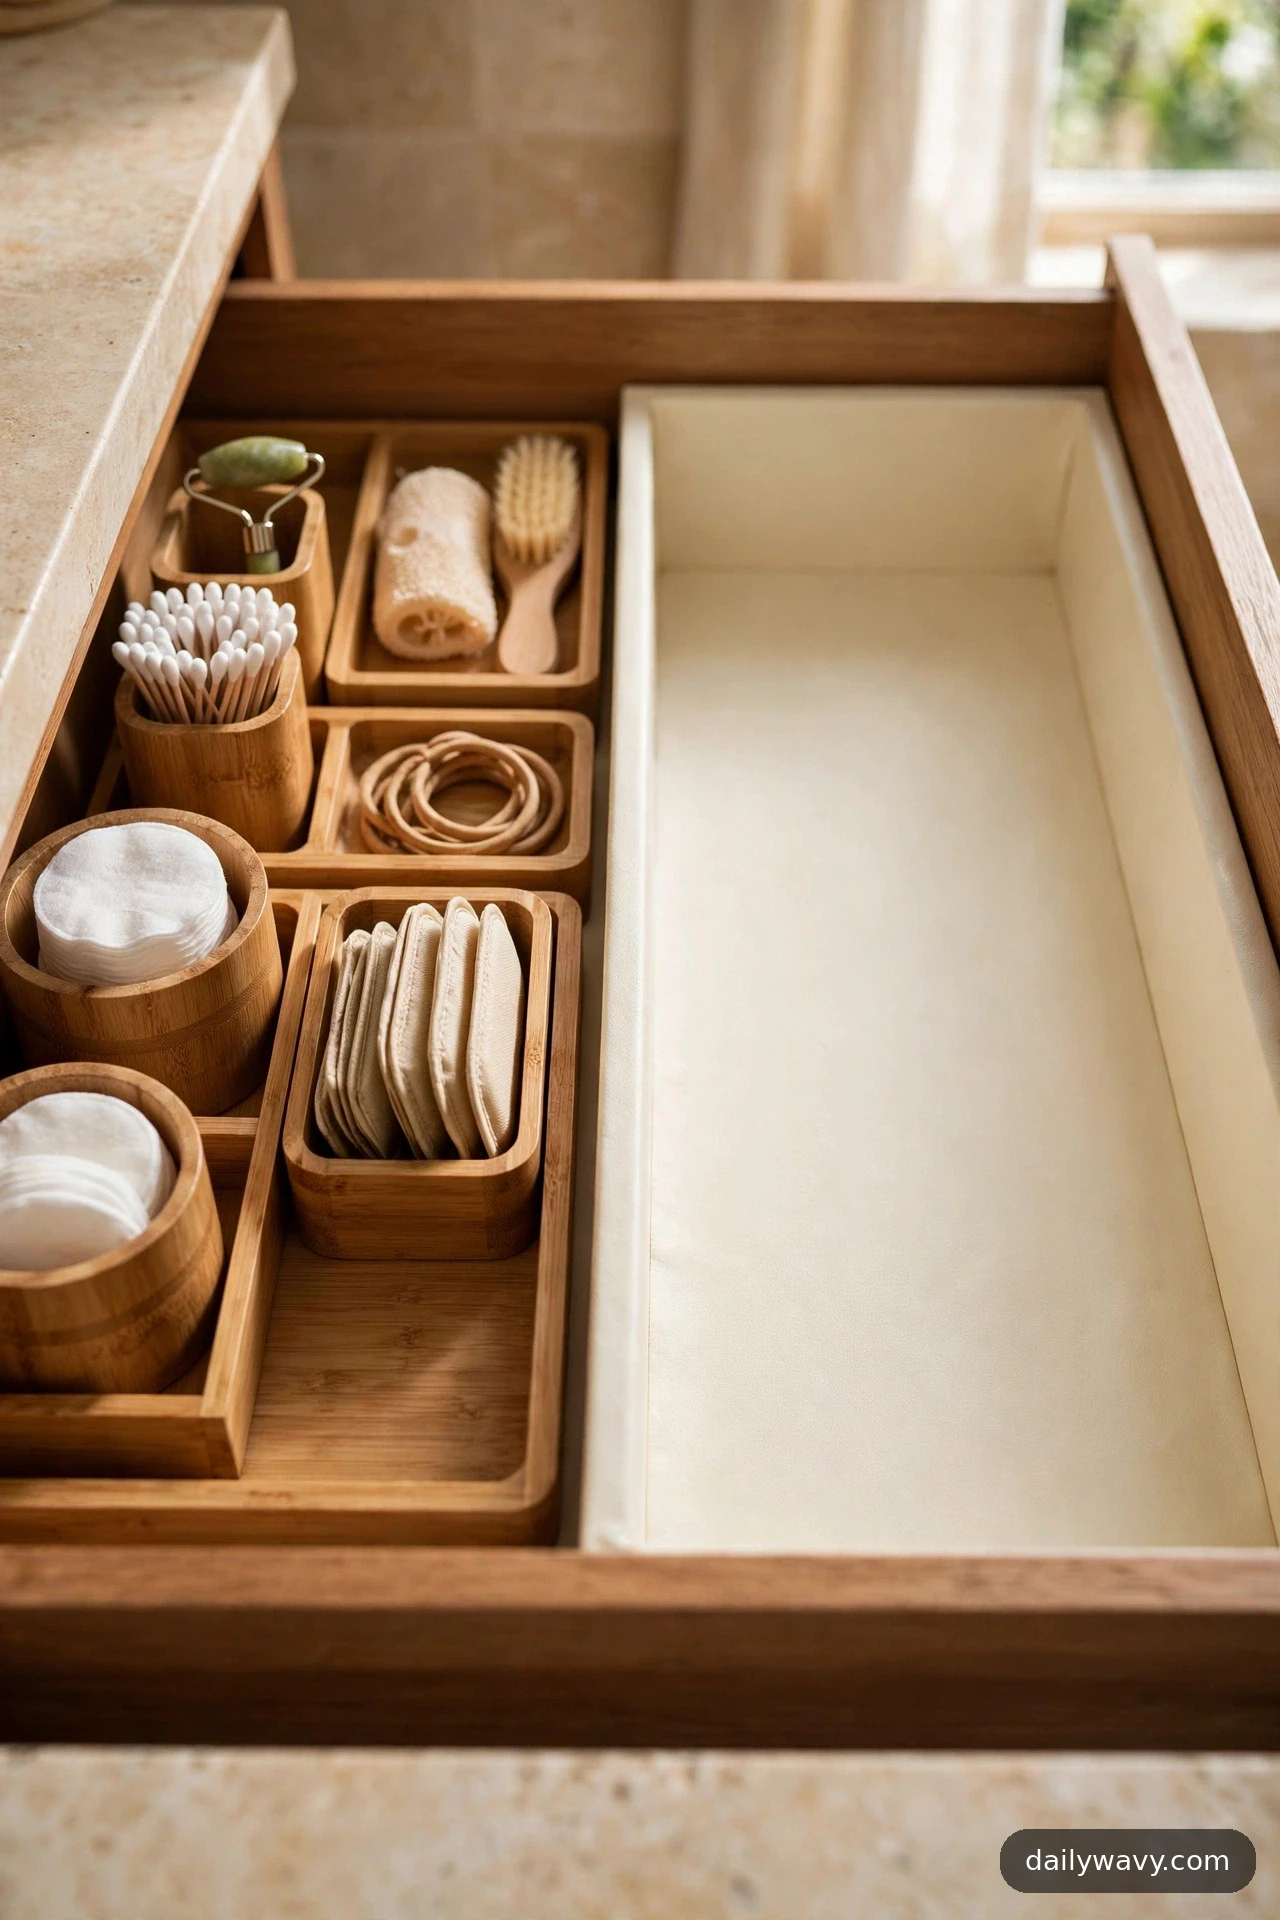
The most counterintuitive organizing idea is also one of the most powerful: leave some of the drawer empty on purpose. A visible buffer zone absorbs the overflow of real life, gives your eyes a resting place, and makes the organized sections look noticeably tidier by contrast. A drawer packed edge to edge has nowhere to grow.
What to measure: Aim to leave 15 to 20 percent of the drawer floor visibly clear. In a 20-inch-wide drawer, that is a 3 to 4 inch clear strip along one side.
Materials: Nothing to buy. The discipline to stop filling is the whole material list. A clean liner in the empty zone keeps it looking deliberate rather than unfinished.
Placement: Run the empty strip along the right side or across the back, wherever your hand naturally passes. It becomes the spot where new purchases land before they earn a permanent home.
Effort: Zero minutes, plus ongoing restraint.
Lower-cost alternative: This one is free by definition. If the empty space bothers you, lay a folded linen cloth there: it reads as a styled pause rather than a gap.
14. A Removable Full-Width Divider
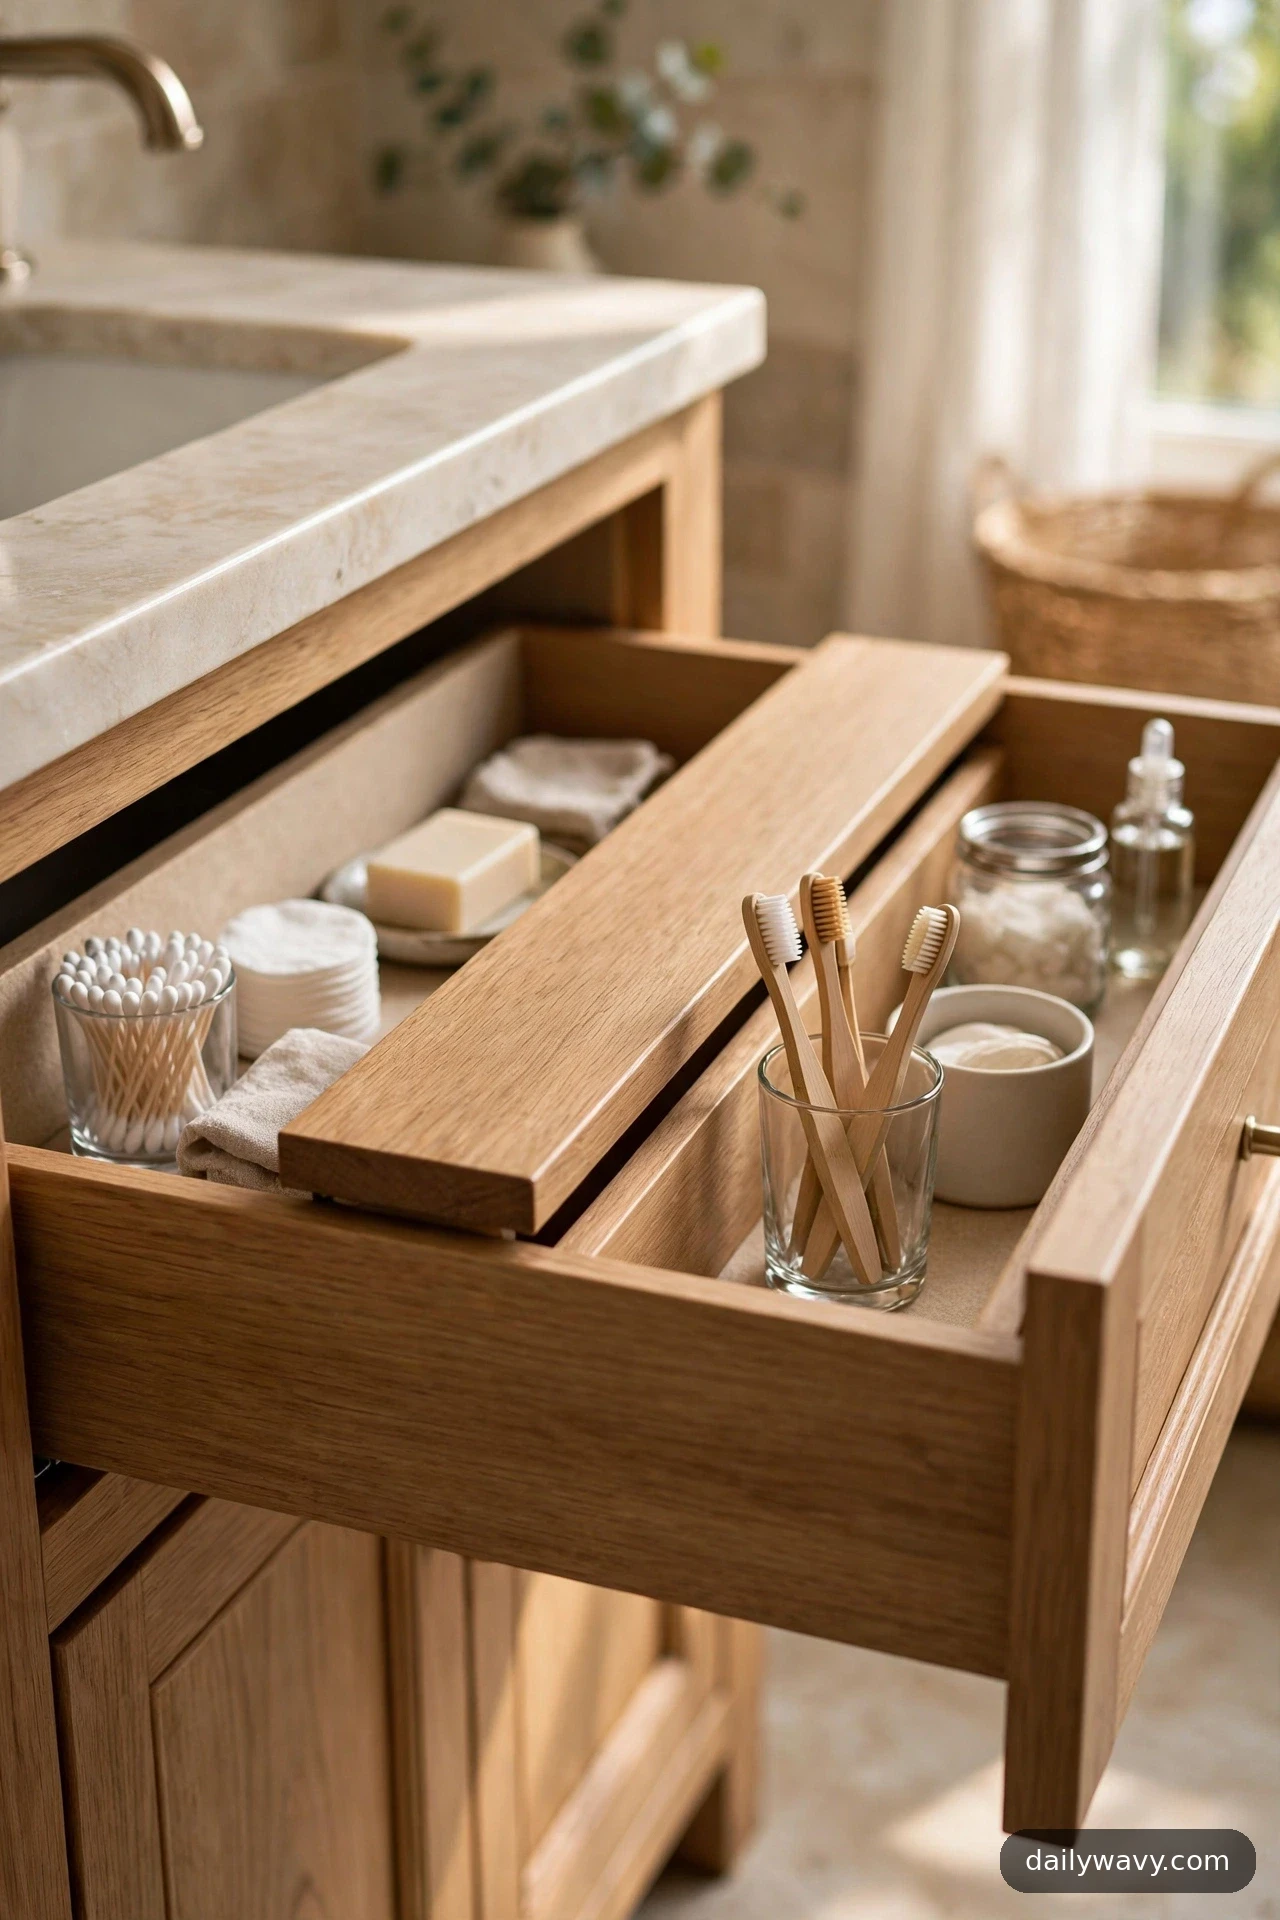
Some drawers need a hard split: front half for daily use, back half for storage. A full-width divider creates two clean zones in one move, and because it lifts out, you can still clean the drawer floor or reconfigure in seconds. Fixed dividers are a commitment; removable ones are a decision you can change.
What to measure: Measure the inside width of the drawer at both the front and the back (drawers can taper). The divider should fit snugly enough not to slide but loose enough to lift out with two fingers.
Materials: One full-width divider: a bamboo drawer divider, a cut-to-width strip of 1/4-inch plywood, or an expandable spring-loaded divider that presses against the drawer walls.
Placement: About two-thirds of the way back for a daily-front and storage-back split. Daily items in front, spares and occasionals behind the divider.
Effort: 10 minutes to fit and load.
Lower-cost alternative: A strip of rigid cardboard wrapped in contact paper, cut to a friction fit. Replace it when it softens; it costs pennies.
15. Long Adjustable Dividers
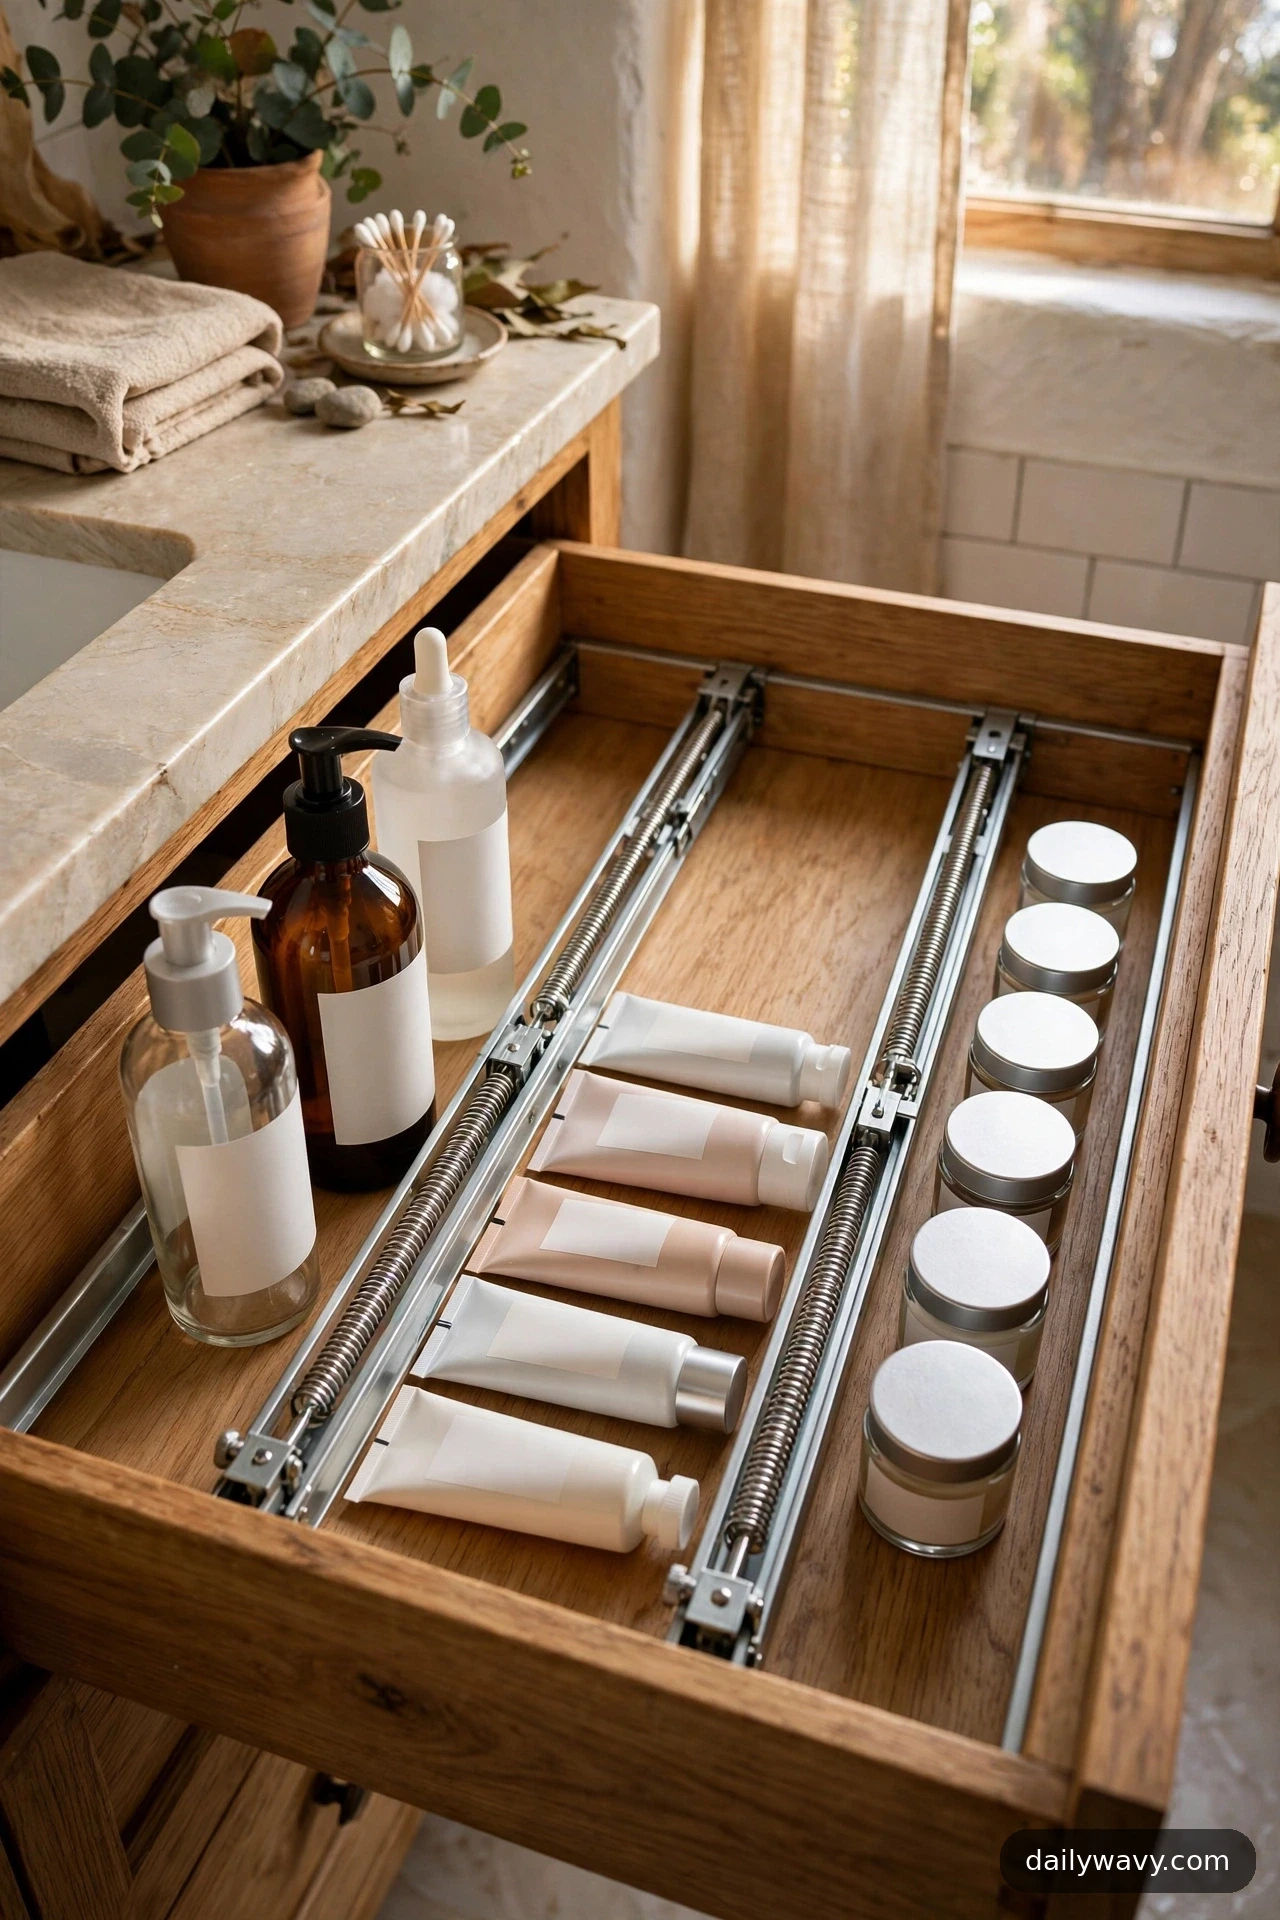
Bottles come in every height and width, and fixed compartments never match them all. Long adjustable dividers, the spring-loaded kind that press against the drawer walls, let you build custom lanes exactly around what you own. When your products change, the lanes change with them in a few moments.
What to measure: Measure the drawer depth front to back, then buy dividers rated for that span (most cover 13 to 17 inches, or 17 to 22 inches). Count how many lanes you want: one per product family.
Materials: A set of 3 to 4 spring-loaded drawer dividers, bamboo or plastic. They need no screws and no adhesive.
Placement: Press them in to create lanes running front to back: tall bottles in one lane, tubes in another, jars in a third. Keep the spring tension firm enough that a full bottle cannot push a divider sideways.
Effort: 15 minutes to install and arrange.
Lower-cost alternative: Wooden paint stirrers cut to length and held with small adhesive clips. They do not spring-load, but they divide a drawer into lanes just as well.
16. Small Square Trays
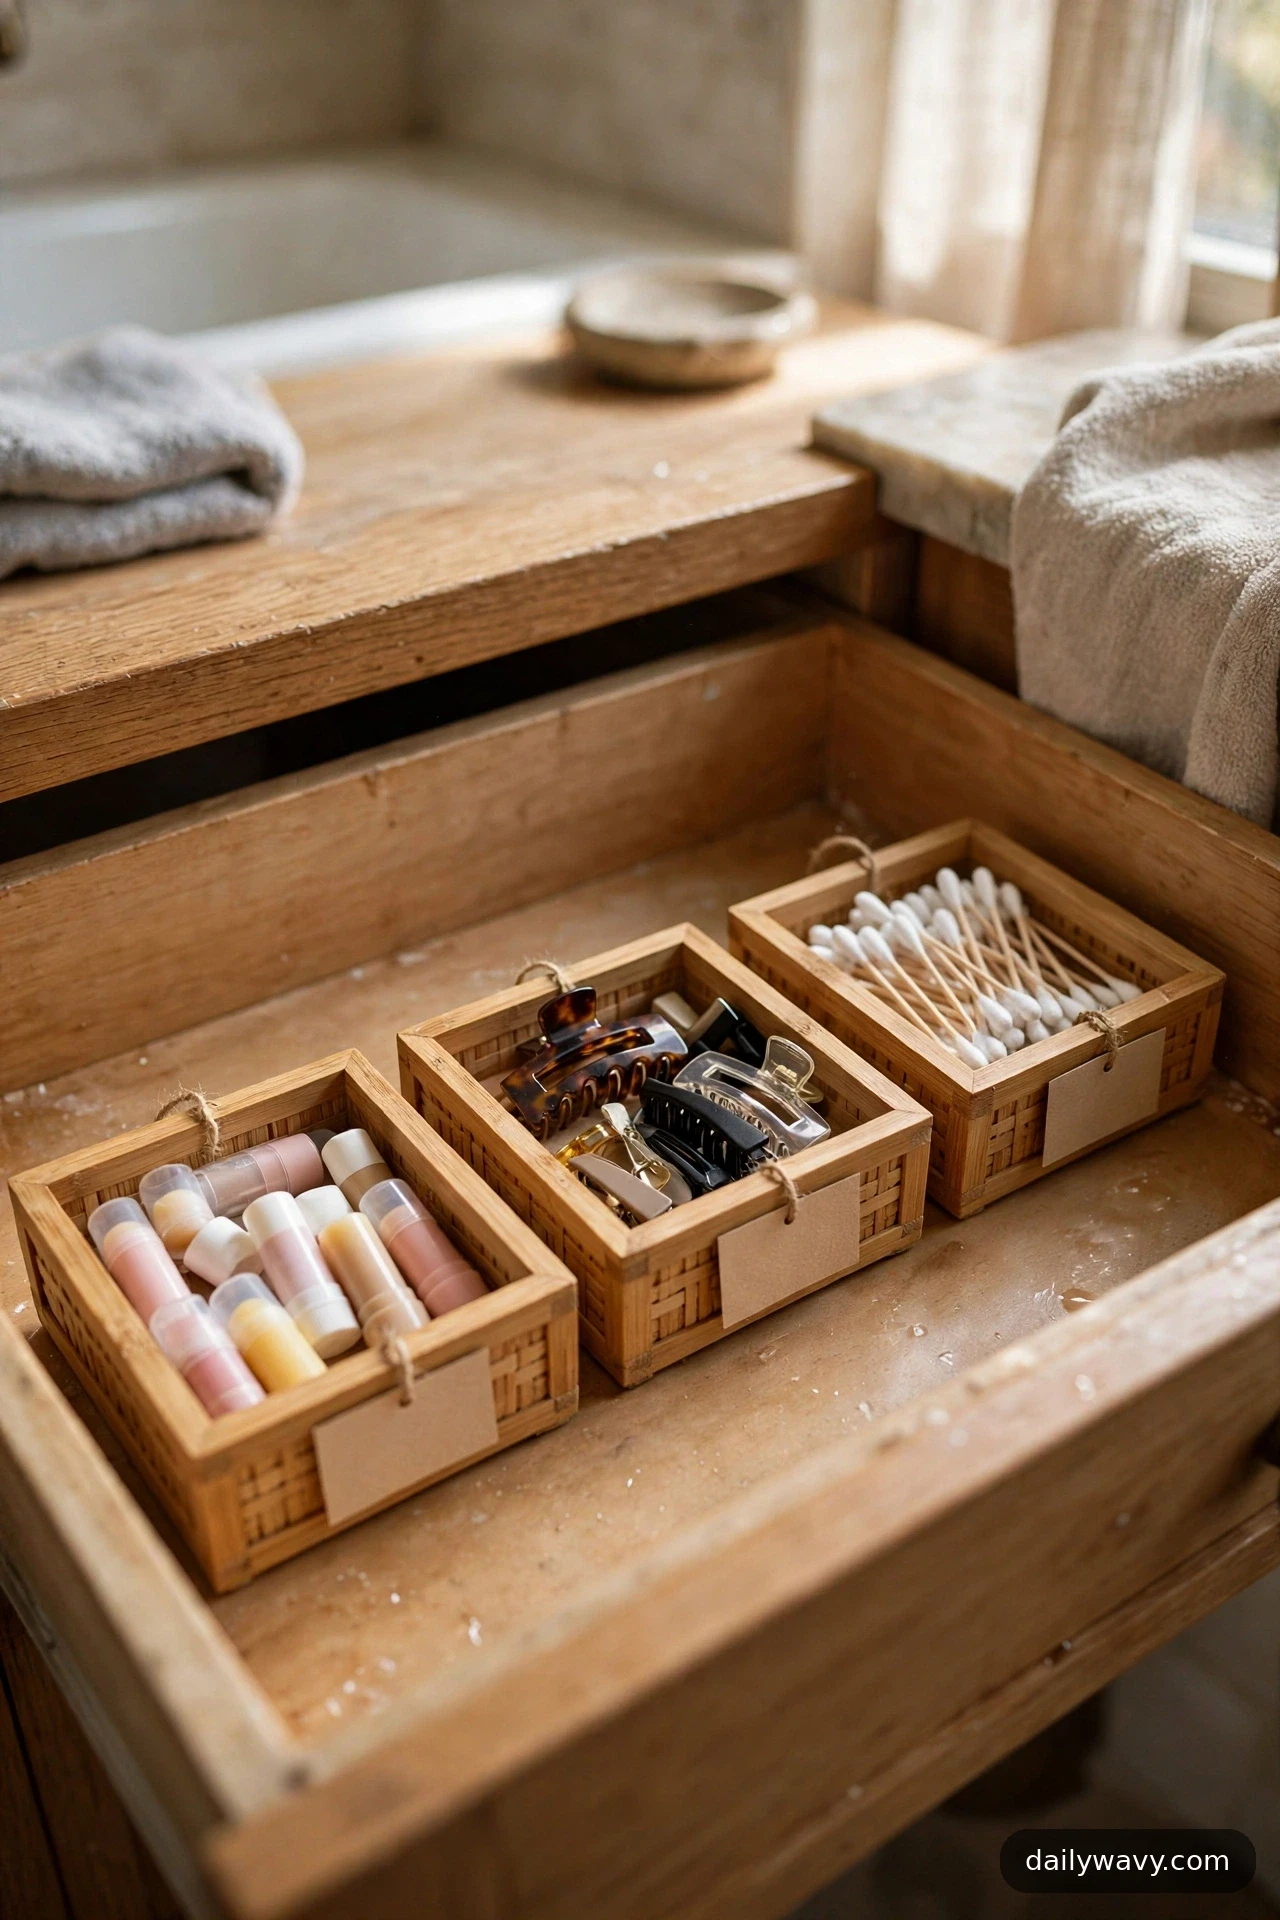
One big tray turns into a junk drawer inside your drawer. Small square trays, one per category, keep everything separated without wasted space: lip balms in one, hair clips in another, cotton swabs in a third. The grid of little squares also looks remarkably satisfying every time you open the drawer.
What to measure: A 3 by 3 inch or 4 by 4 inch square is the sweet spot for most categories. Count your categories, then lay out a grid on paper to confirm the squares fit your drawer before buying.
Materials: A set of small square trays in one material (bamboo, white ceramic, or clear acrylic). Matching trays matter more here than anywhere else, since the grid is the look.
Placement: Arrange in a tight grid with no gaps, starting from a front corner. Put the daily categories at the front of the grid.
Effort: 20 minutes to sort categories and place.
Lower-cost alternative: Small square gift boxes or the plastic inserts from chocolate boxes, one category per box. Wash them first, and they work beautifully.
17. A Shallow Front-Row Essentials Tray
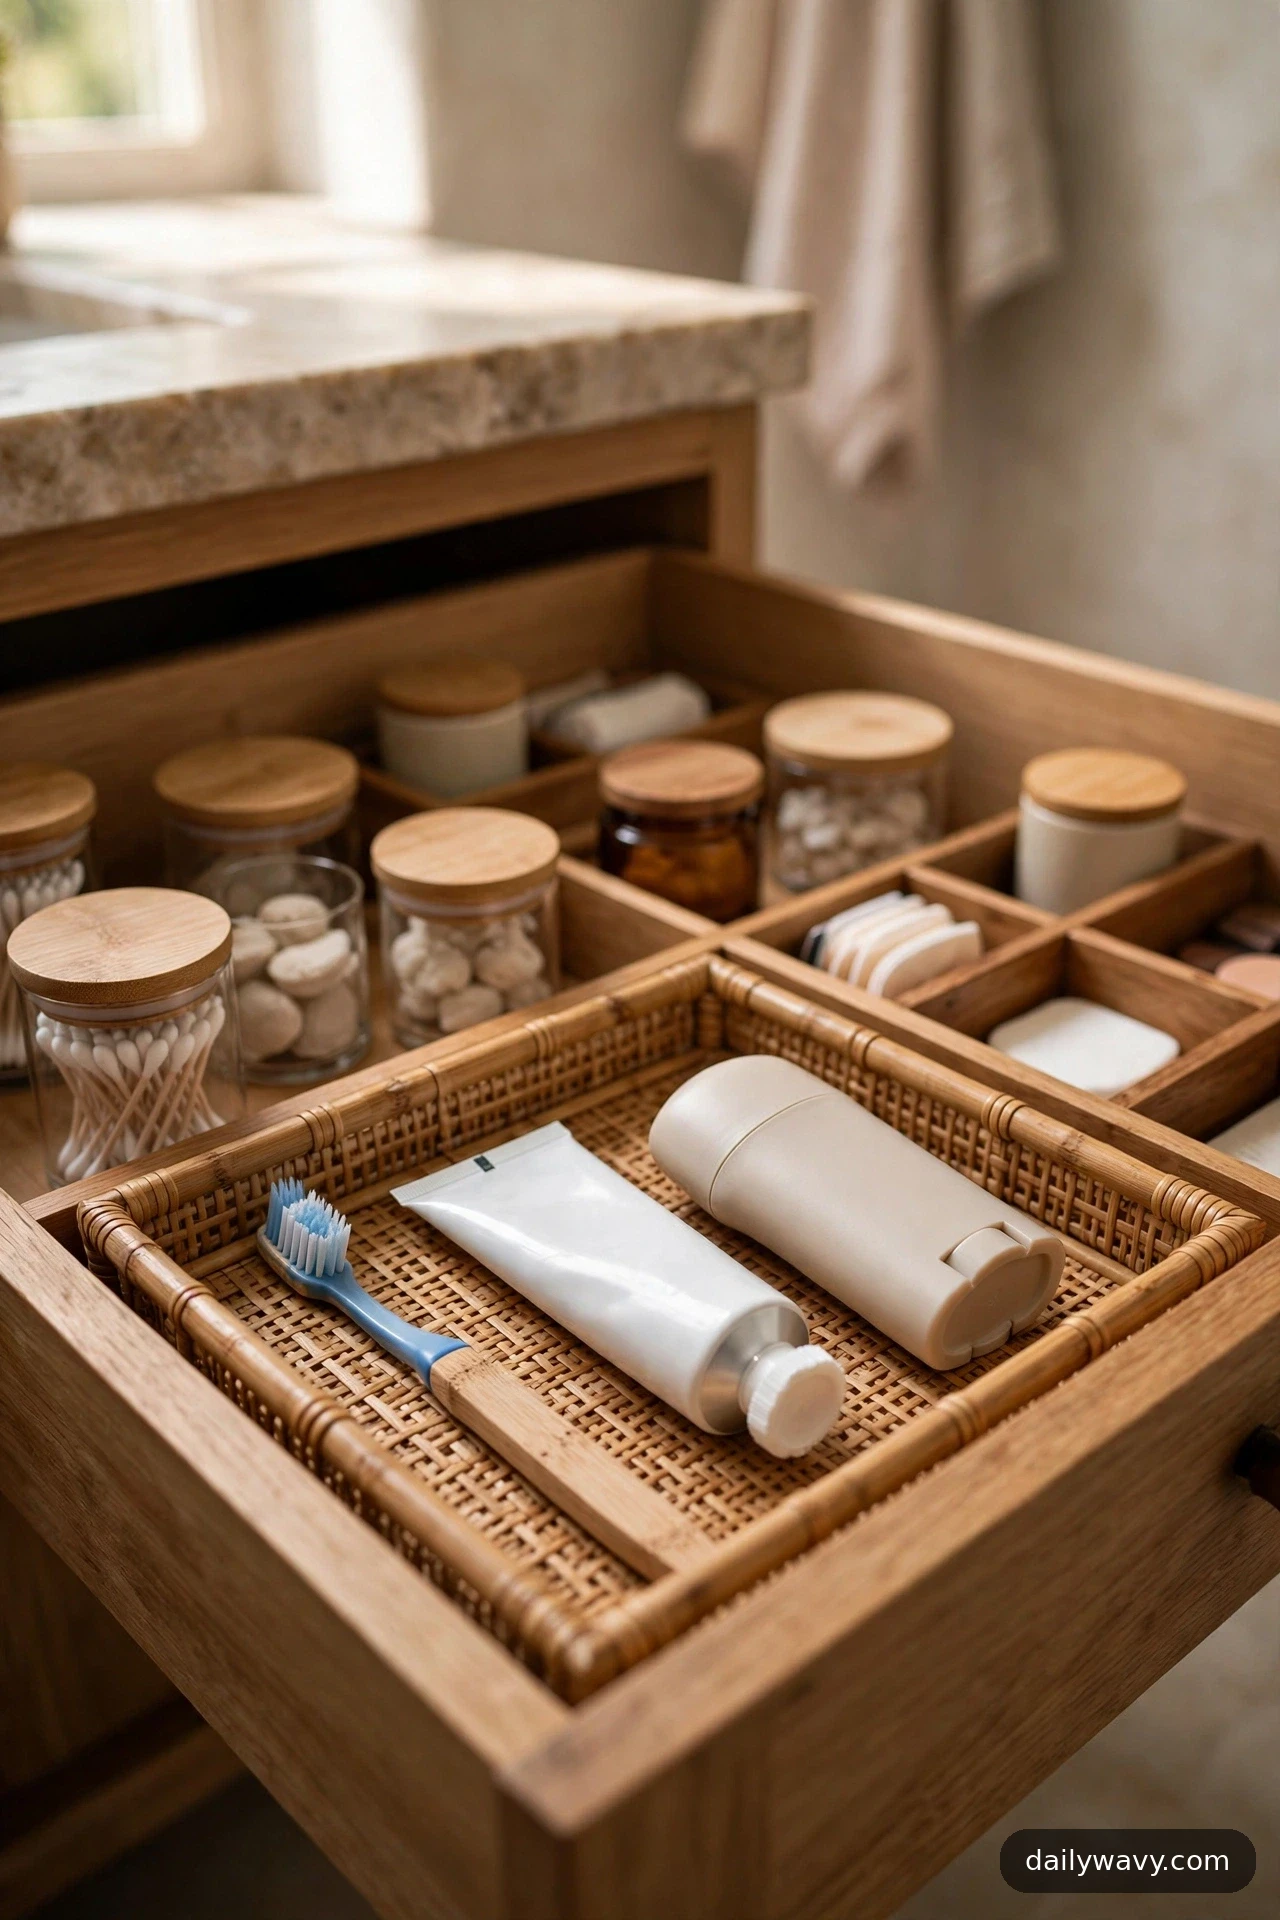
The first five inches of your drawer are the most valuable real estate in your bathroom. A shallow tray that sits right at the front, holding only the things you touch every single morning, turns your routine into a one-motion grab. Everything else can live deeper in the drawer without slowing you down.
What to measure: Measure the front 5 inches of your drawer. The tray must be shallow: no more than 1.5 inches tall, so it never catches on the drawer above or the cabinet frame.
Materials: One shallow rectangular tray (bamboo, melamine, or lacquered) sized to your front zone. Limit it to 4 or 5 items: toothbrush, toothpaste, deodorant, and one or two more true daily essentials.
Placement: Front center of the drawer, flush against the drawer front. When you open the drawer, the tray should meet your hand before anything else.
Effort: 10 minutes, and the discipline to keep it to true essentials only.
Lower-cost alternative: A shallow baking pan or the lid of a storage box. It is the right shape and depth, and nobody sees it but you.
18. A Compartment For Backup Items
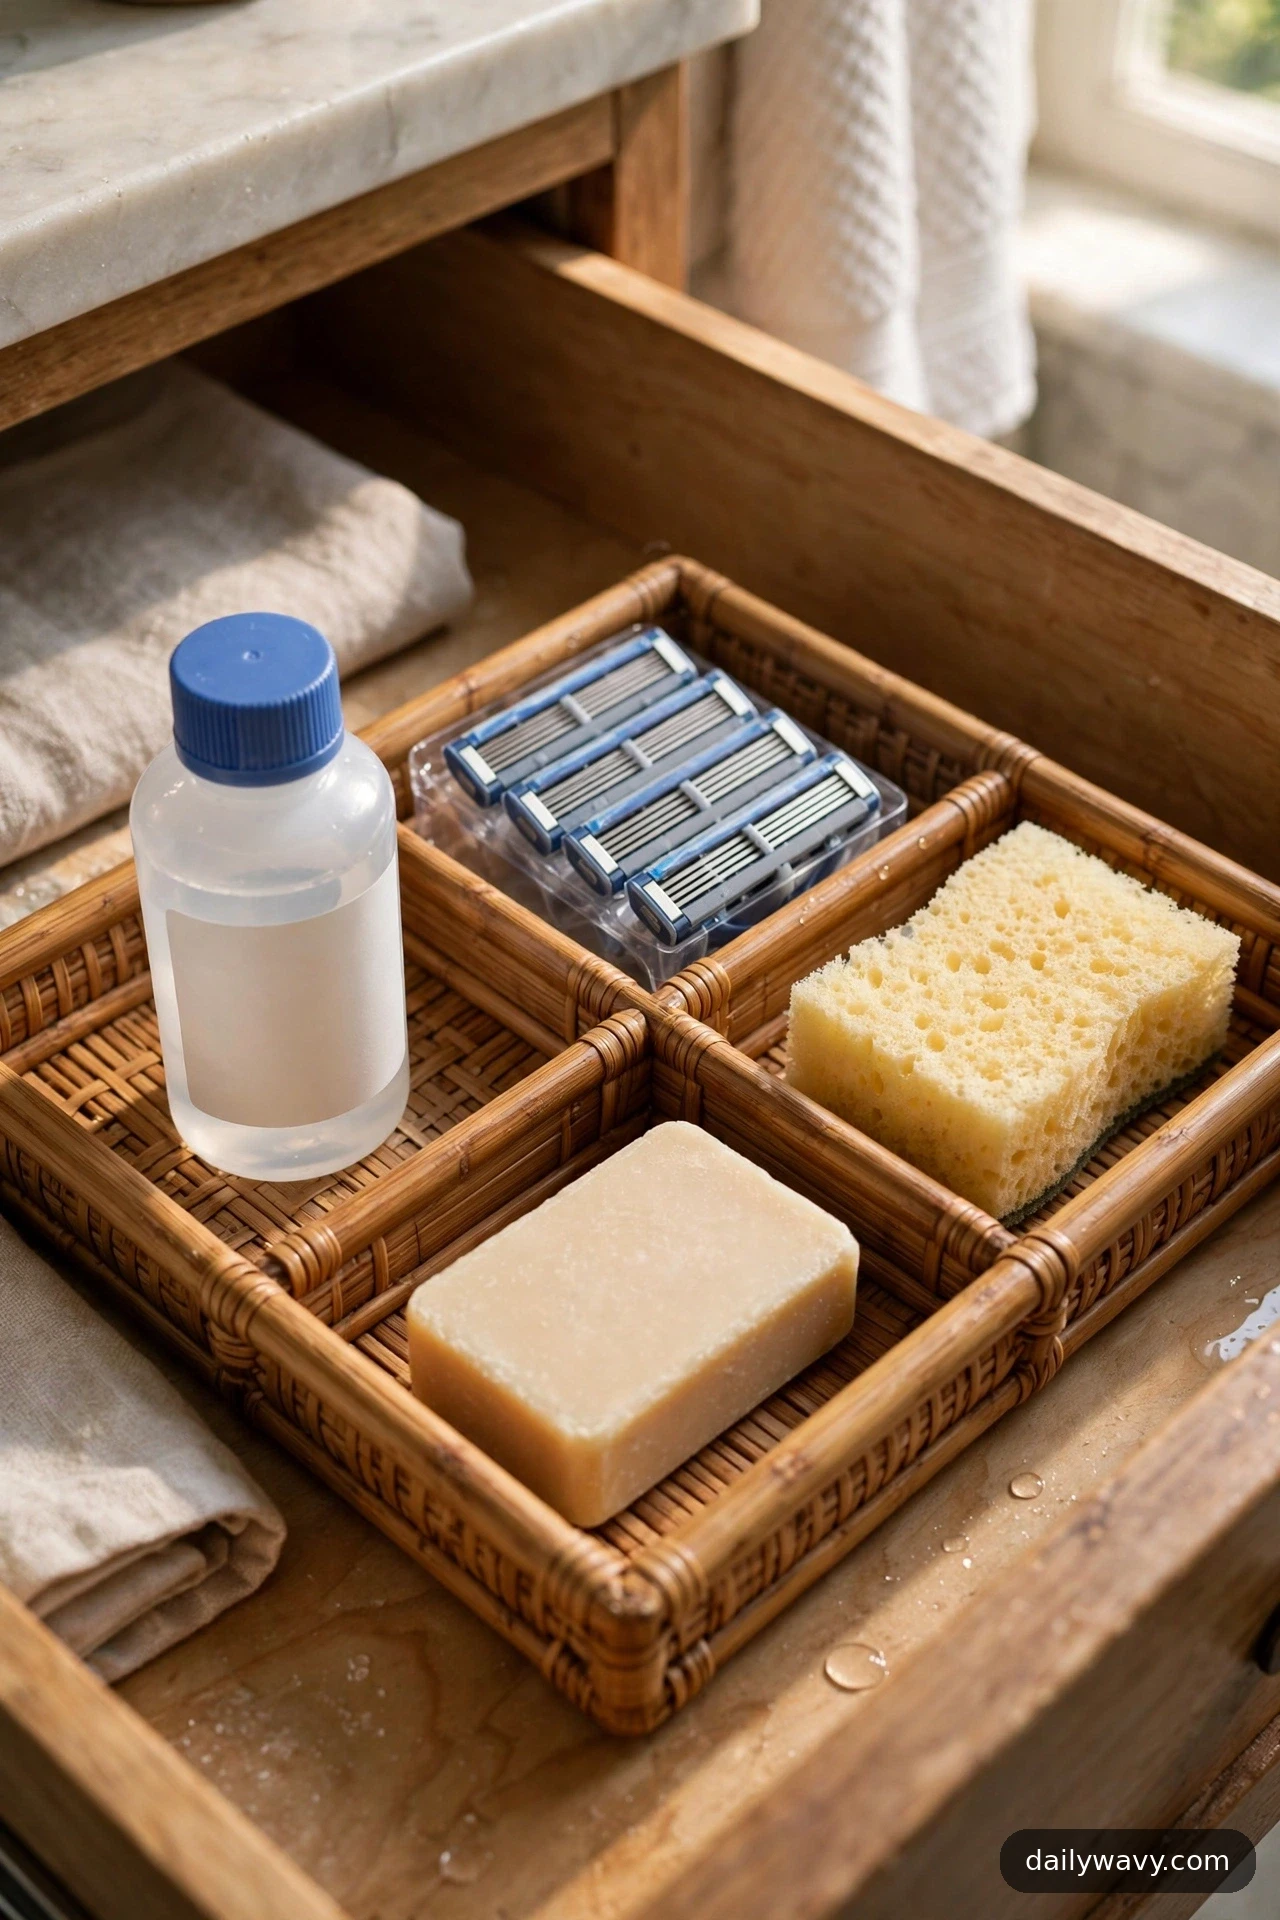
Backups deserve their own compartment, not a corner they share with daily items. A defined backup zone holds your spare contact solution, extra razor cartridges, and the soap bar you will open next month. Kept separate, backups stay clean, unopened, and easy to inventory at a glance.
What to measure: A 6 by 4 inch compartment fits most backup collections. If your backups overflow that, you probably have too many: one spare per consumable is the rule.
Materials: One lidded box or deep tray with a simple label. The lid matters here because it keeps dust off items that might sit for months.
Placement: Back corner or back strip of the drawer, behind the daily zones. Check it monthly and buy a replacement for anything you have opened.
Effort: 15 minutes to gather and place the backups.
Lower-cost alternative: A clean plastic food container with a snap lid. It seals against bathroom humidity, which is exactly what backup items need.
Frequently asked questions
How much interior height does a bathroom drawer need for organizers?
Most drawer organizers need at least 2.5 inches of interior height to sit comfortably. Measure from the drawer floor to the top edge of the drawer box, and buy organizers at least half an inch shorter than that number so the drawer closes smoothly. If your drawer is shallower than that, stick to a flat liner and trays no more than 1.5 inches tall.
What is the best material for bathroom drawer organizers?
Bamboo, sealed wood, and easy-clean plastics all work well in bathrooms. Whatever you choose, it should handle humidity and wipe clean, since bathrooms stay damp. Avoid raw cardboard for anything permanent.
How do I organize a very shallow bathroom drawer?
Go flat: use shallow trays no more than 1.5 inches tall, store tubes lying down in a single layer, and skip anything with a lid that adds height. The shallow front-row essentials tray above fits the same low-clearance approach.
Should I decant products into matching containers?
Only the small consumables: cotton pads, cotton balls, hair ties, and bath salts look wonderful decanted and stay fresh in sealed jars. Keep anything with an expiration date or safety instructions in its original packaging.
How often should I re-sort a bathroom drawer?
A quick weekly sort of the catchall dish and a full pull-everything-out reset twice a year keeps the system working. A full reset of one drawer usually takes under 30 minutes once the organizers are in place.
What should I do with expired products?
Check dates on sunscreen, medications, and anything with active ingredients, and dispose of expired items according to your local waste rules. Many communities have take-back programs for medications; never flush them.
Start with one drawer
You do not need all 18 ideas. You need the three or four that match your actual drawer and your actual routine. Start with the tape measure, then the non-slip liner, then whichever idea made you think “that is exactly my problem.” One organized drawer has a way of spreading: once the top drawer works, the rest of the bathroom starts to feel possible. For the spaces around the drawer, from under-sink cabinets to narrow wall gaps, our small bathroom storage guide picks up where this one leaves off, and small pantry organization applies the same zone logic to the kitchen. Browse the full Home & Decor collection when you are ready for the next room.





One Comment