16 Under-Sink Bathroom Organization Ideas to Keep Essentials Within Reach
The cabinet under your bathroom sink is one of the hardest-working spots in the house, and it usually shows. Between…
The cabinet under your bathroom sink is one of the hardest-working spots in the house, and it usually shows. Between the P-trap, the supply lines, and the shutoff valves, most of what is in there gets shoved in around the pipes and forgotten. These sixteen ideas change that without a remodel. Each one works with the plumbing instead of against it: moisture-safe materials, containers that clear the trap, and zones that keep cleaners separate from the things that touch your face. Measure twice, buy once, and the under-sink space finally earns its keep.
Jump to an idea
- A labeled closed container
- A compact shelf riser
- A small pull-out caddy
- A hook solution suited to the surface
- A clear bin with visible contents
- A standing organizer with open drainage
- A vertical arrangement saving width
- A low basket for backup supplies
- A separate zone for wet items
- A removable insert for easier cleaning
- A compact rack at reachable height
- A closed box for rarely used items
- A basket assigned to one person
- A return-to-place tray
- A small freestanding storage unit
- A grouped arrangement by routine
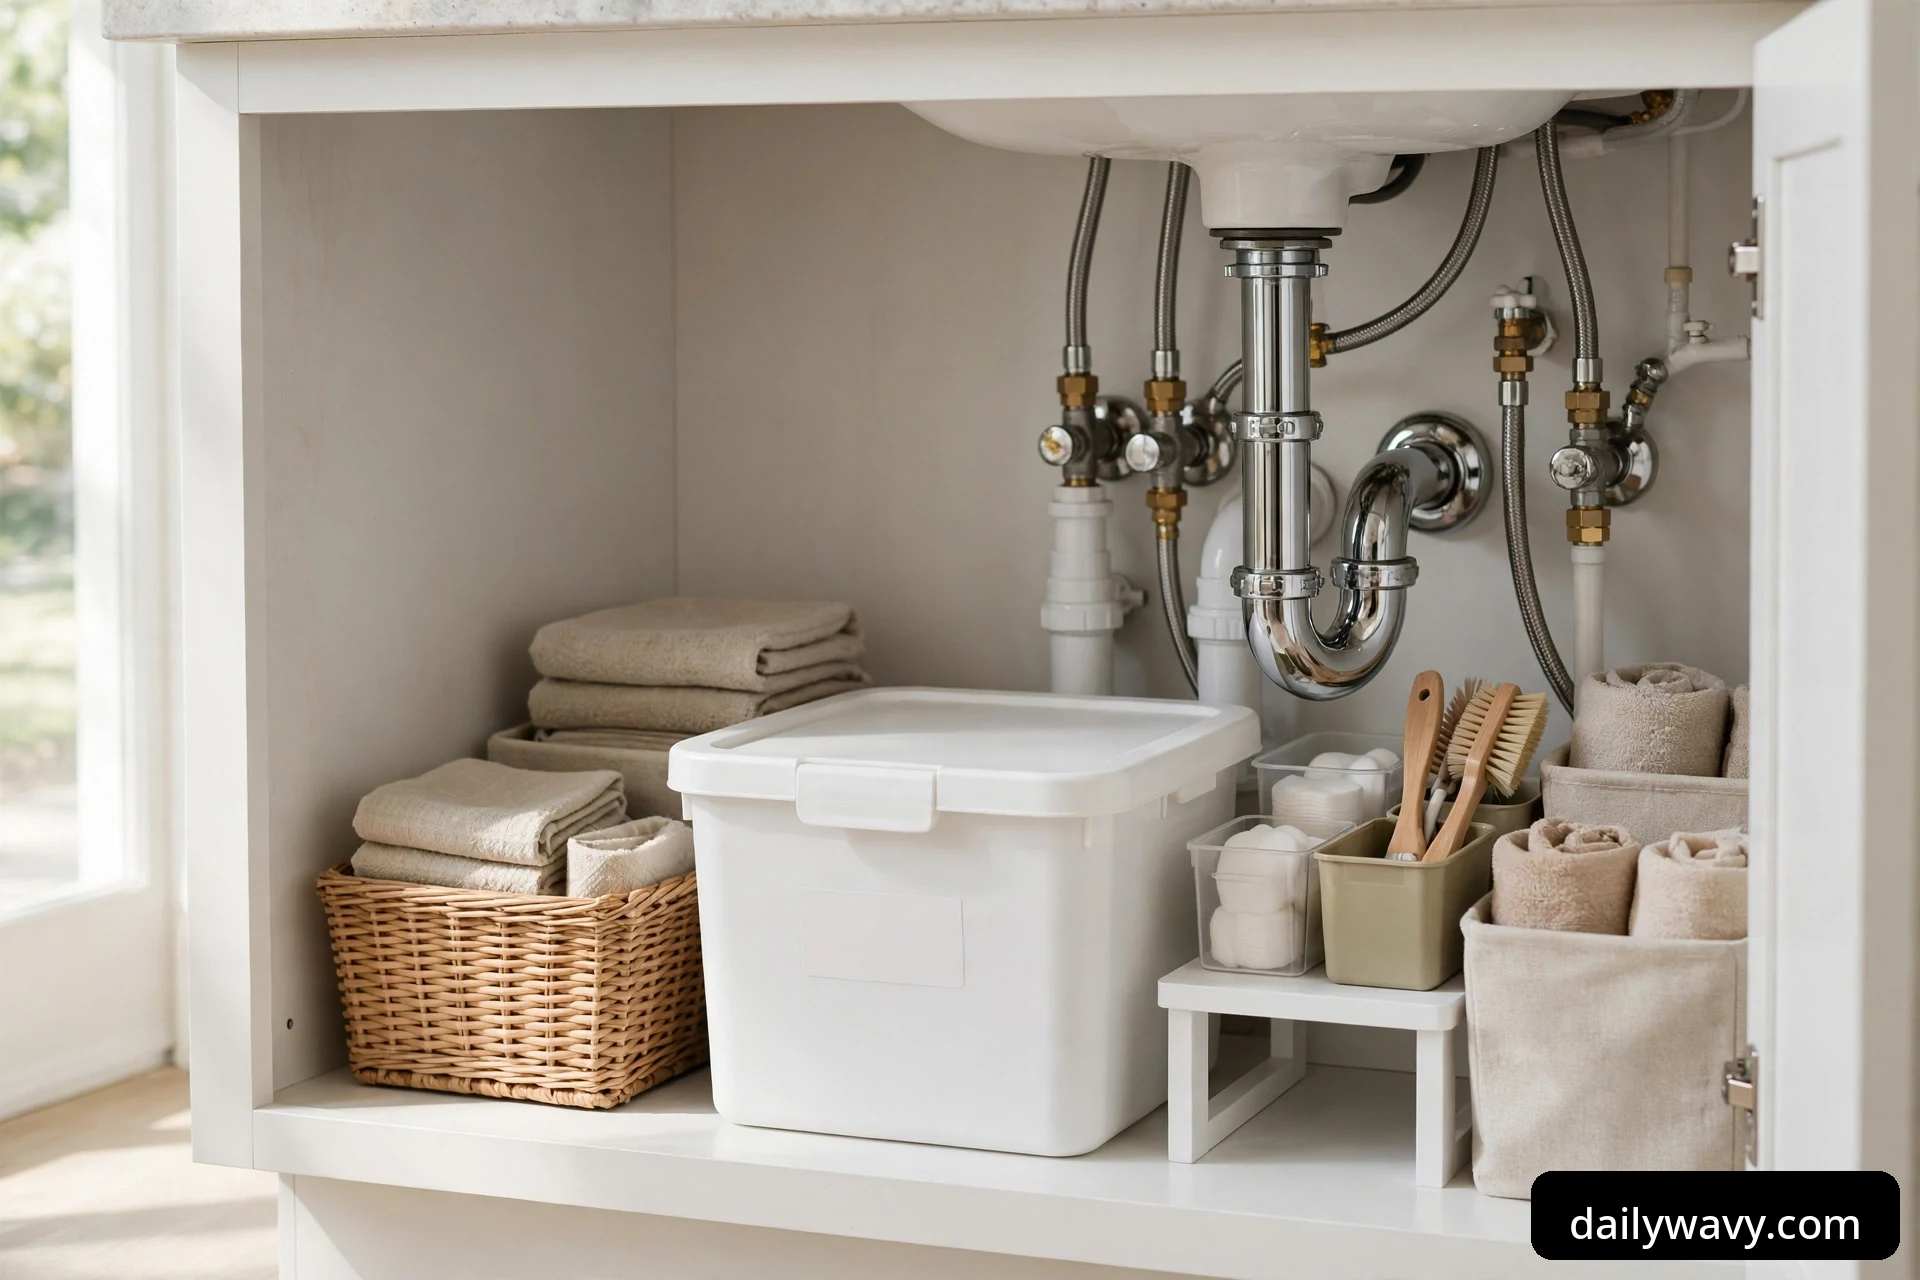
Before you buy anything: measure around the plumbing
Open both doors and take a tape measure to the cabinet. Record three numbers: the interior width wall to wall (often 24 to 30 inches in a standard vanity), the interior depth from the back wall to the inside of the door (usually 16 to 20 inches), and the clear height on each side of the P-trap (typically 14 to 18 inches beside the pipes, less directly beneath the curved trap). Leave the shutoff valves uncovered and reachable; nothing you install should require moving a valve to reach it. While you are there, wipe the cabinet floor dry and feel for dampness around the trap connections. A small drip becomes a big problem behind closed bins, so deal with leaks before you organize. This is the same measure-first thinking behind our small bathroom storage approach, where every container earns its place by fitting the actual space. One more non-negotiable: cleaning products and personal-care items live in separate containers, and anything with a warning label goes up high or behind a childproof latch if children use this bathroom.
1. A labeled closed container
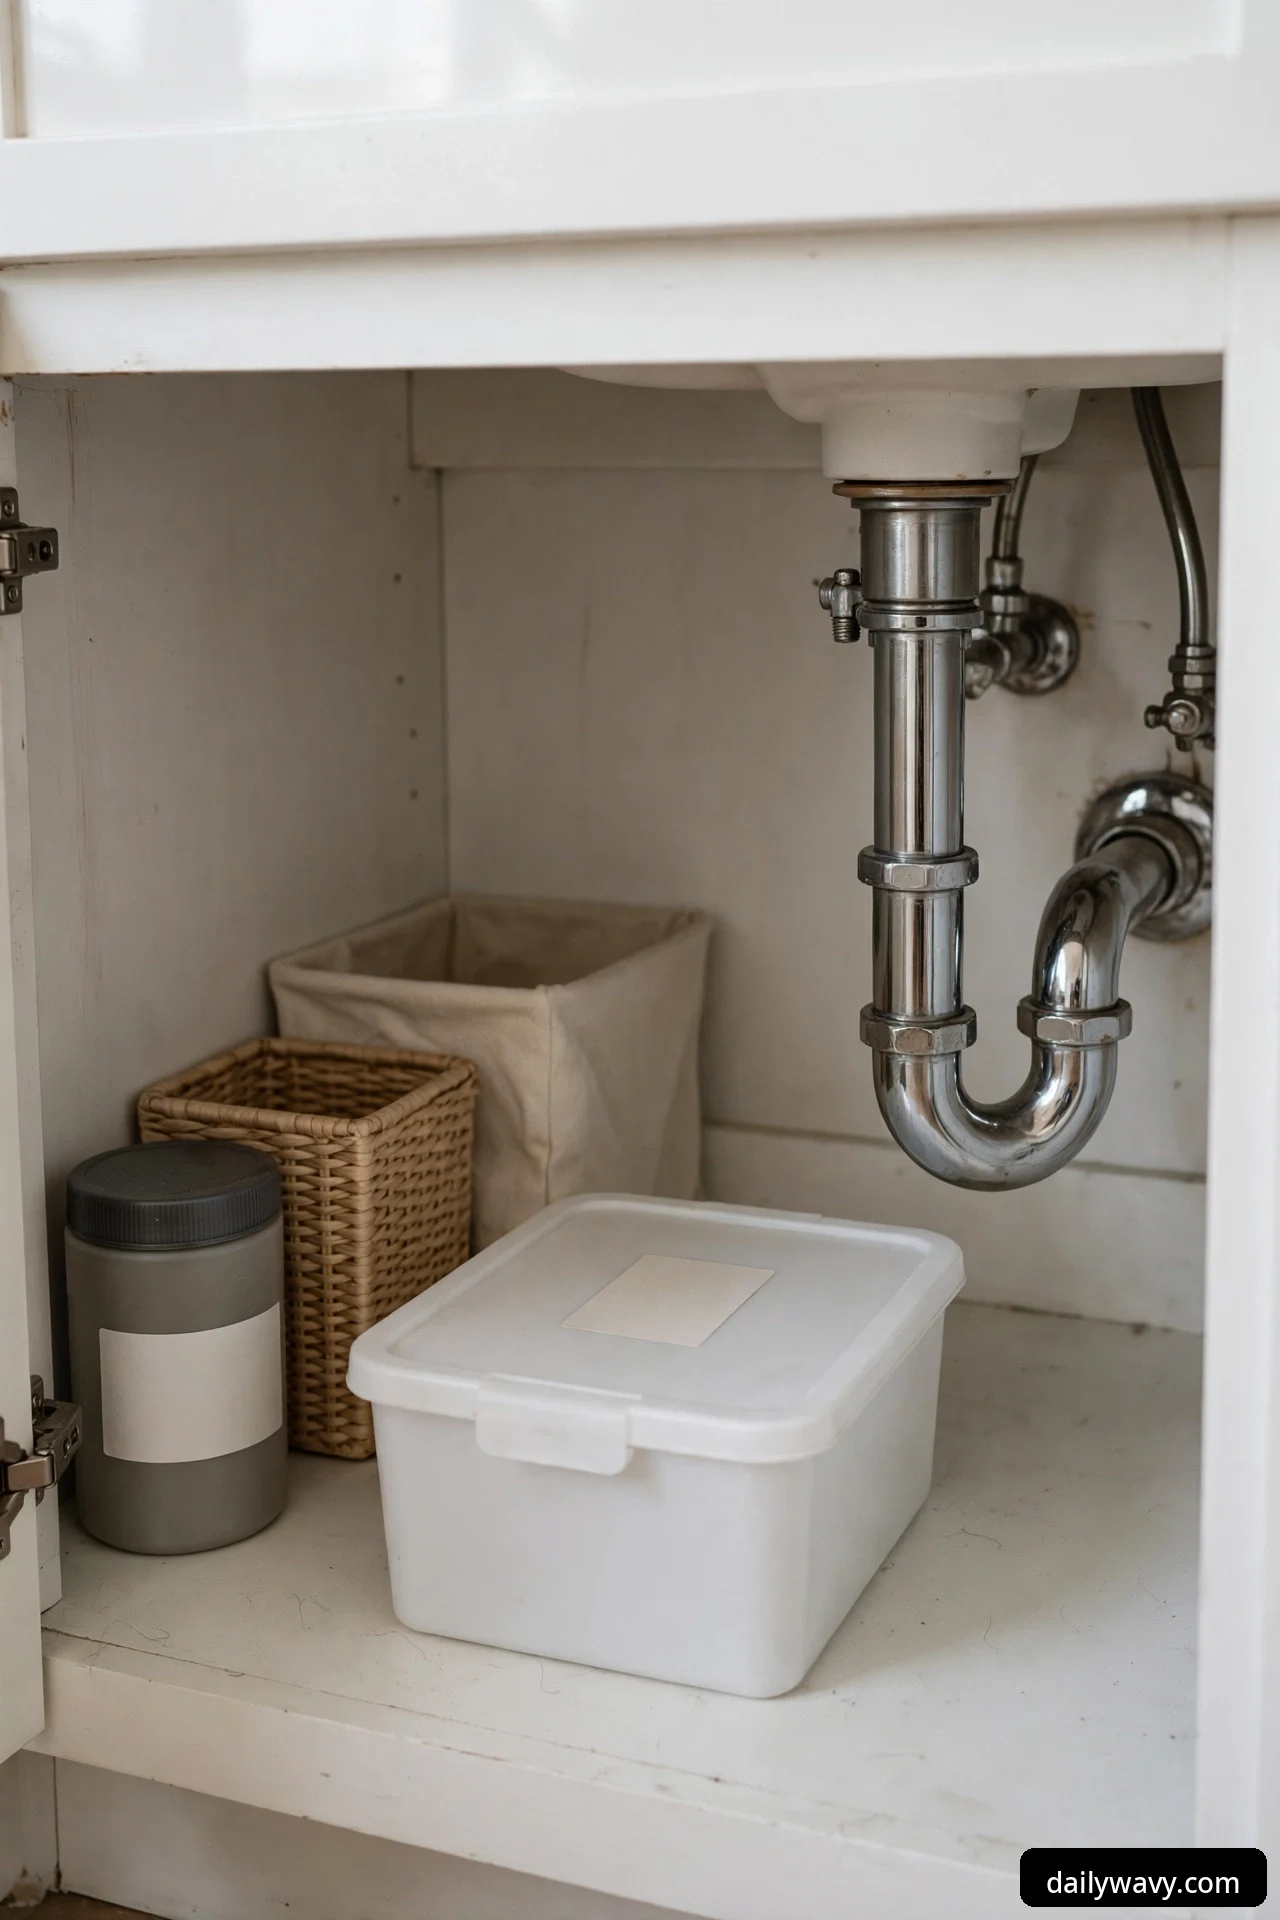
This is the foundation everything else builds on. A lidded container sized to clear your P-trap turns one cavernous, pipe-interrupted space into a tidy home for one category of items: cotton pads and swabs, extra soap, or sealed first-aid basics. Choose a plastic box with a snap-on lid, roughly 12 inches wide by 8 inches deep by 7 inches tall, which slides into the open bay beside the trap in most standard vanities. The lid matters because under-sink air runs damp; it keeps cotton and gauze from absorbing moisture and odors.
What to measure: the clear footprint beside the trap, plus the height from the cabinet floor to the underside of the drain pipe. Buy containers at least an inch shorter than that height so the lid closes without forcing.
Materials: hard plastic with a gasketed or snap lid, a label maker or waterproof label tape.
Placement: front and center on the side with the most clearance, label facing the door so you can read it in one glance.
Approximate effort: ten minutes, including labeling.
Lower-cost alternative: a clean cereal box wrapped in contact paper with a flap lid works for dry cotton supplies, replaced every few months since cardboard and damp air do not mix.
2. A compact shelf riser

The P-trap makes one level feel like two, and a shelf riser makes that literal. A small riser, about 10 inches wide and 6 inches tall, creates an upper shelf for bottles and a lower slot for flat items like washcloth stacks or spare sponges. Because it sits on the cabinet floor and does not attach to anything, you can lift the whole thing out when you need to reach a valve. Look for powder-coated metal or solid plastic; raw wood swells in damp air.
What to measure: the height between the cabinet floor and the lowest pipe crossing that zone, and the footprint clear of pipes. Risers of 6 inches fit beside most traps.
Materials: coated metal or plastic shelf riser, non-slip cabinet liner underneath to stop sliding.
Placement: on the deeper side of the cabinet, pushed toward the back wall so daily items stay in front.
Approximate effort: five minutes to set in place and arrange.
Lower-cost alternative: a sturdy plastic dish rack turned on its side does the same job for bottles if it fits the footprint.
3. A small pull-out caddy

Deep vanity cabinets hide things in the back, so bring the back to you. A narrow caddy with a pull handle, roughly 5 inches wide by 14 inches deep, fits into the slim gap beside the supply lines and pulls straight out like a drawer. This is where daily reachables live: your cleanser, moisturizer, toothpaste backup, contact solution. The narrow width is the point; it threads through the pipe maze instead of competing with it.
What to measure: the narrowest clear gap beside the supply lines from back wall to door, minus half an inch for the pull. Note any pipe that crosses the path at handle height.
Materials: plastic caddy with a built-in handle and raised front lip so bottles do not slide out when you pull.
Placement: in the slim vertical gap, handle facing the door, daily-use items only.
Approximate effort: fifteen minutes to measure, place, and load.
Lower-cost alternative: a narrow office desk organizer or cutlery tray with the compartments you need, as long as the sides are tall enough to hold bottles upright.
4. A hook solution suited to the surface
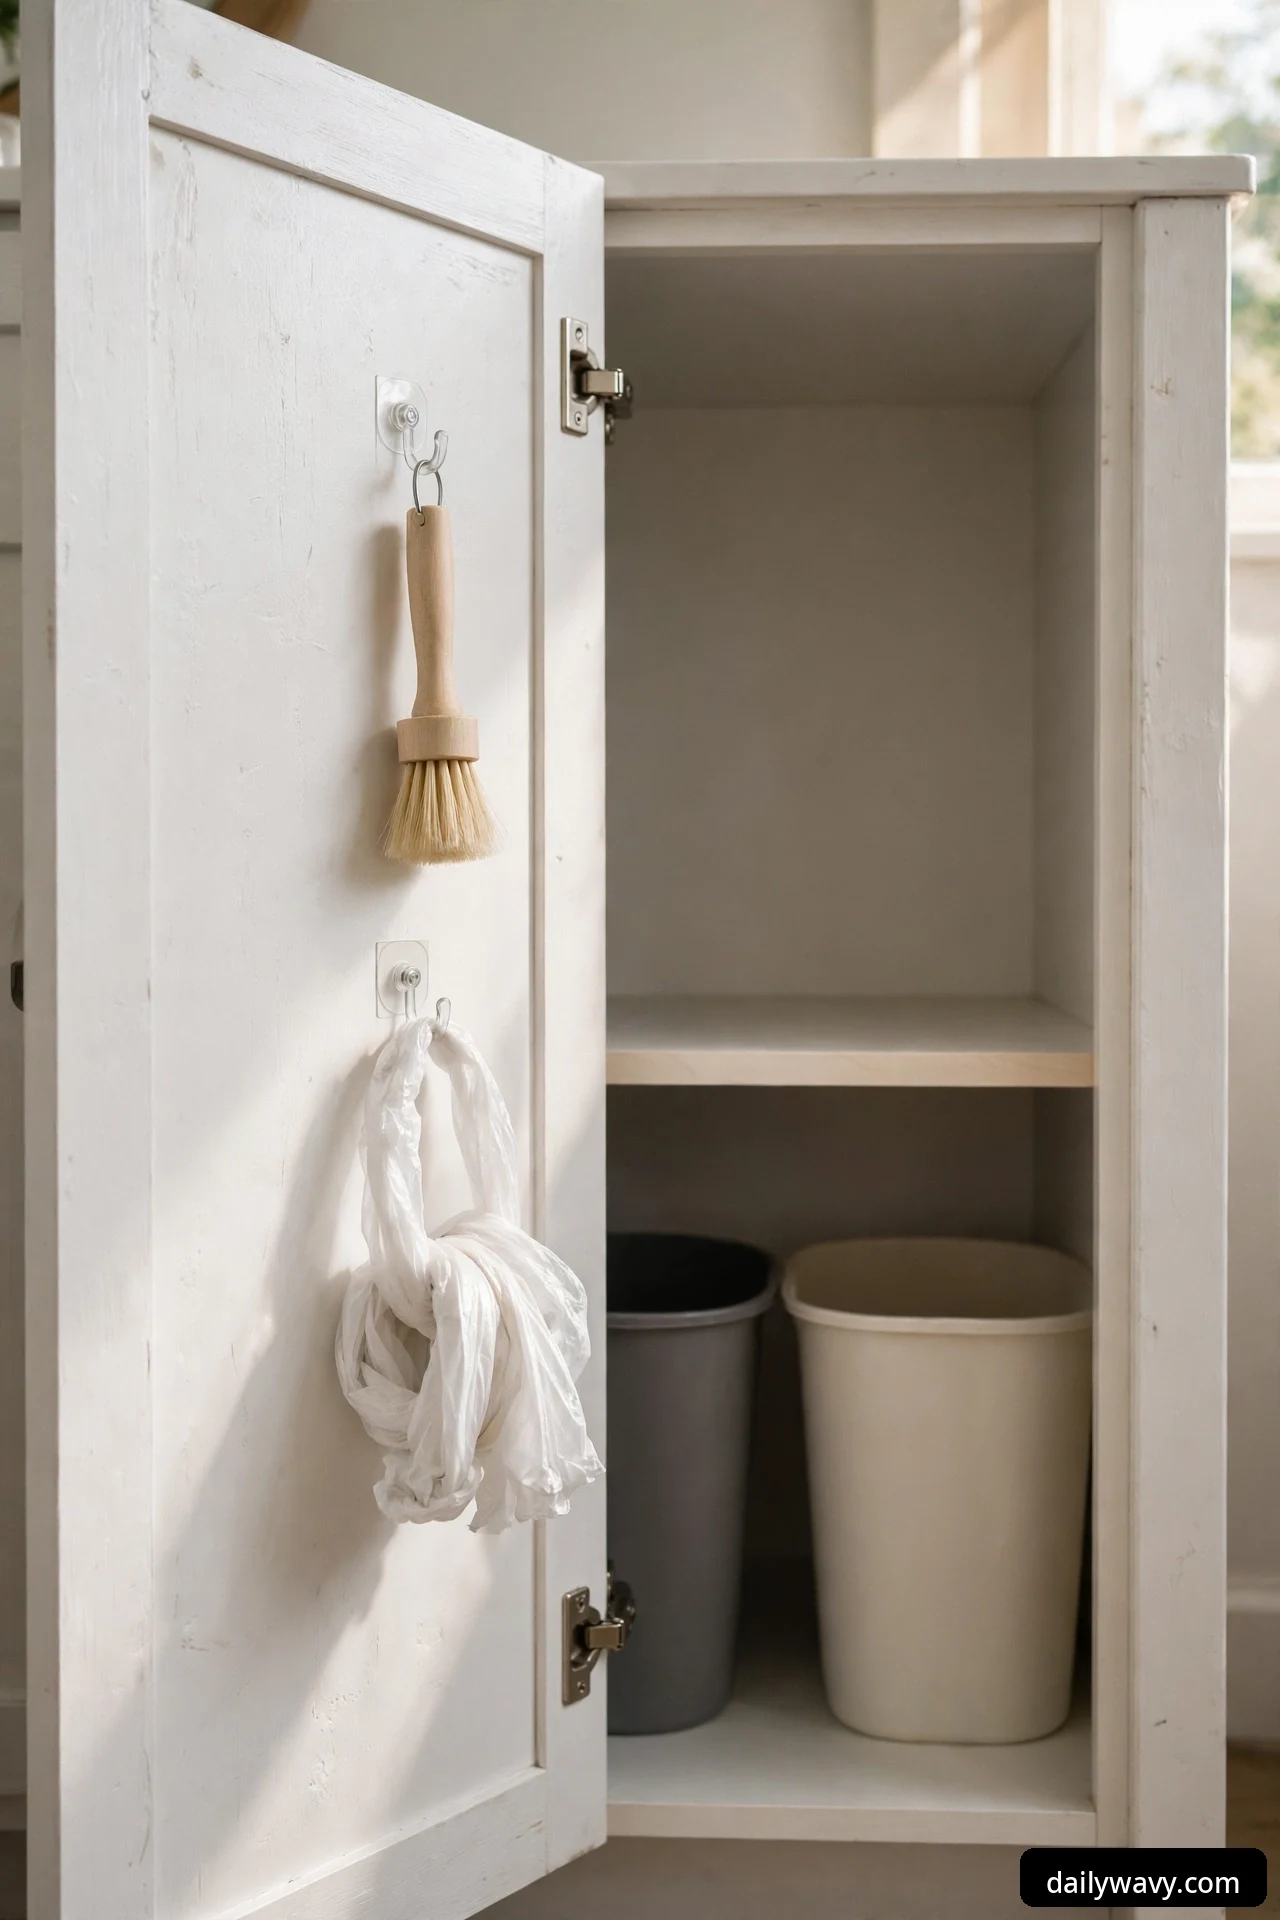
The insides of cabinet doors are free real estate, and hooks turn them into storage for light items: a small cleaning brush, spare garbage bags on a loop, or a microfiber cloth. Match the hook to the surface. Adhesive hooks work on smooth painted or laminate doors; screw-in hooks hold better on solid wood but leave a hole; over-the-door wire hooks avoid adhesives entirely. Whatever you choose, test the door closes fully before you load it, and keep the total weight under about two pounds per door so the hinges do not sag.
What to measure: the flat area of the door interior, and the clearance when the door closes against the cabinet frame. Items must not bump the pipes when the door swings.
Materials: adhesive hooks rated for at least a pound each, or a tension-mounted over-door rack for heavier loads.
Placement: inside the door, away from the latch side, with items short enough to clear the frame.
Approximate effort: ten minutes to clean the surface, stick the hooks, and wait for the adhesive to cure before loading.
Lower-cost alternative: self-adhesive key hooks from the dollar store hold a brush and a bag of spare sponges perfectly well.
5. A clear bin with visible contents

Opaque bins hide clutter; clear bins reveal whether the system is working. A transparent bin, about 10 by 7 by 6 inches, holds the category you reach for weekly: extra razors, travel bottles, sample sizes. When you can see everything at a glance, you buy fewer duplicates of things you already own. Clear acrylic or PET plastic works here because it resists the damp air better than open baskets do.
What to measure: the shelf space on your riser or the clear footprint on the cabinet floor, so the bin sits fully supported.
Materials: clear PET or acrylic bin with a low profile, small waterproof label on the front edge.
Placement: at eye level when the door opens, ideally on the riser shelf, so the contents are visible without pulling anything out.
Approximate effort: ten minutes to sort, load, and label.
Lower-cost alternative: large clear food-storage containers without lids give the same visibility at a fraction of the price.
6. A standing organizer with open drainage
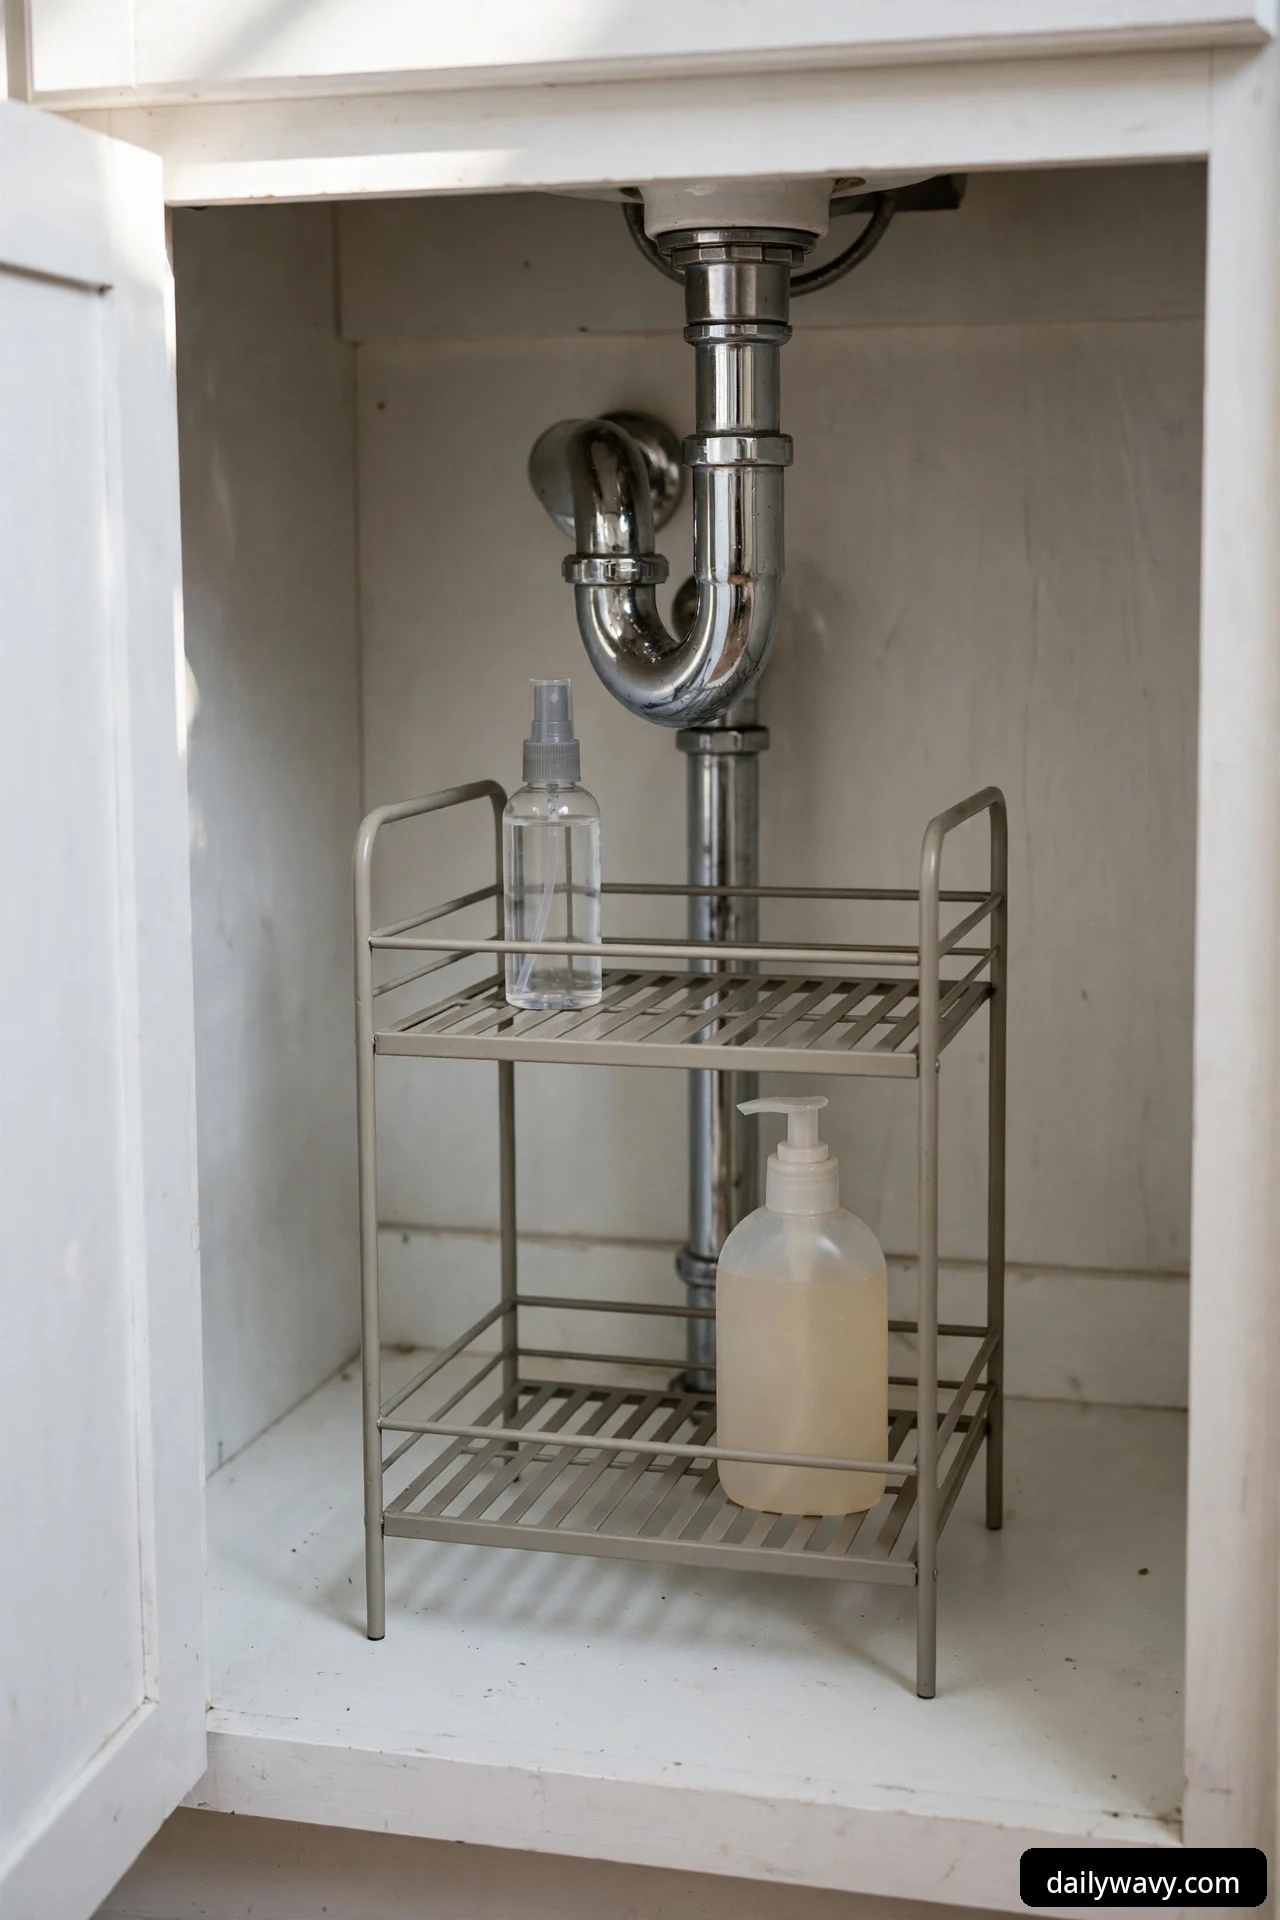
Under-sink cabinets get wet: condensation on pipes, a drippy bottle, a splash from the supply lines. A standing tiered organizer with open, slatted shelves lets moisture fall through instead of pooling under your supplies. This is the spot for items that arrive damp or live near water, like a soap dish refill, a spare soap dispenser, or a small spray bottle. Two tiers of about 12 inches wide fit most cabinets and give you vertical storage without drilling a single hole.
What to measure: floor space clear of the trap, plus headroom to the underside of the sink basin. Two-tier units usually need 12 to 14 inches of height.
Materials: rust-resistant coated metal or bamboo with a sealed finish, with shelves that are slatted or wire-grid rather than solid.
Placement: where drips are most likely, typically directly under the trap, where the open shelves let air circulate.
Approximate effort: ten minutes of assembly, if it is not already assembled.
Lower-cost alternative: a two-tier shower caddy repurposed for the cabinet does the same job; just check the height fits.
7. A vertical arrangement saving width
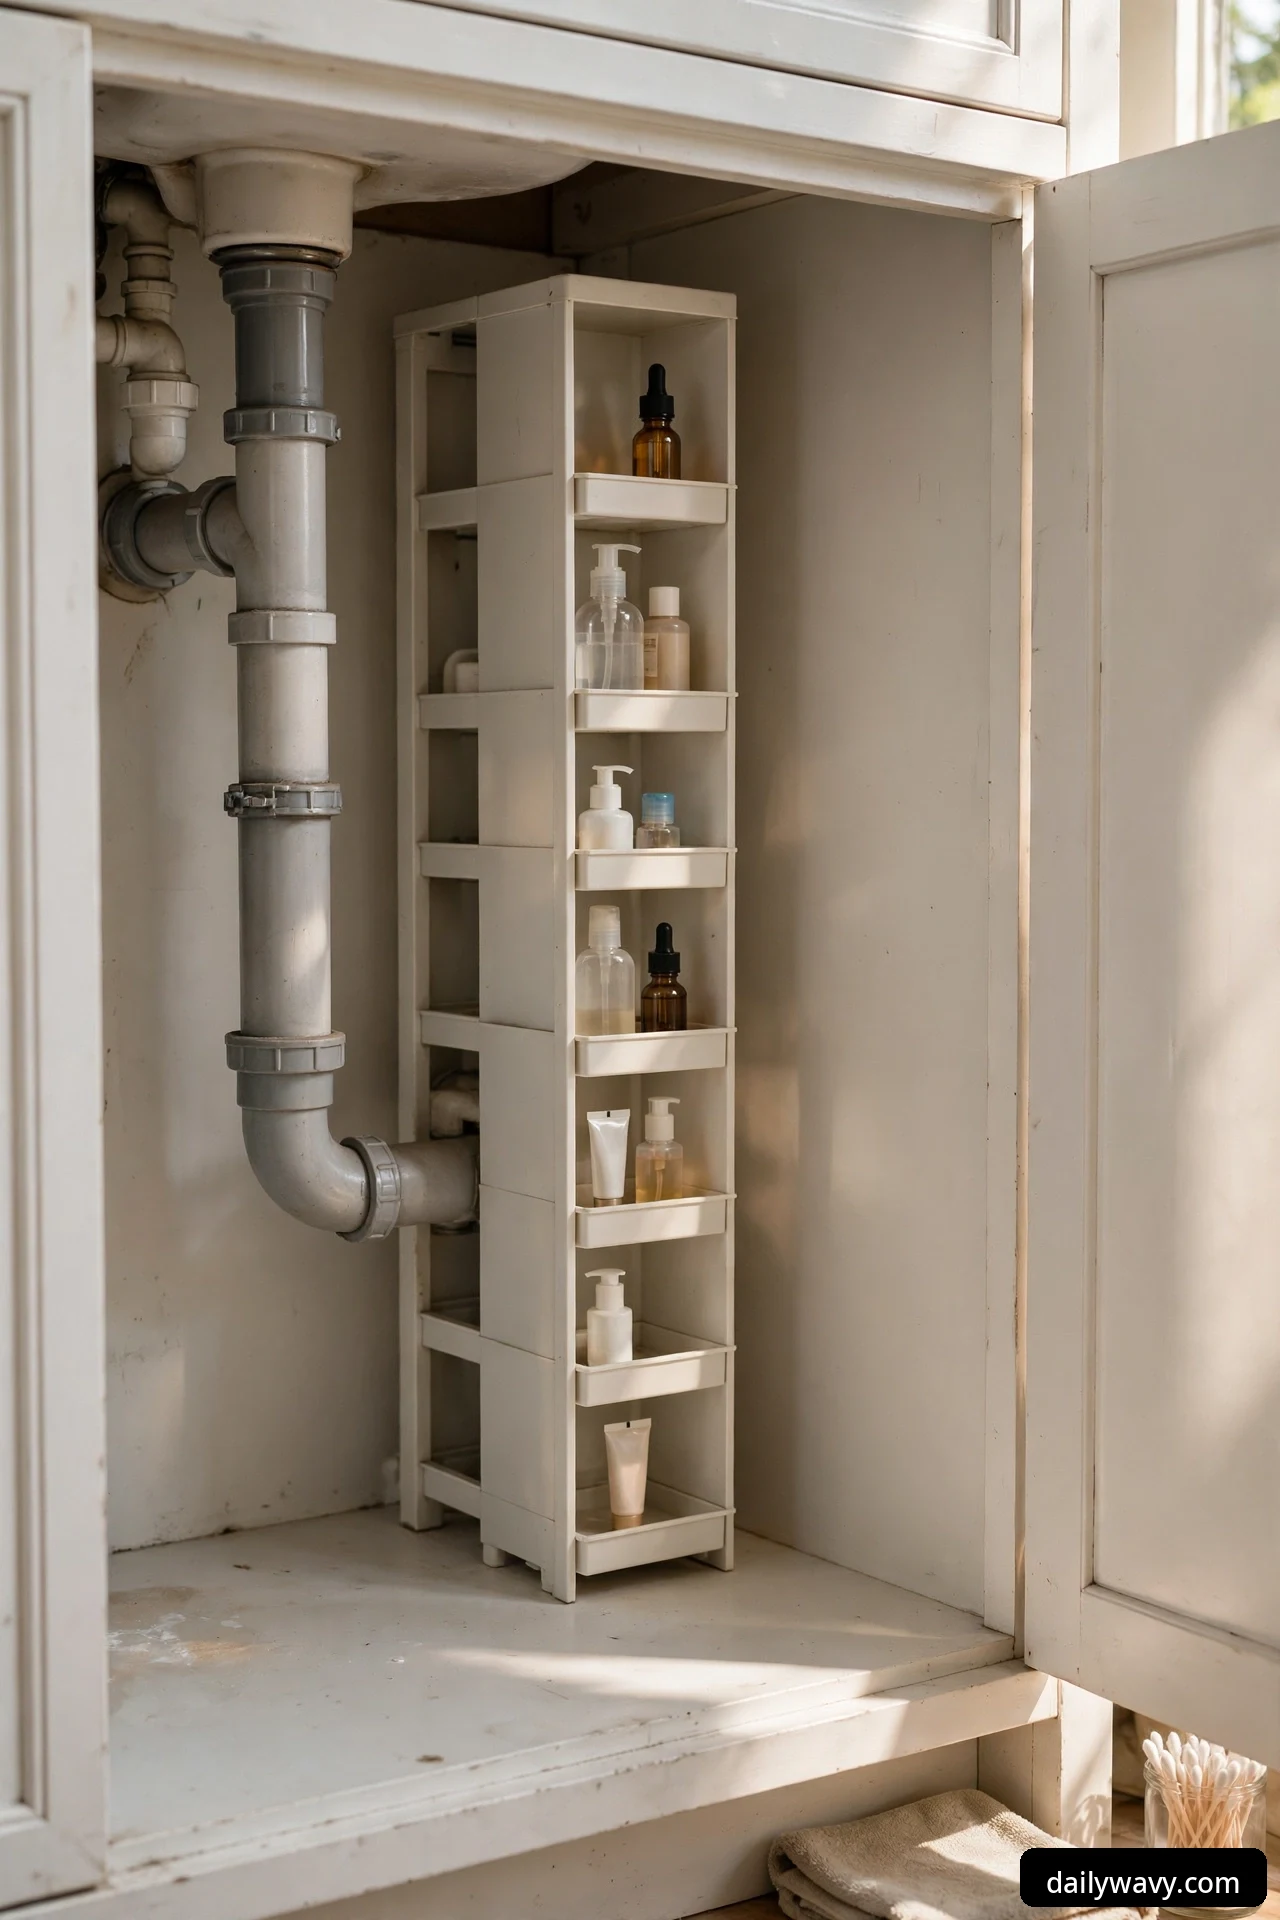
When the cabinet is wide but pipe-heavy, go tall instead of wide. A slim vertical unit, no more than 6 inches wide and up to 16 inches tall, holds bottles in a footprint smaller than a paperback. Cleaning sprays, tall shampoo backups, and hair product bottles stand upright with their caps and labels visible. The vertical shape threads between the trap and the wall where nothing horizontal would fit.
What to measure: the tallest clear vertical slot beside the drain assembly, from floor to the lowest pipe or basin edge.
Materials: narrow plastic or metal tower organizer with raised edges on each shelf so tall bottles stay put.
Placement: in the tallest clear slot, usually toward the back corner, with the most-used bottles on the lowest shelf for easy grabbing.
Approximate effort: five minutes to place and stock.
Lower-cost alternative: a tension-rod shelf made from a small spring rod and a fabric hanging organizer cut to width, braced between the cabinet walls.
8. A low basket for backup supplies
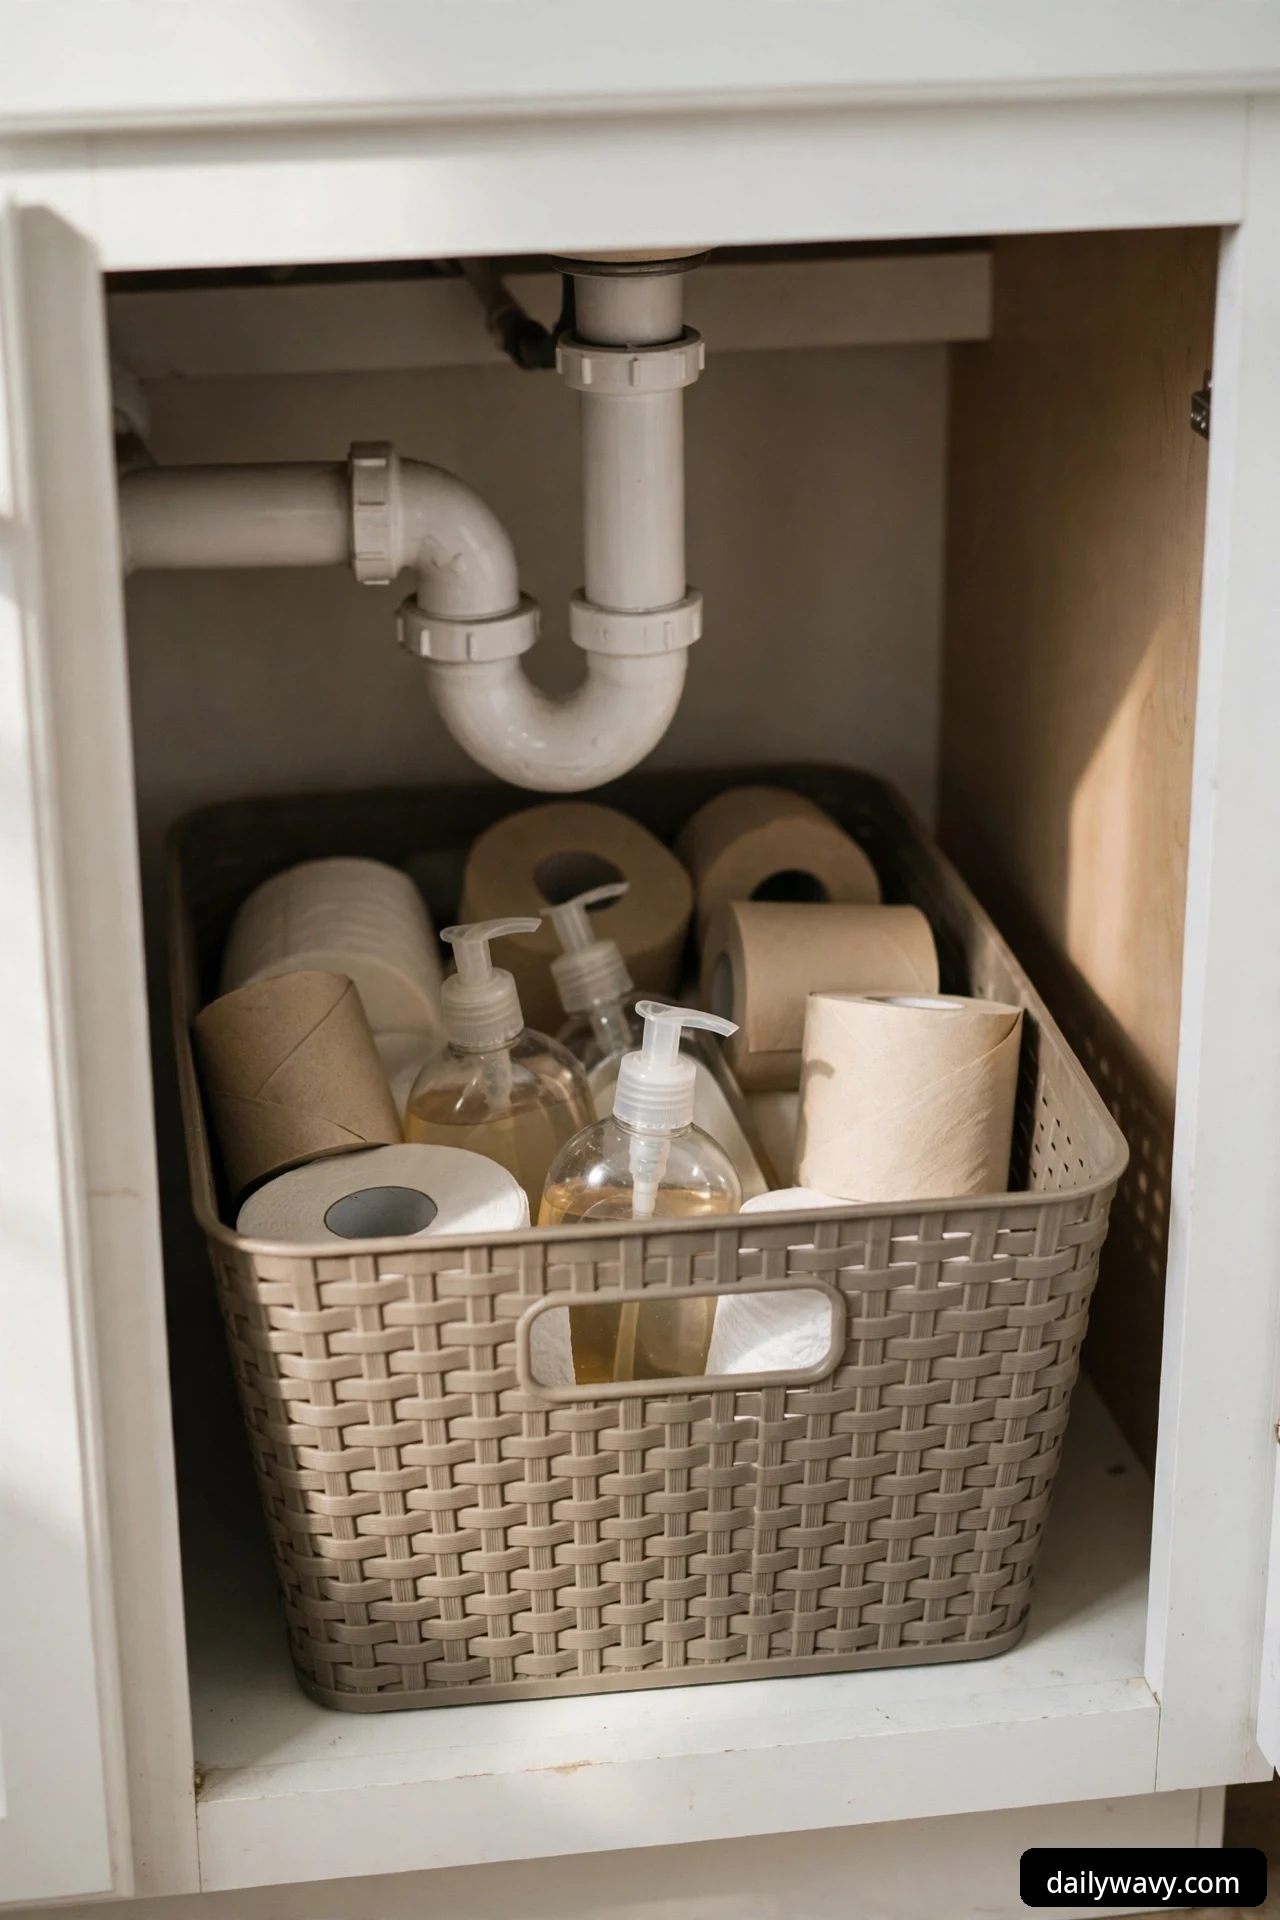
Backups need a home that is out of the way but not out of mind: extra hand soap, spare toilet paper rolls, the backup toothbrush heads. A low, wide basket, roughly 14 by 10 by 5 inches, slides under the lowest pipes where tall containers cannot go. The low profile is deliberate; it uses the awkward shallow zone that other organizers waste. Choose woven plastic or coated wire rather than natural fiber, which absorbs damp air and mildews.
What to measure: the clearance under the lowest pipe, minus an inch, and the footprint of the shallow zone at the front of the cabinet.
Materials: low-profile woven plastic or vinyl-coated wire basket with a handle cutout on the short side.
Placement: front of the cabinet, sliding under the pipes, handle facing the door for easy pull-out.
Approximate effort: five minutes, mostly spent deciding what counts as a backup.
Lower-cost alternative: a shallow cardboard box lined with a plastic bag works for dry backups, replaced every few months.
9. A separate zone for wet items

Wet things and dry things should not share a bin. Give damp items their own zone: a small ventilated tray for the sponge you wrung out, the washcloth that is still drying, or the bath mat edge that needs airing. A perforated tray or a bamboo bath-mat style rack lets air reach every side, so things dry before they start to smell. Keep this zone on the side farthest from your dry storage, and never let wet items touch cardboard, wood, or cloth storage.
What to measure: a 10-by-8-inch corner of the cabinet floor with airflow, away from the driest storage.
Materials: perforated plastic tray or slatted bamboo rack that lifts items off the cabinet floor.
Placement: the corner nearest the door, where opening the door adds a little air circulation each day.
Approximate effort: five minutes to place and assign.
Lower-cost alternative: a plastic dish drainer tray from the kitchen, washed and repurposed, works perfectly.
10. A removable insert for easier cleaning
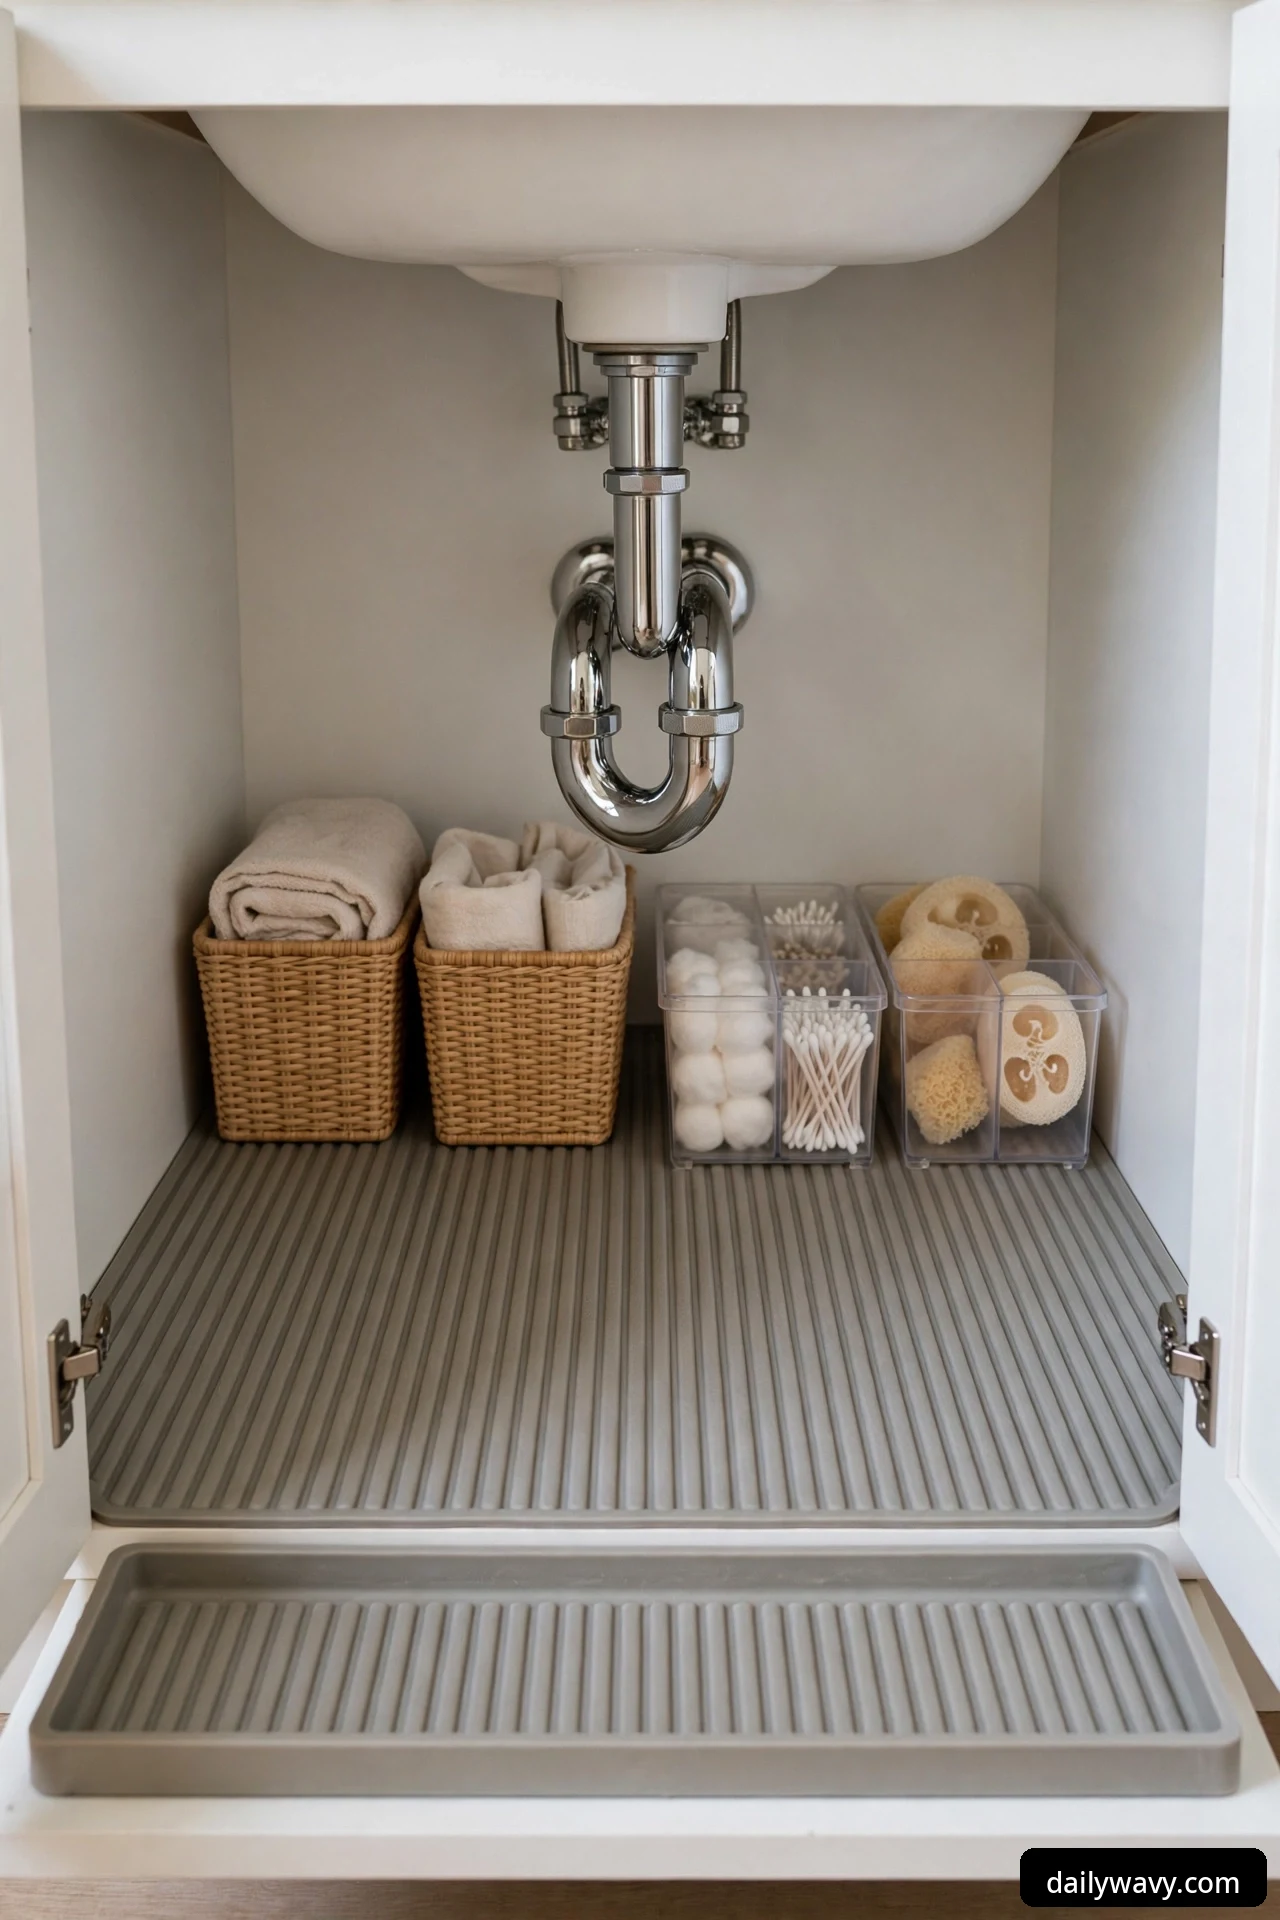
The biggest argument against under-sink organizing is cleaning: who wants to unload everything to wipe up a leak? A removable insert, a shallow tray or a custom-cut sheet of cabinet liner covering the whole floor, solves it. When the cabinet needs attention, you lift out one tray instead of thirty loose items. Waterproof liners also catch the slow drip before it reaches the wood, which helps protect the vanity from slow drips. Cut shelf liner to fit around the pipe penetrations so coverage is complete.
What to measure: the full interior floor, tracing around the pipe entries onto paper first so the cutout fits.
Materials: waterproof ribbed cabinet liner or a shallow boot tray, plus a utility knife and a straightedge.
Placement: across the entire cabinet floor, under everything else.
Approximate effort: twenty minutes to measure, cut, and lay.
Lower-cost alternative: a cut-to-fit plastic tablecloth or shower curtain remnant, taped at the edges, does the job for a season.
11. A compact rack at reachable height

Bending to the floor for daily items gets old fast. A compact rack that raises the everyday bottles to the height of the open door, about 12 to 16 inches off the cabinet floor, puts cleanser and moisturizer right where your hand lands. Freestanding two-shelf racks that sit on the cabinet floor do this without fasteners; pick one whose top shelf lands just below the door opening so you reach in at a natural angle rather than stooping.
What to measure: from the cabinet floor to the bottom edge of the door opening, and the depth of the clear zone in front of the pipes.
Materials: freestanding coated-metal or plastic two-shelf rack, sized to the clear zone.
Placement: front and center, where the top shelf sits at comfortable hand height.
Approximate effort: five minutes to set and stock.
Lower-cost alternative: an inverted sturdy crate with a flat board on top raises items the same way.
12. A closed box for rarely used items
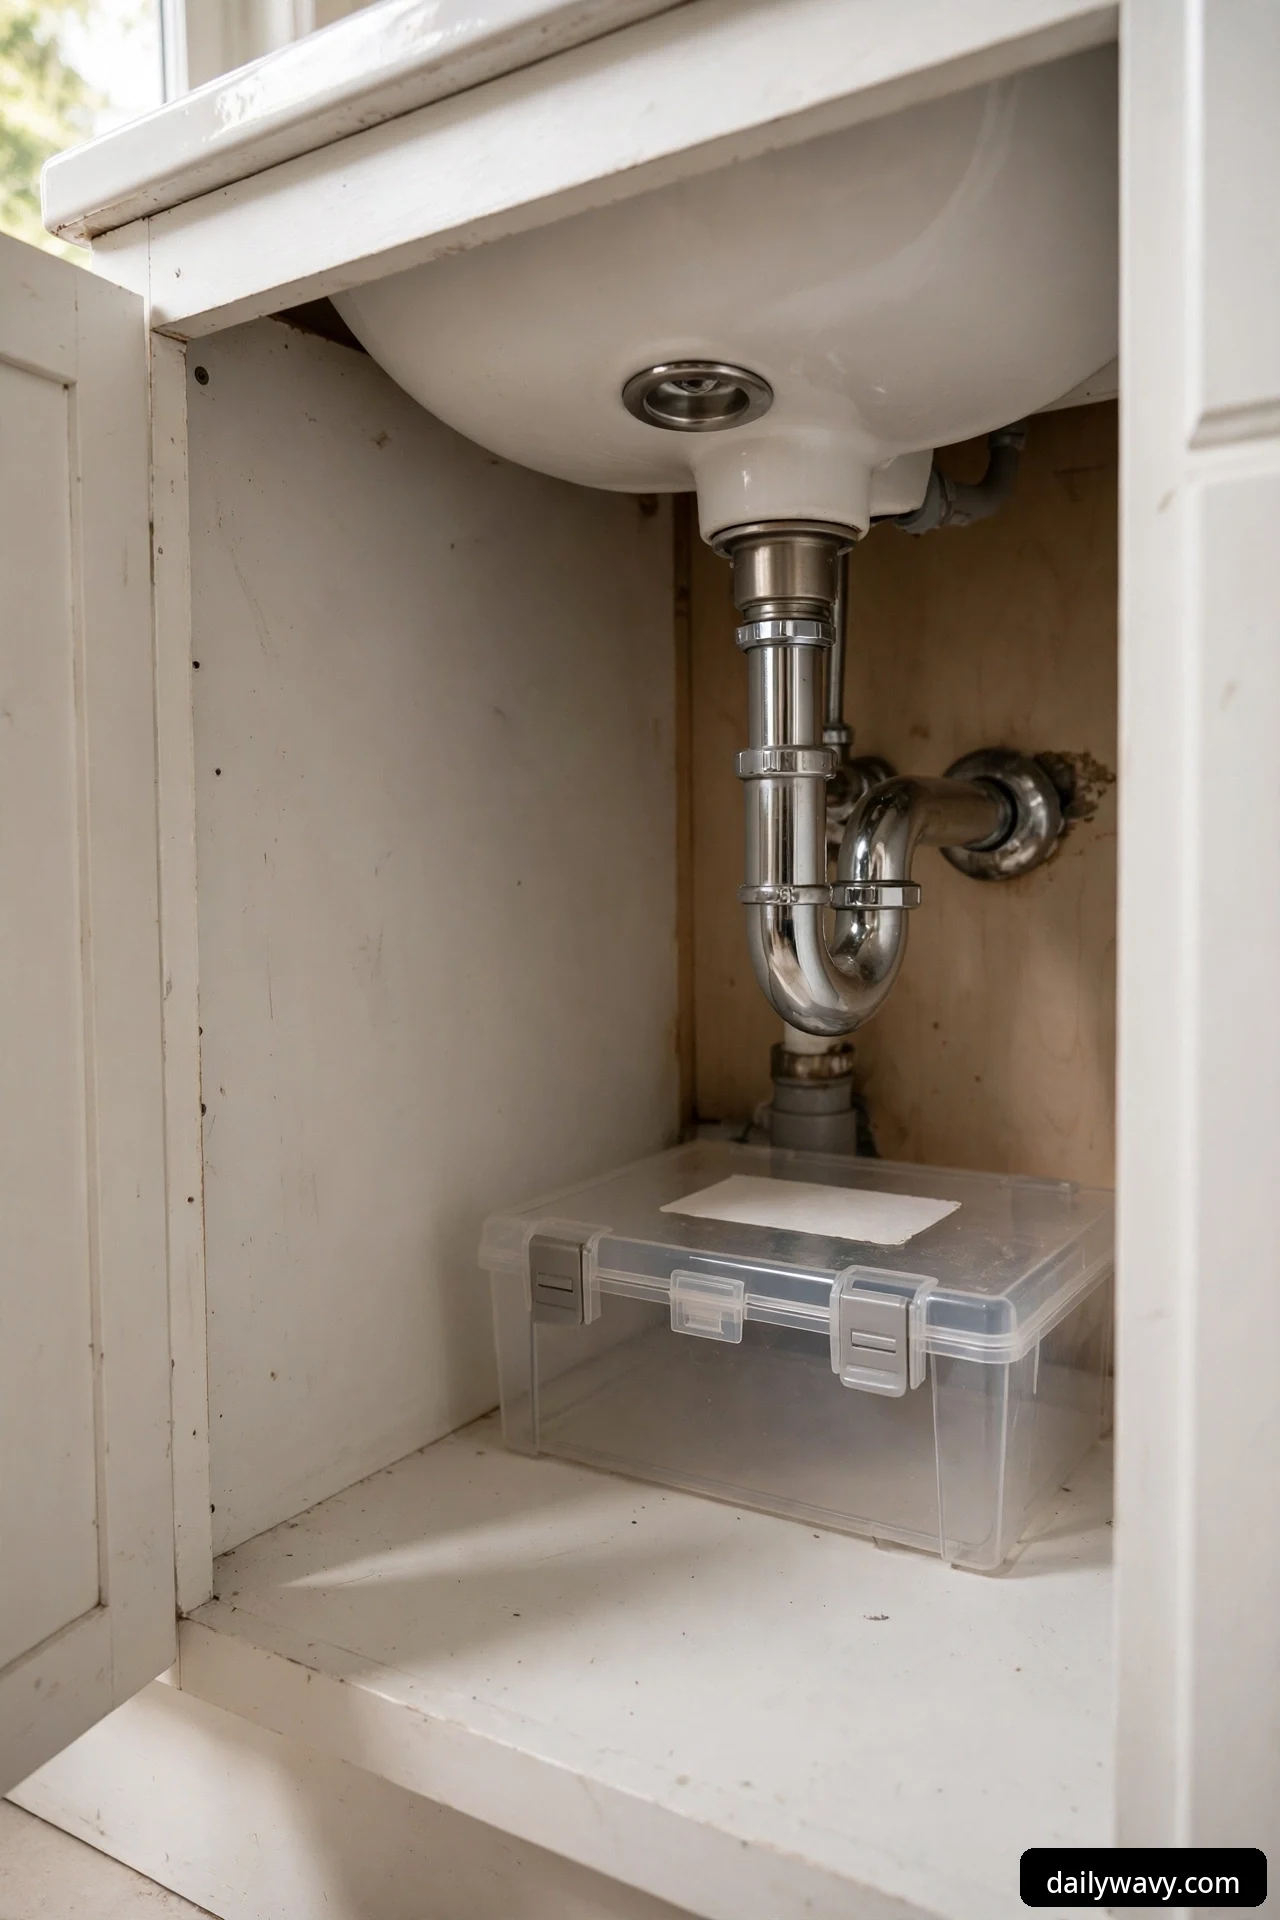
Not everything under the sink earns front-row space. The closed box is for the twice-a-year crowd: extra caulk tubes, plumbing tape, the replacement faucet cartridge, spare cabinet knobs. A lidded box, about 12 by 9 by 8 inches, keeps them dust-free and out of the way at the very back of the cabinet. Write the contents on the outside and the date you last touched it; if a box goes two years untouched, its contents probably belong in the garage or the donation pile.
What to measure: the back-corner footprint behind the pipes, where tall items cannot stand but a low box fits.
Materials: hard plastic box with a latching lid, plus a label with contents and date.
Placement: the back corner, behind the daily-use zone, where it will not block valve access.
Approximate effort: ten minutes to gather the strays and box them.
Lower-cost alternative: a lidded shoe box sealed with packing tape, with the contents written on the side in marker.
13. A basket assigned to one person
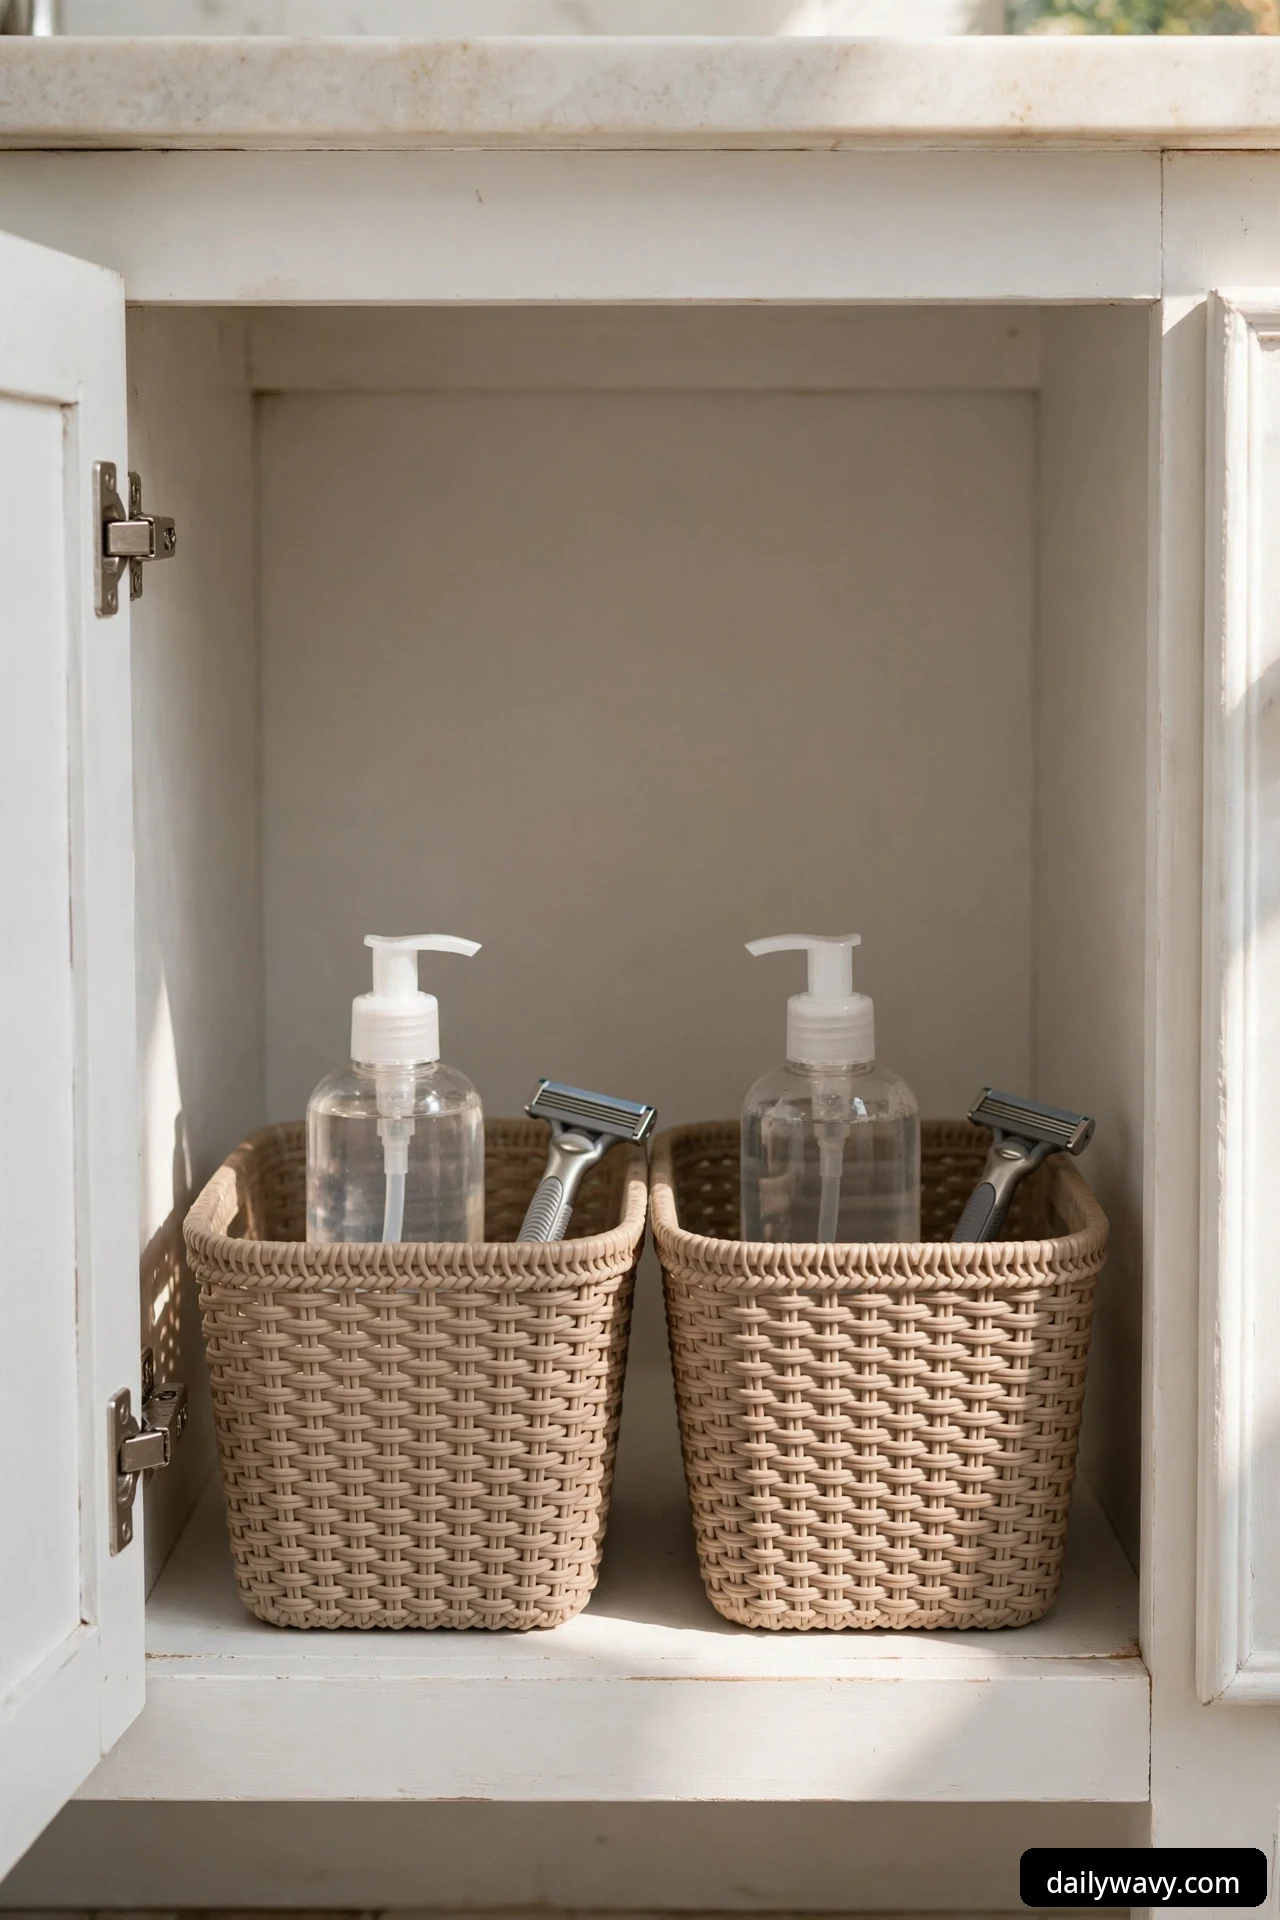
Shared bathrooms fail at organization because nobody knows what is whose. Fix it with one basket per person, each labeled with a name or a color. Every basket holds that person’s daily under-sink items: their cleanser, their razor, their contact solution. When something runs out, the owner of the basket knows. When a guest uses the bathroom, they are not rummaging through someone else’s supplies. Baskets of about 8 by 6 by 5 inches fit two or three side by side in a standard vanity.
What to measure: divide the usable front width by the number of users, minus half an inch per basket for clearance.
Materials: matching baskets in different colors or with name labels, sized to the per-person share of width.
Placement: side by side across the front, so each person’s basket is the first thing they see.
Approximate effort: fifteen minutes to divide supplies and label.
Lower-cost alternative: reuse small gift bags or tote bags, one per person, with names written on masking tape.
14. A return-to-place tray

Organization dies in the gap between “I used it” and “I put it back.” A small tray by the door, about 10 by 7 inches, gives in-between items a landing spot: the new soap not yet opened, the vitamin bottle that lives on the counter but gets stashed when guests come, the item you pulled out and will need again tomorrow. Once a week, everything on the tray gets returned to its real home or thrown away. The tray keeps the system honest without demanding perfection every day.
What to measure: a flat spot just inside the door, clear of the swing and the pipes.
Materials: shallow tray with a lip, wipeable plastic or melamine.
Placement: immediately inside the door, where it is the first thing you see and the last thing you pass.
Approximate effort: five minutes to place; thirty seconds a week to clear it.
Lower-cost alternative: a cafeteria tray or a baking sheet with a rim works just as well.
15. A small freestanding storage unit

When bins and racks still are not enough, a small freestanding unit, think a two-drawer plastic tower about 12 inches wide and 24 inches tall, turns the cabinet into a mini dresser. The drawers give you enclosed, dust-free storage for the overflow: sealed first-aid basics in the top drawer, extra personal care in the bottom. A cool, dry spot outside the bathroom is still the better home for most medicines. Measure carefully here, because these towers are the tallest thing you will put under a sink, and the drawers need clearance to open past the trap. If it does not fit with the drawers opening, it does not fit.
What to measure: height from floor to the lowest obstruction, width of the clear bay, and drawer pull-out clearance past the pipes.
Materials: freestanding plastic drawer tower with smooth-gliding drawers, sized to the clear bay.
Placement: in the tallest, widest clear bay, drawers facing the door, medicine drawer on top and out of children’s reach.
Approximate effort: ten minutes of assembly plus loading.
Lower-cost alternative: stack two sturdy milk crates with a board between them for a two-tier open version.
16. A grouped arrangement by routine

The final idea is not a product but a system: group everything by routine instead of by type. Morning items together (cleanser, deodorant, contact solution), evening items together (makeup remover, night cream, floss), weekly items together (exfoliant, hair mask, nail clippers). Use the containers from the earlier ideas, but arrange them so one pull or one basket serves a whole routine. This is how the cabinet stops being storage and starts being a workflow. If you keep a labeled system anywhere else in the house, this will feel familiar; our small pantry organization ideas use the same group-by-routine logic in the kitchen.
What to measure: nothing new; re-sort what you already placed in ideas 1 through 15.
Materials: the containers you already have, plus small labels or colored tape to mark each routine group.
Placement: morning group front and center, evening group beside it, weekly group toward the back.
Approximate effort: twenty minutes to re-sort and label.
Lower-cost alternative: it is free; it is just a re-sort of what you already own.
Frequently asked questions
How do I organize under a bathroom sink with lots of pipes?
Work in the gaps instead of fighting them. Measure the clear bays beside and under the trap, then choose narrow caddies, low baskets, and vertical units that fit those exact spaces. Freestanding organizers beat anything that needs fastening, because you can lift them out to reach the shutoff valves.
What materials hold up best in the damp air under a sink?
Hard plastic, coated metal, glass, and sealed bamboo. Avoid raw wood, natural wicker, and cardboard for anything permanent; they absorb moisture and mildew. Whatever you use, keep it off a wet cabinet floor with a waterproof liner underneath.
How do I keep cleaning products safe around kids?
Store cleaners in a separate closed container from personal-care items, place it as high as the cabinet allows or behind a childproof cabinet latch, and never transfer chemicals into food or drink containers. If the bathroom is used by small children, a latch on the cabinet door is one of the most effective steps.
Should I keep medicines under the bathroom sink?
The damp, warm air under a sink is not ideal for medications; a cool, dry spot outside the bathroom is better for most prescriptions. If you do store anything medical here, keep it in a sealed container in the top drawer of a freestanding unit, well out of children’s reach.
How often should I clean out under the sink?
A quick scan every month, when you clear the return-to-place tray, and a full empty-and-wipe twice a year. The removable liner makes the deep clean take minutes instead of an afternoon.
What do I do if I find a leak while organizing?
Stop organizing and fix the leak first. Tighten the slip nuts on the trap by hand, check the supply line connections, and dry everything thoroughly. If the cabinet floor is swollen or soft, it needs repair before anything goes back in. Storage should never hide a water problem.
Under-sink organization is really plumbing respect with nice containers. Once every item has a spot that fits the pipes, the humidity, and the people using the bathroom, the cabinet stays tidier with less effort. For more ideas in the same spirit, browse the Home & Decor collection, where every guide is built around real rooms and real measurements.