15 Christmas Appetizer Ideas to Plan Your Menu
15 Christmas Appetizer Ideas to Plan Your Menu Christmas dinner starts before the main course. The appetizers set the tone…
15 Christmas Appetizer Ideas to Plan Your Menu
Christmas dinner starts before the main course. The appetizers set the tone for the whole evening, so they need to taste great, look festive, and hold up while guests mingle. This collection gathers 15 Christmas appetizer ideas that cover that brief. Each one uses real ingredients with real quantities, includes make-ahead and transport notes, and tells you exactly how to store leftovers. Plan your menu with confidence.

Jump to the recipes
- Cranberry Brie Pastry Bites
- Spinach Feta Pinwheels
- Roasted Pepper Crostini
- Rosemary Potato Bites
- Mushroom Tartlets
- Goat Cheese Stuffed Dates
- Pesto Mozzarella Skewers
- Mini Cheese Gougeres
- Cranberry Meatballs
- Caramelized Onion Tarts
- Herbed Cheese Truffles
- Garlic Mushroom Skewers
- Pear Walnut Crostini
- Savory Cheese Shortbread
- Stuffed Mini Peppers
1. Cranberry Brie Pastry Bites

These are the appetizer that disappears first. Flaky puff pastry cups hold creamy brie and tart cranberry sauce, and the combination of rich cheese with bright fruit tastes exactly like Christmas. They bake in under 15 minutes, so they are perfect for the oven window right before guests arrive.
Yield: 24 bites (about 12 servings)
Ingredients: 1 sheet (about 8 oz) frozen puff pastry, thawed; 8 oz brie, rind on, cut into 24 small cubes; 1/2 cup whole-berry cranberry sauce; 1 teaspoon fresh rosemary leaves, finely chopped; 1 tablespoon honey (optional).
Method: Heat the oven to 400°F (200°C). Lightly grease a 24-cup mini muffin tin. Roll the pastry slightly and cut it into 24 squares. Press one square into each muffin cup. Place a cube of brie in each cup, then spoon about 1 teaspoon of cranberry sauce on top. Sprinkle with rosemary. Bake 12 to 14 minutes until the pastry is puffed and golden. Cool 5 minutes in the tin, then lift out with a small spatula.
Make-ahead: Assemble the cups up to 8 hours ahead, cover, and refrigerate. Bake straight from the fridge, adding 2 minutes to the bake time. The baked bites reheat well at 350°F for 5 minutes.
Transport: Carry them in the tin, covered loosely with foil. Reheat at the destination if you can.
Troubleshooting: If the pastry bottoms feel soft, the tin was likely underfilled with pastry. Press the squares firmly into the cups and chill them 10 minutes before baking so the layers set before the heat hits.
Storage: Refrigerate leftovers in an airtight container for up to 3 days. Reheat in the oven, not the microwave, to keep the pastry crisp.
2. Spinach Feta Pinwheels
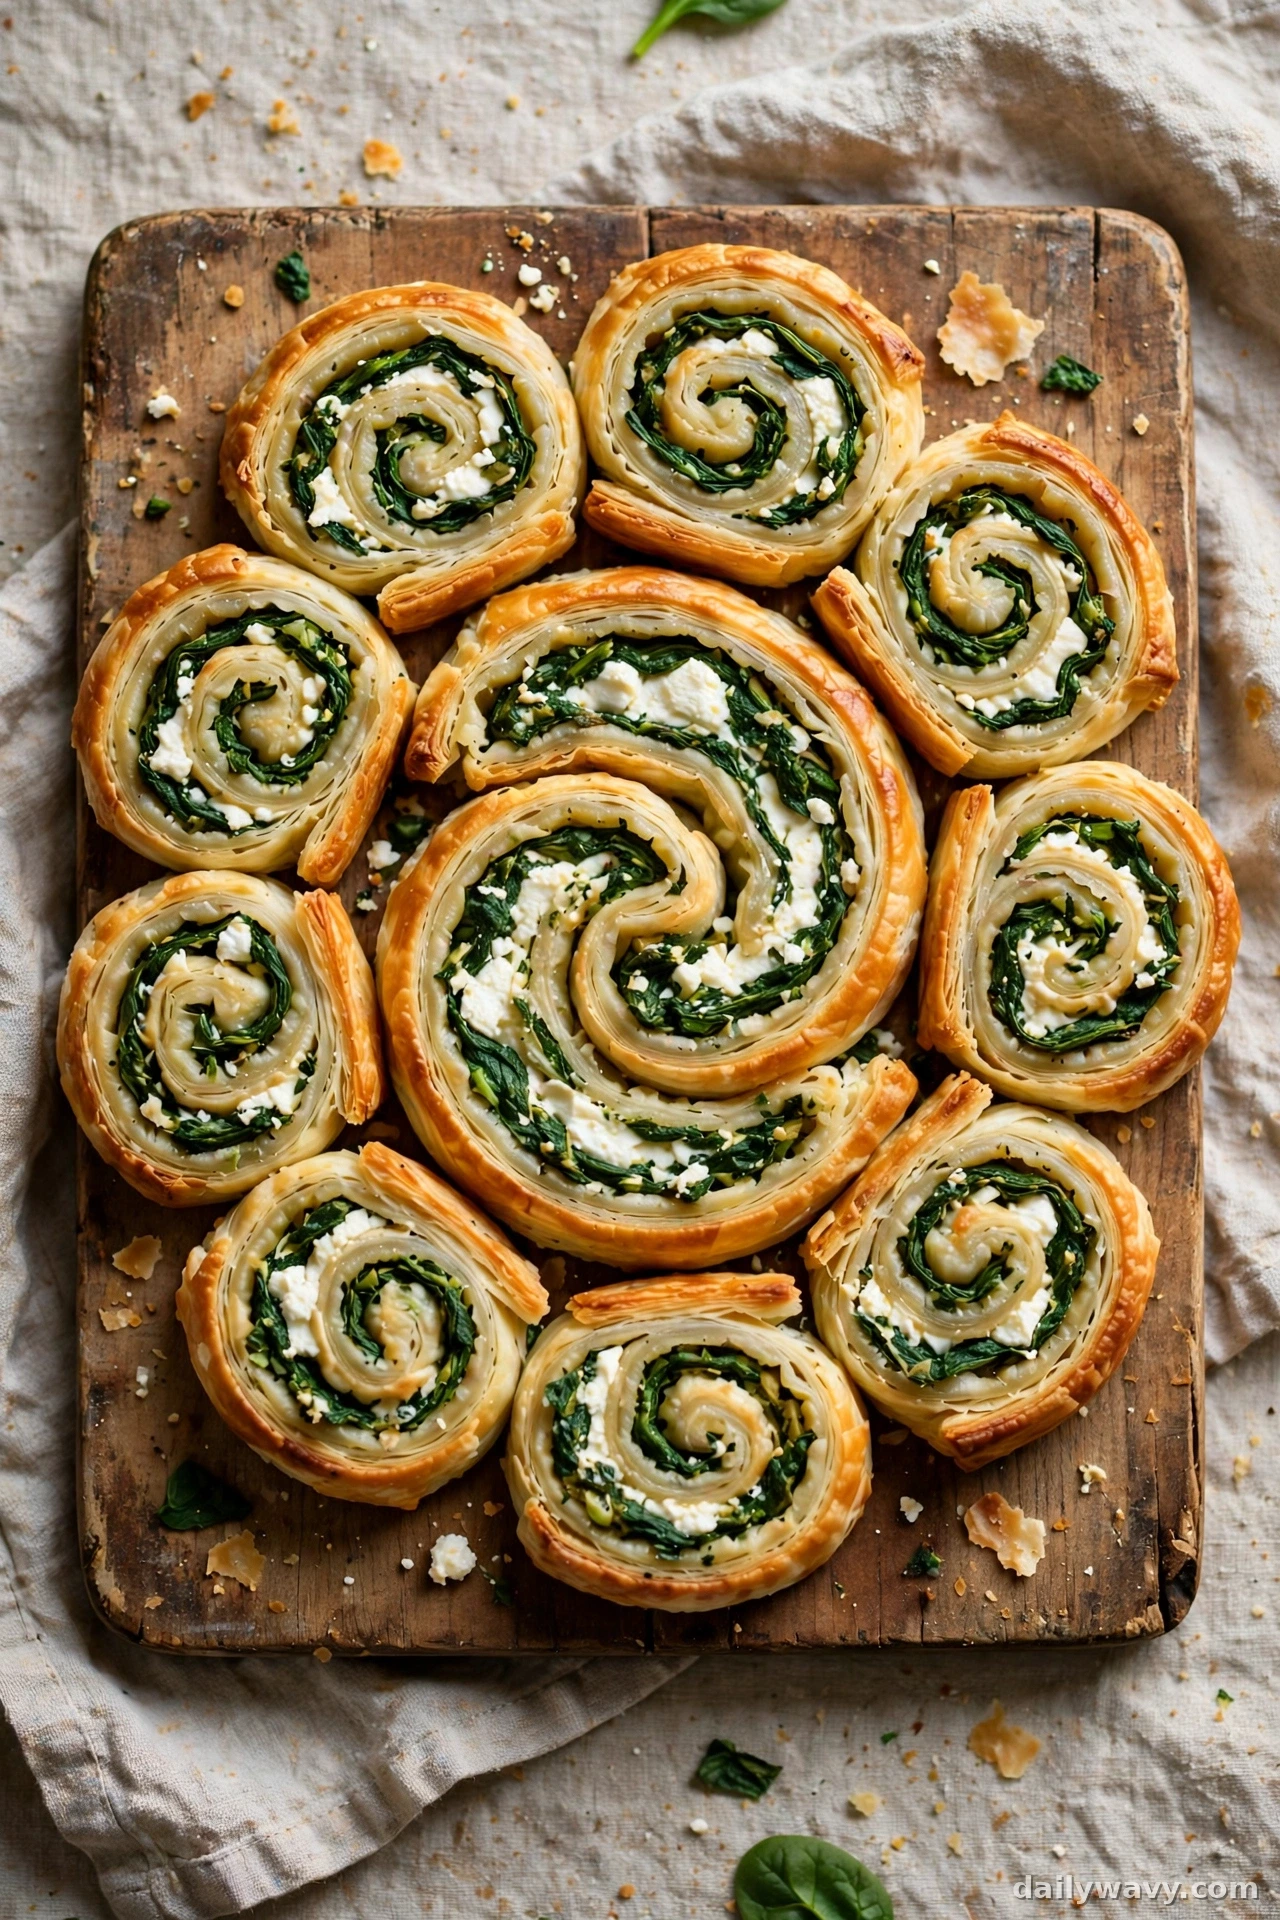
Pinwheels are the quiet workhorse of any appetizer spread. A sheet of puff pastry rolled around a garlicky spinach and feta filling slices into neat spirals that look professional and taste savory and bright. The feta brings salt and tang, the spinach keeps them from feeling heavy, and they are just as good at room temperature as warm.
Yield: About 24 pinwheels (about 12 servings)
Ingredients: 1 sheet (about 8 oz) frozen puff pastry, thawed; 8 oz frozen chopped spinach, thawed and squeezed very dry; 4 oz feta, crumbled; 2 oz cream cheese, softened; 1 clove garlic, minced; 1/4 teaspoon salt; 1/4 teaspoon black pepper; 1 egg beaten with 1 tablespoon water (egg wash).
Method: Heat the oven to 400°F (200°C) and line a baking sheet with parchment. In a bowl, stir the spinach, feta, cream cheese, garlic, salt, and pepper until combined. Roll the pastry into a 12 by 10 inch rectangle. Spread the filling to within 1/2 inch of the edges. Roll up tightly from a long side, then chill the log 30 minutes. Brush with egg wash, slice into 24 pieces about 1/2 inch thick, and arrange cut side up on the sheet. Bake 16 to 18 minutes until golden.
Make-ahead: Roll the log the day before and keep it wrapped in the fridge. Slice and bake the day of the party. Baked pinwheels keep at room temperature for up to 2 hours on the serving tray.
Transport: Stack them in a single layer in a rigid container with parchment between layers. They travel well warm or at room temperature.
Troubleshooting: If the spirals unwind in the oven, the log was rolled too loosely or sliced before chilling. A firm 30-minute chill is what locks the spiral shape.
Storage: Refrigerate up to 3 days and reheat at 350°F for 6 to 8 minutes to restore the crisp pastry.
3. Roasted Pepper Crostini
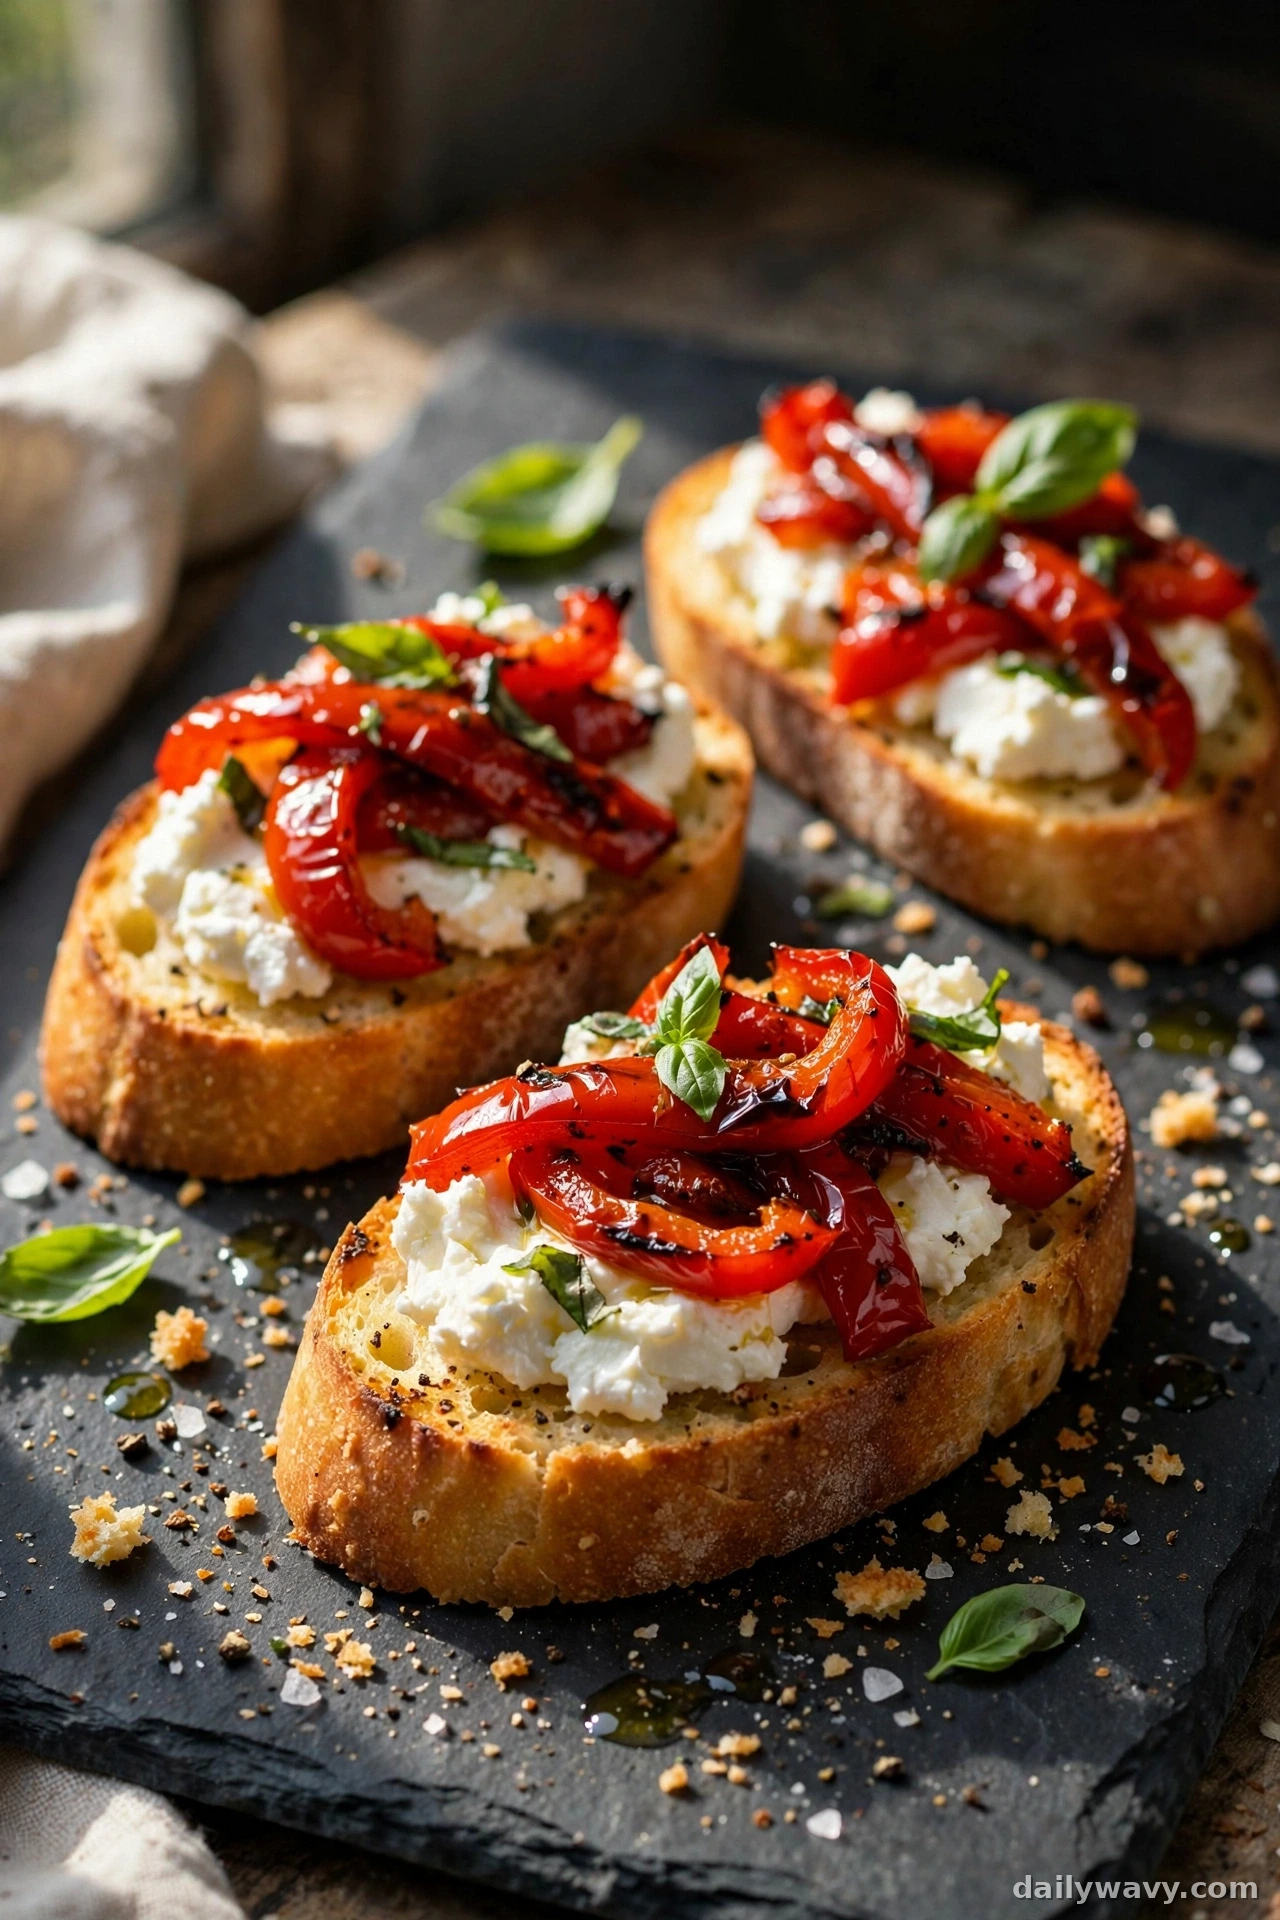
Roasted red peppers have a sweet, smoky flavor that pairs beautifully with creamy goat cheese on crisp toast. These crostini come together fast, and the colors are festive without any effort. Serve them at room temperature so the flavors come through fully.
Yield: 24 crostini (about 12 servings)
Ingredients: 1 baguette (about 12 oz), cut into 24 slices 1/2 inch thick; 3 tablespoons olive oil; 12 oz jarred roasted red peppers, drained and patted dry, cut into strips; 6 oz goat cheese, softened; 2 tablespoons fresh basil, chopped; 1/2 teaspoon balsamic vinegar; salt and pepper to taste.
Method: Heat the oven to 375°F (190°C). Brush both sides of the baguette slices with olive oil, arrange on a baking sheet, and toast 8 to 10 minutes until golden, flipping once. Spread each toast with goat cheese. Toss the pepper strips with balsamic, salt, and pepper, then lay them over the cheese. Scatter basil on top and serve at room temperature.
Make-ahead: Toast the bread up to 24 hours ahead and store it in an airtight container. Assemble no more than 2 hours before serving so the toast stays crisp.
Transport: Carry the components separately and assemble at the party if the drive is longer than 30 minutes. For short trips, transport assembled on a tray, covered loosely.
Troubleshooting: If the toasts get soggy, the peppers were not dried enough. Pat them very dry with paper towels before arranging them, and never add the cheese and peppers more than 2 hours ahead.
Storage: Refrigerate leftover assembled crostini up to 1 day. The toast softens in the fridge, so refresh it in a 350°F oven for 4 minutes if you want the crunch back.
4. Rosemary Potato Bites
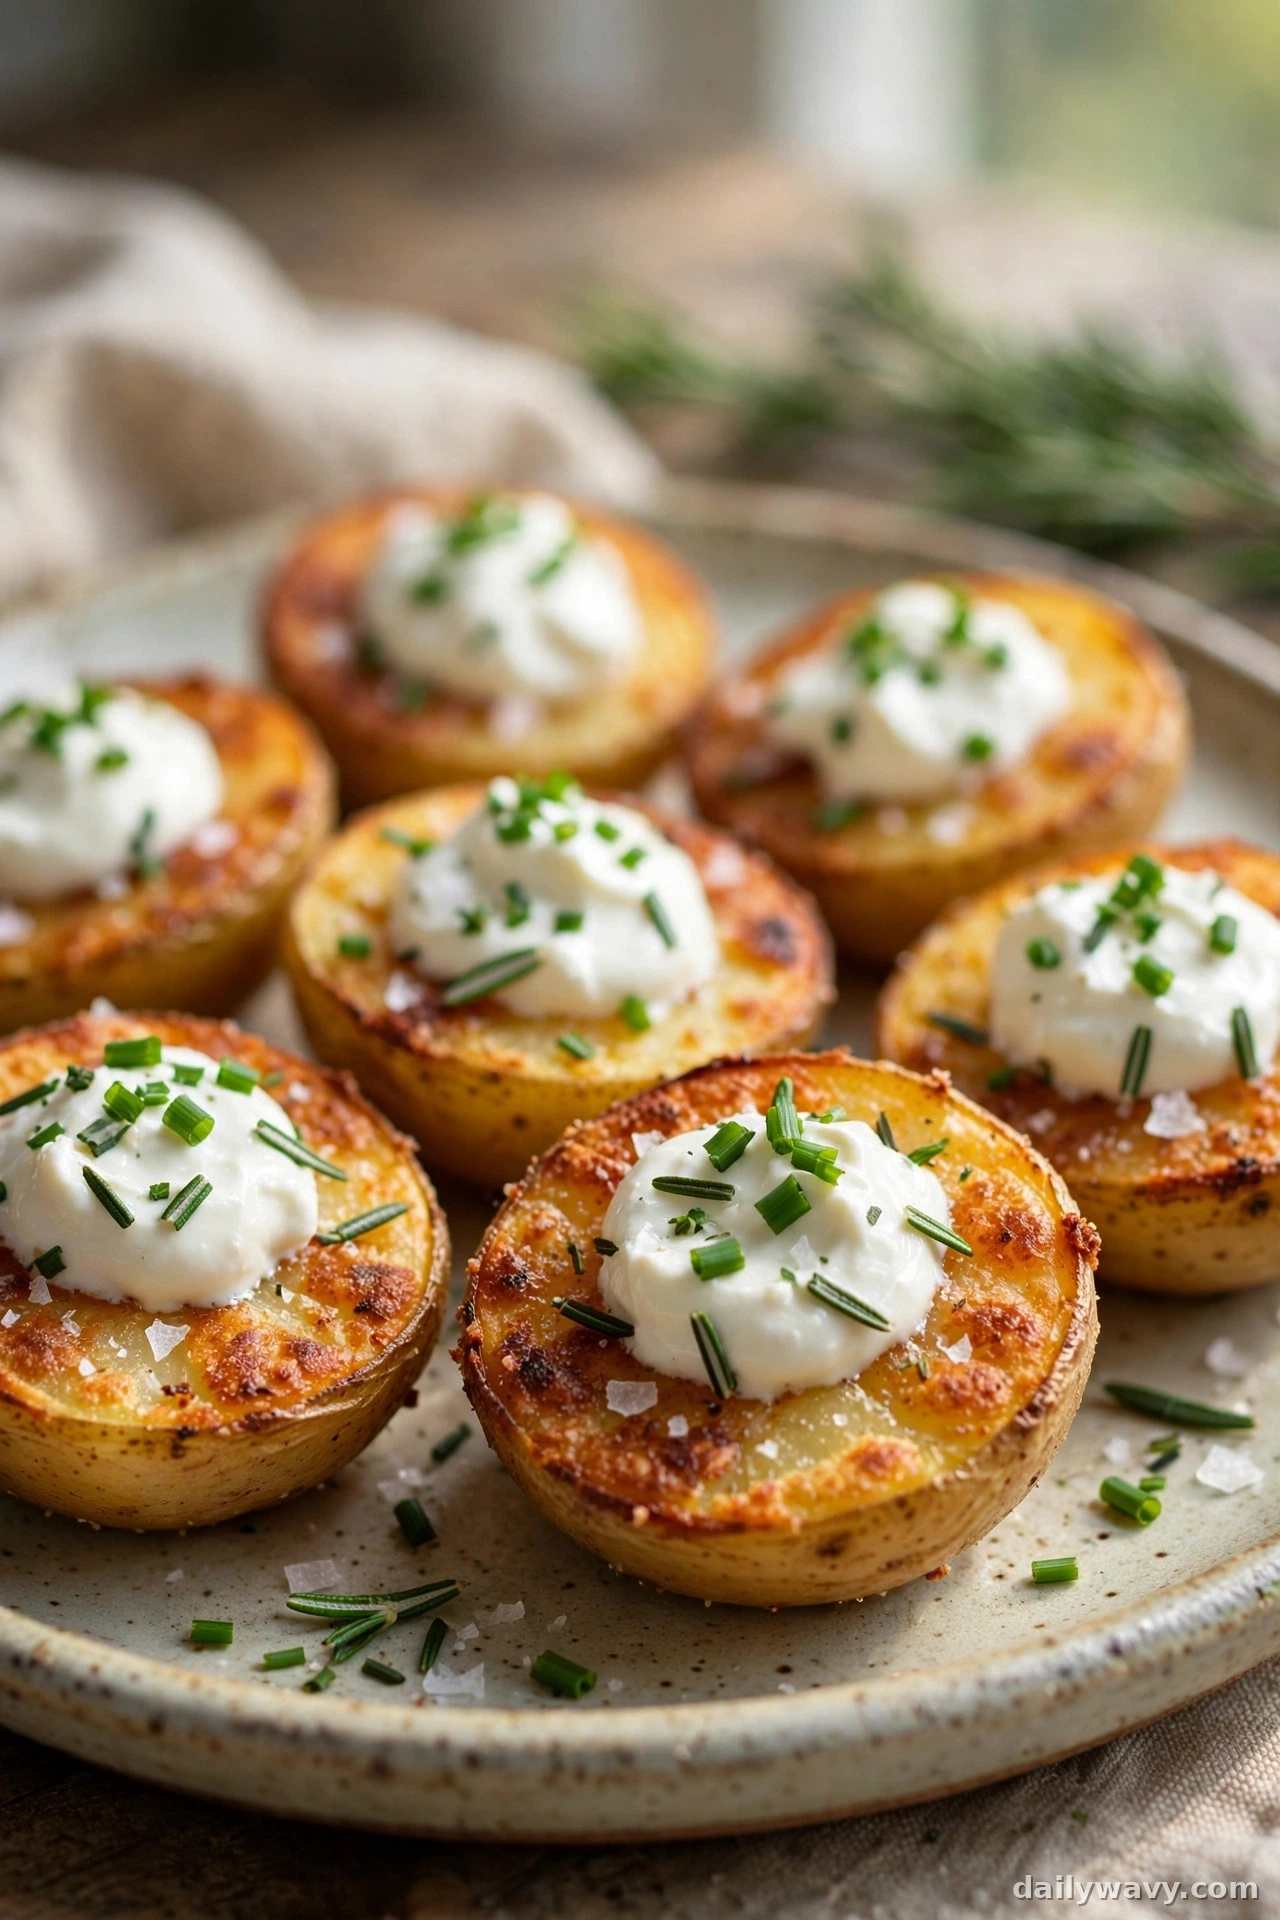
Halved baby potatoes make perfect little boats for sour cream, and a sprinkle of rosemary and flaky salt turns them into something guests will keep reaching for. They are naturally gluten free, filling, and sturdy enough to survive a buffet table without falling apart.
Yield: About 24 bites (about 12 servings)
Ingredients: 1 1/2 lb baby potatoes (about 24 potatoes); 2 tablespoons olive oil; 1 teaspoon kosher salt; 1/2 cup sour cream; 2 tablespoons fresh rosemary, finely chopped; 1 tablespoon fresh chives, sliced; flaky sea salt for finishing.
Method: Heat the oven to 425°F (220°C). Toss the potatoes with olive oil and kosher salt, then halve them lengthwise. Arrange cut side down on a baking sheet and roast 20 to 25 minutes until the cut sides are deeply golden and crisp. Cool 5 minutes, then flip cut side up and pipe or spoon 1 teaspoon of sour cream onto each. Top with rosemary, chives, and a pinch of flaky salt.
Make-ahead: Roast the potatoes up to 4 hours ahead and keep them at room temperature. Reheat at 400°F for 5 minutes before topping. The sour cream goes on only just before serving.
Transport: Carry the roasted halves in a covered pan and the sour cream in a piping bag or zip-top bag with the corner snipped. Assemble in minutes at the party.
Troubleshooting: If the potatoes stick to the pan, the sheet was too cool when they went on. Preheat the sheet in the oven for 5 minutes before arranging the potatoes, and use enough oil.
Storage: Refrigerate assembled bites up to 1 day, though the sour cream topping is best fresh. Plain roasted halves keep 4 days and reheat beautifully.
5. Mushroom Tartlets

Mushroom tartlets taste like something from a catering menu, but frozen tart shells do most of the work. The mushrooms cook down with thyme and a splash of sherry until they are deeply savory, and gruyere adds a nutty richness. They look impressive arranged on a platter and serve warm.
Yield: 24 tartlets (about 12 servings)
Ingredients: 2 packages (15 shells each) frozen mini tart shells, thawed; 12 oz cremini mushrooms, finely chopped; 2 tablespoons butter; 1 small shallot, minced; 2 tablespoons dry sherry (or broth); 1 teaspoon fresh thyme leaves; 4 oz gruyere, shredded; salt and pepper to taste.
Method: Heat the oven to 375°F (190°C). Melt the butter in a skillet over medium-high heat and cook the mushrooms and shallot 6 to 8 minutes until the mushrooms release their liquid and brown. Add the sherry and thyme, cook 2 minutes more, and season. Spoon the mixture into the tart shells, top with gruyere, and bake 12 to 15 minutes until the cheese melts and the shells are golden.
Make-ahead: Cook the mushroom filling up to 2 days ahead and refrigerate. Fill the shells and bake the day of the party. The shells go stale if filled too far in advance.
Transport: Carry them in the tin they baked in, covered with foil. Warm in a 350°F oven for 5 minutes on arrival.
Troubleshooting: If the filling tastes flat, it needs more salt and a longer cook. Mushrooms need a full 8 minutes of undisturbed browning before you add liquid; that caramelization is where the flavor comes from.
Storage: Refrigerate up to 3 days. Reheat at 350°F for 6 to 8 minutes; the shells will crisp back up.
6. Goat Cheese Stuffed Dates

Sweet medjool dates, tangy goat cheese, and salty prosciutto make a three-ingredient bite with an almost absurdly good flavor balance. They need almost no prep, they hold for hours at room temperature, and the sweet and salty contrast is the kind of thing guests ask about.
Yield: 24 stuffed dates (about 12 servings)
Ingredients: 24 medjool dates (about 12 oz); 6 oz goat cheese, at room temperature; 12 slices prosciutto (about 6 oz), halved lengthwise; 1/4 cup walnuts, toasted and finely chopped (optional).
Method: Slice each date lengthwise and remove the pit, keeping one side attached. Fill each date with about 1 teaspoon of goat cheese. Wrap with half a slice of prosciutto, pressing the seam underneath. If using walnuts, press a few pieces into the exposed cheese. Arrange seam side down on a platter.
Make-ahead: Stuff the dates up to 24 hours ahead and refrigerate. Wrap with prosciutto no more than 4 hours before serving, since the meat softens against the cheese over time.
Transport: They travel beautifully in a single layer in a rigid container. No heating needed.
Troubleshooting: If the prosciutto tears while wrapping, it is too cold. Let it sit at room temperature 15 minutes before you start, and pull it from the package gently.
Storage: Refrigerate up to 3 days. Let them sit 20 minutes at room temperature before serving so the cheese softens.
7. Pesto Mozzarella Skewers

Caprese skewers are a party classic for a reason. Cherry tomatoes, mozzarella pearls, and basil brushed with pesto give you a fresh bite between the heavier appetizers. They are naturally vegetarian, gluten free, and they add a splash of red and green to the table.
Yield: About 24 skewers (about 12 servings)
Ingredients: 24 cherry tomatoes (about 12 oz); 24 mozzarella pearls (about 8 oz), drained; 24 fresh basil leaves; 1/3 cup basil pesto; 4-inch wooden skewers or toothpicks.
Method: Pat the mozzarella dry with paper towels. Thread one tomato, one basil leaf, and one mozzarella pearl onto each skewer. Arrange on a platter and brush lightly with pesto just before serving.
Make-ahead: Assemble up to 8 hours ahead, cover tightly, and refrigerate. Brush with pesto only at serving time; pesto darkens in the fridge but tastes the same.
Transport: Pack the assembled skewers flat in a container with the pesto in a separate small jar. Brush it on at the party for the freshest look.
Troubleshooting: If the basil wilts or blackens, it sat in the fridge uncovered too long. Wrap the platter tightly with plastic wrap pressed close to the skewers to limit air exposure.
Storage: Refrigerate up to 1 day. These are best the day they are made. Keep cold items at or below 40°F and do not leave them out longer than 2 hours.
8. Mini Cheese Gougeres

Gougeres are French cheese puffs made from pate a choux, and they are lighter than they look. The gruyere gives them a deep savory flavor, the shells bake up hollow and crisp, and they are irresistible warm from the oven. A batch makes plenty, and the technique is simpler than the name suggests.
Yield: About 30 gougeres (about 15 servings)
Ingredients: 1/2 cup (1 stick) unsalted butter; 1 cup water; 1/2 teaspoon salt; 1 cup all-purpose flour; 4 large eggs, at room temperature; 1 1/2 cups gruyere, finely shredded; 1/4 teaspoon black pepper; 1/4 teaspoon paprika (optional).
Method: Heat the oven to 425°F (220°C) and line two baking sheets with parchment. In a saucepan, bring the butter, water, and salt to a boil. Add the flour all at once and stir hard with a wooden spoon until a smooth ball forms and pulls away from the pan, about 2 minutes. Transfer to a bowl and beat in the eggs one at a time, mixing fully after each. Stir in the gruyere, pepper, and paprika. Drop heaping tablespoons 2 inches apart on the sheets. Bake 10 minutes at 425°F, then reduce to 375°F (190°C) and bake 15 to 18 minutes more until deeply golden and firm. Poke each with a skewer to release steam, then cool on a rack.
Make-ahead: Bake up to 4 hours ahead and keep them uncovered at room temperature. Reheat at 350°F for 5 minutes before serving. You can also freeze the baked puffs up to 1 month and reheat from frozen at 350°F for 10 minutes.
Transport: Carry them in a paper bag or uncovered container. Sealing them warm creates condensation and softens the shells.
Troubleshooting: If the puffs collapse after baking, they were underbaked. They should be deeply golden, not just lightly colored, and sound hollow when tapped on the bottom.
Storage: Keep baked gougeres in an airtight container at room temperature up to 1 day, or freeze up to 1 month. Reheat before serving.
9. Cranberry Meatballs

Cranberry meatballs hit the sweet and tangy note that defines a holiday table. Frozen cocktail meatballs simmer in a sauce of cranberry and chili sauce until glazed and glossy, and the slow cooker does all the work. Put out toothpicks and watch them disappear.
Yield: About 32 meatballs (about 16 servings)
Ingredients: 32 oz frozen cocktail meatballs (about 60 count); 1 can (14 oz) whole-berry cranberry sauce; 1 bottle (12 oz) chili sauce; 2 tablespoons brown sugar; 1 teaspoon Worcestershire sauce.
Method: Stir the cranberry sauce, chili sauce, brown sugar, and Worcestershire in a slow cooker until combined. Add the frozen meatballs and stir to coat. Cook on low 3 to 4 hours or on high 1 1/2 to 2 hours, stirring once halfway through, until the sauce is bubbling and the meatballs are hot through. Switch to warm for serving.
Make-ahead: The sauce keeps in the fridge up to 3 days before cooking. Or cook the meatballs fully a day ahead, refrigerate, and reheat in the slow cooker on low for 1 1/2 hours.
Transport: Carry the slow cooker itself if you have a locking lid. The warm setting keeps them at serving temperature for the whole party.
Troubleshooting: If the sauce is too thin, the meatballs released more liquid than expected. Leave the lid slightly ajar for the last 30 minutes so the extra moisture evaporates and the sauce thickens.
Storage: Refrigerate up to 4 days in the sauce. Reheat gently on the stove or in the slow cooker until steaming.
10. Caramelized Onion Tarts
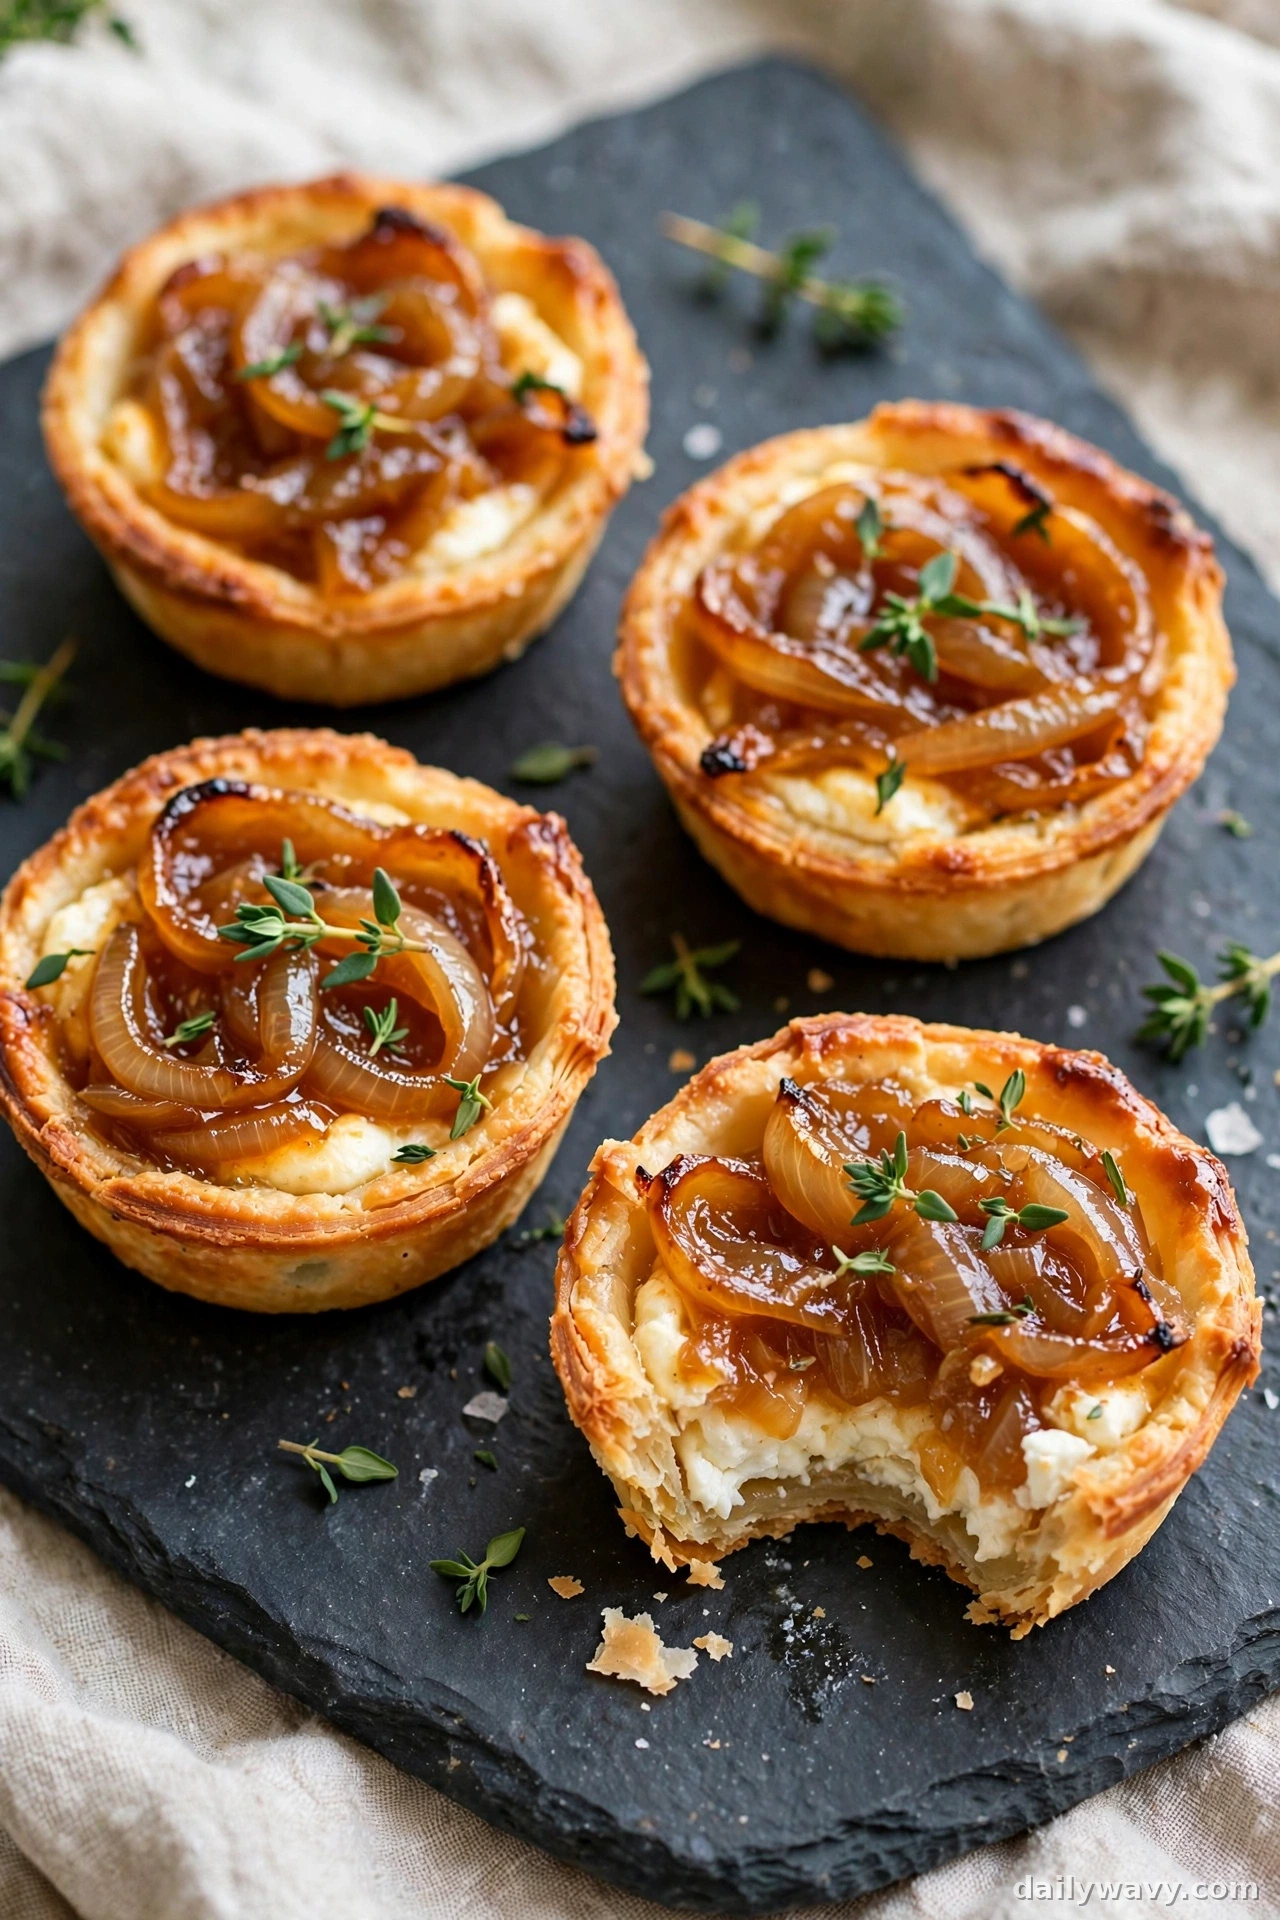
Caramelized onions are sweet, jammy, and deeply savory, and they turn a simple pastry shell into something memorable. These tarts take a little patience since the onions need a slow cook, but the filling can be made days ahead and the finished tarts look elegant with almost no effort.
Yield: 24 tartlets (about 12 servings)
Ingredients: 2 packages (15 shells each) frozen mini tart shells, thawed; 3 large yellow onions (about 1 1/2 lb), thinly sliced; 3 tablespoons butter; 1 tablespoon olive oil; 1 teaspoon sugar; 1 teaspoon balsamic vinegar; 4 oz goat cheese, crumbled; fresh thyme leaves for topping; salt and pepper to taste.
Method: Heat the oven to 375°F (190°C). In a large skillet, melt the butter with the oil over medium-low heat. Add the onions and salt, and cook 30 to 35 minutes, stirring often, until deeply golden and jammy. Stir in the sugar and balsamic and cook 2 minutes more. Spoon the onions into the tart shells, top with goat cheese, and bake 12 to 14 minutes until the cheese softens and the shells are golden. Finish with thyme.
Make-ahead: The caramelized onions keep in the fridge up to 4 days. Fill and bake the tarts the day of the party for the crispest shells.
Transport: Carry in the tin they baked in, covered with foil. Warm at 350°F for 5 minutes on arrival.
Troubleshooting: If the onions burn instead of caramelizing, the heat was too high. True caramelization happens low and slow; if the pan gets dark spots, add a splash of water and scrape them up.
Storage: Refrigerate up to 3 days. Reheat at 350°F for 6 to 8 minutes.
11. Herbed Cheese Truffles
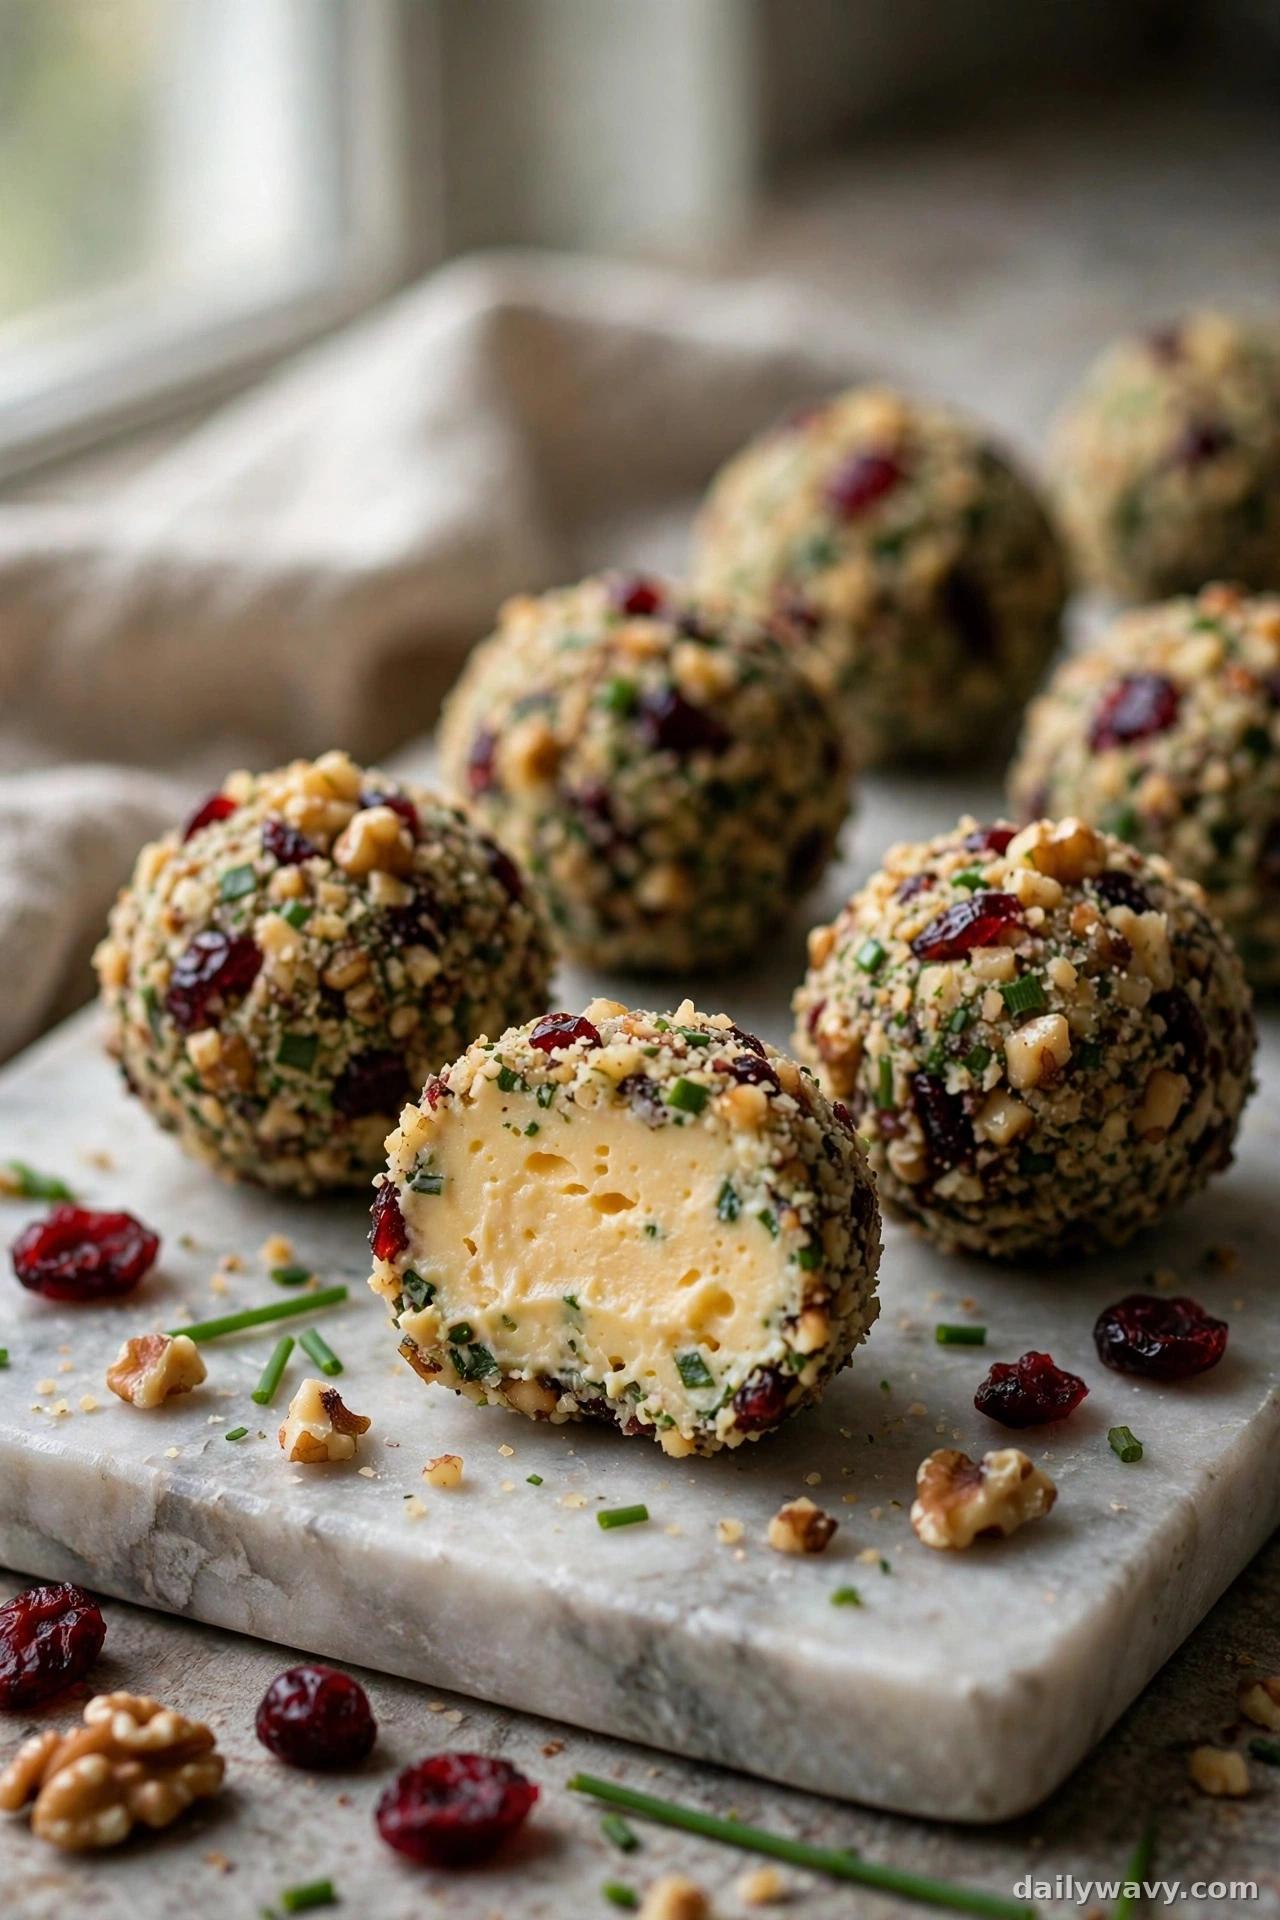
These savory truffles are basically a cheese ball reimagined as elegant bite-size spheres. Cream cheese rolled with sharp cheddar and coated in herbs and toasted nuts looks beautiful on a platter and tastes like the best part of a holiday cheese board. They are fully no-bake, which frees up oven space on a busy cooking day.
Yield: About 24 truffles (about 12 servings)
Ingredients: 8 oz cream cheese, at room temperature; 6 oz sharp cheddar, finely shredded; 2 tablespoons fresh chives, minced; 1 tablespoon fresh parsley, minced; 1/2 teaspoon garlic powder; 1/4 teaspoon salt; 3/4 cup pecans or walnuts, toasted and finely chopped; 2 tablespoons dried cranberries, finely chopped (optional).
Method: Beat the cream cheese, cheddar, chives, parsley, garlic powder, and salt until smooth and well combined. Chill the mixture 1 hour until firm. Scoop tablespoon portions and roll into balls. Toss the chopped nuts with the dried cranberries if using, then roll each ball in the coating, pressing gently so it sticks. Arrange on a platter and chill at least 30 minutes before serving.
Make-ahead: These are ideal make-ahead food. Roll and coat them up to 3 days before the party and keep them covered in the fridge. The flavors actually improve as they sit.
Transport: Pack them cold in a single layer in a rigid container. Set the platter out 15 minutes before guests arrive so the cheese softens slightly.
Troubleshooting: If the mixture is too soft to roll, it needs more chill time or the cheese was too warm. An hour in the fridge firms it right up, and working quickly with cool hands keeps them smooth.
Storage: Refrigerate up to 5 days in an airtight container. Keep them cold at or below 40°F and do not leave them at room temperature longer than 2 hours.
12. Garlic Mushroom Skewers
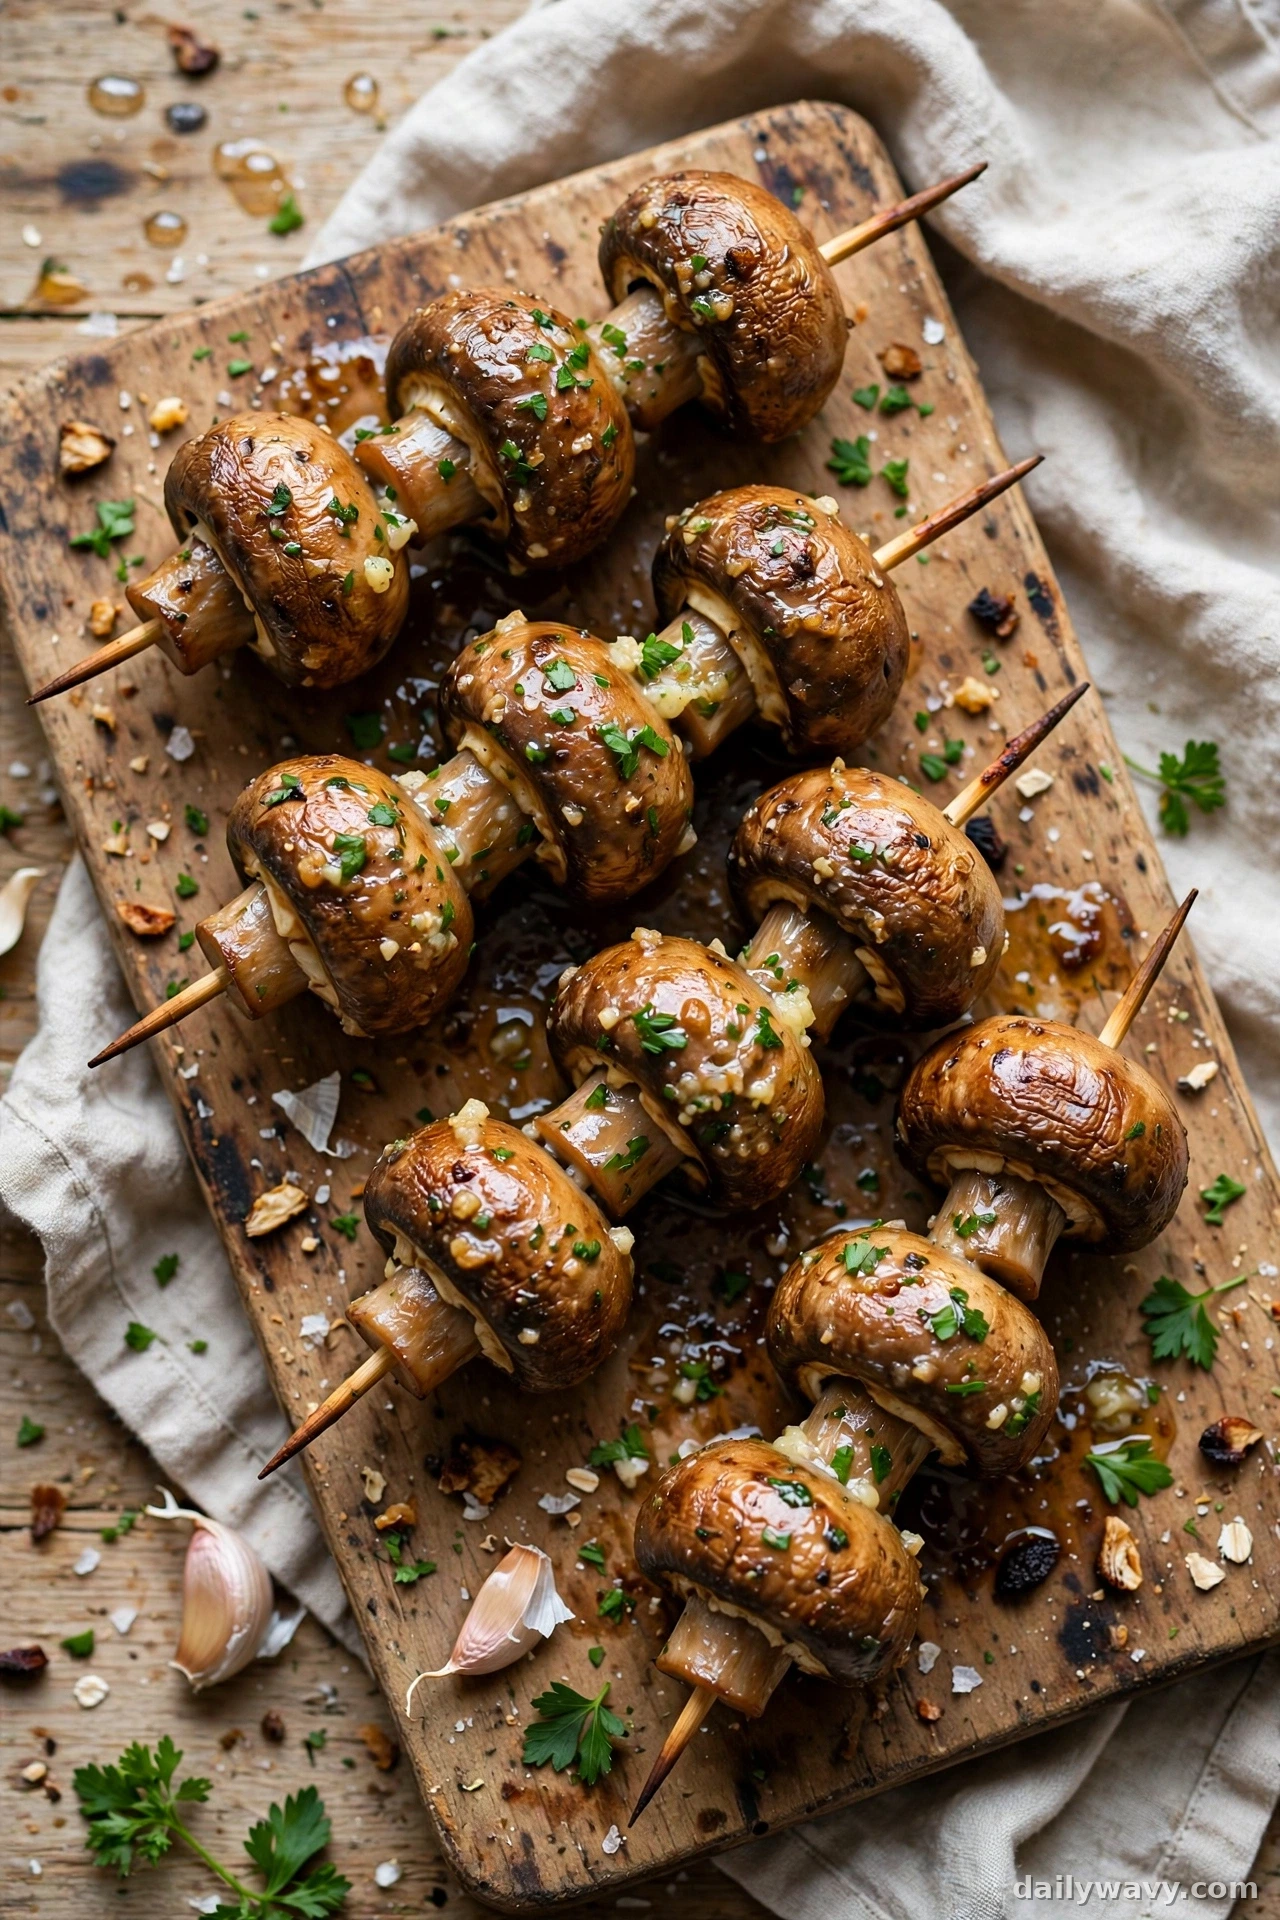
Whole cremini mushrooms roasted with garlic butter on little skewers are a warm, savory bite that feels substantial without being heavy. The mushrooms shrink slightly and concentrate in flavor, the garlic butter soaks in, and they look great lined up on a serving board next to the cheese and crackers.
Yield: About 24 skewers (about 12 servings)
Ingredients: 24 cremini mushrooms (about 1 lb), stems trimmed; 4 tablespoons butter, melted; 3 cloves garlic, minced; 1 tablespoon fresh parsley, chopped; 1/2 teaspoon salt; 1/4 teaspoon black pepper; 24 short wooden skewers or sturdy toothpicks.
Method: Heat the oven to 425°F (220°C). Thread one mushroom onto each skewer through the stem end. Stir the melted butter with the garlic, parsley, salt, and pepper. Arrange the skewers on a rimmed baking sheet and brush generously with the garlic butter. Roast 15 to 18 minutes, brushing once halfway through, until the mushrooms are tender and browned.
Make-ahead: Trim and skewer the mushrooms up to 8 hours ahead and refrigerate. The garlic butter can be mixed a day ahead. Roast just before serving for the best texture.
Transport: Carry them on the baking sheet, covered with foil. They hold heat well for about 20 minutes, or warm them at 375°F for 5 minutes at the party.
Troubleshooting: If the mushrooms release too much liquid, the pan was crowded. Give them space on the sheet so they roast instead of steaming; use two sheets if you need to.
Storage: Refrigerate up to 3 days. Reheat at 375°F for 8 minutes. Leftovers are excellent chopped into a sheet pan dinner for the next holiday meal.
13. Pear Walnut Crostini

Ripe pear, crunchy walnuts, and salty blue cheese on crisp toast make a crostini with real texture contrast. The sweetness of the pear keeps the blue cheese from overwhelming, and a drizzle of honey ties everything together. These are the crostini for people who think they do not like blue cheese.
Yield: About 24 crostini (about 12 servings)
Ingredients: 1 baguette (about 12 oz), cut into 24 slices 1/2 inch thick; 3 tablespoons olive oil; 2 ripe but firm pears, thinly sliced; 4 oz blue cheese, crumbled; 1/2 cup walnuts, toasted and chopped; 2 tablespoons honey.
Method: Heat the oven to 375°F (190°C). Brush the baguette slices with olive oil, arrange on a baking sheet, and toast 8 to 10 minutes until golden, flipping once. Top each toast with 2 pear slices, a crumble of blue cheese, and a sprinkle of walnuts. Drizzle lightly with honey and serve.
Make-ahead: Toast the bread up to 24 hours ahead and store airtight. Slice the pears and assemble no more than 1 hour before serving so the fruit stays fresh and the toast stays crisp.
Transport: Carry the toasts in a single layer and the toppings separately if the trip is long. Assemble at the party for the best texture.
Troubleshooting: If the pears brown after slicing, toss them gently with 1 teaspoon of lemon juice. It keeps the color bright without changing the flavor.
Storage: These are best eaten fresh. Refrigerate leftovers up to 1 day; the toast will soften but still tastes good.
14. Savory Cheese Shortbread
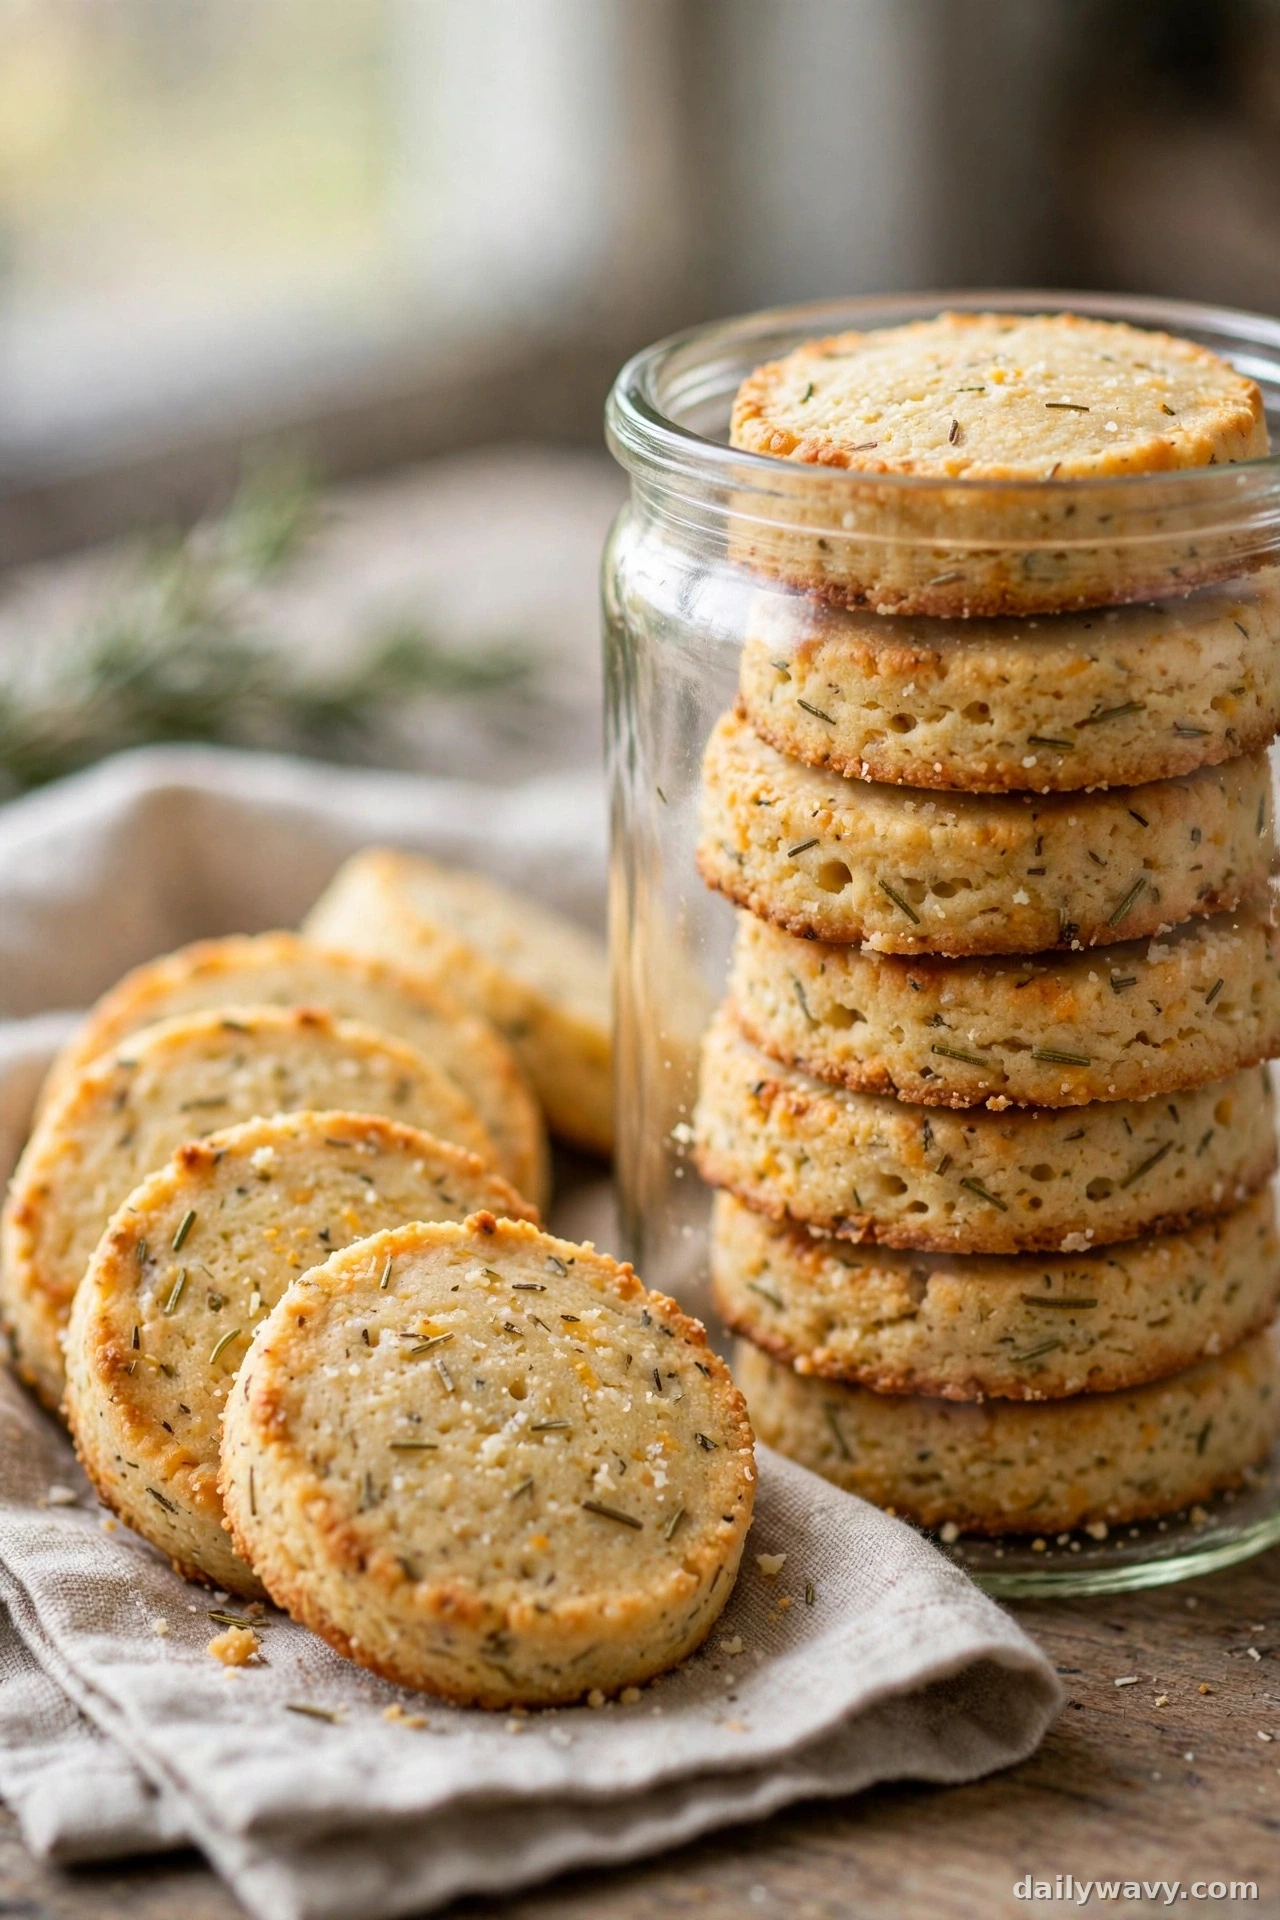
Cheese shortbread is buttery, crisp, and deeply savory, like a cracker crossed with a cookie. Cheddar and parmesan give it a sharp, nutty flavor, and a hint of rosemary keeps it festive. They keep for days, travel perfectly, and pair with everything from wine to a simple soup. Bake a double batch; they will be gone by New Year.
Yield: About 36 shortbread (about 18 servings)
Ingredients: 1 cup (2 sticks) unsalted butter, at room temperature; 4 oz sharp cheddar, finely shredded; 2 oz parmesan, finely grated; 2 cups all-purpose flour; 1 tablespoon fresh rosemary, finely chopped; 1/2 teaspoon salt; 1/4 teaspoon black pepper; 1/4 teaspoon cayenne (optional).
Method: Heat the oven to 325°F (160°C) and line two baking sheets with parchment. Beat the butter until creamy, then mix in the cheddar, parmesan, rosemary, salt, pepper, and cayenne. Add the flour and mix just until a dough forms. Roll into two logs about 1 1/2 inches thick, wrap in plastic, and chill 1 hour. Slice 1/4 inch thick and arrange on the sheets. Bake 18 to 22 minutes until the edges are lightly golden. Cool on the sheet 5 minutes, then move to a rack.
Make-ahead: These are a dream for planning. The dough logs keep in the fridge up to 1 week or in the freezer up to 2 months. The baked shortbread keeps in an airtight container at room temperature up to 1 week.
Transport: They are sturdy and stack well. Layer them in a tin with parchment between layers.
Troubleshooting: If the shortbread spreads or feels greasy, the dough was too warm when it went in the oven. A firm 1-hour chill holds the shape and gives a crisp texture.
Storage: Store at room temperature in an airtight container up to 1 week. They also freeze beautifully up to 2 months.
15. Stuffed Mini Peppers

Mini sweet peppers stuffed with seasoned cream cheese and topped with crispy bacon make a colorful, naturally gluten free bite with a sweet crunch. They are one of the easiest appetizers here: no pastry to manage, no slow cooking, just halving, filling, and baking. The red, orange, and yellow peppers look like ornaments on the platter.
Yield: About 24 halves (about 12 servings)
Ingredients: 12 mini sweet peppers (about 12 oz); 8 oz cream cheese, at room temperature; 1/2 cup shredded cheddar; 1 teaspoon garlic powder; 1/2 teaspoon smoked paprika; 6 slices bacon, cooked crisp and crumbled; 2 tablespoons fresh chives, sliced.
Method: Heat the oven to 400°F (200°C). Halve the peppers lengthwise and remove the seeds. Stir the cream cheese, cheddar, garlic powder, and paprika until smooth. Fill each pepper half with about 1 tablespoon of the mixture. Arrange on a baking sheet and bake 12 to 15 minutes until the filling is golden on top. Scatter with bacon and chives.
Make-ahead: Fill the peppers up to 8 hours ahead and refrigerate. Bake just before serving. You can also cook the bacon a day ahead.
Transport: Carry them in the baking pan, covered with foil. Warm at 375°F for 5 minutes at the party.
Troubleshooting: If the filling bubbles out of the peppers, they were overfilled. A level tablespoon per half is plenty; the filling puffs slightly as it bakes.
Storage: Refrigerate up to 3 days. Reheat at 375°F for 6 to 8 minutes. Like the skewers, leftovers work well repurposed: they make a fun, colorful addition to any party snacks board with their festive look.
Frequently asked questions
How many appetizers should I make for a Christmas party?
Plan 4 to 6 pieces per person for a party where dinner follows, or 8 to 10 pieces per person if the appetizers are the meal. This collection gives you 15 recipes, so picking 4 or 5 from the list is usually plenty for a crowd of 10 to 15.
How far ahead can I make Christmas appetizers?
Most of the recipes here can be partly prepared 1 to 3 days ahead. Cheese shortbread and herbed cheese truffles are the best full make-ahead options; several others let you prep the filling or components in advance and finish on the day.
What is the 2-hour rule for food safety?
Perishable foods like cheese, meat, and dairy should not sit at room temperature longer than 2 hours. Set out smaller batches and refill the platter rather than putting everything out at once. Keep cold items refrigerated until serving.
Can I transport appetizers to someone else’s party?
Yes, and several recipes here are built for it. Shortbread, stuffed dates, and pinwheels travel best. For warm items, carry them in the pan they baked in and reheat on arrival. Bring toppings separately when the recipe says so.
Which appetizers are best for picky eaters and kids?
Cranberry meatballs, spinach feta pinwheels, and stuffed mini peppers tend to go over well with all ages. If you are unsure, stick with familiar flavors like the cranberry meatballs, pinwheels, and stuffed mini peppers above.
Planning your Christmas menu
Pick four or five recipes from this list and build your menu around variety: one warm and savory, one fresh, one cheese-based, one that can sit out for hours, and one sweet note. Make the shortbread and truffles days ahead, prep the fillings the day before, and bake the pastry bites just before guests arrive. With the timing planned this way, you can actually enjoy the party instead of working through it.