14 Chocolate Cheesecake Ideas with Different Crusts and Finishes
Chocolate cheesecake is one of those desserts that stops conversation. A dense, satiny slice with a glossy finish, a forkful…
Chocolate cheesecake is one of those desserts that stops conversation. A dense, satiny slice with a glossy finish, a forkful that melts slow, and cocoa richness that makes vanilla cheesecake feel like it is holding back. This roundup gives you fourteen workable recipes built around one reliable base, and the real star is variety: brownie bases, cookie crusts, spiced crumbs, nut crusts, and two lighter fillings for days when you want the flavor with a gentler richness. Every recipe uses a 9-inch springform pan, lists exact amounts, and tells you the one adjustment that keeps that version crack-free and creamy. If mornings run sweet at your house, our apple cinnamon overnight oats are a make-ahead breakfast for another day.
Jump to a recipe
- Chocolate cheesecake with a brownie base
- Chocolate cheesecake swirled into cheesecake bars
- Chocolate cheesecake with chocolate cookie crust
- Chocolate cheesecake with a ginger crust
- Chocolate cheesecake with a pecan crust
- Chocolate cheesecake with vanilla wafer base
- Chocolate cheesecake with a toasted oat crust
- Chocolate cheesecake with mascarpone filling
- Chocolate cheesecake with yogurt filling
- Chocolate cheesecake with a pistachio crust
- Chocolate cheesecake with a cinnamon crust
- Chocolate cheesecake with a coconut crust
- Chocolate cheesecake with a hazelnut crust
- Chocolate cheesecake with a caramel biscuit base

The cheesecake method that keeps every version creamy
All fourteen recipes below share one reliable foundation, and understanding it is what separates a silky slice from a dry, cracked one. Use a 9-inch springform pan with the sides and bottom lined with parchment where noted. Every filling starts with room-temperature ingredients: cold cream cheese turns lumpy no matter how hard you beat it, and over-beating to fix lumps is what whips in the air that later cracks. Beat the cream cheese and sugar first until completely smooth, then add eggs one at a time on low speed, mixing just until each disappears. Chocolate goes in melted and slightly cooled, never hot.
Bake low and slow. These recipes bake at 325°F in a water bath: wrap the outside of the springform tightly in two layers of heavy foil, set it in a roasting pan, and pour in hot water to reach halfway up the sides. The gentle, even heat sets the custard without overbaking the edges, which is the main cause of cracks. Doneness is visual and tactile: the outer two inches should look set while the center two inches still jiggle like set gelatin when you nudge the pan. Turn the oven off, crack the door, and let the cheesecake cool in the oven for 1 hour before moving it to a wire rack, then refrigerate uncovered for at least 8 hours or overnight before slicing.
Every recipe below makes one 9-inch cheesecake (12 slices) unless noted, and the round-cheesecake fillings bake 50 to 70 minutes. Storage is the same across the board: refrigerate in an airtight container up to 5 days, or freeze (whole or sliced, wrapped well) up to 2 months. Thaw frozen slices in the fridge overnight. Slice with a long thin knife dipped in hot water and wiped clean between cuts for bakery-clean slices.
1. Chocolate cheesecake with a brownie base
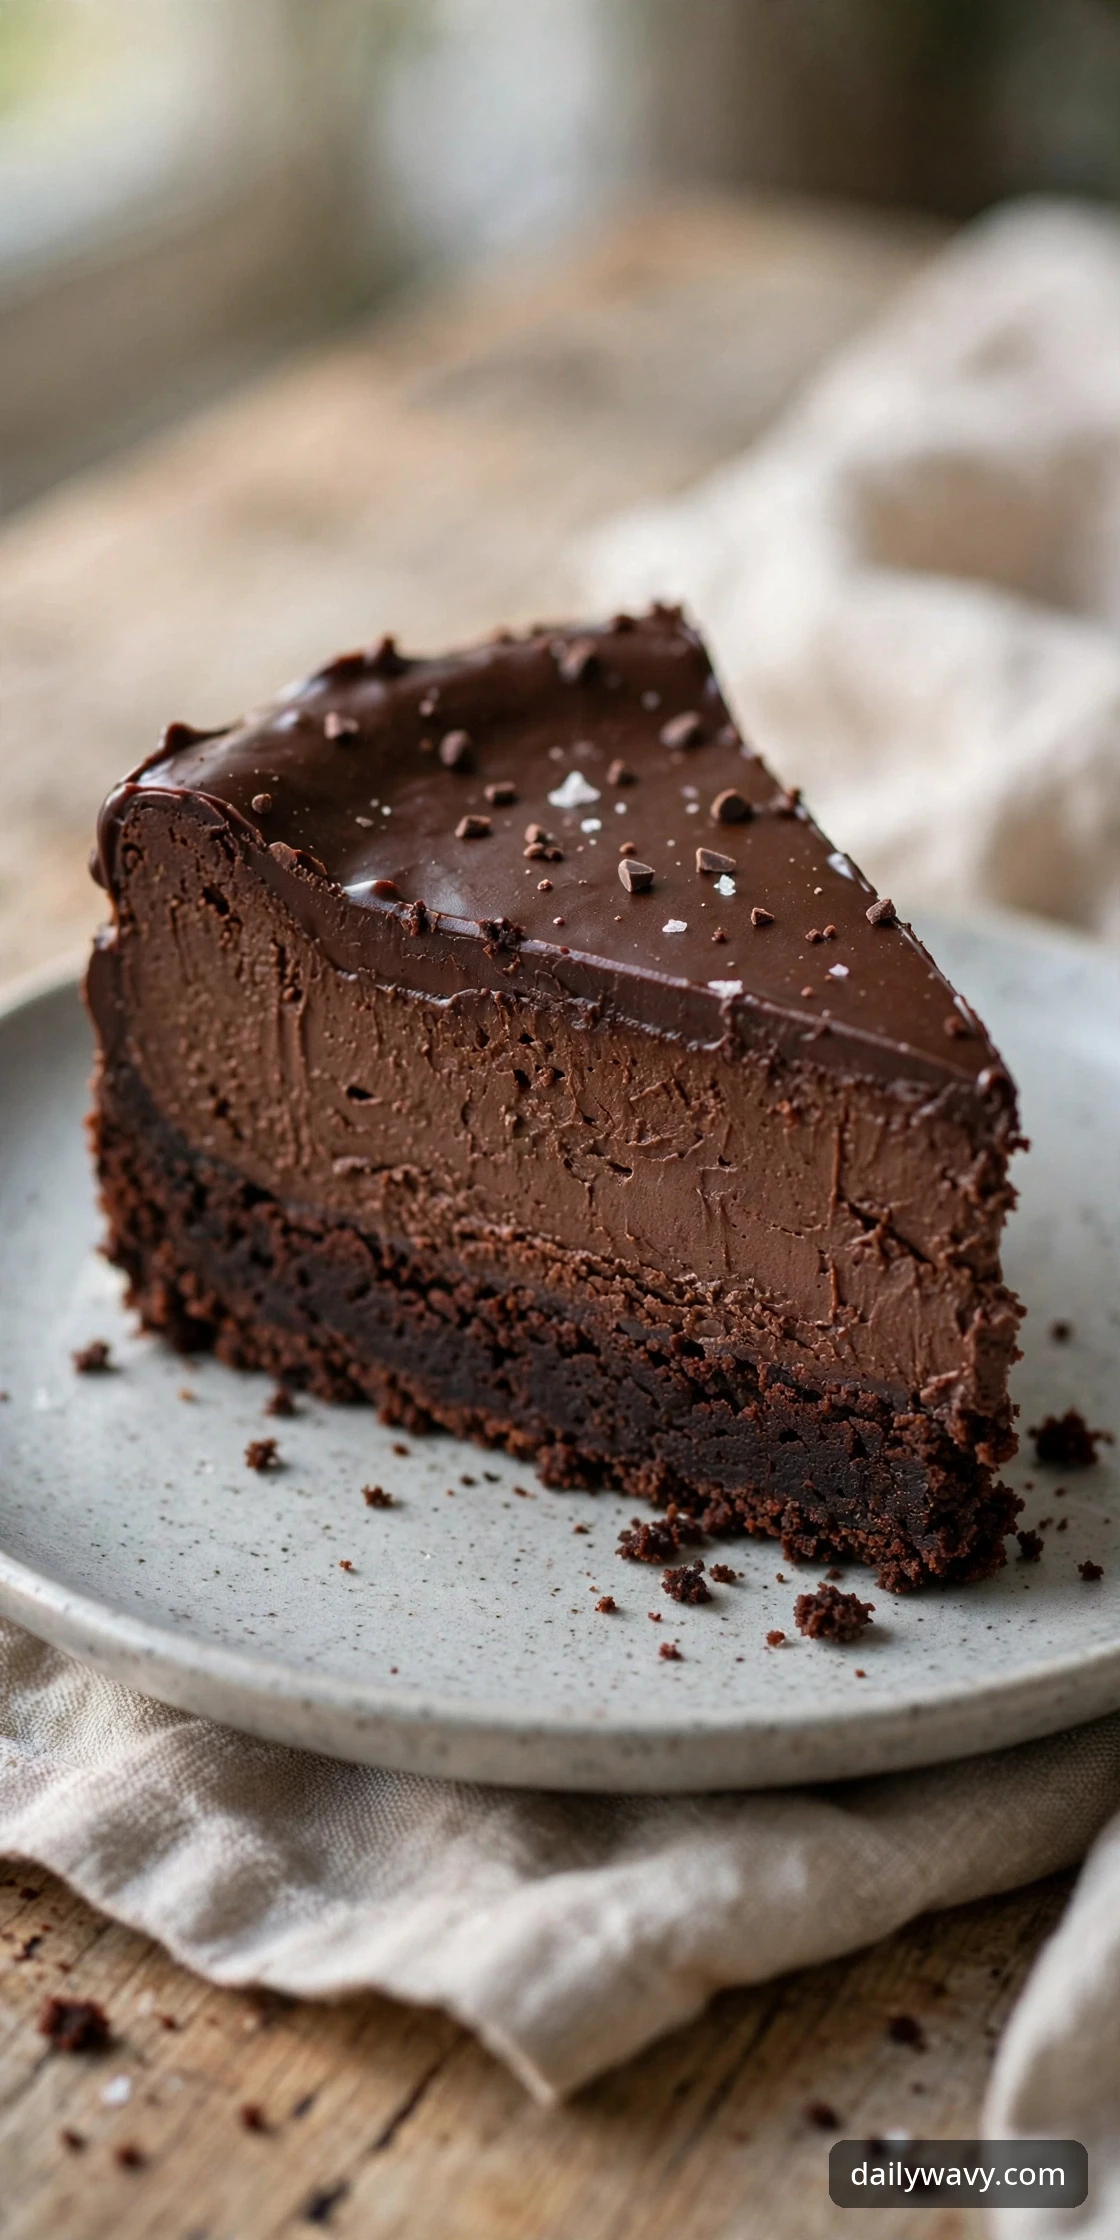
This is the showstopper of the collection. A fudgy brownie base instead of crumbs gives the cake a second chocolate layer with actual chew, and the filling on top bakes dense and glossy. Together they read as one continuous chocolate experience: the fork goes through silky cheesecake, then meets that rich brownie bite at the bottom. It tastes like someone combined the best part of a brownie with the best part of a cheesecake, and honestly that is exactly what happened.
The filling is straightforward cocoa cheesecake, so the brownie base does the heavy lifting on flavor. Expect an intensely chocolate slice that still finishes clean, not heavy.
Yield: one 9-inch cheesecake (12 slices) | Oven: 325°F water bath | Bake time: 60-70 minutes
Ingredients
- 1 box (18.3 oz) fudgy brownie mix, prepared with the egg and oil on the package
- 24 oz (three 8-oz blocks) cream cheese, at room temperature
- 1 cup granulated sugar
- 1/3 cup unsweetened cocoa powder, sifted
- 3 large eggs, at room temperature
- 1/2 cup sour cream, at room temperature
- 6 oz semisweet chocolate, melted and slightly cooled
- 1 teaspoon vanilla extract
- 1/4 teaspoon fine salt
Method
- Heat the oven to 350°F. Prepare the brownie batter per package directions and pour into a parchment-lined 9-inch springform pan. Bake 22 to 25 minutes, until a toothpick comes out with moist crumbs. Cool 15 minutes, then reduce the oven to 325°F.
- Beat the cream cheese and sugar on medium until completely smooth, about 2 minutes. Beat in the cocoa and salt.
- Add the eggs one at a time on low speed, mixing just until each disappears. Mix in the sour cream, melted chocolate, and vanilla until smooth.
- Pour over the brownie base. Bake in a water bath 60 to 70 minutes, until the edges are set and the center jiggles like gelatin.
- Cool in the turned-off oven with the door cracked for 1 hour, then at room temperature 30 minutes. Refrigerate at least 8 hours before slicing.
Troubleshooting tip: The brownie layer can overbake under the cheesecake if you bake it to full doneness first. Pull it when the center still looks slightly underdone; it finishes baking under the filling.
Storage: Refrigerate up to 5 days; freeze up to 2 months, thawed overnight in the fridge.
2. Chocolate cheesecake swirled into cheesecake bars

All the flavor of the classic, cut into grab-and-go squares. These bars bake in a 9×13-inch pan on a press-in cookie crust, and the swirl is pure theater: ribbons of dark chocolate cheesecake marbled through plain vanilla cheesecake, so every bite shifts between the two. They are the practical party choice. No springform, no water bath, no slicing anxiety, and they feed a crowd.
The texture is a touch firmer than the round cakes because the filling is shallower, which makes the bars cut beautifully and hold their shape on a dessert table.
Yield: 24 bars | Oven: 325°F | Bake time: 35-40 minutes
Ingredients
- 2 cups chocolate cookie crumbs (about 24 sandwich cookies)
- 6 tablespoons butter, melted
- 24 oz cream cheese, at room temperature
- 3/4 cup granulated sugar
- 3 large eggs, at room temperature
- 1/3 cup sour cream, at room temperature
- 4 oz semisweet chocolate, melted and slightly cooled
- 2 tablespoons unsweetened cocoa powder, sifted
- 1 teaspoon vanilla extract
- 1/4 teaspoon fine salt
Method
- Heat the oven to 325°F. Line a 9×13-inch pan with parchment, leaving overhang on two sides. Mix the crumbs and melted butter, press firmly and evenly into the pan, and bake 10 minutes.
- Beat the cream cheese and 3/4 cup sugar until smooth. Add the eggs one at a time on low, then the sour cream, vanilla, and salt.
- Transfer 1 1/2 cups of the batter to a separate bowl and stir in the melted chocolate and cocoa. Spread the plain batter over the crust, then dollop the chocolate batter over it in spoonfuls. Run a knife through once or twice for the swirl.
- Bake 35 to 40 minutes, until the center is just set with a slight jiggle. Cool at room temperature 1 hour, then refrigerate at least 6 hours. Lift out with the parchment and cut into 24 bars.
Troubleshooting tip: Swirl restraint is everything. Two passes of the knife gives beautiful marbling; five passes turns the whole thing muddy brown.
Storage: Refrigerate up to 5 days; freeze up to 2 months between layers of parchment.
3. Chocolate cheesecake with chocolate cookie crust
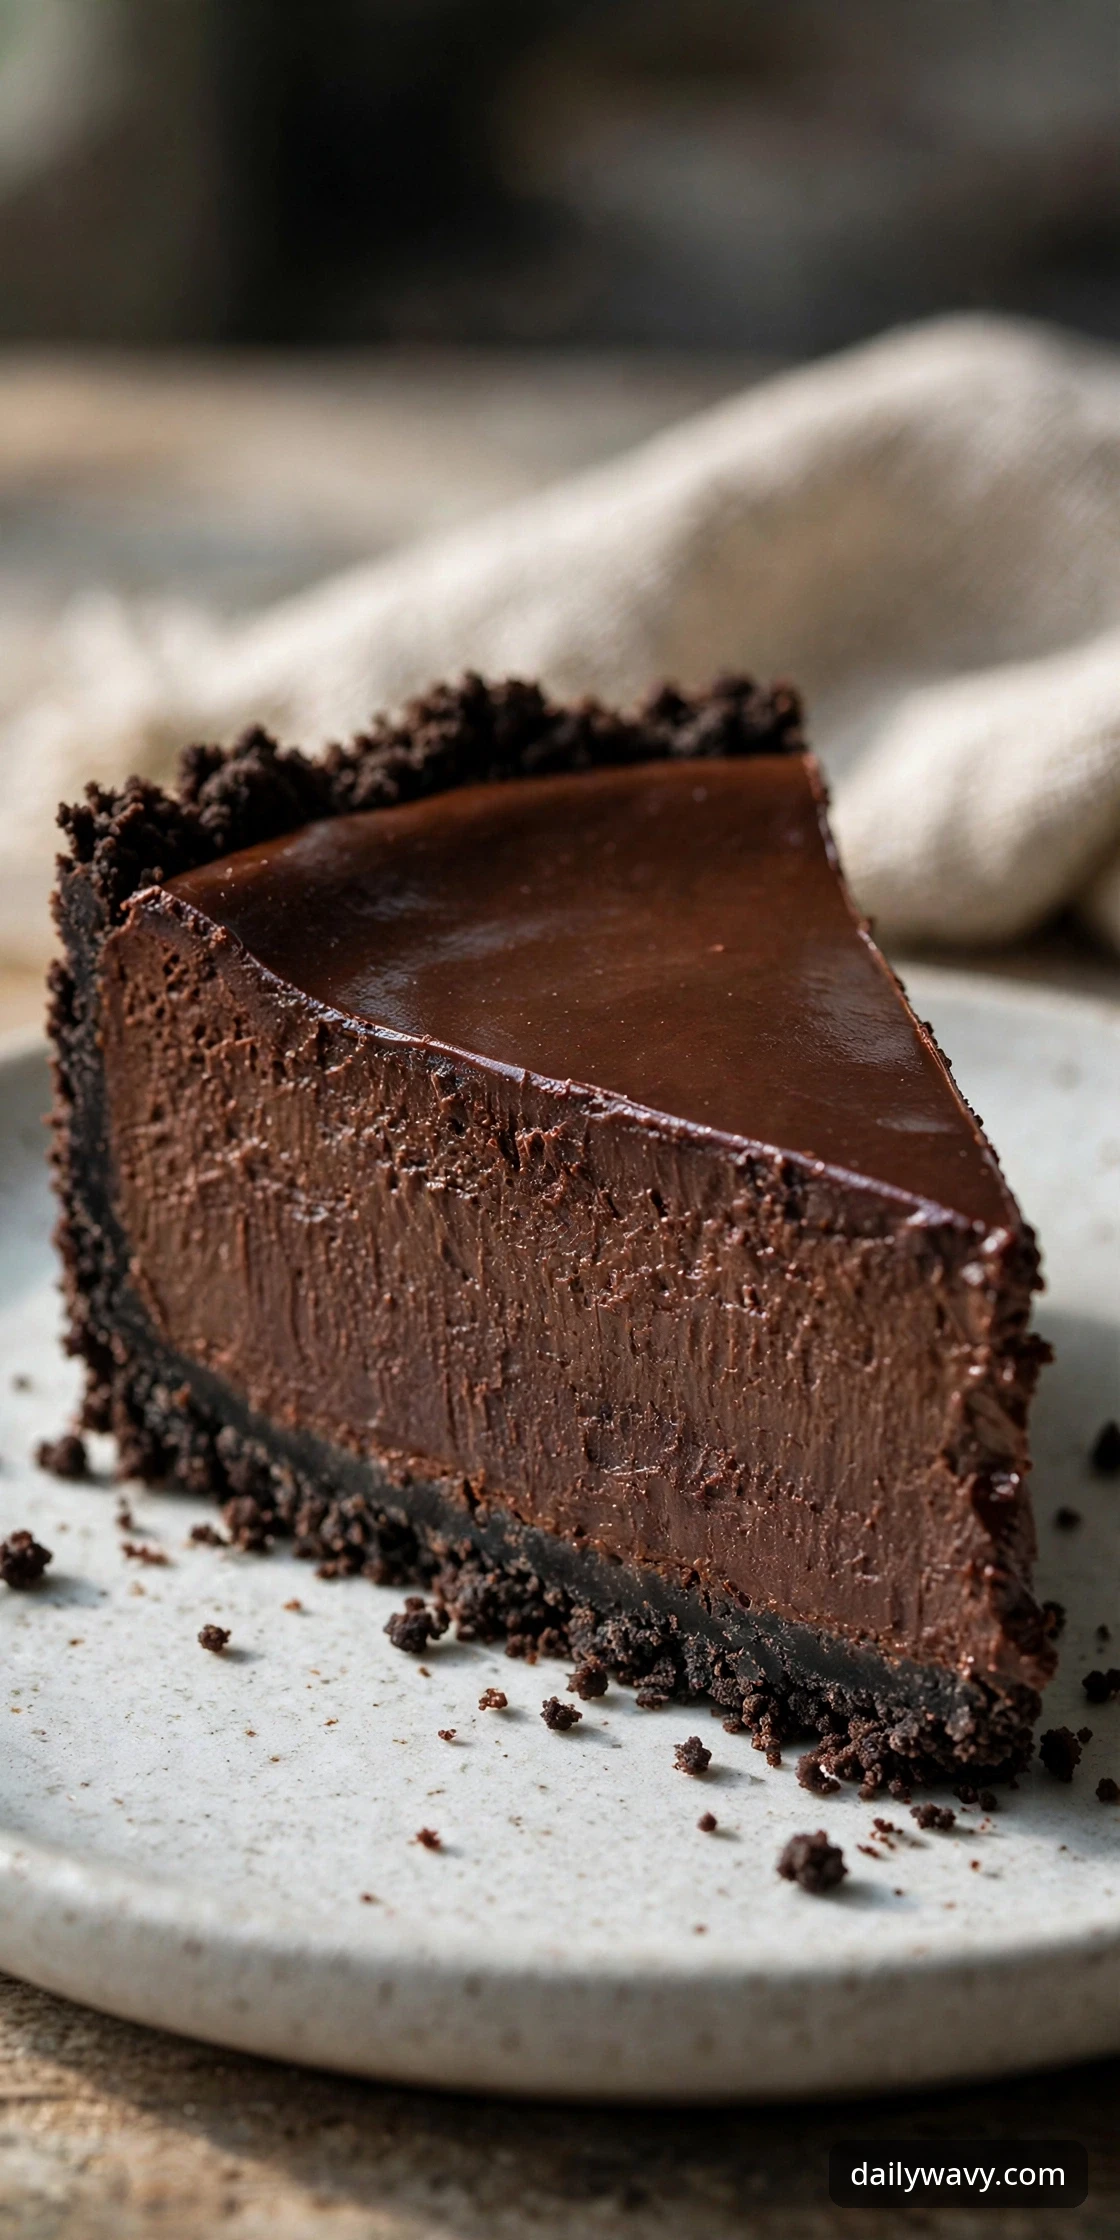
This is the double-chocolate classic done right. A crust of crushed chocolate sandwich cookies with their cream centers (yes, leave the filling in) gives you a sweet, almost fudgy base that presses like a dream and slices clean. The filling is pure dark chocolate cheesecake, so the crust adds sweetness and texture contrast without competing on cocoa.
Use Dutch-process cocoa in the filling if you have it. It gives a deeper color and a smoother chocolate flavor that plays well with the sweet crust.
Yield: one 9-inch cheesecake (12 slices) | Oven: 325°F water bath | Bake time: 55-65 minutes
Ingredients
- 28 chocolate sandwich cookies (about 2 1/2 cups crumbs)
- 5 tablespoons butter, melted
- Pinch of salt
- 24 oz cream cheese, at room temperature
- 1 cup granulated sugar
- 1/3 cup Dutch-process cocoa powder, sifted
- 3 large eggs, at room temperature
- 1/2 cup heavy cream, at room temperature
- 6 oz dark chocolate (60% cacao), melted and slightly cooled
- 1 teaspoon vanilla extract
Method
- Heat the oven to 325°F. Pulse the cookies (filling and all) into fine crumbs. Mix with the melted butter and salt; press into the bottom and 1 inch up the sides of a springform pan. Bake 10 minutes and cool slightly.
- Beat the cream cheese and sugar until completely smooth. Beat in the cocoa, then the eggs one at a time on low. Mix in the cream, melted chocolate, and vanilla.
- Pour over the crust. Bake in a water bath 55 to 65 minutes, until edges are set and the center jiggles slightly.
- Cool in the turned-off oven with the door cracked 1 hour, then at room temperature. Refrigerate at least 8 hours.
Troubleshooting tip: Grinding the cookies too coarse makes a crumbly crust that falls apart when sliced. The crumbs should look like wet sand before you add the butter.
Storage: Refrigerate up to 5 days; freeze up to 2 months.
4. Chocolate cheesecake with a ginger crust

Chocolate and ginger snap is one of those combinations that sounds odd until you taste it, and then it becomes obvious. The warm, peppery bite of gingersnaps cuts through the richness of the filling, so each slice tastes brighter and less heavy than the cookie-crust versions. A whisper of ground ginger in the filling ties the two layers together.
This is the version for people who find chocolate cheesecake too one-note. The ginger keeps it interesting to the last bite.
Yield: one 9-inch cheesecake (12 slices) | Oven: 325°F water bath | Bake time: 55-65 minutes
Ingredients
- 2 1/4 cups gingersnap crumbs (about 32 cookies)
- 6 tablespoons butter, melted
- 24 oz cream cheese, at room temperature
- 1 cup granulated sugar
- 1/4 cup unsweetened cocoa powder, sifted
- 1 teaspoon ground ginger
- 3 large eggs, at room temperature
- 1/2 cup sour cream, at room temperature
- 6 oz semisweet chocolate, melted and slightly cooled
- 1 teaspoon vanilla extract
- 1/4 teaspoon fine salt
Method
- Heat the oven to 325°F. Mix the gingersnap crumbs with the melted butter and press into the bottom and 1 inch up the sides of a springform pan. Bake 10 minutes and cool slightly.
- Beat the cream cheese and sugar until smooth. Beat in the cocoa, ginger, and salt, then the eggs one at a time on low. Mix in the sour cream, melted chocolate, and vanilla.
- Pour over the crust. Bake in a water bath 55 to 65 minutes, until the edges are set and the center jiggles slightly.
- Cool in the turned-off oven with the door cracked 1 hour, then at room temperature. Refrigerate at least 8 hours.
Troubleshooting tip: Gingersnaps vary wildly in spice level. Taste your crumbs before pressing; if they are mild, add 1/4 teaspoon more ground ginger to the crumb mixture.
Storage: Refrigerate up to 5 days; freeze up to 2 months.
5. Chocolate cheesecake with a pecan crust

A nut crust changes the whole architecture of a cheesecake. Toasted pecans ground with a little sugar bake into a base that is buttery, slightly crumbly, and almost shortbread-like, with none of the sweetness of a cookie crust. It is the grown-up version: chocolate and pecan is a classic pairing, and the toastiness of the nuts brings out the roasted notes in the cocoa. This one tastes like the chocolate-pecan tortes you pay too much for at bakeries.
Pulse the pecans fine but stop before they turn to butter. A food processor makes quick work of it.
Yield: one 9-inch cheesecake (12 slices) | Oven: 325°F water bath | Bake time: 55-65 minutes
Ingredients
- 2 cups pecan halves, toasted and cooled
- 1/4 cup granulated sugar
- 1/4 cup all-purpose flour
- 5 tablespoons butter, melted
- 1/4 teaspoon fine salt
- 24 oz cream cheese, at room temperature
- 1 cup granulated sugar
- 1/3 cup unsweetened cocoa powder, sifted
- 3 large eggs, at room temperature
- 1/2 cup heavy cream, at room temperature
- 6 oz semisweet chocolate, melted and slightly cooled
- 1 teaspoon vanilla extract
Method
- Heat the oven to 325°F. Pulse the pecans with the sugar, flour, and salt into fine crumbs. Stir in the melted butter and press into the bottom and 1 inch up the sides of a springform pan. Bake 12 minutes and cool slightly.
- Beat the cream cheese and sugar until smooth. Beat in the cocoa, then the eggs one at a time on low. Mix in the cream, melted chocolate, and vanilla.
- Pour over the crust. Bake in a water bath 55 to 65 minutes, until the edges are set and the center jiggles slightly.
- Cool in the turned-off oven with the door cracked 1 hour, then at room temperature. Refrigerate at least 8 hours.
Troubleshooting tip: Under-baking the nut crust is the usual mistake. It should look set and smell deeply toasty before the filling goes in, or the bottom stays soft.
Storage: Refrigerate up to 5 days; freeze up to 2 months.
6. Chocolate cheesecake with vanilla wafer base

Sometimes the simplest crust is the most dependable one. Vanilla wafer crumbs bake into a pale, sweet, buttery base that lets the chocolate filling be the entire show. There is a reason this crust appears on classic New York cheesecakes: it holds together, it cuts clean, and its mild vanilla flavor never fights the chocolate. If you have only ever made graham cracker crusts, the finer crumb of vanilla wafers is a small upgrade that photographs beautifully against dark filling.
The contrast is part of the appeal: ivory crumbs against a deep brown cake.
Yield: one 9-inch cheesecake (12 slices) | Oven: 325°F water bath | Bake time: 55-65 minutes
Ingredients
- 2 cups vanilla wafer crumbs (about 55 wafers)
- 6 tablespoons butter, melted
- 24 oz cream cheese, at room temperature
- 1 cup granulated sugar
- 1/3 cup unsweetened cocoa powder, sifted
- 3 large eggs, at room temperature
- 1/2 cup sour cream, at room temperature
- 6 oz semisweet chocolate, melted and slightly cooled
- 1 teaspoon vanilla extract
- 1/4 teaspoon fine salt
Method
- Heat the oven to 325°F. Mix the wafer crumbs with the melted butter and press into the bottom and 1 inch up the sides of a springform pan. Bake 10 minutes and cool slightly.
- Beat the cream cheese and sugar until smooth. Beat in the cocoa and salt, then the eggs one at a time on low. Mix in the sour cream, melted chocolate, and vanilla.
- Pour over the crust. Bake in a water bath 55 to 65 minutes, until the edges are set and the center jiggles slightly.
- Cool in the turned-off oven with the door cracked 1 hour, then at room temperature. Refrigerate at least 8 hours.
Troubleshooting tip: Vanilla wafer crumbs are fine and light, so they can burn around the rim. Tent the pan edges with foil if they darken before the bake is done.
Storage: Refrigerate up to 5 days; freeze up to 2 months.
7. Chocolate cheesecake with a toasted oat crust

Toasted oats give you a crust with actual character. Old-fashioned rolled oats, toasted until golden and ground with brown sugar and butter, bake into a base that tastes like oatmeal cookies met cheesecake. It is rustic in the best way: nubby, caramelly, and sturdy enough to hold a tall slice. The brown sugar in the crust echoes the cocoa in the filling, so the whole slice tastes warmer and more rounded than the cookie-crust versions.
This is the cheesecake to make when you want homemade flavor with zero fanciness.
Yield: one 9-inch cheesecake (12 slices) | Oven: 325°F water bath | Bake time: 55-65 minutes
Ingredients
- 2 1/2 cups old-fashioned rolled oats
- 1/3 cup packed brown sugar
- 1/3 cup all-purpose flour
- 6 tablespoons butter, melted
- 1/2 teaspoon cinnamon
- 1/4 teaspoon fine salt
- 24 oz cream cheese, at room temperature
- 1 cup granulated sugar
- 1/3 cup unsweetened cocoa powder, sifted
- 3 large eggs, at room temperature
- 1/2 cup sour cream, at room temperature
- 6 oz semisweet chocolate, melted and slightly cooled
- 1 teaspoon vanilla extract
Method
- Heat the oven to 350°F. Spread the oats on a sheet pan and toast 8 to 10 minutes, stirring once, until golden and fragrant. Cool, then pulse with the brown sugar, flour, cinnamon, and salt into coarse crumbs. Reduce the oven to 325°F.
- Stir in the melted butter and press into the bottom and 1 inch up the sides of a springform pan. Bake 10 minutes and cool slightly.
- Beat the cream cheese and sugar until smooth. Beat in the cocoa, then the eggs one at a time on low. Mix in the sour cream, melted chocolate, and vanilla.
- Pour over the crust. Bake in a water bath 55 to 65 minutes, until the edges are set and the center jiggles slightly. Cool in the turned-off oven with the door cracked 1 hour, then at room temperature. Refrigerate at least 8 hours.
Troubleshooting tip: Do not skip the toasting step. Raw oats give a pale, bland crust that tastes like breakfast cereal; toasted oats are where the flavor lives.
Storage: Refrigerate up to 5 days; freeze up to 2 months.
8. Chocolate cheesecake with mascarpone filling
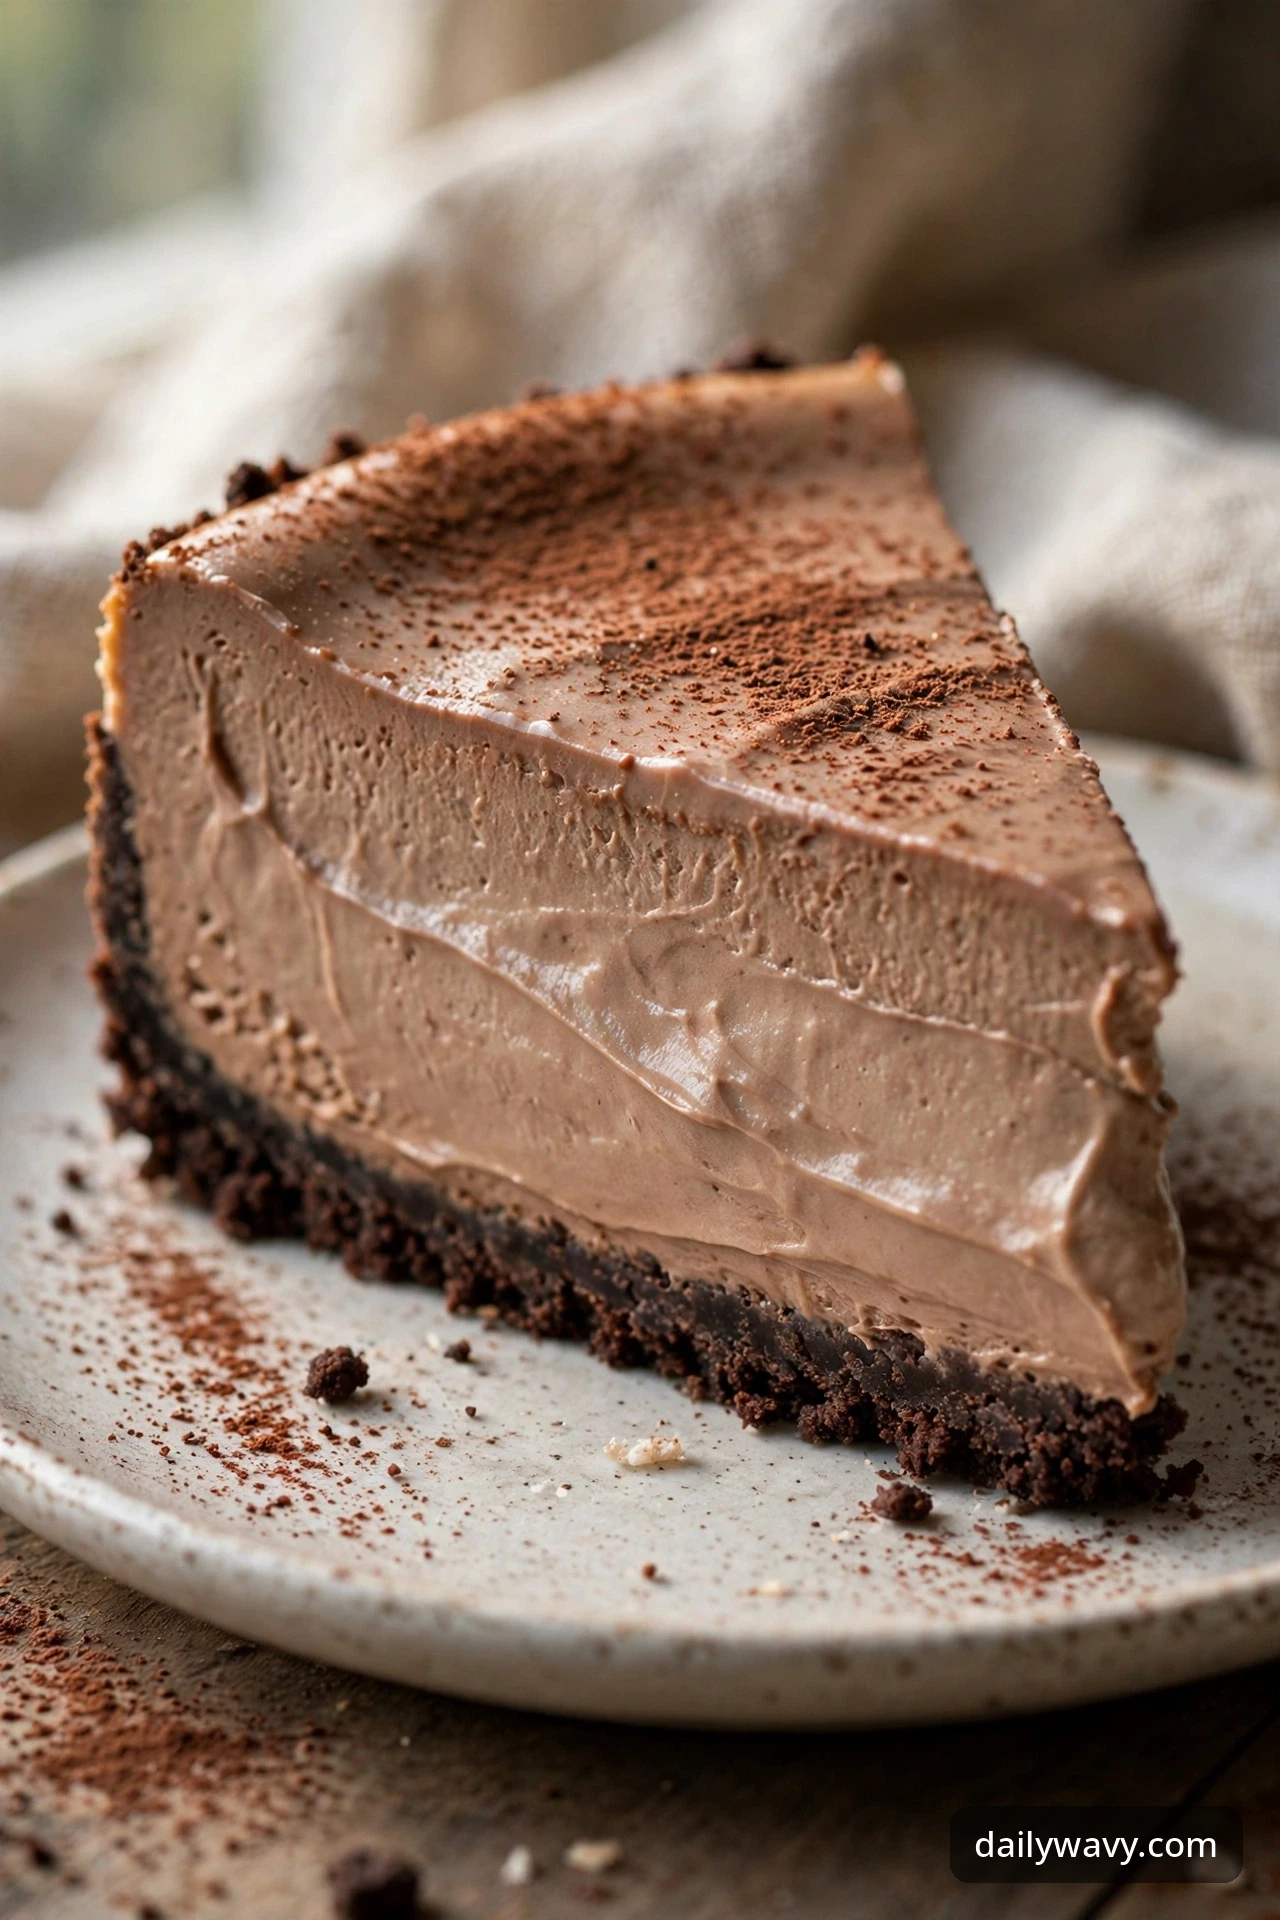
This is the luxury option. Half the cream cheese is swapped for mascarpone, and the difference is real: the filling bakes up silkier, milder, and almost mousselike, with a softness that regular cream cheese cannot quite reach. It tastes like the Italian dessert counter version of chocolate cheesecake. Serve it plain with a dusting of cocoa, because anything more would get in the way.
Mascarpone is more delicate than cream cheese, so bake this one at the low end of the time range and watch for the jiggle.
Yield: one 9-inch cheesecake (12 slices) | Oven: 325°F water bath | Bake time: 50-60 minutes
Ingredients
- 2 cups chocolate cookie crumbs
- 6 tablespoons butter, melted
- 16 oz cream cheese, at room temperature
- 8 oz mascarpone, at room temperature
- 3/4 cup granulated sugar
- 1/3 cup Dutch-process cocoa powder, sifted
- 3 large eggs, at room temperature
- 1/2 cup heavy cream, at room temperature
- 5 oz semisweet chocolate, melted and slightly cooled
- 1 teaspoon vanilla extract
- 1/4 teaspoon fine salt
Method
- Heat the oven to 325°F. Mix the crumbs with the melted butter and press into the bottom and 1 inch up the sides of a springform pan. Bake 10 minutes and cool slightly.
- Beat the cream cheese, mascarpone, and sugar on medium until completely smooth, about 3 minutes. Beat in the cocoa and salt, then the eggs one at a time on low. Mix in the cream, melted chocolate, and vanilla.
- Pour over the crust. Bake in a water bath 50 to 60 minutes, until the edges are set and the center jiggles like gelatin.
- Cool in the turned-off oven with the door cracked 1 hour, then at room temperature. Refrigerate at least 8 hours.
Troubleshooting tip: Mascarpone splits if it gets too warm or is overbeaten. Keep it at cool room temperature (not soft) and beat only until smooth.
Storage: Refrigerate up to 4 days; freeze up to 2 months. The softer set does not hold quite as long as the cream-cheese versions.
9. Chocolate cheesecake with yogurt filling

For days when you want the chocolate cheesecake experience with a lighter step. Greek yogurt replaces part of the cream cheese and all of the sour cream, so the filling is tangier, a touch less dense, and noticeably less rich. It still bakes into a proper sliceable cheesecake, just one that feels brighter and more refreshing. The slight tartness of the yogurt actually makes the chocolate flavor pop.
This version is also forgiving to slice, since the lighter filling releases from the knife cleanly.
Yield: one 9-inch cheesecake (12 slices) | Oven: 325°F water bath | Bake time: 55-65 minutes
Ingredients
- 2 cups graham cracker crumbs
- 1/4 cup granulated sugar
- 6 tablespoons butter, melted
- 16 oz cream cheese, at room temperature
- 1 1/2 cups plain whole-milk Greek yogurt
- 1 cup granulated sugar
- 1/3 cup unsweetened cocoa powder, sifted
- 3 large eggs, at room temperature
- 5 oz semisweet chocolate, melted and slightly cooled
- 1 teaspoon vanilla extract
- 1/4 teaspoon fine salt
Method
- Heat the oven to 325°F. Mix the graham crumbs, sugar, and melted butter; press into the bottom and 1 inch up the sides of a springform pan. Bake 10 minutes and cool slightly.
- Beat the cream cheese and sugar until smooth. Beat in the cocoa and salt, then the eggs one at a time on low. Whisk in the yogurt, melted chocolate, and vanilla until smooth.
- Pour over the crust. Bake in a water bath 55 to 65 minutes, until the edges are set and the center jiggles slightly.
- Cool in the turned-off oven with the door cracked 1 hour, then at room temperature. Refrigerate at least 8 hours.
Troubleshooting tip: Use whole-milk Greek yogurt, not fat-free. The fat-free versions can make the filling grainy and weepy.
Storage: Refrigerate up to 4 days; freeze up to 2 months. The lighter texture freezes well but softens faster once thawed.
10. Chocolate cheesecake with a pistachio crust

The looker of the collection. A pistachio crust bakes up with a gorgeous green-gold color that frames dark chocolate filling like art, and the flavor pairing is genuinely special: pistachio's sweet, almost floral nuttiness against deep cocoa. Roast the pistachios before grinding to bring out their full flavor, and save a few chopped ones for the top. This is the cheesecake to make when you want the dessert table to do the talking.
Expect a slice that tastes elegant and a little unexpected, in the best way.
Yield: one 9-inch cheesecake (12 slices) | Oven: 325°F water bath | Bake time: 55-65 minutes
Ingredients
- 2 cups shelled pistachios
- 1/4 cup granulated sugar
- 1/4 cup all-purpose flour
- 5 tablespoons butter, melted
- 1/4 teaspoon fine salt
- 24 oz cream cheese, at room temperature
- 1 cup granulated sugar
- 1/3 cup Dutch-process cocoa powder, sifted
- 3 large eggs, at room temperature
- 1/2 cup heavy cream, at room temperature
- 6 oz semisweet chocolate, melted and slightly cooled
- 1 teaspoon vanilla extract
- 2 tablespoons chopped pistachios, for garnish
Method
- Heat the oven to 350°F. Spread the pistachios on a sheet pan and roast 6 to 8 minutes until fragrant. Cool, then pulse with the sugar, flour, and salt into fine crumbs. Reduce the oven to 325°F.
- Stir in the melted butter and press into the bottom and 1 inch up the sides of a springform pan. Bake 12 minutes and cool slightly.
- Beat the cream cheese and sugar until smooth. Beat in the cocoa, then the eggs one at a time on low. Mix in the cream, melted chocolate, and vanilla.
- Pour over the crust. Bake in a water bath 55 to 65 minutes, until the edges are set and the center jiggles slightly. Cool in the turned-off oven with the door cracked 1 hour, then at room temperature. Refrigerate at least 8 hours. Garnish with the chopped pistachios before serving.
Troubleshooting tip: Salted pistachios work fine, but reduce the salt in the crust to a pinch. Buy shelled to save yourself a long afternoon.
Storage: Refrigerate up to 5 days; freeze up to 2 months. Add the garnish fresh after thawing.
11. Chocolate cheesecake with a cinnamon crust
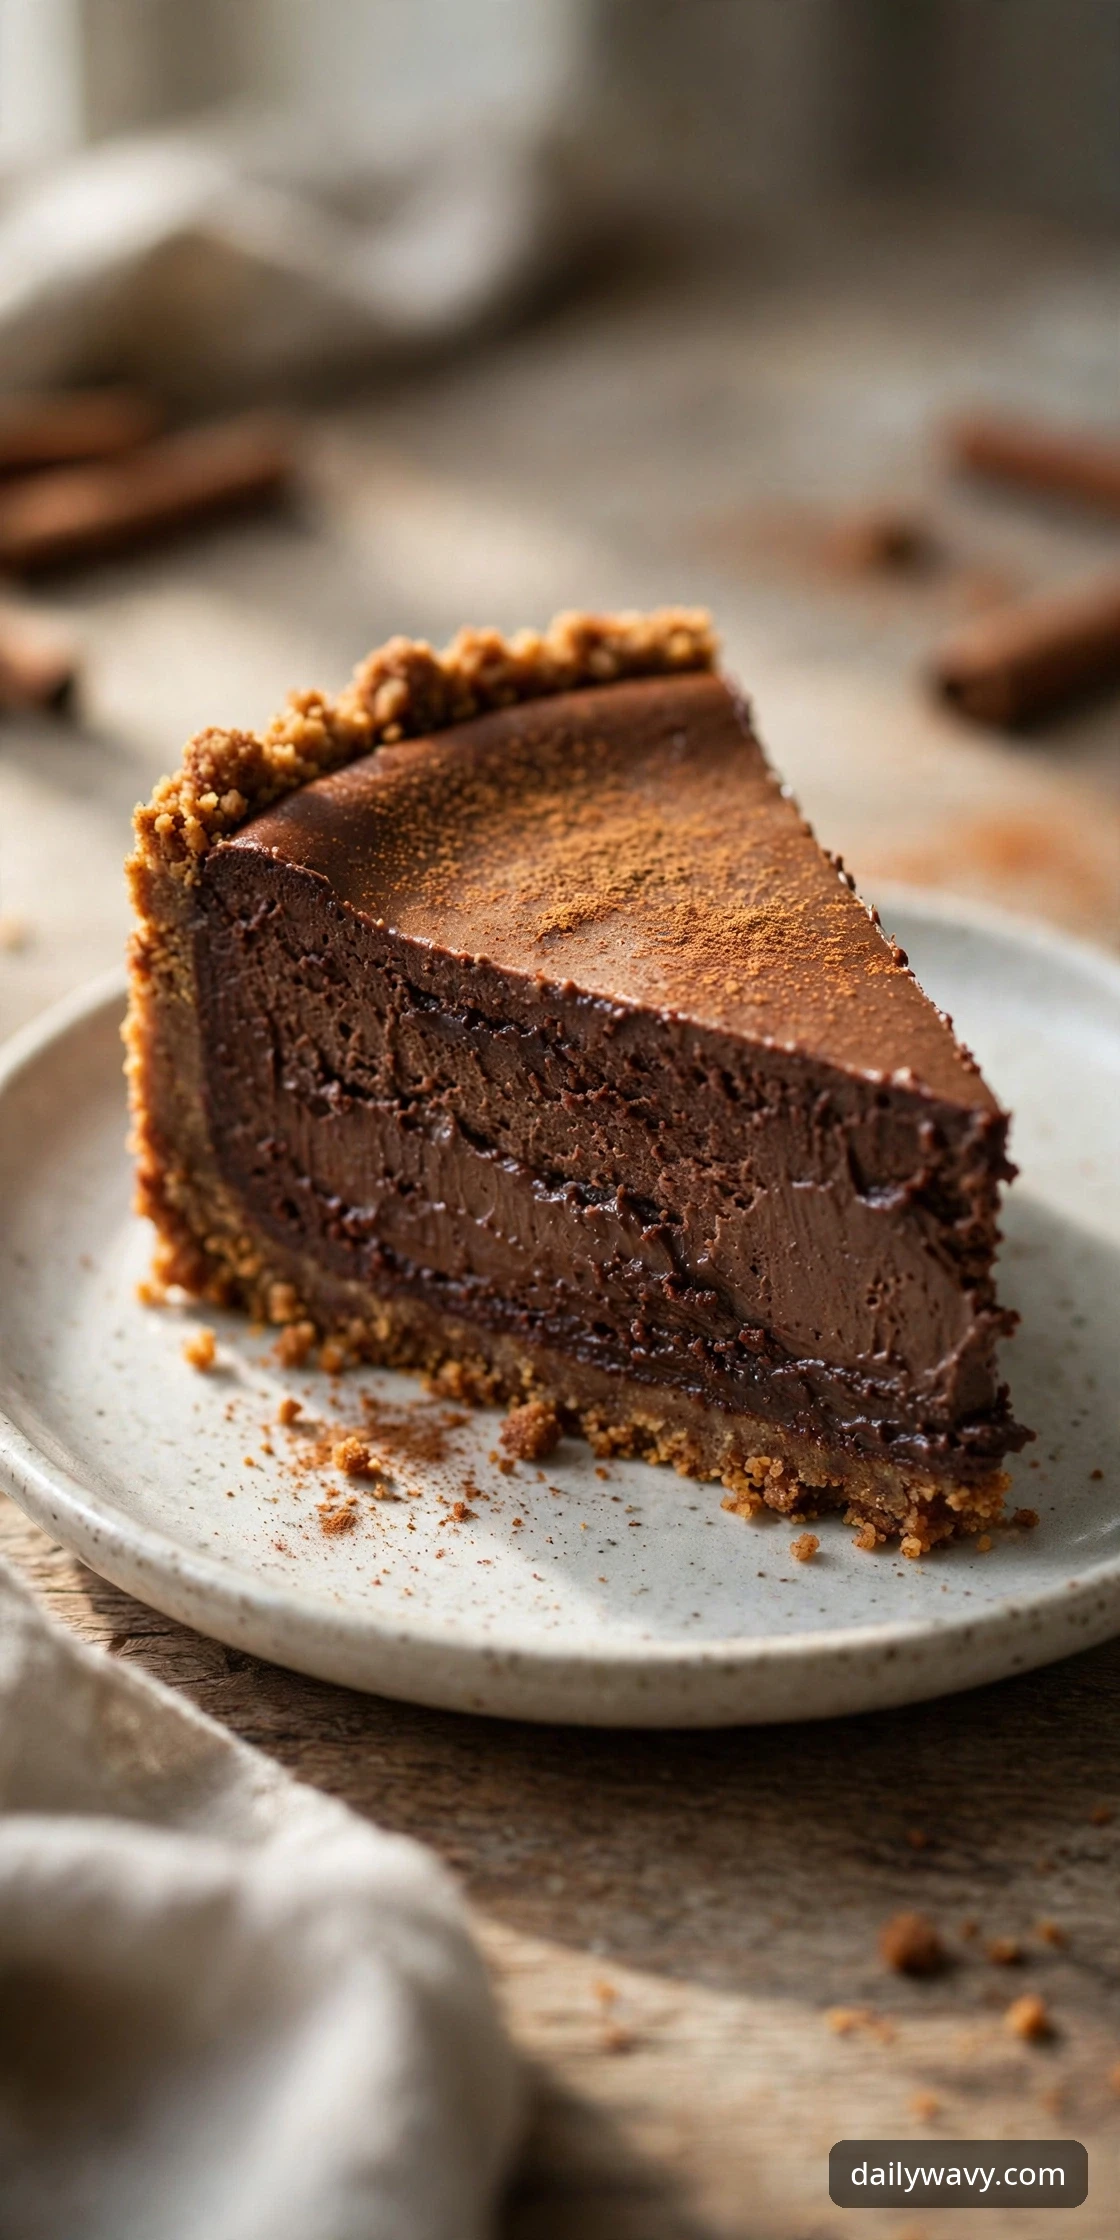
This one tastes like a Mexican hot chocolate in cheesecake form. A graham cracker crust loaded with cinnamon (plus a pinch of cayenne if you are feeling bold) gives every bite a warm, spiced base note that makes the chocolate taste deeper and more complex. It is a small change with an outsized effect, and it makes this version the cozy-season favorite.
The optional cayenne is worth trying in half the recipe if you are unsure. You barely taste heat; you taste more chocolate.
Yield: one 9-inch cheesecake (12 slices) | Oven: 325°F water bath | Bake time: 55-65 minutes
Ingredients
- 2 cups graham cracker crumbs
- 1/4 cup granulated sugar
- 2 teaspoons ground cinnamon, plus more for dusting
- 6 tablespoons butter, melted
- 24 oz cream cheese, at room temperature
- 1 cup granulated sugar
- 1/3 cup unsweetened cocoa powder, sifted
- 1 1/2 teaspoons ground cinnamon
- Pinch of cayenne pepper (optional)
- 3 large eggs, at room temperature
- 1/2 cup sour cream, at room temperature
- 6 oz semisweet chocolate, melted and slightly cooled
- 1 teaspoon vanilla extract
- 1/4 teaspoon fine salt
Method
- Heat the oven to 325°F. Mix the graham crumbs, sugar, 2 teaspoons cinnamon, and melted butter; press into the bottom and 1 inch up the sides of a springform pan. Bake 10 minutes and cool slightly.
- Beat the cream cheese and sugar until smooth. Beat in the cocoa, 1 1/2 teaspoons cinnamon, cayenne if using, and salt, then the eggs one at a time on low. Mix in the sour cream, melted chocolate, and vanilla.
- Pour over the crust. Bake in a water bath 55 to 65 minutes, until the edges are set and the center jiggles slightly.
- Cool in the turned-off oven with the door cracked 1 hour, then at room temperature. Refrigerate at least 8 hours. Dust with extra cinnamon before serving.
Troubleshooting tip: Old ground cinnamon loses its punch. If your jar has been open more than a year, buy a fresh one for this recipe; it is the star flavor.
Storage: Refrigerate up to 5 days; freeze up to 2 months.
12. Chocolate cheesecake with a coconut crust

Chocolate and coconut is a pairing that works beautifully, and this crust makes it official. Sweetened shredded coconut pressed with butter and a little flour bakes into a chewy, golden, almost macaroon-like base that stays tender under the filling. The flavor combination lands squarely in chocolate-candy territory, and the texture contrast between chewy coconut and silky cheesecake is genuinely fun.
Toast the coconut first for a deeper flavor and a prettier golden color.
Yield: one 9-inch cheesecake (12 slices) | Oven: 325°F water bath | Bake time: 55-65 minutes
Ingredients
- 2 1/2 cups sweetened shredded coconut
- 1/4 cup all-purpose flour
- 1/4 cup granulated sugar
- 5 tablespoons butter, melted
- 1/4 teaspoon fine salt
- 24 oz cream cheese, at room temperature
- 1 cup granulated sugar
- 1/3 cup unsweetened cocoa powder, sifted
- 3 large eggs, at room temperature
- 1/2 cup coconut cream, at room temperature
- 6 oz semisweet chocolate, melted and slightly cooled
- 1 teaspoon vanilla extract
- 1/2 teaspoon coconut extract (optional)
Method
- Heat the oven to 350°F. Spread the coconut on a sheet pan and toast 5 to 7 minutes, stirring once, until golden at the edges. Cool, then mix with the flour, sugar, salt, and melted butter. Reduce the oven to 325°F.
- Press into the bottom and 1 inch up the sides of a springform pan. Bake 12 minutes and cool slightly.
- Beat the cream cheese and sugar until smooth. Beat in the cocoa, then the eggs one at a time on low. Mix in the coconut cream, melted chocolate, vanilla, and coconut extract if using.
- Pour over the crust. Bake in a water bath 55 to 65 minutes, until the edges are set and the center jiggles slightly. Cool in the turned-off oven with the door cracked 1 hour, then at room temperature. Refrigerate at least 8 hours.
Troubleshooting tip: Coconut burns fast under a broiler-like blast, so keep the toast time honest and watch it the whole 5 to 7 minutes.
Storage: Refrigerate up to 5 days; freeze up to 2 months.
13. Chocolate cheesecake with a hazelnut crust

If chocolate and hazelnut is your favorite candy pairing, this is your cheesecake. Toasted hazelnuts ground into a crust taste remarkably like the inside of a chocolate-hazelnut truffle, and a spoonful of chocolate-hazelnut spread in the filling (optional but recommended) turns the whole cake into something that tastes expensive. Rub the skins off the toasted hazelnuts in a towel; they come off easily and the crust looks better without them.
The toasted hazelnuts and chocolate-hazelnut spread keep the whole cake firmly in chocolate-hazelnut territory.
Yield: one 9-inch cheesecake (12 slices) | Oven: 325°F water bath | Bake time: 55-65 minutes
Ingredients
- 2 cups hazelnuts
- 1/4 cup granulated sugar
- 1/4 cup all-purpose flour
- 5 tablespoons butter, melted
- 1/4 teaspoon fine salt
- 24 oz cream cheese, at room temperature
- 1 cup granulated sugar
- 1/3 cup unsweetened cocoa powder, sifted
- 3 large eggs, at room temperature
- 1/2 cup heavy cream, at room temperature
- 5 oz semisweet chocolate, melted and slightly cooled
- 1/4 cup chocolate-hazelnut spread (optional)
- 1 teaspoon vanilla extract
Method
- Heat the oven to 350°F. Spread the hazelnuts on a sheet pan and roast 8 to 10 minutes until fragrant. Rub in a clean towel to remove most of the skins. Cool, then pulse with the sugar, flour, and salt into fine crumbs. Reduce the oven to 325°F.
- Stir in the melted butter and press into the bottom and 1 inch up the sides of a springform pan. Bake 12 minutes and cool slightly.
- Beat the cream cheese and sugar until smooth. Beat in the cocoa, then the eggs one at a time on low. Mix in the cream, melted chocolate, chocolate-hazelnut spread if using, and vanilla.
- Pour over the crust. Bake in a water bath 55 to 65 minutes, until the edges are set and the center jiggles slightly. Cool in the turned-off oven with the door cracked 1 hour, then at room temperature. Refrigerate at least 8 hours.
Troubleshooting tip: Some skin flecks in the crust are fine, but big papery pieces can taste bitter. A quick towel rub takes care of most of them.
Storage: Refrigerate up to 5 days; freeze up to 2 months.
14. Chocolate cheesecake with a caramel biscuit base
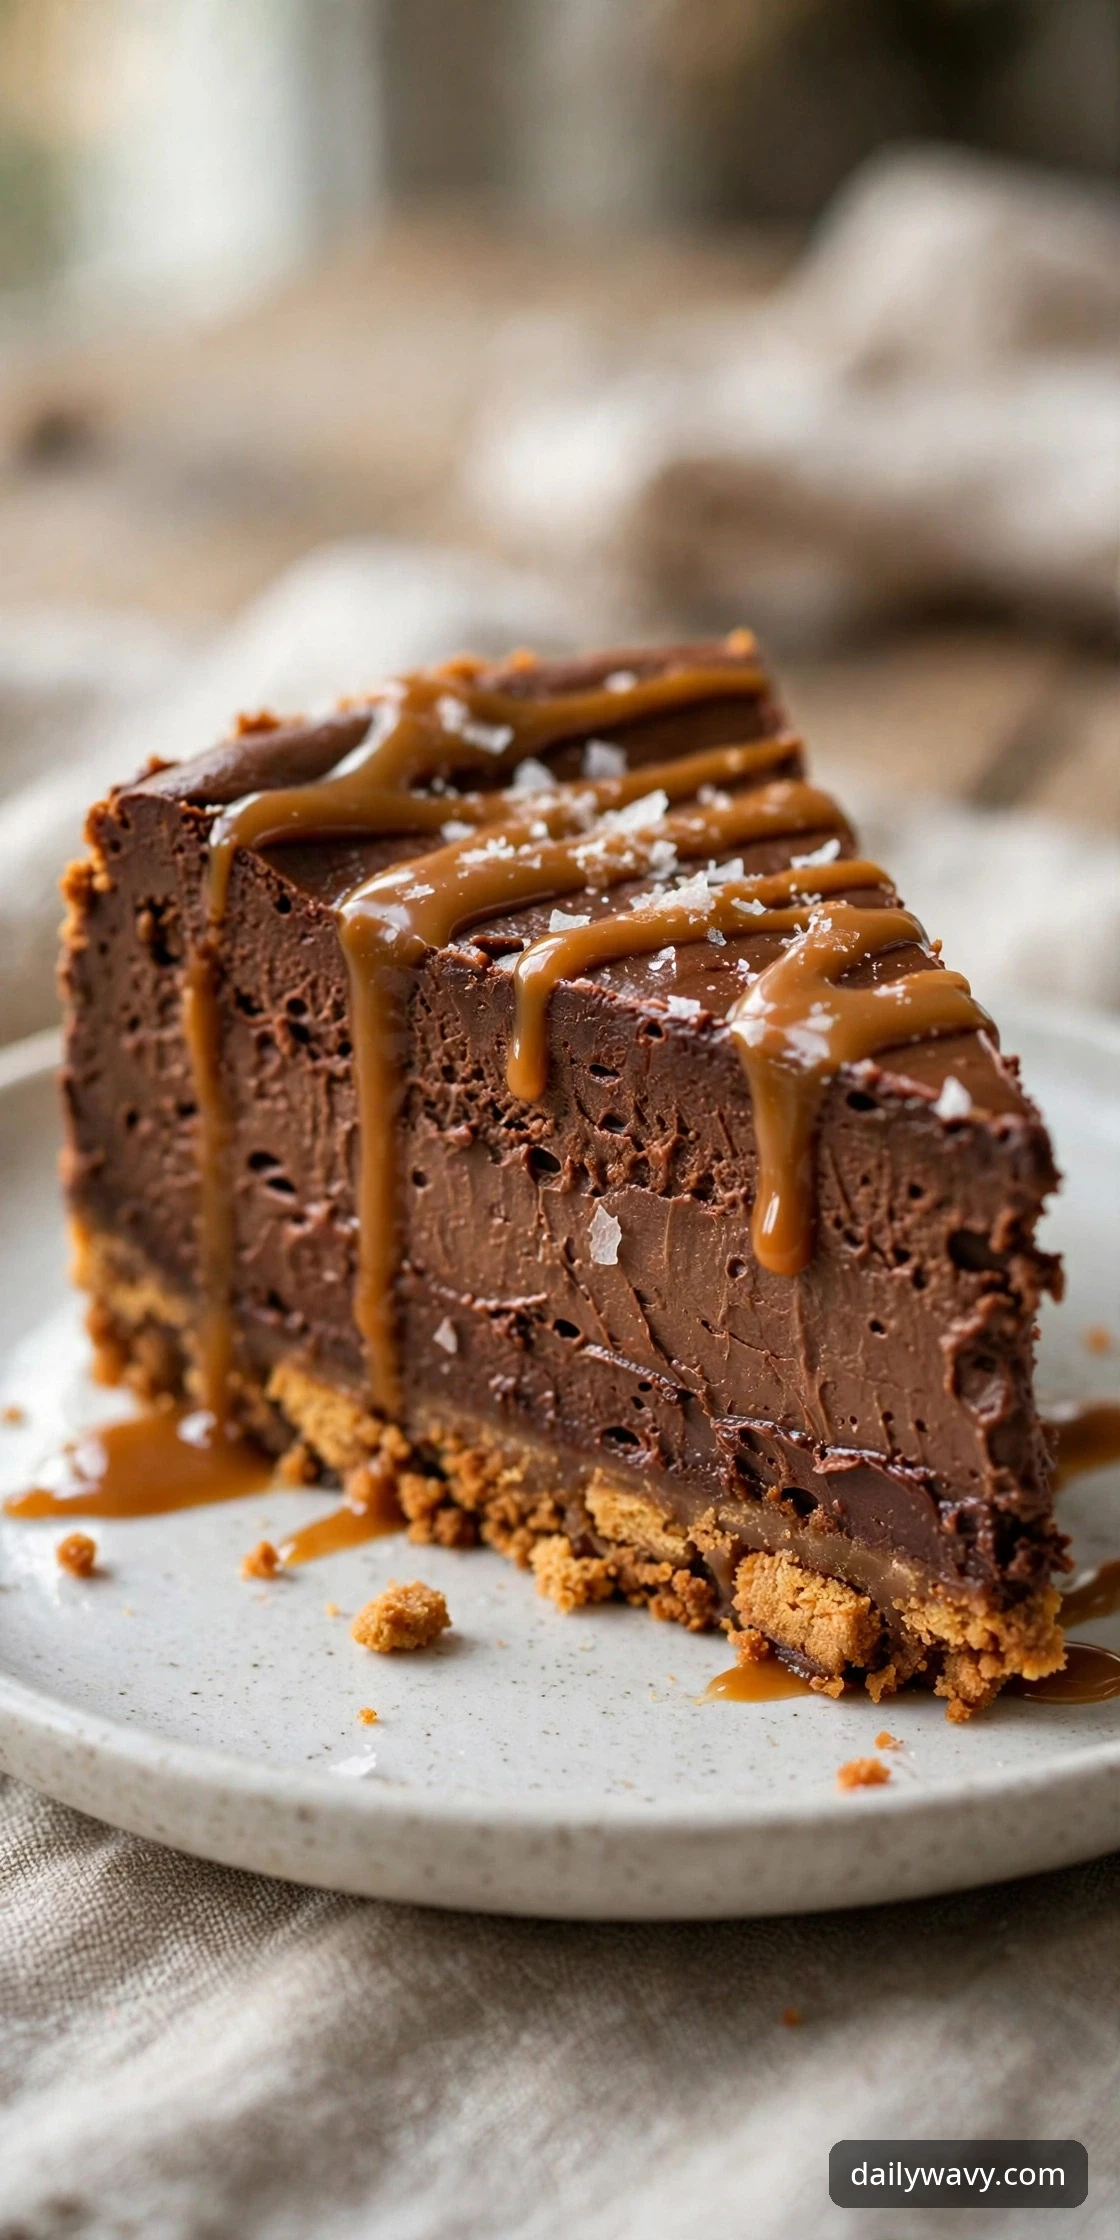
The closer. Caramel or toffee-flavored digestive biscuits (or graham crackers with caramel sauce drizzled in, if you cannot find them) make a crust that tastes like salted caramel met cheesecake. A pinch of flaky sea salt in the crust keeps it from tipping too sweet, and a thin caramel drizzle over the finished slice is the move. This is the richest version here, so plan small slices and strong coffee.
For a simple blueberry muffin morning and a showstopping dessert night, this roundup has you covered on both ends.
Yield: one 9-inch cheesecake (12 slices) | Oven: 325°F water bath | Bake time: 55-65 minutes
Ingredients
- 2 1/2 cups caramel or toffee biscuit crumbs (about 20 digestive-style biscuits)
- 1/2 teaspoon flaky sea salt, plus more for serving
- 6 tablespoons butter, melted
- 24 oz cream cheese, at room temperature
- 1 cup granulated sugar
- 1/3 cup unsweetened cocoa powder, sifted
- 3 large eggs, at room temperature
- 1/2 cup sour cream, at room temperature
- 6 oz semisweet chocolate, melted and slightly cooled
- 1/3 cup caramel sauce, plus more for drizzling
- 1 teaspoon vanilla extract
Method
- Heat the oven to 325°F. Mix the biscuit crumbs, sea salt, and melted butter; press into the bottom and 1 inch up the sides of a springform pan. Bake 10 minutes and cool slightly.
- Beat the cream cheese and sugar until smooth. Beat in the cocoa, then the eggs one at a time on low. Mix in the sour cream, melted chocolate, 1/3 cup caramel sauce, and vanilla.
- Pour over the crust. Bake in a water bath 55 to 65 minutes, until the edges are set and the center jiggles slightly.
- Cool in the turned-off oven with the door cracked 1 hour, then at room temperature. Refrigerate at least 8 hours. Drizzle with caramel and a pinch of flaky salt before serving.
Troubleshooting tip: The caramel in the filling can make the center set a little slower. Trust the jiggle test over the clock; give it 5 more minutes if the whole surface is moving.
Storage: Refrigerate up to 5 days; freeze up to 2 months. Drizzle fresh caramel after thawing.
Frequently asked questions
Why does my chocolate cheesecake crack?
Almost always because the edges overbaked while the center was still raw. A water bath, the low 325°F oven, and pulling the cake when the center still jiggles like gelatin helps prevent cracks. Room-temperature ingredients and low-speed mixing help too, because overbeaten batter puffs and falls.
Can I make chocolate cheesecake without a water bath?
You can, and the bars in this roundup do exactly that, but a round cheesecake baked dry is much more likely to crack and bake unevenly. The foil-wrapped water bath is one of the most useful techniques in this article, so it is worth the extra two minutes.
How do I know when chocolate cheesecake is done?
The outer two inches should look set and matte, while the center two inches jiggle like set gelatin when you gently nudge the pan. It will look slightly underdone. That is correct. The residual heat finishes the job, and the overnight chill sets it firm. An instant-read thermometer in the center should read about 150°F if you want a number.
Why is my cheesecake grainy?
Cold cream cheese is the usual culprit. Let it sit at room temperature a full hour (two in a cold kitchen) and beat it with the sugar before anything else goes in, scraping the bowl twice. Sifting the cocoa also helps, since cocoa clumps never fully dissolve.
Can I freeze chocolate cheesecake?
Yes, and it freezes beautifully. Wrap the whole cake or individual slices tightly in plastic wrap, then foil, and freeze up to 2 months. Thaw overnight in the refrigerator. Add garnishes like whipped cream or fresh caramel after thawing, not before freezing.
Which crust is best for a beginner?
The vanilla wafer base or the chocolate cookie crust. Both press easily, hold together, and slice cleanly, so you can focus on the filling. Save the nut crusts for your second cheesecake, once the water bath feels routine. For dinner before dessert, try our lemon garlic chicken skillet and save this article for the weekend.
A final slice of advice
Fourteen ways in, the pattern is clear: the filling is the easy part and the crust is where your personality shows up. Pick the crust that sounds like you, follow the foundation method at the top, and give the cake its full overnight chill. Cheesecake rewards patience more than skill. Slice it cold with a hot knife, serve it to people you like, and browse the rest of our Food & Drink ideas when you are ready for the next thing.