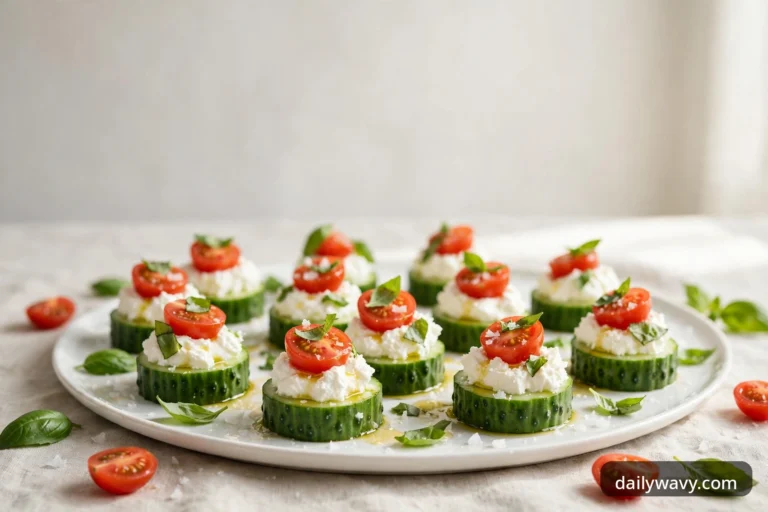
10 Chocolate Cake Recipes for Celebrations and Coffee Breaks
A good chocolate cake is the rare dessert that works everywhere. It anchors a birthday table just as easily as…
A good chocolate cake is the rare dessert that works everywhere. It anchors a birthday table just as easily as it makes an ordinary Tuesday afternoon feel deliberate. What separates a decent chocolate cake from one people talk about is not some secret ingredient. It is a reliable base recipe, a filling or frosting that is actually balanced, and a few technique details that keep the crumb moist and the slices clean. This guide gives you ten complete recipes built on one dependable chocolate cake base, each with exact ingredients, real timing, and honest storage guidance. Every cake here has been planned with realistic home-kitchen equipment in mind, and each photo shows the finished cake as described.

Jump to a recipe:
- Chocolate cake layer cake with berry filling
- Chocolate cake bundt with chocolate drizzle
- Chocolate cake with toasted almond crust
- Chocolate cake with yogurt glaze
- Chocolate cake with caramel frosting
- Chocolate cake with cherry compote
- Chocolate cake with coconut cream
- Chocolate cake with mascarpone frosting
- Chocolate cake with browned-butter icing
- Chocolate cake with raspberry buttercream
The base chocolate cake every recipe below uses
All ten recipes start with the same base cake, and that is deliberate. Learn one batter well and you stop guessing. This recipe is designed for deep, dark flavor and a tender, moist crumb. The hot coffee is the quiet hero: it does not make the cake taste like coffee, it blooms the cocoa so the chocolate flavor reads stronger. If you prefer, use hot water instead; the cake still works, just slightly less intense.
The base recipe makes two 8-inch round layers (the standard the sections assume) and takes about 15 minutes to mix.
Yield: two 8-inch round layers | Oven: 350°F | Bake time: 30 to 35 minutes
Ingredients
- 1 3/4 cups all-purpose flour
- 3/4 cup unsweetened natural cocoa powder
- 2 cups granulated sugar
- 1 1/2 teaspoons baking powder
- 1 1/2 teaspoons baking soda
- 1 teaspoon fine salt
- 2 large eggs, at room temperature
- 1 cup whole milk, at room temperature
- 1/2 cup neutral oil (vegetable or canola)
- 2 teaspoons vanilla extract
- 1 cup hot brewed coffee (or hot water)
Method
- Heat the oven to 350°F. Grease two 8-inch round pans, line the bottoms with parchment, and grease the parchment.
- Whisk the flour, cocoa, sugar, baking powder, baking soda, and salt in a large bowl until evenly combined.
- Add the eggs, milk, oil, and vanilla. Beat on medium speed for 2 minutes. The batter will be thick.
- With the mixer on low, pour in the hot coffee in a slow stream. The batter will turn thin. That is correct.
- Divide between the pans. Bake 30 to 35 minutes, until a toothpick inserted in the center comes out with a few moist crumbs but no wet batter.
- Cool in the pans 10 minutes, then turn out onto a wire rack and cool completely before frosting.
Pan conversions
When a section below calls for a different pan, use this table. All baking is at 350°F, and every size was converted from the same batter volume, so the flavor and texture carry over.
- Two 9-inch rounds: 25 to 30 minutes (slightly thinner layers)
- One 9 by 13-inch pan: 30 to 35 minutes
- Three 6-inch rounds: 22 to 26 minutes (tall, elegant layers)
- 24 standard cupcakes: 18 to 22 minutes
- One 12-cup Bundt pan: 50 to 60 minutes (only where noted)
Start checking for doneness at the low end of the range. A toothpick that comes out completely clean means you have baked about 2 minutes too long; aim for a few moist crumbs.
Frosting and filling ratios
The sections below give full frosting recipes, but it helps to know the backbone ratios in case you want to scale or adjust:
- Chocolate buttercream: 1 cup unsalted butter, 3 1/2 cups powdered sugar, 1/2 cup cocoa powder, 1/4 cup milk, pinch of salt. Enough to fill and frost a two-layer 8-inch cake.
- Chocolate ganache glaze: 8 ounces chopped semisweet chocolate plus 1 cup heavy cream. Pourable after resting 5 minutes. For a thicker ganache that holds drizzle lines, use a 2 to 1 chocolate-to-cream ratio (12 ounces chocolate to 3/4 cup cream).
- Whipped cream: 1 cup heavy cream whipped with 2 tablespoons powdered sugar and 1 teaspoon vanilla. Stable for about 4 hours at cool room temperature; longer if refrigerated.
Keep frosting at cool room temperature while you assemble. Buttercream that is too cold tears the cake; too warm and it slides. If the kitchen is hot, chill the frosted cake 20 minutes between coats.
1. Chocolate cake layer cake with berry filling
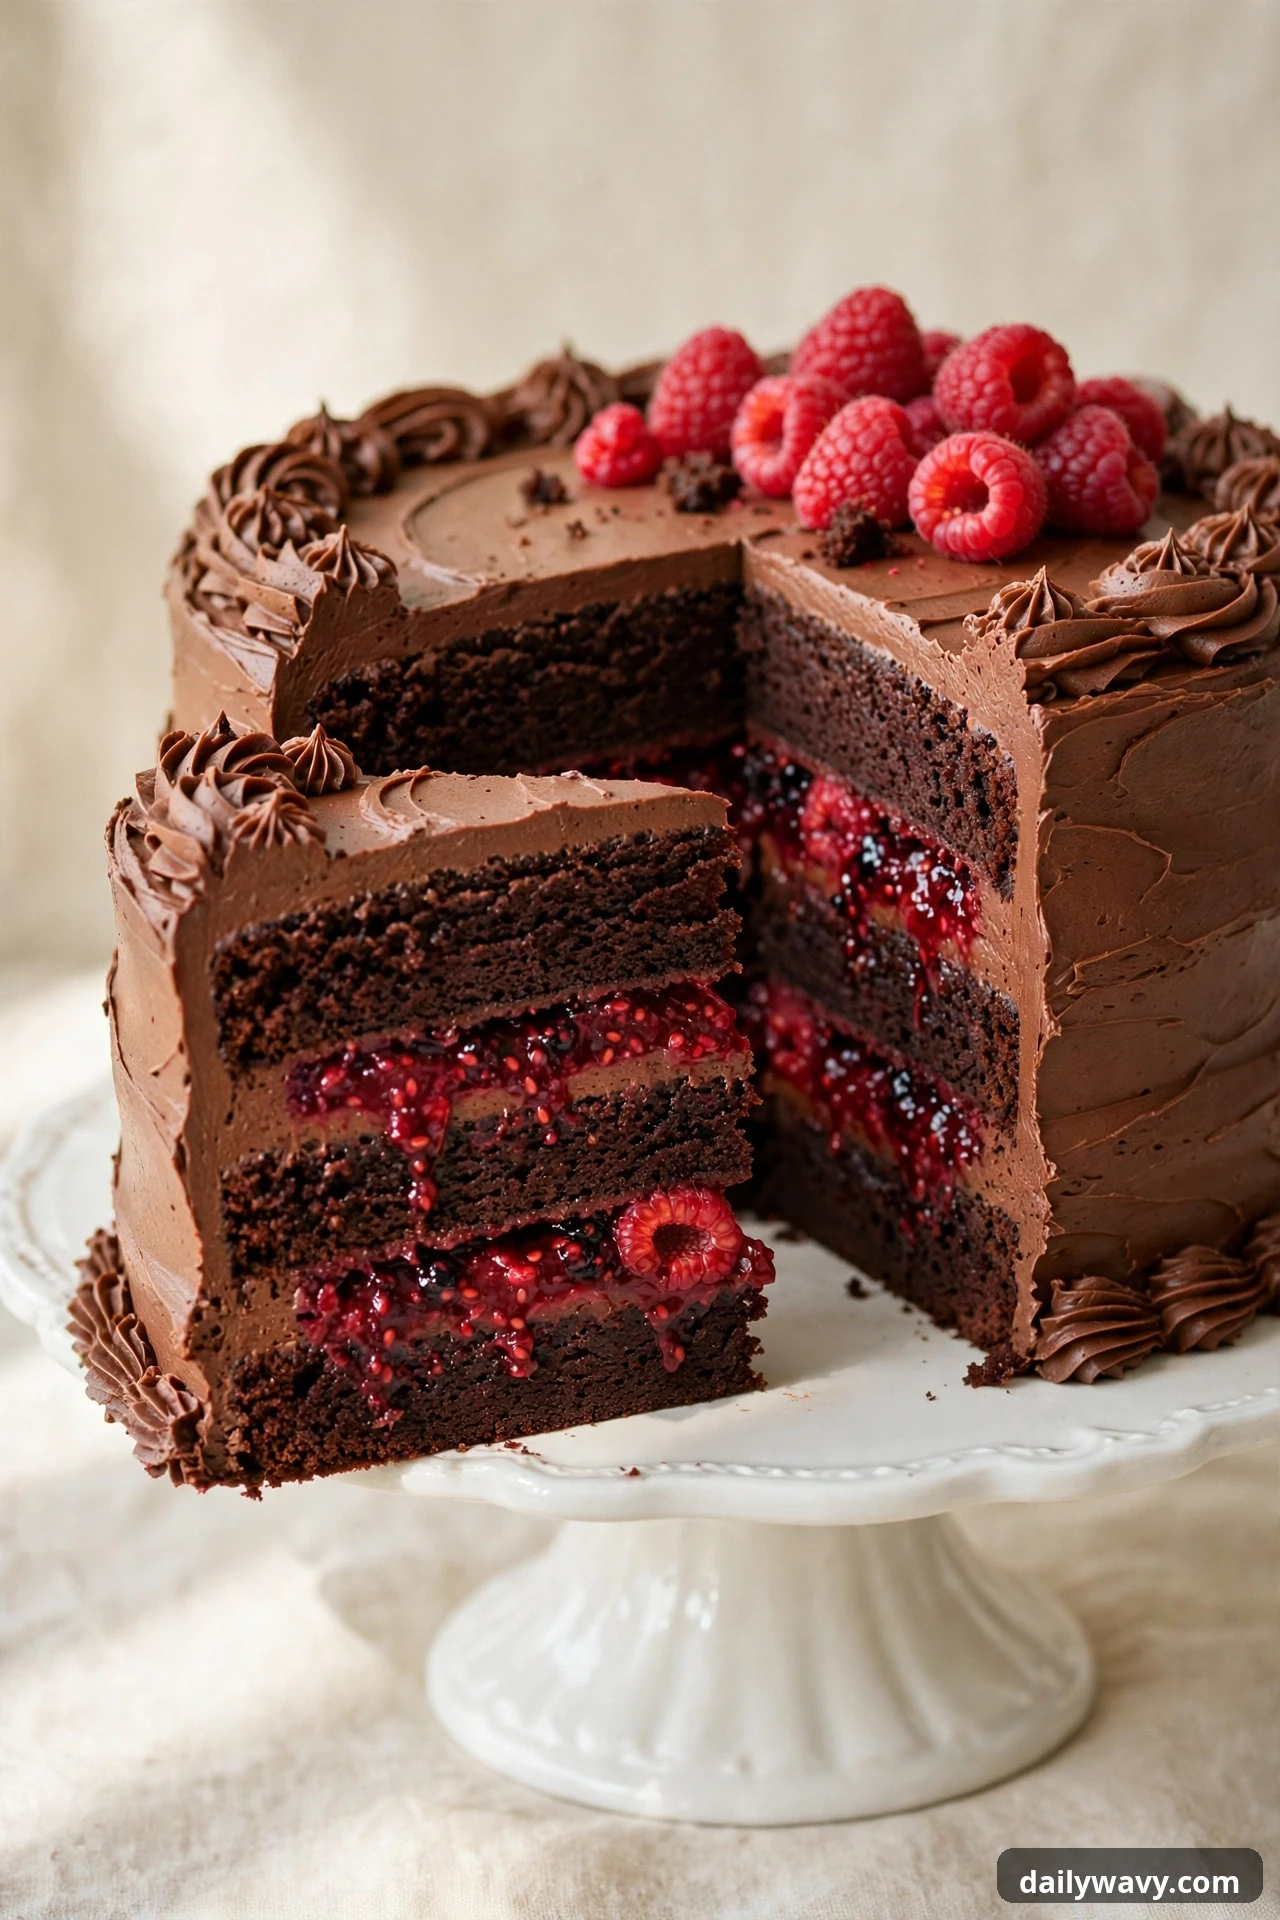
This is the celebration cake, the one that earns gasps when the first slice comes out. Three dark layers, a bright berry filling that cuts through the richness, and silky chocolate buttercream outside. The berries bring acidity and freshness that keep the whole thing from feeling heavy, and the jewel-red band of filling against the dark crumb is what makes every slice look like a patisserie cake.
Yield: 12 to 14 slices | Oven: 350°F | Active time: 45 minutes plus cooling
Ingredients
For the cake
the base chocolate cake batter above, baked as three 6-inch rounds (22 to 26 minutes) or two 8-inch rounds split into four layers.
For the berry filling
- 3 cups mixed berries (raspberries, blackberries, sliced strawberries), fresh or thawed frozen
- 1/3 cup granulated sugar
- 1 tablespoon cornstarch
- 1 tablespoon lemon juice
For the chocolate buttercream
- 1 cup unsalted butter, softened
- 3 1/2 cups powdered sugar
- 1/2 cup unsweetened cocoa powder
- 1/4 cup whole milk
- 1 teaspoon vanilla extract
- Pinch of fine salt
Method
- Make the filling first so it cools. Combine the berries, sugar, cornstarch, and lemon juice in a saucepan. Cook over medium heat, stirring, until the mixture bubbles and thickens, 5 to 7 minutes. Transfer to a bowl and cool completely. It should be thick enough to hold a line when you drag a spoon through it.
- Bake and cool the cake layers completely.
- Beat the butter with the cocoa, powdered sugar, milk, vanilla, and salt until smooth and spreadable, 2 to 3 minutes. Add milk a teaspoon at a time if it feels stiff.
- Level the layers with a serrated knife if domed. Place the first layer on a cake stand. Pipe or spread a dam of buttercream around the edge of the layer, then fill the center with half the berry filling. Repeat for the second layer. Top with the final layer.
- Frost the outside with a thin crumb coat, chill 20 minutes, then apply the final coat. Smooth with a bench scraper or offset spatula.
- Decorate with fresh berries on top just before serving.
Troubleshooting tip: If the filling leaks out the sides, it was not thick enough or the buttercream dam was too thin. Cook the filling until it clearly holds its shape on a spoon, and build the dam about 1/2 inch tall.
Storage: Refrigerate in a covered cake keeper for up to 4 days. Let slices sit at room temperature 20 to 30 minutes before serving so the buttercream softens.
2. Chocolate cake bundt with chocolate drizzle
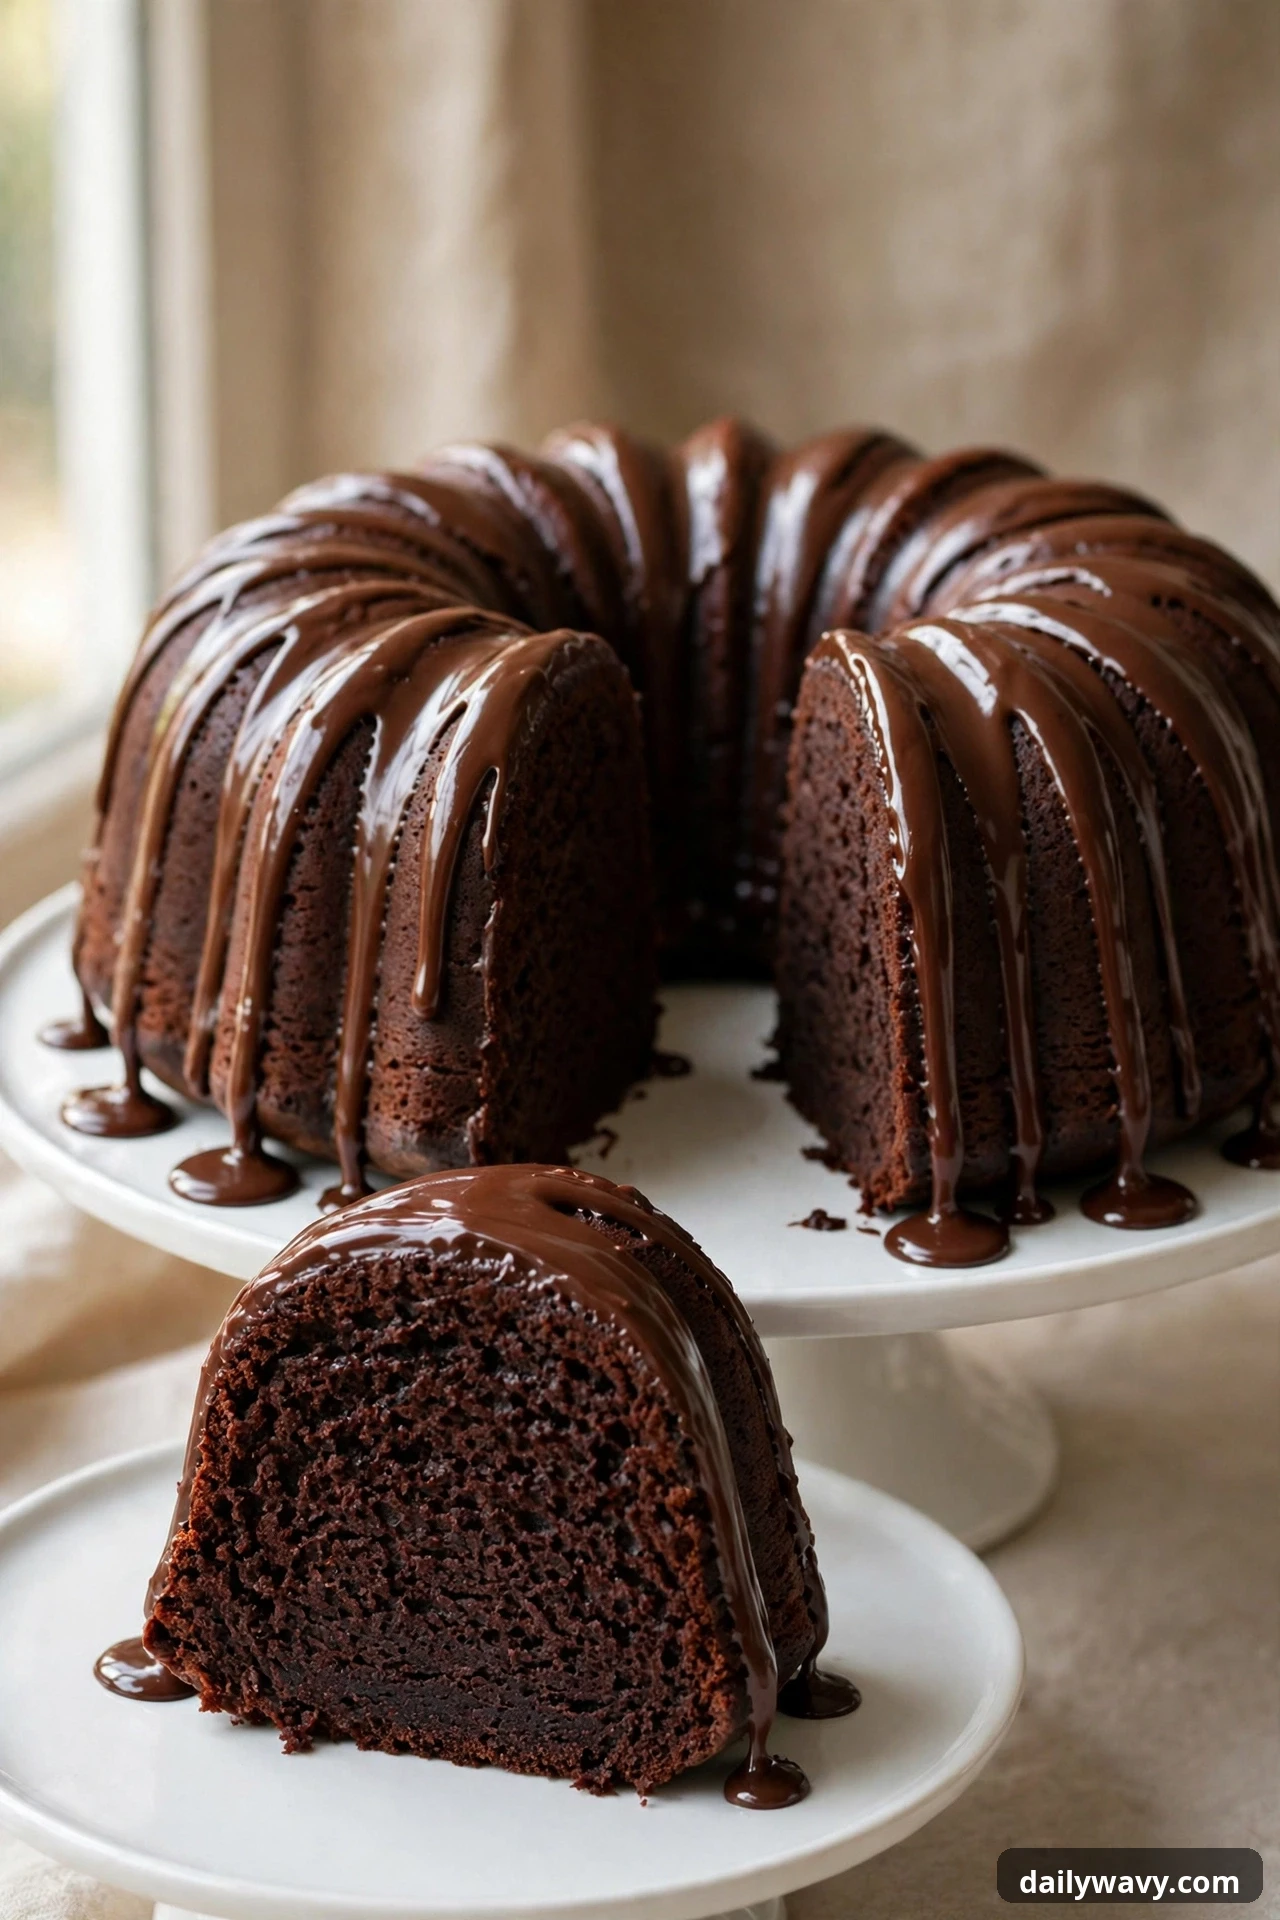
A Bundt cake is the smartest party cake there is. The fluted shape does the decorating for you, it feeds a crowd, and it slices beautifully. This version takes the base batter into a well-greased 12-cup Bundt pan, then finishes it with a glossy chocolate drizzle that settles into the ridges. It looks dramatic and tastes like a bakery cake, with about half the assembly effort of a layer cake.
Yield: 14 to 16 slices | Oven: 350°F | Active time: 30 minutes plus cooling
Ingredients
- The base chocolate cake batter above, baked in a 12-cup Bundt pan
- Shortening or butter and cocoa powder, for greasing the pan
For the chocolate drizzle
- 6 ounces semisweet chocolate, chopped
- 1/2 cup heavy cream
- 1 tablespoon unsalted butter
Method
- Heat the oven to 350°F. Grease the Bundt pan thoroughly with shortening or butter, then dust with cocoa powder, tapping out the excess. Every ridge needs coverage; this is what prevents sticking.
- Pour in the batter and smooth the top. Bake 50 to 60 minutes, until a long skewer comes out with a few moist crumbs.
- Cool in the pan exactly 15 minutes, then invert onto a wire rack and lift the pan off. Cool completely.
- Make the drizzle: heat the cream until steaming, pour over the chopped chocolate and butter, and rest 3 minutes. Stir until smooth and glossy.
- Spoon the drizzle over the top of the cooled cake, letting it run down the flutes. Rest 15 minutes to set before slicing.
Troubleshooting tip: If the cake sticks, you almost certainly missed a ridge during greasing. There is no rescue once baked; prevent it by brushing the pan with melted shortening and dusting with cocoa. If the cake cools in the pan longer than 20 minutes, the sugars start to set and release becomes harder, so time the 15-minute inversion.
Storage: Cover tightly and keep at room temperature for up to 3 days. The drizzle keeps the crumb moist; if the cake seems dry on day three, a 10-second microwave per slice revives it.
3. Chocolate cake with toasted almond crust
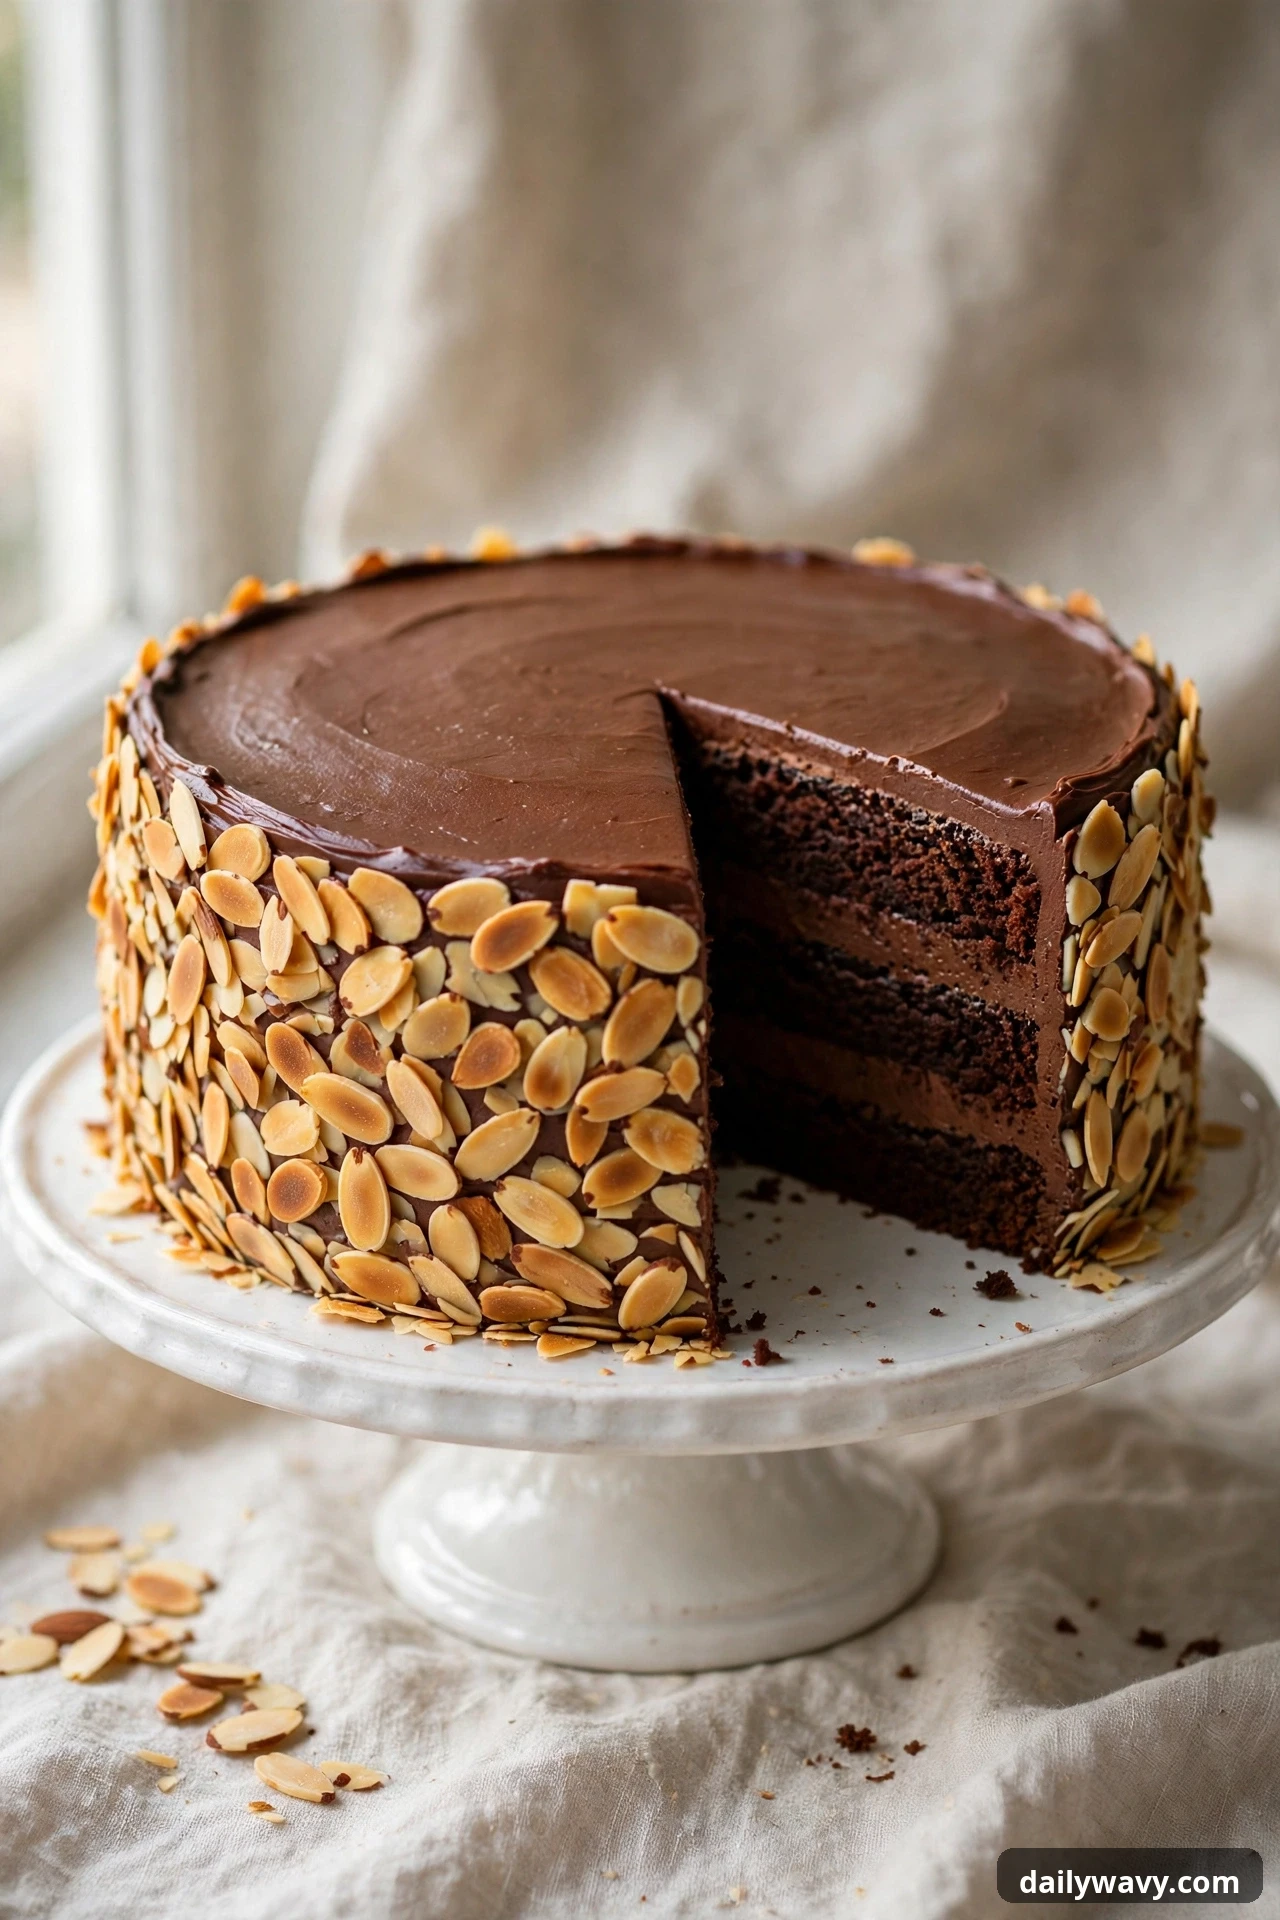
Texture is what makes this cake memorable. Inside, the crumb is soft and dark. Outside, a full coat of toasted sliced almonds gives every bite a buttery crunch and a roasted flavor that pairs beautifully with chocolate. It looks striking on a cake stand, like something from a European bakery, and it is genuinely easy: the almonds stick to a tacky coat of buttercream with nothing more than a gentle press.
Yield: 12 slices | Oven: 350°F (325°F for almonds) | Active time: 40 minutes plus cooling
Ingredients
For the cake
the base chocolate cake batter above, baked as two 8-inch rounds.
For the chocolate buttercream
- 1 cup unsalted butter, softened
- 3 1/2 cups powdered sugar
- 1/2 cup unsweetened cocoa powder
- 1/4 cup whole milk
- 1 teaspoon vanilla extract
- Pinch of fine salt
For the almond crust
- 1 1/2 cups sliced almonds
Method
- Toast the almonds: spread them on a sheet pan and bake at 325°F for 6 to 8 minutes, stirring once, until fragrant and lightly golden at the edges. Cool completely. They continue to darken as they cool, so pull them a shade lighter than you think.
- Bake and cool the cake layers. Level if domed.
- Beat the buttercream ingredients until smooth and spreadable.
- Fill between the layers with a generous 3/4 cup of buttercream. Frost the outside with a smooth, even coat, slightly thicker than usual.
- While the buttercream is still soft, press the toasted almonds onto the sides of the cake, working in small handfuls. Tilt the cake slightly and let excess fall back into the bowl. Cover the sides completely, then press a ring of almonds around the top edge.
- Chill 20 minutes to set the buttercream before slicing.
Troubleshooting tip: If the almonds will not stick, the buttercream has crusted over. Work within 10 minutes of frosting, or lightly warm the outside with a spatula dipped in hot water and dried, then press the nuts on.
Storage: Cover and refrigerate for up to 4 days. The almonds stay crisp best when the cake is kept cold; bring slices to room temperature 20 minutes before serving.
4. Chocolate cake with yogurt glaze
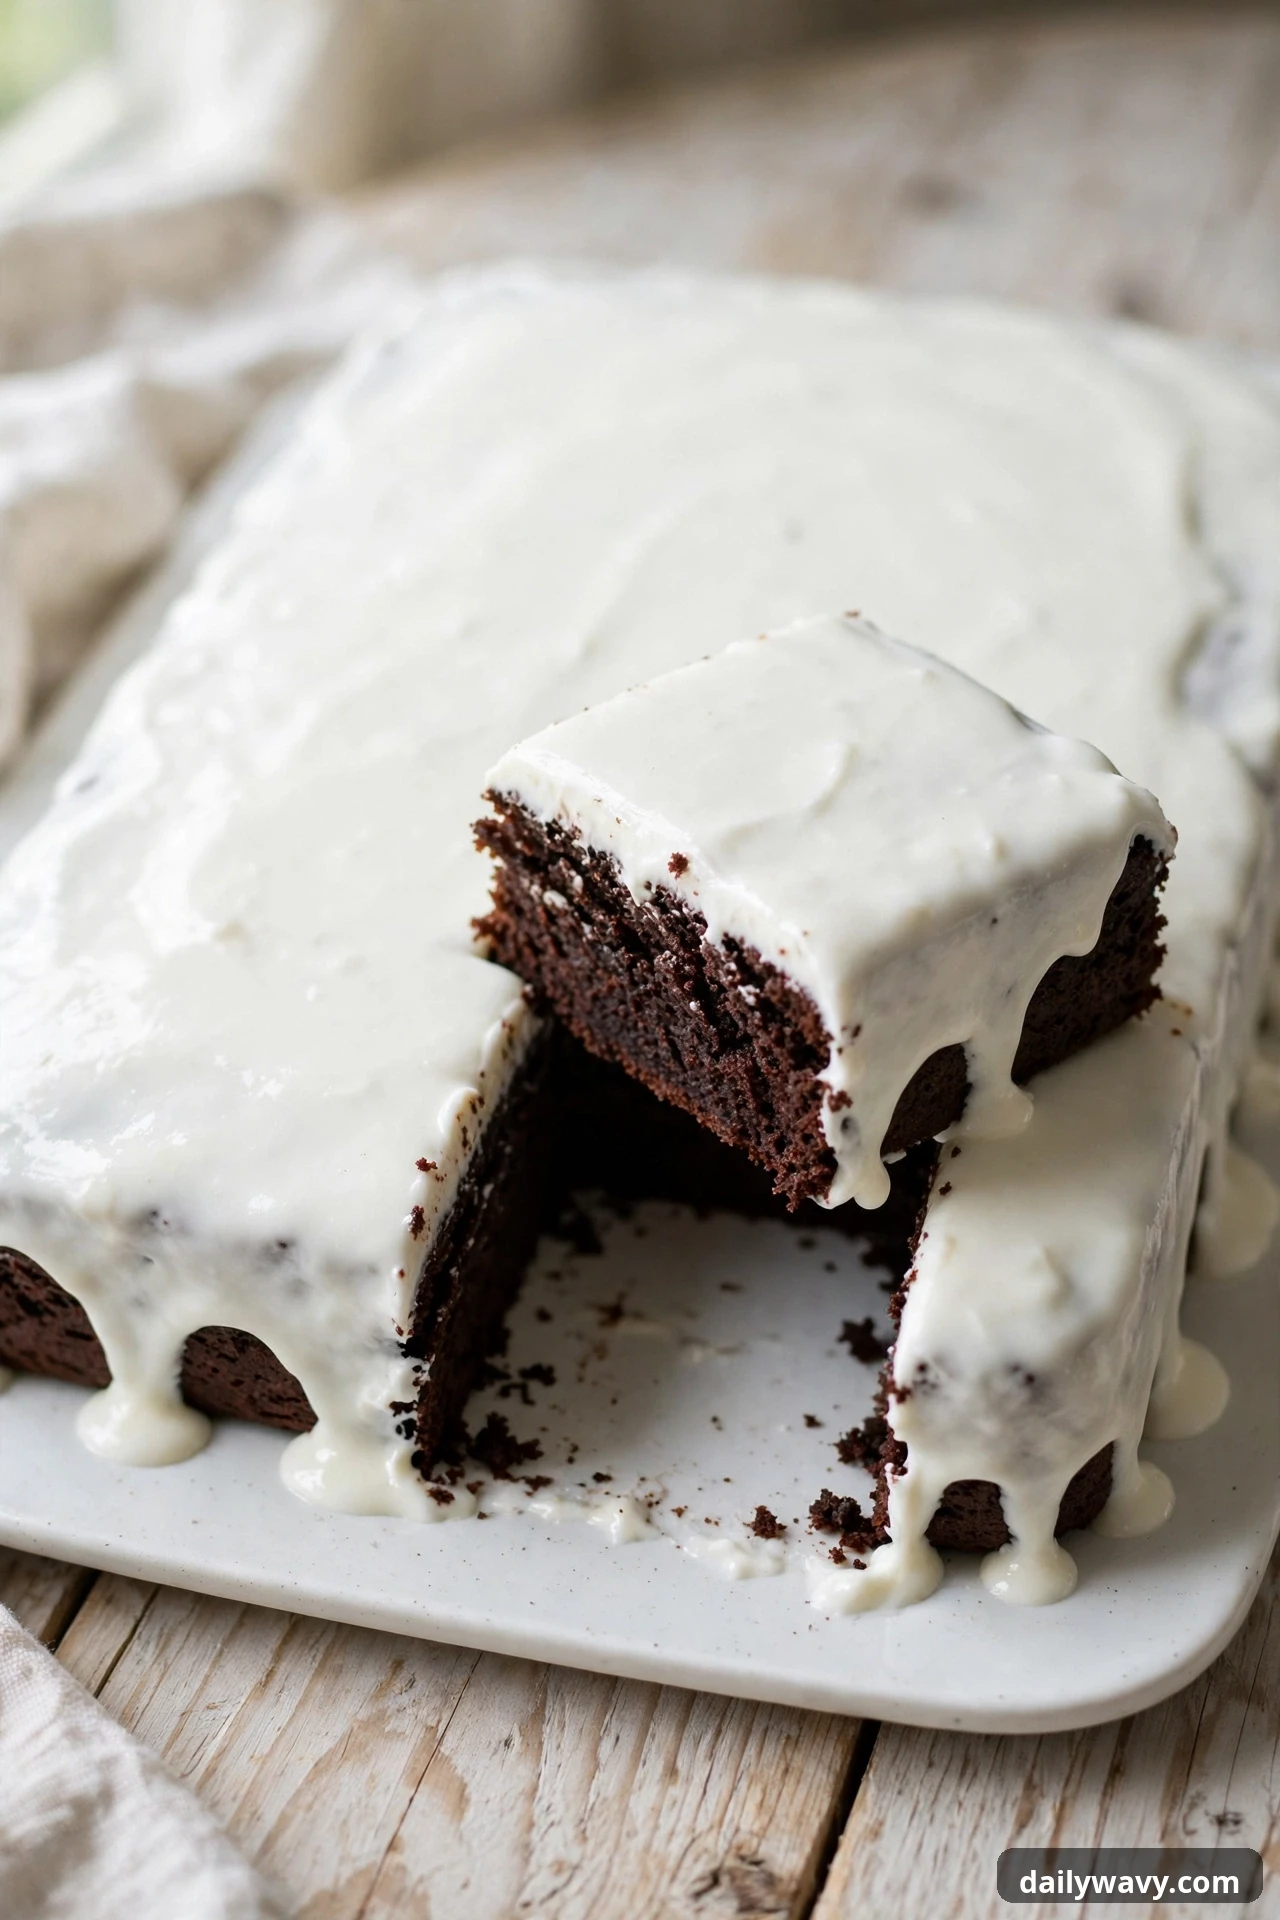
This is the coffee-break cake. A single layer, baked in a 9 by 13-inch pan, draped with a tangy Greek yogurt glaze that sets into a soft white shell. The yogurt's acidity does something wonderful to chocolate: it lifts it, the way a squeeze of lemon lifts seafood. The result is lighter than buttercream, less sweet than ganache, and it cuts into clean squares that stack perfectly for a bake sale or an office tray.
Yield: 15 squares | Oven: 350°F | Active time: 25 minutes plus cooling
Ingredients
For the cake
the base chocolate cake batter above, baked in a 9 by 13-inch pan, 30 to 35 minutes.
For the yogurt glaze
- 1 cup plain whole-milk Greek yogurt
- 1 1/2 cups powdered sugar, sifted
- 1 teaspoon vanilla extract
- 1 tablespoon lemon juice
Method
- Bake the sheet cake in the 9 by 13-inch pan and cool it completely in the pan. Do not rush this; glaze on a warm cake slides off.
- Whisk the Greek yogurt, sifted powdered sugar, vanilla, and lemon juice until completely smooth. The glaze should fall off the whisk in a thick ribbon.
- Pour the glaze over the cooled cake and spread gently to the edges with an offset spatula.
- Rest 30 minutes at room temperature for the glaze to set into a soft shell, or chill 20 minutes to set faster.
- Cut into 15 squares with a knife wiped clean between cuts.
Troubleshooting tip: If the glaze is runny, the powdered sugar was not sifted or the yogurt was low-fat. Use full-fat Greek yogurt and sift the sugar; you can thicken a thin glaze with another 1/4 cup of sifted powdered sugar.
Storage: Because the glaze contains dairy, refrigerate for up to 4 days, covered. The cake stays moist under the glaze; serve cold or at room temperature, both work.
5. Chocolate cake with caramel frosting
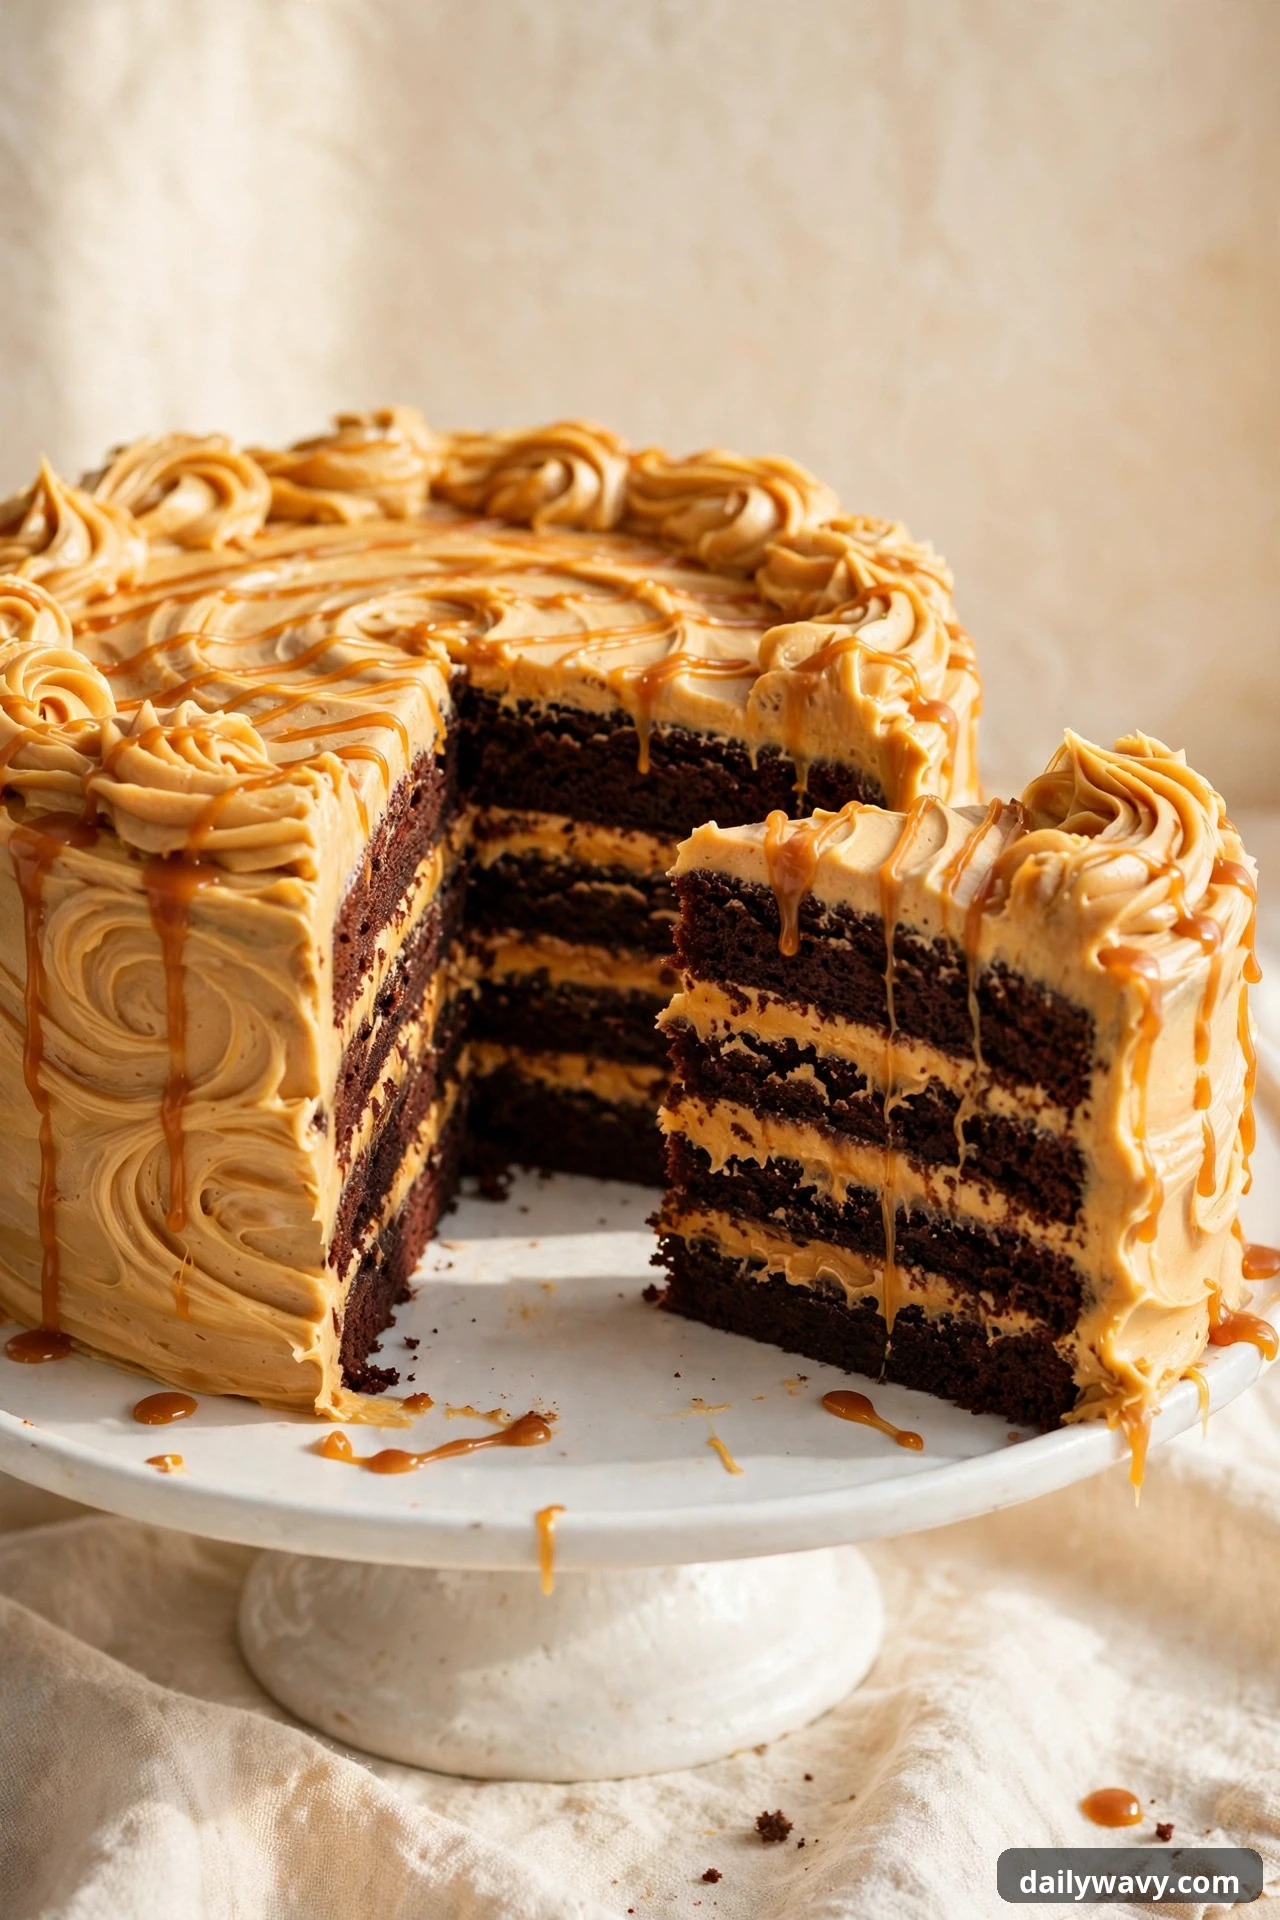
Caramel and chocolate is one of those combinations that needs no introduction. This frosting starts with a real caramel, made on the stovetop, then gets whipped into butter until it turns into a frosting that tastes like a candy bar grew up. It is sweeter than the buttercream versions, so it pairs best with the dark cocoa base, which keeps it in balance. Serve this at a birthday and watch it disappear.
Yield: 12 slices | Oven: 350°F | Active time: 50 minutes plus cooling
Ingredients
For the cake
the base chocolate cake batter above, baked as two 8-inch rounds.
For the caramel
- 1 cup granulated sugar
- 6 tablespoons unsalted butter, cut into pieces
- 1/2 cup heavy cream, warmed
- 1/2 teaspoon fine salt
For the caramel frosting
- 1 cup unsalted butter, softened
- The cooled caramel above
- 2 1/2 cups powdered sugar, sifted
- 1 teaspoon vanilla extract
Method
- Make the caramel first. Heat the sugar in a heavy saucepan over medium heat, stirring constantly with a wooden spoon. It will clump, then melt into an amber liquid. The moment it reaches a deep amber color (about 350°F if you use a thermometer, but color is a fine guide), add the butter and stir until melted.
- Pour in the warm cream slowly; it will bubble vigorously. Stir until smooth, then add the salt. Cool the caramel completely, about 45 minutes. Warm caramel melts frosting.
- Bake and cool the cake layers.
- Beat the softened butter for 2 minutes until pale. Add the cooled caramel and beat until combined. Add the powdered sugar and vanilla and beat 2 to 3 minutes until fluffy.
- Fill between the layers with 3/4 cup of frosting, frost the outside, and drizzle any leftover caramel over the top of the finished cake in thin lines.
Troubleshooting tip: If the frosting is runny, the caramel was still warm or too thin. Caramel should coat a spoon when cool. If it splits and looks greasy, beat in 2 more tablespoons of sifted powdered sugar and chill the bowl 15 minutes, then rewhip.
Storage: Cover and keep at cool room temperature for 2 days, or refrigerate for up to 5 days. Caramel frosting firms in the fridge; bring to room temperature 30 minutes before serving.
6. Chocolate cake with cherry compote
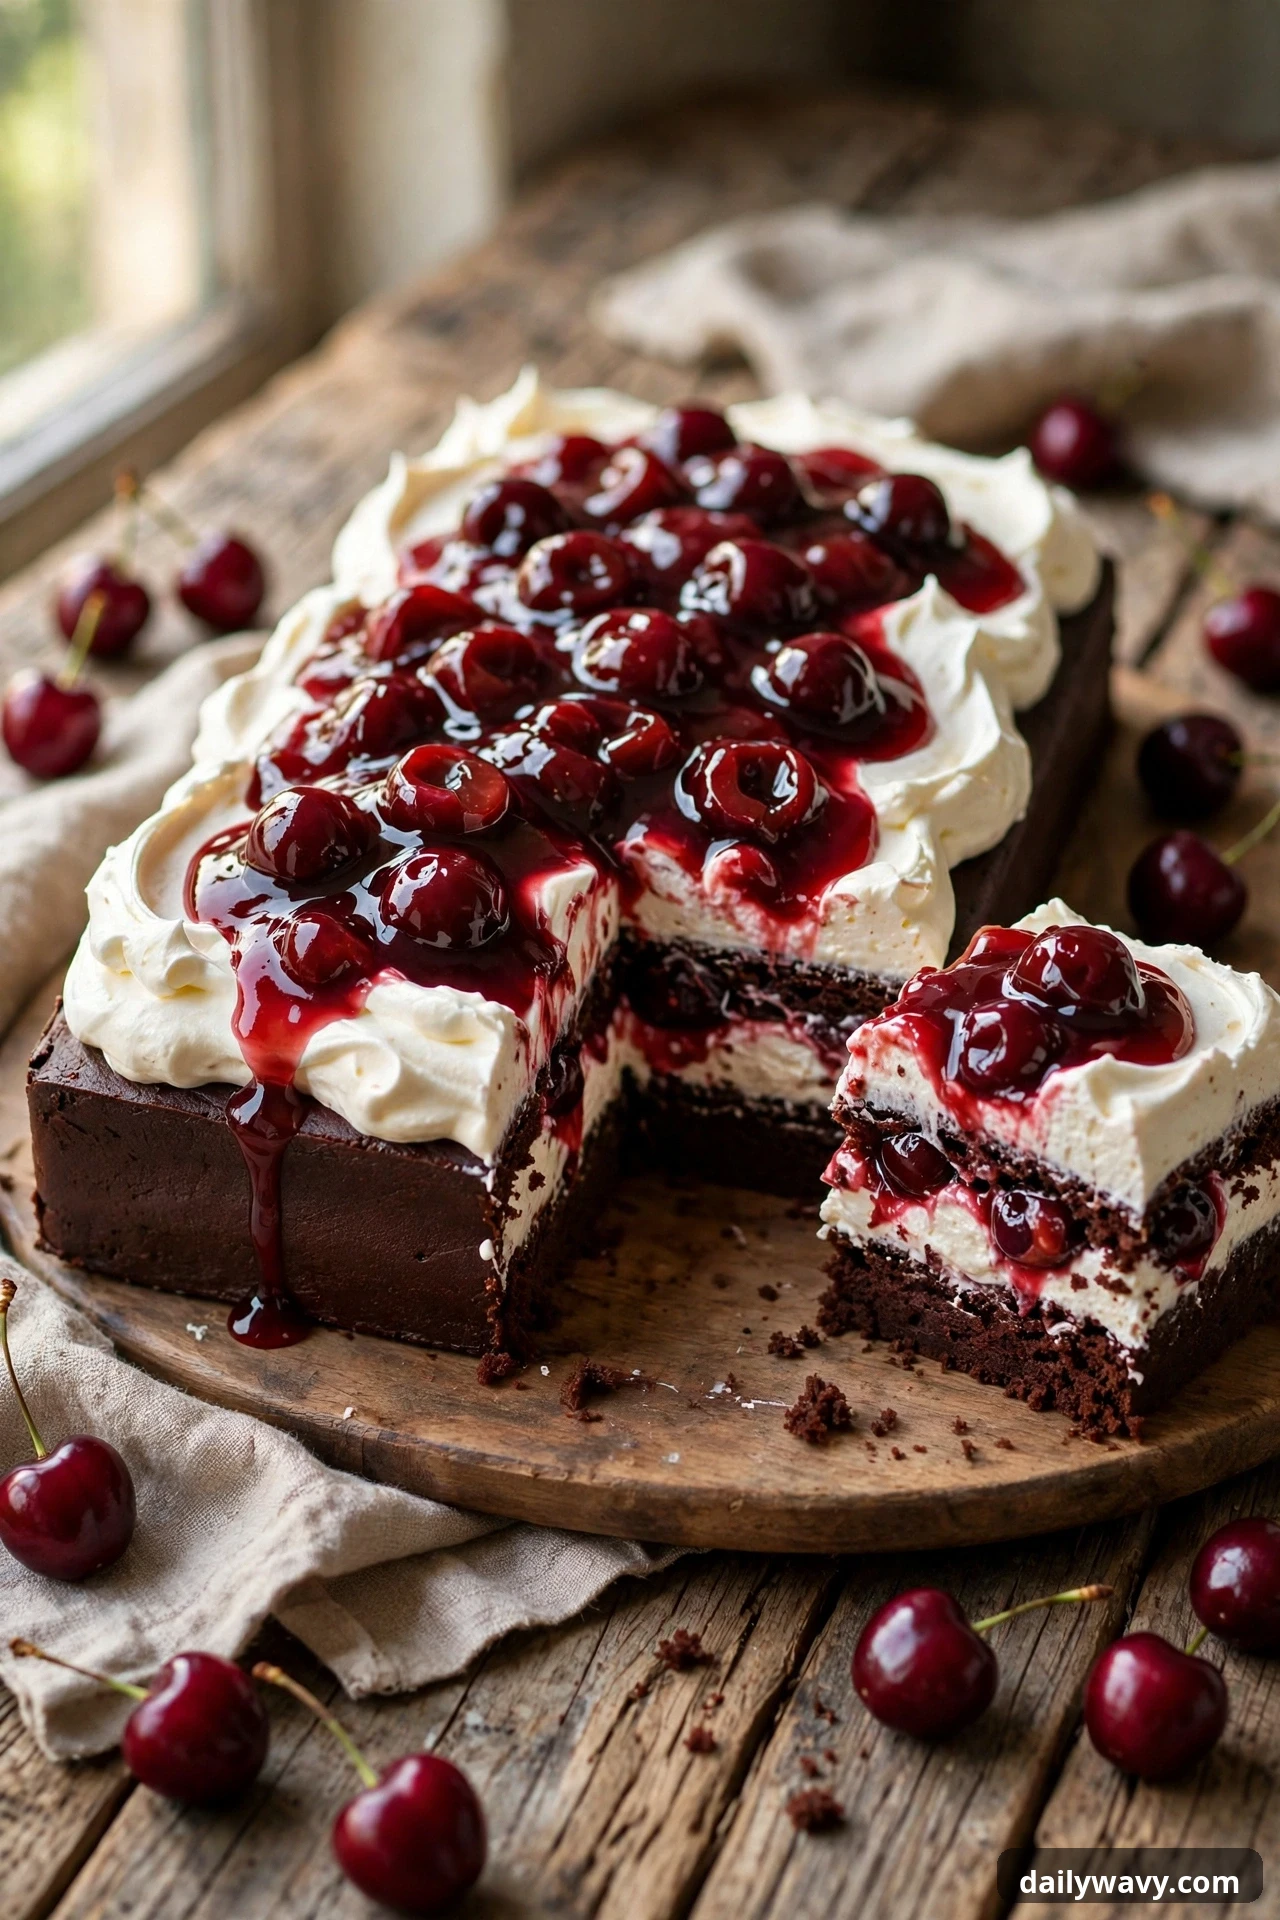
Chocolate and cherry is a classic for a reason. The deep fruitiness of cooked cherries echoes the dark notes in good cocoa, and the compote's bright red looks spectacular spooned over a dark cake. This version keeps things simple: a tender chocolate sheet cake, a quick cherry compote cooked on the stovetop, and a cloud of lightly sweetened whipped cream. It is the easiest cake in this roundup to make look impressive.
Yield: 15 servings | Oven: 350°F | Active time: 35 minutes plus cooling
Ingredients
For the cake
the base chocolate cake batter above, baked in a 9 by 13-inch pan, 30 to 35 minutes.
For the cherry compote
- 4 cups fresh or frozen pitted sweet cherries
- 1/3 cup granulated sugar
- 1 tablespoon lemon juice
- 1 tablespoon cornstarch mixed with 2 tablespoons cold water
- 1/2 teaspoon vanilla extract
For the whipped cream
- 1 1/2 cups heavy cream, cold
- 3 tablespoons powdered sugar
- 1 teaspoon vanilla extract
Method
- Bake the sheet cake and cool it completely in the pan.
- Make the compote: combine the cherries, sugar, and lemon juice in a saucepan. Cook over medium heat until the cherries release their juices, 6 to 8 minutes. Stir in the cornstarch slurry and simmer 2 minutes until thickened and glossy. Remove from heat, stir in the vanilla, and cool completely.
- Whip the cold cream with the powdered sugar and vanilla to soft peaks.
- Spread the whipped cream over the cooled cake. Spoon the cooled cherry compote over the top in generous ribbons, letting the juices soak in slightly.
- Cut into squares and serve, with extra compote alongside if you like.
Troubleshooting tip: If the compote is too thin, it was not simmered long enough after adding the cornstarch. It should thicken noticeably and leave a clear trail when you drag a spoon across the bottom of the pan. Frozen cherries release more liquid than fresh, so give them an extra minute or two.
Storage: Because of the whipped cream, refrigerate for up to 3 days, covered. The cake actually improves on day two as the compote soaks in. Serve cold or let stand 15 minutes.
7. Chocolate cake with coconut cream

This is the tropical-leaning member of the group, and it works better than you might expect. Coconut and chocolate are a classic pair, and the coconut whipped cream here is lighter than buttercream while the toasted coconut on top adds crunch and a golden color contrast. It reads as a summer celebration cake, the one you bring to a backyard gathering when you want something that is not the usual.
Yield: 12 slices | Oven: 350°F (325°F for coconut) | Active time: 40 minutes plus cooling
Ingredients
For the cake
the base chocolate cake batter above, baked as two 8-inch rounds.
For the coconut cream
- 1 1/2 cups heavy cream, cold
- 1/4 cup canned coconut cream (the thick part from the top of the can)
- 1/3 cup powdered sugar
- 1 teaspoon coconut extract (optional but recommended)
For the topping
- 1 cup sweetened shredded coconut
Method
- Toast the coconut: spread it on a sheet pan and bake at 325°F for 5 to 7 minutes, stirring once, until the edges turn golden. Watch closely; coconut goes from golden to burnt in under a minute. Cool completely.
- Bake and cool the cake layers.
- Whip the cold heavy cream, coconut cream, powdered sugar, and coconut extract to firm peaks.
- Fill between the layers with 1 cup of the coconut cream. Frost the top and sides with the remaining cream, keeping the coat slightly rustic.
- Press the toasted coconut onto the sides and scatter it over the top.
- Chill 30 minutes before slicing so the cream sets.
Troubleshooting tip: If the coconut cream will not whip to peaks, everything was too warm. Chill the bowl and beaters 15 minutes before whipping, and make sure the canned coconut cream is cold. If it still will not hold, the coconut cream had too much liquid; skim only the thick solid part from the can next time.
Storage: Refrigerate for up to 3 days, covered. The toasted coconut softens slightly after the first day but still tastes wonderful. Serve cold.
8. Chocolate cake with mascarpone frosting
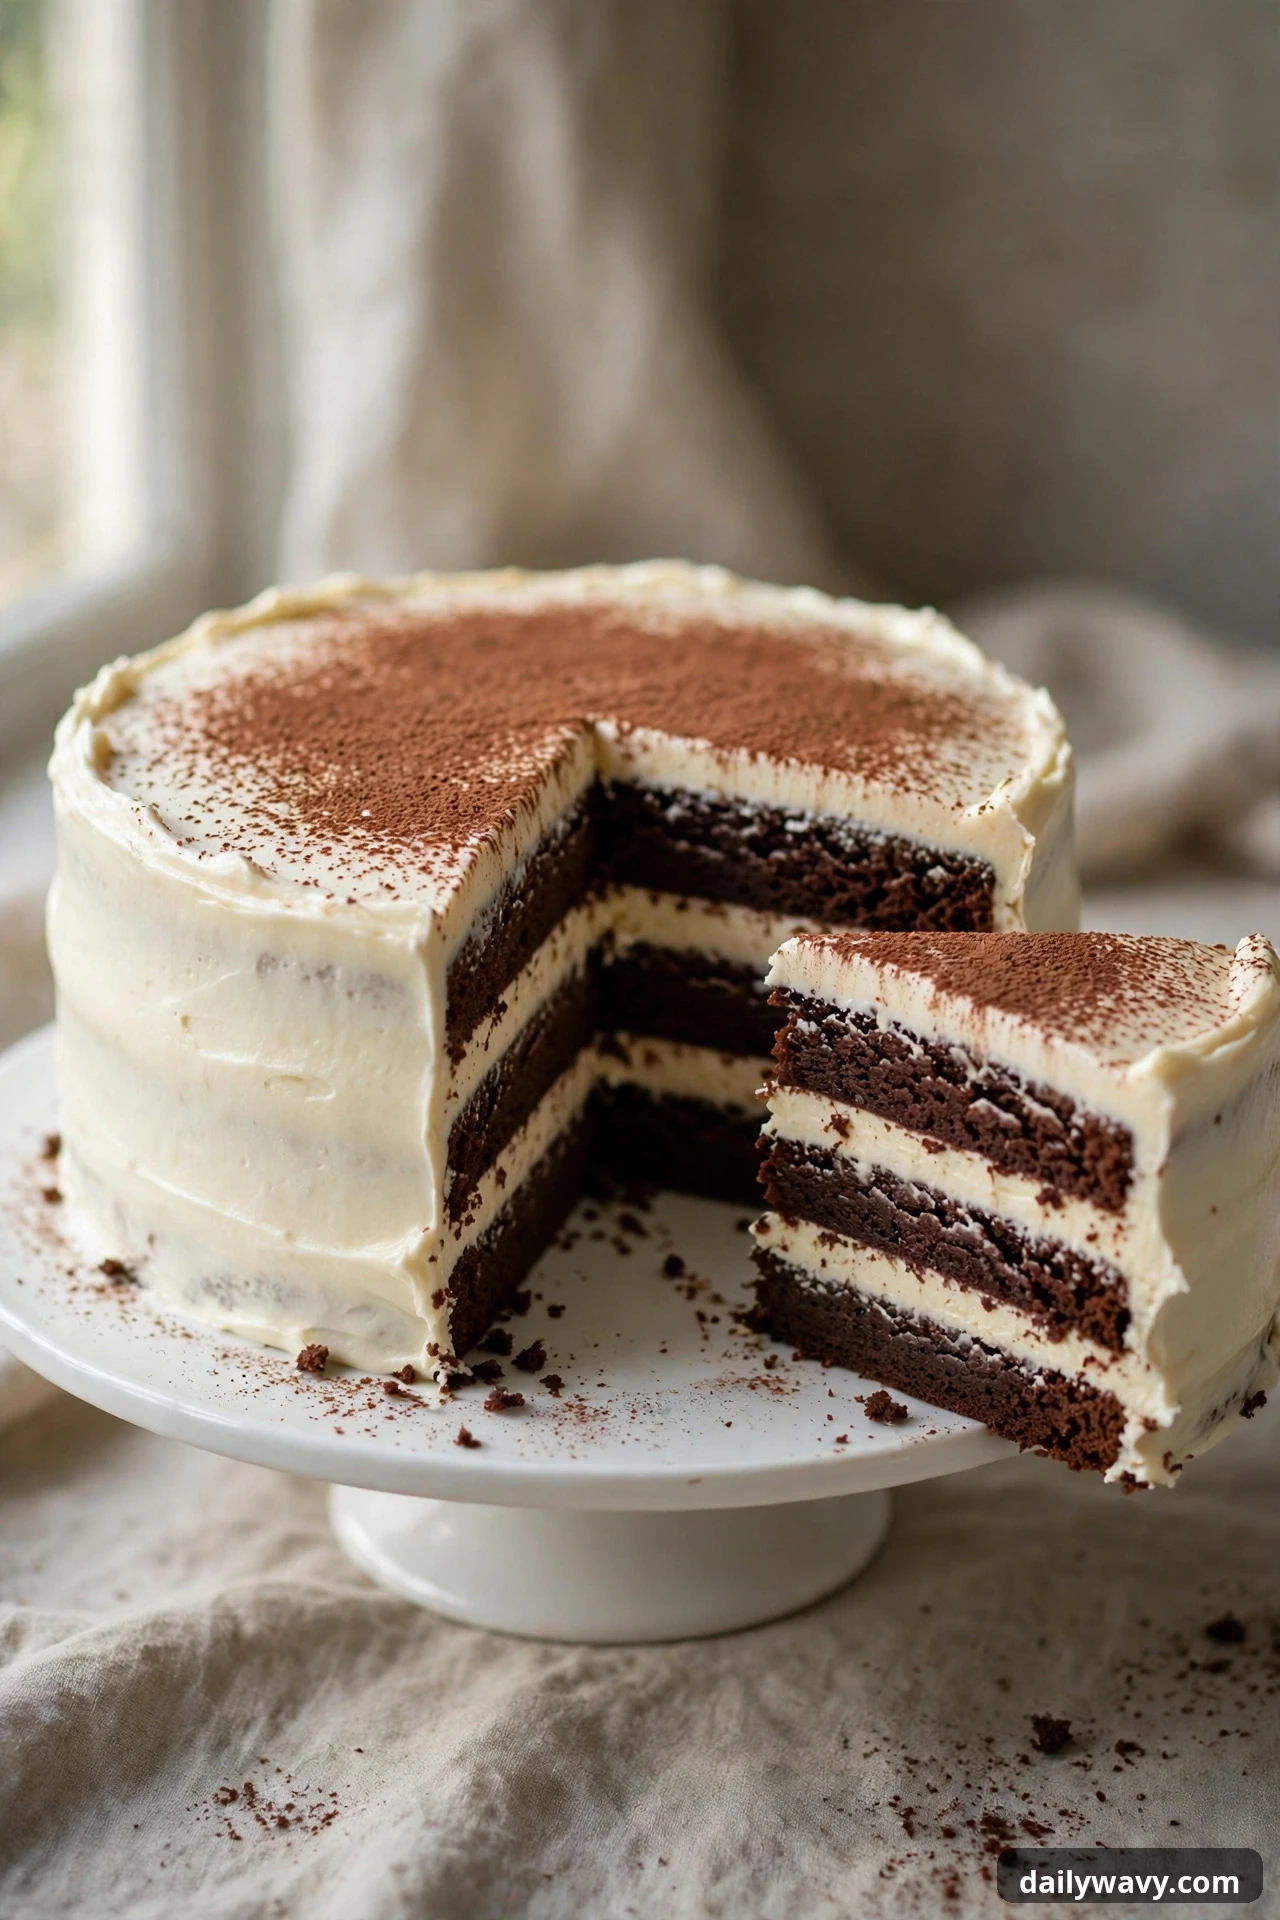
Mascarpone frosting is what you reach for when you want luxury without heaviness. It is less sweet than buttercream, silkier than whipped cream, and it has a subtle tang that makes chocolate taste richer by contrast. The frosting here is barely sweetened, so the cake itself does the sweet-talking. A dusting of cocoa on top finishes it with a look that says special occasion.
Yield: 12 slices | Oven: 350°F | Active time: 35 minutes plus cooling
Ingredients
For the cake
the base chocolate cake batter above, baked as two 8-inch rounds.
For the mascarpone frosting
- 8 ounces mascarpone cheese, cold
- 1 1/2 cups heavy cream, cold
- 3/4 cup powdered sugar, sifted
- 1 teaspoon vanilla extract
- Pinch of fine salt
To finish:
- 1 tablespoon unsweetened cocoa powder, for dusting
Method
- Bake and cool the cake layers completely.
- In a large bowl, whisk the cold mascarpone with the powdered sugar, vanilla, and salt until smooth. Do not overmix; mascarpone turns grainy if beaten too long.
- Add the cold heavy cream and whip until the mixture holds soft, billowy peaks, 2 to 3 minutes. Stop as soon as it holds shape.
- Fill between the layers with 1 cup of frosting. Frost the outside with the rest, smoothing the top and leaving the sides slightly textured.
- Dust the top with cocoa powder through a small sieve just before serving.
Troubleshooting tip: Mascarpone frosting can go from perfect to broken in about 30 seconds of overbeating. Whip on medium speed and stop the moment it holds peaks. If it does break and look curdled, there is no full rescue; use it as a filling between layers where the texture is hidden, and it will still taste excellent.
Storage: This frosting contains mascarpone and cream, so it must be refrigerated. Keep the cake covered in the fridge for up to 3 days. Serve chilled or let stand 15 minutes; the frosting softens quickly at room temperature.
9. Chocolate cake with browned-butter icing

Browned butter is the ingredient that makes people ask what is in the frosting. Cooking the butter until the milk solids toast turns it nutty, deep, and almost caramel-like, and that flavor runs straight through the icing. Paired with chocolate cake, it creates something warm and toasty that tastes like fall. This is the cake for people who think they have tried every chocolate cake. They have not tried this one.
Yield: 12 slices | Oven: 350°F | Active time: 45 minutes plus cooling
Ingredients
For the cake
the base chocolate cake batter above, baked as two 8-inch rounds.
For the browned-butter icing
- 1/2 cup unsalted butter
- 2 cups powdered sugar, sifted
- 1/4 cup unsweetened cocoa powder, sifted
- 1/4 cup whole milk, plus more as needed
- 1 teaspoon vanilla extract
- Pinch of fine salt
Method
- Brown the butter: melt the butter in a light-colored saucepan over medium heat. It will foam, then the foam will subside and the milk solids will turn golden brown and smell nutty, 5 to 7 minutes. Watch constantly at the end; it goes from browned to burnt fast. Pour into a heatproof bowl, including the browned bits, and cool to room temperature, about 30 minutes. Do not skip the cooling.
- Bake and cool the cake layers.
- Beat the cooled browned butter with the sifted powdered sugar, cocoa, milk, vanilla, and salt until smooth and spreadable, 2 to 3 minutes. Add milk a teaspoon at a time if the icing is too thick.
- Fill between the layers with 3/4 cup of icing and frost the outside. The icing sets slightly as it stands, giving a beautiful matte finish.
- Optional: sprinkle flaky sea salt over the top for a salted-browned-butter finish.
Troubleshooting tip: If the icing tastes bitter, the butter went past browned to burnt. The milk solids should be the color of hazelnuts, not dark brown. Start over if they look dark; there is no fixing burnt butter. Also, icing made with still-warm browned butter will be thin and greasy, so be patient with the cooling.
Storage: Cover and keep at room temperature for up to 3 days. The icing holds well; the cake stays moist because the icing seals the crumb.
10. Chocolate cake with raspberry buttercream
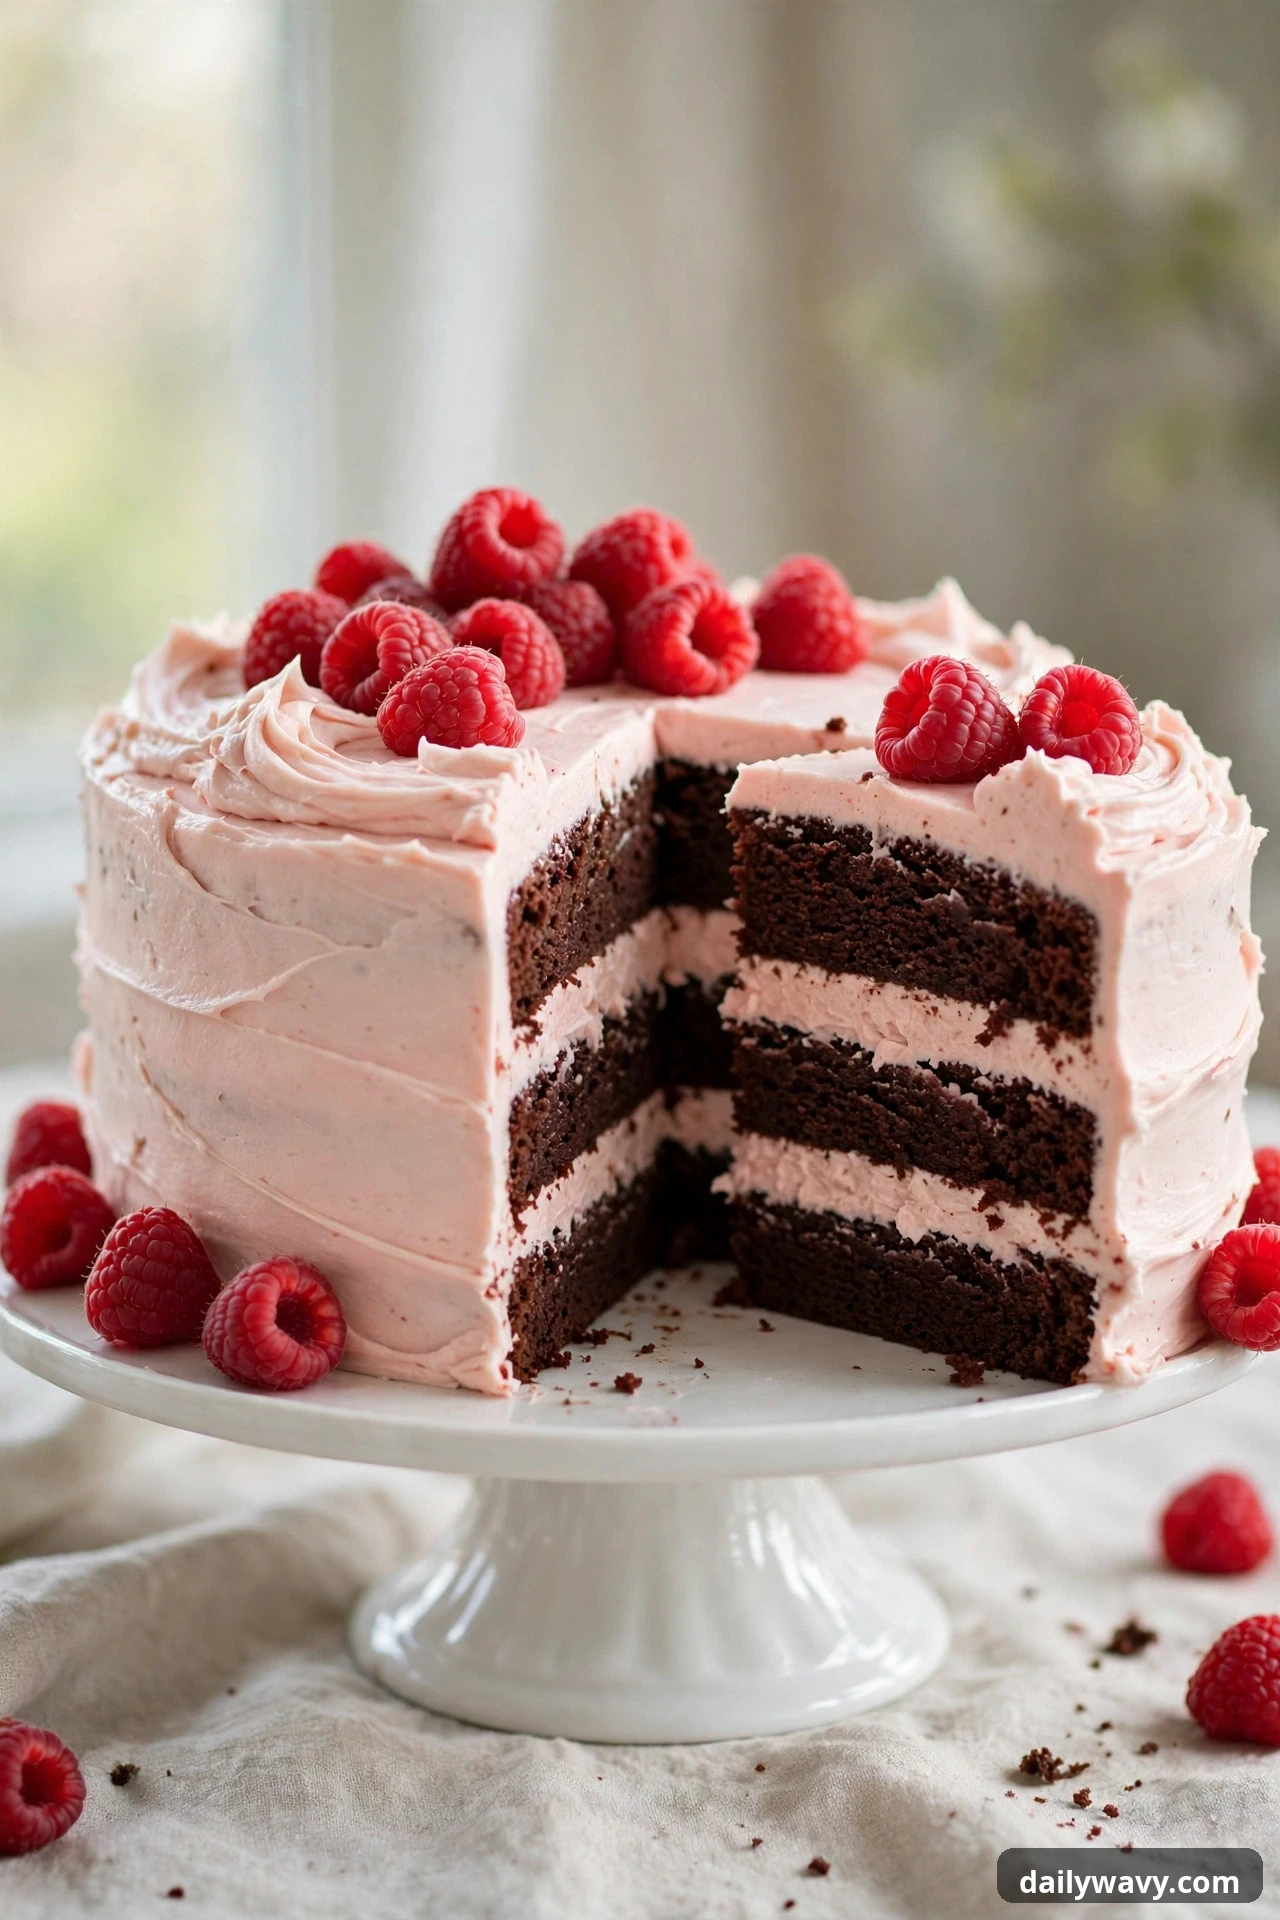
This is the showstopper. Real raspberry puree whipped into buttercream gives a frosting that is naturally pink, genuinely fruity, and not at all artificial tasting. The tartness of the raspberries against the dark chocolate is electric, and the color contrast between the pale pink frosting and the dark crumb makes every slice beautiful. It is the cake to make when you want the dessert table to look like spring.
Yield: 12 slices | Oven: 350°F | Active time: 50 minutes plus cooling
Ingredients
For the cake
the base chocolate cake batter above, baked as two 8-inch rounds.
For the raspberry puree
- 2 cups fresh or thawed frozen raspberries
- 2 tablespoons granulated sugar
For the raspberry buttercream
- 1 cup unsalted butter, softened
- 3 cups powdered sugar, sifted
- 1/4 cup reduced raspberry puree (from above)
- 1 teaspoon vanilla extract
- Pinch of fine salt
- 1 tablespoon heavy cream, if needed
To finish:
- Fresh raspberries, for decorating
Method
- Make the puree: cook the raspberries and sugar in a small saucepan over medium heat until the berries break down, 5 minutes. Press through a fine-mesh sieve to remove the seeds; you should have about 1/2 cup of smooth puree.
- Reduce the puree: return it to the saucepan and simmer until thickened to 1/4 cup, about 5 minutes. Cool completely. This reduction is what keeps the frosting from becoming runny.
- Bake and cool the cake layers.
- Beat the softened butter 2 minutes until pale. Add the sifted powdered sugar, the cooled reduced puree, vanilla, and salt. Beat 2 to 3 minutes until fluffy and pink. Add the cream a teaspoon at a time only if the frosting is too stiff.
- Fill between the layers, frost the outside, and decorate the top with fresh raspberries.
Troubleshooting tip: If the buttercream is soupy, the puree was not reduced enough or was still warm. The puree must be thick (it should mound slightly on a spoon) and completely cool. If the frosting is already too thin, beat in 1/2 cup more sifted powdered sugar and chill 20 minutes before rewhipping.
Storage: Refrigerate for up to 4 days, covered. The real fruit in the frosting means this cake should not sit at room temperature more than a couple of hours. Serve slightly cool or at room temperature.
Frequently asked questions
Can I make these cakes ahead of time?
Yes. Unfrosted layers keep well: wrap them tightly in plastic wrap and store at room temperature for 2 days, or freeze for up to 3 months. Thaw frozen layers at room temperature still wrapped, which keeps condensation off the crumb. Frosted cakes follow the storage note in each recipe. Assembling a day ahead usually improves flavor, since fillings settle into the crumb.
Why did my chocolate cake turn out dry?
The most common cause is overbaking. Chocolate cake goes from moist to dry in a window of about 3 minutes, so check at the low end of every time range given here and pull the cake when a toothpick shows a few moist crumbs. Other causes: measuring flour by scooping instead of spooning and leveling (adds a lot of extra flour), or baking at an oven that runs hot. An inexpensive oven thermometer is one of the most useful upgrades for cake baking.
Can I use Dutch-process cocoa instead of natural cocoa?
You can, but adjust the leavening. This base recipe uses both baking powder and baking soda balanced for natural cocoa, which is acidic. Dutch-process cocoa is neutral, so with it you should use 2 teaspoons baking powder and 1/2 teaspoon baking soda instead. The cake will be darker and milder either way.
How do I get clean slices?
Chill the frosted cake 30 minutes first, then use a long thin knife dipped in hot water and wiped dry between every cut. For layer cakes, a gentle sawing motion beats pressing straight down. For sheet cakes with glaze, the same hot-knife method gives bakery-clean squares.
Can I freeze a frosted chocolate cake?
Yes, with conditions. Buttercream-frosted cakes freeze beautifully for up to 3 months: freeze uncovered 1 hour to firm the frosting, then wrap tightly in plastic wrap and foil. Thaw overnight in the refrigerator, then bring to room temperature before serving. Cakes with mascarpone, yogurt glaze, or whipped cream frostings should not be frozen frosted; freeze the layers unfrosted instead.
What is the best cocoa for chocolate cake?
Use an unsweetened natural cocoa powder from a brand you trust for baking, and make sure it is fresh; cocoa loses potency after about a year once opened. The recipes here were developed with standard supermarket natural cocoa. Save expensive single-origin cocoa for recipes where chocolate is the only flavor; in these cakes, the frostings and fillings share the stage.
A cake for every kind of sweet moment
Ten recipes, one dependable base, and no reason to fear the celebration cake ever again. Whether you need the drama of the berry-filled layer cake for a birthday, the ease of the cherry compote sheet cake for a potluck, or the quiet comfort of browned-butter icing for a coffee break, you now have a clear path from batter to beautiful slices.
If baking is becoming your thing, our blueberry muffin recipes use many of the same pantry staples and the same careful approach to mixing and timing. And when you need a savory break from all this sweetness, the lemon garlic chicken skillet is one of our most loved weeknight dinners. For more ideas across every meal, browse the full Food & Drink collection.
Happy baking. May your layers be level, your frosting be smooth, and your slices be clean.